|
|
PBP Commentary |
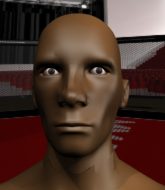
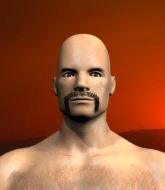
Coming up we have a welterweight MMA rules bout between Dawson Hopkins (ranked 0 p4p, 0 weight class) and Stevie Why (ranked 0 p4p, 0 weight class). Dawson Hopkins is staring across the cage at his opponent, tweaking his nipples... Tweaking his own nipples that is.
 |
|
 |
| 175 cm
23
184 lbs
12 - 2 - 0 |
|
180 cm
29
180 lbs
18 - 12 - 0 |
Good wrestling
World class boxer
KO power |
|
Good wrestler
Excellent boxer
Powerful |
|
| |
|
Ladies and gentlemen. This fight is 3 rounds, in the welterweight division.
Introducing the fighter to my left, fighting out of the red corner.
With a record of
12 - 2 - 0, fighting out of Las Vegas, Dawson Hopkins!
And introducing the fighter to my right, fighting out of the blue corner.
With a record of
18 - 12 - 0, fighting out of Las Vegas, Stevie Why!
The judges for this bout are Gwen Towbar, Alan Glass and Daniel Franklin.

The bell rings for round one and we are underway!
Why closes the distance but Hopkins moves to the side
and Hopkins counters with a nice uppercut.
Hopkins throws a one two combo.
Why throws a combination that misses
and Hopkins counters nicely by changing levels and landing a hook to the body.
Why jabs at Hopkins's body.
Why misses with a takedown
and Hopkins counters with a three punch combo that has Why backing up. Why nods at Hopkins to acknowledge the strikes.
Stevie Why seems to be the more aggressive standup fighter in this bout.
Why closes the distance but Hopkins moves to the side
and Hopkins counters with a lovely straight right hand!
Hopkins takes an uppercut right on the jaw but it doesn't phase him.

It looks like Dawson Hopkins has been cut.
Hopkins throws a body punch but Why moves out of range.
Horrible takedown by Why or perhaps it was just good defense by Hopkins which made him look bad.
Hopkins swings away with a body shot that misses
and Why counters with a series of strikes. Hopkins will be more careful next time no doubt.
Why throws a predictable looking body shot
and Hopkins counters with a quick right hand to the jaw.

That's one minute gone in the round.
Hopkins swings away with a body shot that misses
letting Why counter with a right hand.
Why shoots in with a takedown attempt and he has Hopkins pinned against the cage. Hopkins gets the underhooks and manages to circle away.
Dawson Hopkins has stuffed three takedown attempts in the round now. That's going to take a lot out of Stevie Why.
Why scores with a three punch combo!
Why misses with a jab, cross combination.
Why tries to clinch
and Hopkins counters with a nice low kick that buckles Why's knee momentarily.
Why fakes high and shoots in for a takedown but Hopkins avoids it really well and circles away.
Why tries to clinch but fails miserably
and Hopkins counters with a good low kick that Why was not able to check.
Hopkins connects with a leg kick. Why looked like he was expecting something else and didn't defend it.
Why looks gassed!
Hopkins scores with a shot to the body.
Why moves to clinch but Hopkins breaks away
and Hopkins counters with a straight punch to the midsection.

That's two minutes gone in the round.
Why misses with a left hand
and Hopkins counters nicely by changing levels and landing a hook to the body.
We've seen a great period of action over the last minute or so - credit to both fighters for going all out!
Hopkins circles away from the clinch attempt
and Hopkins counters with a straight right hand.
Dawson Hopkins is looking to keep the fight on the feet at all costs.
Hopkins tries to land with a swinging hook to the body but Why was well out of range. Poor timing from Hopkins.
Why dives in and grabs Hopkins's left leg, looking for a takedown. Hopkins pushes down on Why's head and hops out.
Why walks into a straight right hand from Hopkins.
Hopkins lands a jab to the nose.
Why doesn't succeed with the takedown
and Hopkins counters with a stiff right hand.
Hopkins circles away from the clinch attempt
and Hopkins counters nicely by changing levels and landing a hook to the body.

That's three minutes gone in the round.
Why fails with the takedown.
Why closes the distance but Hopkins moves to the side
and Hopkins counters with a left to the body.
Why misses with an uppercut
and Hopkins counters with a shot to the ribs. That looked like it hurt.
Hopkins looks to score with a jab to the body but Why is just out of range.
Hopkins scores with a jab to the body.
Hopkins scores with a slapping inside leg kick.
Hopkins scores with a nice right hand.
Hopkins lands a kick to the ribs of his opponent. Nice work there - in and out in a flash.
Why on the wrong end of a nice hook.
Hopkins feints with a shoulder and throws a nice leg kick to Why's calf.
Hopkins ducks down and throws a hook to the body but Why moves away.

That's four minutes gone in the round.
A jab from Hopkins finds it's way through Why's defenses.
Why takes a shot right to the bread basket.
Why moves to clinch but Hopkins breaks away
and Hopkins makes him pay by landing a nice hook to the body before moving out of range.
This is a great period of action - very entertaining stuff!
Hopkins scores with a shot to the body.
Why misses with a takedown attempt - Hopkins sprawls well and throws a nice strike on the way out which just misses.
Hopkins lands a nice hook to Why's body. Why takes it in his stride and looks to land his own strikes.
Hopkins lands a leg kick. The shin dug right into the meat of the thigh.
As the round comes to an end the crowd are showing their appreciation for a great round of action.
Hopkins throws a nice head kick!
Nice body punch from Hopkins.
Why throws an off balance right hand
and Hopkins counters with an outside leg kick.
And that�s the end of the round � the fighters go back to their corners.
Dawson Hopkins dominated that round.
The cut man is working on Dawson Hopkins's cut.
The corners get their ten second warning. Both fighters stand from their stools and stare eachother down, ready to get back to the action.

An inside leg kick lands from Hopkins.
Why looks to clinch
and Hopkins counters with a nice low kick that buckles Why's knee momentarily.
Hopkins misses with a series of wild punches.
Why swings wildly with a couple of big hooks
and Hopkins counters with a straight right hand.
Why tries to grapple but his opponent circles
and Hopkins counters with a stiff right hand.
Why chopped to the floor by a nice leg kick but he springs right back up before Hopkins can pounce on him.
Dawson Hopkins is winning the standup battle so far.
Why shoots in but Hopkins avoids the takedown attempt easily.
Why is breathing heavily.
Hopkins scores with a nice right hand.
Why shoots for a takedown but Hopkins saw that one coming a mile off and avoided it easily.
Why wants to clinch
letting Hopkins counter with a right hand.
That's one minute gone in the round.
Hopkins throws a leg kick which misses Why's front leg but catches the back leg as Why tries to avoid it.
Hopkins is looking to wear down Why with body shots, infact he's throwing more body shots than head shots at the moment.
Hopkins lands a slapping body shot.
Both these guys seem content to just stand up and trade with eachother but Why might want to think about changing up his gameplan a bit because over the course of the fight, Hopkins has got the better of the exchanges.
Why closes the distance but Hopkins moves to the side
and Hopkins counters with a straight punch to the midsection.
A chopping leg kick lands by Hopkins.
Hopkins scores with a shot to the body.
Hopkins lands with a right hand.
Why tries to clinch but fails miserably
and Hopkins counters with a straight punch to the midsection.
Why's leg has a nasty welt from taking a succession of leg kicks. That must be slowing him down.
Hopkins connects with a body shot that sends Why's belly button to the back.
Why misses with a takedown attempt
and Hopkins counters with a head kick. That will keep Why thinking before he tries any more sloppy attacks!
Dawson Hopkins has stuffed three takedown attempts in the round now. That's going to take a lot out of Stevie Why.
That's two minutes gone in the round.
A solid leg kick lands there for Hopkins.
Hopkins connects with a leg kick. Why looked like he was expecting something else and didn't defend it.
Hopkins with a body punch. A glancing blow.
Hopkins lunges in with swinging rights and lefts but Why circles away quickly and effectively.
Hopkins throws a nice hook to the body that draws an oooh from the crowd.
Why wants to clinch
and Hopkins counters with a left to the body.
This has been an exciting period of action!
Hopkins scores with a nice head shot.
Hopkins pulls out of a head kick attempt.
Hopkins scoring well with a low kick there.
Why shoots in for a double leg but Hopkins sprawls well. That's going to sap some energy.
Why misses with a double jab
and Hopkins counters with a left to the body.
That's three minutes gone in the round.
Why takes a jab right on the kisser.
Why closes the distance and clinches up with Hopkins, looking for a takedown. Why pushes Hopkins against the cage but Hopkins circles to the side and manages to break the clinch.
Nice body punch from Hopkins.
Hopkins scores with a shot to the body.
Why on the wrong end of a kick to the body.
Hopkins lands a jab followed by a nice looking cross.
Hopkins throws a hook to the body but it doesn't connect.
Why takes a jab right on the nose. That must have hurt but he shrugs his shoulders and looks to return the favor.
Why tries to clinch
and Hopkins counters with a straight punch to the midsection.
Hopkins throws a series of punches but Why avoids them all with ease.
Hopkins throws a quick inside leg kick.
That's four minutes gone in the round.
Hopkins works Why's body with a nice hook.
Hopkins changes levels and scores with a jab to the body.
Hopkins scores with a sloppy punch to the body. Not much technique there but it did the business.
Why swings and misses with a shot to the body
and Hopkins counters with a straight right hand.
Crunch! Hopkins slams his shin into Why's torso.
The crowd cheering loudly, showing their appreciation for the quality fight we're seeing here.
Why gets his head snapped back by a nice shot there.
Hopkins lands a slapping body shot.
As the round comes to an end the crowd are showing their appreciation for a great round of action.
Why shakes his hands off, looking to compose himself, but takes a jab to the jaw whilst he does it.
Why has a pretty nasty looking mouse under his right eye.
Hopkins throws a nice outside leg kick.
This fight brought to you by 5M nutrition - it's mmmmm tasty. Nice jab by Hopkins.
And that�s the end of the round � the fighters go back to their corners.
Dawson Hopkins dominated that second round.
The cut man is working on Dawson Hopkins's cut.
The minute break is over - no more time for sponges and pep talks - back to the action! And we move into the final round!

Hopkins throws out a powerful jab.
A slapping leg kick lands for Hopkins.
Why tries to score a power double leg takedown but Hopkins sees that one coming and sprawls well. That will dishearten Why somewhat.
Why misses with a hook to the body
and Hopkins counters with a right hand to the body.
Why shoots in looking for a double leg takedown. Hopkins defends it nicely.
Hopkins tries to land with a swinging hook to the body but Why was well out of range. Poor timing from Hopkins.
Why chopped to the floor by a nice leg kick but he springs right back up before Hopkins can pounce on him.
A low kick from Why misses
and Hopkins counters with a good, hard body kick but Why shrugs it off.
Why takes a big intake of breath there - he's definitely tired.
Why with a lazy takedown attempt
and Hopkins counters with a good low kick that Why was not able to check.
Dawson Hopkins has stuffed three takedown attempts in the round now. That's going to take a lot out of Stevie Why.
Hopkins stuffs a takedown. It's all about dictating where the fight takes place and Hopkins wants it to stay on the feet.
That's one minute gone in the round.
Hopkins scores with a body shot.
Why takes a body punch but keeps moving.
Hopkins throws a head kick that connects with a bit of head and a bit of hand.
Hopkins throws a sloppy head kick and Why moves out of range easily.
Hopkins stuns Why with a nice body shot, before stepping back out of range.
Hopkins connects with a lovely right hand, straight down the pipe.
Hopkins scores with a nice one two combo and darts back out of range to avoid anything coming in the opposite direction.
Why misses with a takedown
and Hopkins counters with a left to the body.
A shot to the liver by Hopkins. Beautiful body shot.
A nice combination there by Hopkins.
Why takes a body punch but keeps moving.
That's two minutes gone in the round.
Why on the wrong end of a nice low kick. He's acting like it's no big deal but he doesn't want to take many more of those.
Hopkins punishes Why's body with a nice straight punch.
Why is pinned up against the cage taking some big shots here. The referee is looking closely deciding whether he should stop the fight.
The crowd are loving this. Great action here.
Ouch! a nice leg kick from Hopkins, right into the meat.
Why takes a nice looking leg kick right on the meat of his thigh there.
Why takes a shot right to the liver - Bas would have been proud of that punch.
Hopkins keeps his opponent at a distance with a nice jab.
Why misses with a takedown attempt
and Hopkins counters nicely by changing levels and landing a hook to the body.
Hopkins digs a good body shot into Why's ribs.
Hopkins fakes and then throws a beautiful body shot. Why looks a bit winded and takes a step backwards to take a breath.
Why is trying desperately to land a takedown but Hopkins is having absolutely none of it. This is turning into a bit of a nightmare for Why.
Hopkins ducks down and throws a hook to the body but Why moves away.
That's three minutes gone in the round.
Why shoots in for a double leg but Hopkins sprawls well. That's going to sap some energy.
Hopkins throws a nice hook to the body that draws an oooh from the crowd.
Hopkins throws a nice inside leg kick.
Hopkins lands with a good body shot.
Dawson Hopkins is fighting for a decision here - he's started to take the cautious approach.
Hopkins connects with a leg kick. He turned his hip over nicely there.
A looping hook to the body misses from Hopkins. Why does a little dance to reset his feet.
Hopkins defends well against a solid takedown attempt from Why.
A nice leg kick lands there from Hopkins.
Hopkins throws a body punch but Why moves out of range.
Stevie Why has stepped it up - he knows he needs a finish here!
Why is pinned up against the cage taking some big shots here. The referee is looking closely deciding whether he should stop the fight.
Stevie Why is looking to throw some combinations by the looks of things.
A telegraphed takedown attempt from Why is defended easily by Hopkins.
That's four minutes gone in the round.
Hopkins lands a body shot.
Hopkins lands with an uppercut that bounces Why off the cage and back into rage.
Why throws a jab, cross combination which is slipped
and Hopkins counters with a nice body shot.
A solid leg kick lands there for Hopkins.
Hopkins changes levels and scores with a jab to the body.
Why throws a combination that misses
and Hopkins counters with a good low kick that Why was not able to check.
Hopkins connects with a hook to the side of his opponent's head.
As the round comes to an end the crowd are showing their appreciation for a great round of action.
Why throws a leg kick
and Hopkins counters with a nice low kick that buckles Why's knee momentarily.
Hopkins lands a glancing blow to the side of Why's head.
Hopkins jabs away that one connects to the head of his opponent.
And that's the end of the fight!
Dawson Hopkins showed his dominance in that final round.
Well Hopkins has outscored his opponent in every aspect of the fight today. Only a scarily incompetent judge or two will keep him from a well deserved win... Over to the ring announcer for the scorecards.
Ladies and gentlemen, after 3 rounds of action, we go to the scorecards for a decision.
Judge Gwen Towbar scores the fight for Dawson Hopkins!
Judge Alan Glass scores the fight for Dawson Hopkins!
Judge Daniel Franklin scores the fight for Dawson Hopkins!
Dawson Hopkins wins by unanimous decision!
|
|
|
|
|
|
|
|
|
|
|
|
|
|
|
|
|
|
|
|
|
|
|
| S |
C
A |
G |
S |
C
B |
G |
|
S |
C |
G |
|
energy
A | B |
|
hype
A | B |
|
pop
A | B |
|
mgr
A | B |
|
FIGHT
RATING
50% |
|
|
|
|
|
|
