|
|
PBP Commentary |
Coming up we have a light heavyweight MMA rules bout between Achilles Myrmidon (ranked 0 p4p, 0 weight class) and Carl Statham (ranked 0 p4p, 0 weight class). Rumors backstage are that the fighters have been paid to keep it standing but we know that would never happen in MMA!
 |
|
 |
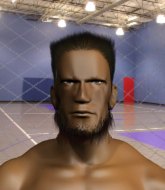
| 186 cm
20
220 lbs
5 - 3 - 0 |
|
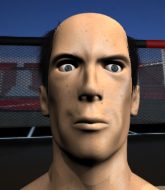
190 cm
26
219 lbs
5 - 1 - 0 |
BJJ Brown Belt
Solid boxing
Very strong |
|
BJJ White Belt
Solid Muay Thai
Solid chin |
|
| |
|
Ladies and gentlemen. This fight is 3 rounds, in the light heavyweight division.
Introducing the fighter to my left, fighting out of the red corner.
With a record of
5 - 3 - 0, fighting out of New York, Achilles Myrmidon!
And introducing the fighter to my right, fighting out of the blue corner.
With a record of
5 - 1 - 0, fighting out of New York, Carl Statham!
The judges for this bout are John Kavanagh, Jonathan Paton and Lou da Vinci.

The bell rings for round one and we are underway!
Myrmidon sizes up Statham with a pawing jab and scores with a straight right down the middle.
Myrmidon shoots in with a takedown attempt and he has Statham pinned against the cage. Statham gets the underhooks and manages to circle away.
Myrmidon misses with a lunging right hand

and Statham counters by moving into the clinch. Good anticipation by Statham.
Statham avoiding damage.
Still in the clinch, Statham scores with a nice short uppercut.
Statham lands on the inside with an uppercut.
Myrmidon is trying to break the clinch but Statham has him pressed against the cage.
Statham working aggressively here.
Myrmidon tries to break the clinch but Statham is controlling the position.
A shot in the inside from Myrmidon.
Myrmidon's head jolts backwards as he takes an uppercut right on the button!
The crowd are loving this. Great action here.
Myrmidon has a couple of punches blocked by Statham.
Nice body punch from Myrmidon - that landed with a thud.
A frustrated look appears on Myrmidon's face as he tries to break the clinch.
Statham swings away with an uppercut that misses.

Myrmidon pushes off and circles away, back to the middle of the mat.
Myrmidon lands with an uppercut that bounces Statham off the cage and back into rage.
Myrmidon on the wrong end of a vicious looking body shot.
Myrmidon fails with an attempt to clinch.

That's one minute gone in the round.
Myrmidon fails miserably with a takedown attempt.
Myrmidon avoids a punch combination nicely.

Myrmidon clinches up with Statham and pushes him back against the cage.
Statham scores with a shoulder strike.
Statham works for underhooks and lands a body shot in the process.
Statham misses with a punch to the body.
Statham doesn't land with the attempted body shot.
An uppercut on the inside fails to land for Myrmidon.
Myrmidon misses with a short punch on the inside.
Myrmidon throws a head punch that misses.
Statham misses with a body punch.
Statham scores with a shoulder strike.
The fans in attendance giving it up for the two fighters, who have really let it all hang out in the last minute or so!
Statham misses with the head strike.
Myrmidon lands on the inside with an uppercut.
Statham lands on the inside with an uppercut.

That's two minutes gone in the round.
Myrmidon can't break the clinch.
Statham misses with a hook from the clinch.
Statham misses with a punch on the inside.
Myrmidon tries to circle away but Statham has him pinned against the cage.
Statham blocks a body shot from Myrmidon.
Myrmidon wants a takedown.
That's three failed takedown attempts in the round for Achilles Myrmidon. That's going to take a lot out of him.
Statham lands a shot to the body.
Myrmidon takes a shot to the head.
A frustrated look appears on Myrmidon's face as he tries to break the clinch.
Myrmidon is trying to break the clinch but Statham has him pressed against the cage.
Statham avoiding damage.
Statham looking to stall.
Myrmidon goes for a takedown attempt but Statham pushes him away and we're back to fighting at a distance.
Statham lands with a two punch combination before moving back out of range.

That's three minutes gone in the round.

Myrmidon shoots in for a takedown and gets it. Let's see what he's got on the mat.
Myrmidon is breathing heavily.
Statham avoiding any damage from the ground and pound.
Statham working a defensive guard here.
We get told so often about how wrestlers don't like to be on their backs. Let's see if Statham can do anything to dispel that myth.

The ref calls for a clean break and stands the fighters back up. Carl Statham wasn't active enough on the ground.
Myrmidon misses with a leg kick.
Myrmidon lands a jab to the nose.

That's four minutes gone in the round.
Myrmidon defending well as Statham loads up on a big left hand.
A punch combination from Myrmidon misses.
Statham misses with a looping left.
Statham scores with a reasonable looking shot to the body. Myrmidon doesn't seem bothered though.
Myrmidon tries to clinch but Statham moves away
and Statham counters with a nice body shot.
Myrmidon throws a hook to the body but it doesn't connect.
Myrmidon ducks down and throws a hook to the body but Statham moves away.
Myrmidon on the wrong end of a decent looking cross there.
Wooooo! Give it up for these two warriors! They are putting on a show!
Myrmidon dives in and grabs Statham's left leg, looking for a takedown. Statham pushes down on Myrmidon's head and hops out.
Statham scores with a nice strike.
The crowd are going absolutely nuts as the round comes to an end - what a fantastic round of action!
Statham connects with a looping left hand that seems like it dazed Myrmidon momentarily.
Statham misses with a body shot.
Some wild striking there from Myrmidon.
And that�s the end of the round � the fighters go back to their corners.
A close round but Carl Statham will probably get the nod.
That's time! Back to the action!

A slow jab from Myrmidon misses its intended target.
Myrmidon is looking to clinch but Statham is avoiding it.
A looping hook to the body misses from Statham. Myrmidon does a little dance to reset his feet.
Statham moves out of range of the leg kick from Myrmidon.
Statham fakes with an overhand right and moves in to clinch with Myrmidon, pushing him back against the cage.
Statham is working hard here but doesn't seem to be able to control effectively, up against the cage.
Statham doesn't land with the attempted body shot.
Statham swings wildly with an uppercut but Myrmidon uses good head movement to avoid it.
Statham misses with a punch on the inside.
Statham misses with a hook from the clinch.
Statham misses with a punch on the inside.
Myrmidon can't break the clinch.
A frustrated look appears on Myrmidon's face as he tries to break the clinch.
Myrmidon blocking some punches.
That's one minute gone in the round.
Myrmidon gets a trip takedown into half guard.
The ref warns both fighters not to hold the cage as they work up against the meshing.
Statham is controlling Myrmidon's position as best he can from this difficult position.
Statham is looking to escape.
We must be close to a standup if these guys don't pick up the pace.
Myrmidon seems to be taking a bit of a break to think of his next move. He lands a short punch in the meantime.
Statham is trying to stand back up but Myrmidon is controlling him
Well, if Myrmidon is going to just lie there, perhaps we should talk about what we're having for dinner tonight� I'm having a ham and pineapple pizza� Yum. Can't wait.
The fighters are pressed up against the cage, both looking to find a bit of space to work.
That's two minutes gone in the round.

Achilles Myrmidon has forced the referee to step in and bring the fight back to the feet.
A slow jab from Myrmidon misses its intended target.
Myrmidon tries to land with a swinging hook to the body but Statham was well out of range. Poor timing from Myrmidon.
Statham dodges the punch combination from Myrmidon.
Statham lands a jab.
Myrmidon slips a straight right by Statham.
Statham keeping at a good range here, avoiding a leg kick.
Achilles Myrmidon seems to be the more aggressive standup fighter in this bout.
The fighters circle momentarily. Myrmidon darts into range and connects with a nice straight punch.
We've seen a great period of action over the last minute or so - credit to both fighters for going all out!
Myrmidon ducks down and throws a hook to the body but Statham moves away.
Statham displays good takedown defense there as he swats away a double leg from Myrmidon.
That's three minutes gone in the round.
Myrmidon misses with a takedown attempt. He shot from a bit too far out.
Both fighters are absolutely exhausted here.
A telegraphed takedown attempt from Myrmidon is defended easily by Statham.
That's three failed takedown attempts in the round for Achilles Myrmidon. That's going to take a lot out of him.
Statham swings wildly with a right hand that was never going to find it's target.
Statham fakes with an overhand right and moves in to clinch with Myrmidon, pushing him back against the cage.
Statham tries a shoulder strike but it doesn't do any damage.
Myrmidon can't break the clinch.
Myrmidon can't break the clinch.
Myrmidon blocks a body shot from Statham.
Still in the clinch, Myrmidon scores with a nice short uppercut.
Statham tries to throw a body punch but Myrmidon avoids it by throwing Statham back against the cage.
A head punch blocked on the inside by Myrmidon.
That's four minutes gone in the round.
Myrmidon is trying to break the clinch but Statham has him pressed against the cage.
Myrmidon blocking some punches.
Myrmidon blocks an uppercut.
Myrmidon lands a short shot on the inside that snaps the head of Statham backwards.
Nice body punch from Statham.
Wooooo! Give it up for these two warriors! They are putting on a show!
Statham cracks Myrmidon with a nice body shot.
Myrmidon tries to score a body lock takedown but Statham shows good agility there to stay on his feet.
A left hand lands to the body for Statham.
A nice right hand lands inside from Statham.
Statham displaying some good clinch control by pressing Myrmidon up against the cage.
Statham misses with a body punch.
Myrmidon tries for a takedown but Statham manages to get underhooks.
As the round comes to an end the crowd are showing their appreciation for a great round of action.
Myrmidon tries a shoulder strike but it doesn't do any damage.
Statham tries to land a shot to the body but it's blocked.
Statham misses with a body punch.
Statham tries a body shot but Myrmidon blocks it.
And that�s the end of the round � the fighters go back to their corners.
A close second round but Carl Statham will probably get the nod - 10:9.
That's the end of the interval. I'm sure that seemed a lot quicker than a minute for our two fighters! Back to the action. This is the final round!

Myrmidon shoots in with a takedown attempt and he has Statham pinned against the cage. Statham gets the underhooks and manages to circle away.
Statham has taken the fight to the clinch.
Myrmidon is trying to break the clinch but Statham has him pressed against the cage.
Statham misses with a hook from the clinch.
Statham goes for a body shot but it's blocked.
Statham working on landing some head shots here - that one got through nicely.
Statham misses with a short punch on the inside.
Statham lands a shoulder strike that jolts his opponent's head backwards.
Statham works on Myrmidon's body with a couple of short punches.
Statham keeps the fight in the clinch, despite Myrmidon's efforts to push away.
Statham swings away with an uppercut that misses.
Myrmidon wants to get back to striking at distance but Statham won't allow it.
Both fighters are breathing heavily.
Statham misses with a body punch.
Myrmidon misses with some punches.
Statham blocks an elbow strike.
That's one minute gone in the round.
Myrmidon is trying to force a seperation but Statham has the dominant position.
A battle for position here, against the cage.
Statham misses with a short punch on the inside.
Statham keeps control of Myrmidon as he tries to wriggle out of the double underhooks.
Myrmidon letting Statham take a breather here.
Statham has Myrmidon pressed against the cage, preventing Myrmidon from circling away and getting back to striking at range.
Statham misses with a punch to the body.
Myrmidon tries to break the clinch but Statham is controlling the position.
Statham makes some space for himself and lands an uppercut.
Statham lands with a left to the head.
Statham throws a head punch that misses.
Statham working aggressively here.
Statham lands with a short punch from the clinch.
Statham is trying to slow down the pace of the fight but Myrmidon is keeping busy.
Myrmidon looks like he'd prefer to be striking at range right now.
That's two minutes gone in the round.
Statham misses with a body punch.
Myrmidon wants to push off and get back to the center of the mat but Statham has him pressed against the cage.
Statham tries a shoulder strike but it doesn't do any damage.
Myrmidon tries to break free but Statham pushes him back against the cage.
Myrmidon wants to break the clinch but can't.
Myrmidon drops down for a takedown but doesn't get it.
Statham lands a left hand.
Fantastic stuff here - a very entertaining period of action, which has drawn cheers from the crowd.
Statham lands a right hand that snaps the head of Myrmidon backwards.
Statham stops a takedown attempt from Myrmidon.
That's three failed takedown attempts in the round for Achilles Myrmidon. That's going to take a lot out of him.
Statham has Myrmidon pressed against the cage, preventing Myrmidon from circling away and getting back to striking at range.
Statham misses with a body punch.
A head punch blocked on the inside by Myrmidon.
Myrmidon's head jolts backwards as he takes an uppercut right on the button!
Statham tries a body shot but Myrmidon blocks it.
Statham stops a takedown attempt from Myrmidon.
Statham has a couple of punches blocked by Myrmidon.
That's three minutes gone in the round.
Statham swings away with an uppercut that misses.
Statham lands with a short shot to the head.
Statham presses Myrmidon against the cage and delivers a mid-strength body shot.
Statham stalling in the clinch but Myrmidon improves position.
Statham lands a hook to the side of the head.
Statham tried to land a shot to the body but connects with Myrmidon's elbow.
Myrmidon blocks a couple of punches on the inside.
Statham blocks a couple of punches on the inside.
Statham gets through Myrmidon's defenses to land a nice punch to the side of the head.
Statham lands a hook to the side of the head.
Myrmidon blocking some punches.
Myrmidon tries to score a body lock takedown but Statham shows good agility there to stay on his feet.
A hook to the body from Statham.
Statham throws a blind hook that connects with the side of Myrmidons head.
Myrmidon blocks a punch to the side of the head.
Statham lands with a good tight uppercut to the head.
This has been an exciting period of action!
Myrmidon looks like he'd prefer to be striking at range right now.
That's four minutes gone in the round.
Statham lands a hook to the side of the head.
Statham lands a shot to the body.
Statham works on Myrmidon's body with a couple of short punches.
Statham misses with a hook from the clinch.
Statham lands with a good tight uppercut to the head.
Statham has Myrmidon pushed against the cage.
Nice body punch from Statham - that landed with a thud.
Statham tries a body shot but Myrmidon blocks it.
Statham lands a hook that snaps the head of Myrmidon backwards.
Achilles Myrmidon has stepped it up - he knows he needs a finish here!
The fighters are pressed against the cage, as the pace of the fight slows.
A short right hand to the side of the head by Statham.
The crowd are going absolutely nuts as the round comes to an end - what a fantastic round of action!
Statham blocks a punch to the side of the head.
Both guys are working to get underhooks.
Carl Statham is fighting for a decision - hopefully he's judged it right and he's actually winning the fight.
Statham misses with some punches.
And that's the end of the fight!
Carl Statham comfortably won the final round on my scorecard.
I've got Statham winning every round here. Surely the decision will go his way and he'll pick up a well deserved decision victory. Over to the ring announcer for the scorecards.
Ladies and gentlemen, after 3 rounds of action, we go to the scorecards for a decision.
Judge John Kavanagh scores the fight 27:30
Judge Jonathan Paton scores the fight 28:30
Judge Lou da Vinci scores the fight 27:30
In favor of your winner, by unanimous decision... Carl Statham!
|
|
|
|
|
|
|
|
|
|
|
|
|
|
|
|
|
|
|
|
|
|
|
| S |
C
A |
G |
S |
C
B |
G |
|
S |
C |
G |
|
energy
A | B |
|
hype
A | B |
|
pop
A | B |
|
mgr
A | B |
|
FIGHT
RATING
98% |
|
|
|
|
|
|

