|
|
PBP Commentary |
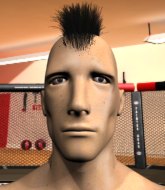
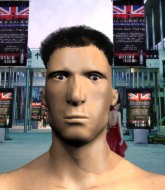
Coming up we have a light heavyweight MMA rules bout between Jonathan Burns (ranked 0 p4p, 0 weight class) and James Braddock (ranked 0 p4p, 0 weight class). James Braddock has the better chin. Will he look to stand and bang today?
 |
|
 |
| 190 cm
19
205 lbs
3 - 0 - 0 |
|
189 cm
19
215 lbs
3 - 0 - 0 |
BJJ Blue Belt
Counter striker
Good in bed |
|
BJJ White Belt
Excellent boxer
Good gas tank |
|
| |
|
Ladies and gentlemen. This fight is 3 rounds, in the light heavyweight division.
Introducing the fighter to my left, fighting out of the red corner.
With a record of
3 - 0 - 0, fighting out of Sydney, Jonathan Burns!
And introducing the fighter to my right, fighting out of the blue corner.
With a record of
3 - 0 - 0, fighting out of Sydney, James Braddock!
The judges for this bout are John Mangel, Eliza Hachem and Damien Edna.

The bell rings for round one and we are underway!
Burns doesn't succeed with the takedown
and Braddock counters with a left and a right that stings Burns.

Burns scores a trip takedown into side control. Nice.
Braddock is trying to improve his position.
Burns wants to lay and pray for a moment but Braddock keeps working.
Braddock taking punishment in the form of punches.

That's one minute gone in the round.
Burns working away.
Braddock is looking to reverse the position.

Burns is trying to get an arm triangle but Braddock is defending well.
Burns is looking to take a break and control but Braddock is keeping him honest, looking to work from the bottom.
Burns throwing strikes but Braddock manages to buck up and roll into a nice reversal - now he's on top in side control!
Burns wants to control but Braddock postures up.
Burns sneaks back into half guard.

That's two minutes gone in the round.
The crowd are starting to boo a lack of action.
Burns is trying to get back to full guard.
Braddock looking to pass the half guard. Not this time.
Braddock content to sit in half guard and control for a moment.
Burns looking to force a kimura from the bottom here. He's concentrating on that move too much though and Braddock pushes past his half guard into mount!
Braddock tucks in and makes sure he doesn't lose the dominant position.
Burns really trying hard to get back to half guard here.

That's three minutes gone in the round.
Burns regains half guard.
Burns is looking to sinch up a guillotine here but Braddock pulls his head out easily.
Burns is looking to regain full guard. Not this time though.
Burns actively working from the bottom here.
Burns is looking to control Braddock's leg but it's slowly edging free. Can Burns avoid being mounted?

That's four minutes gone in the round.
Well. There's a bit of a lull in the action here and the crowd are starting to get restless.
Burns is looking to sinch up a guillotine here but Braddock pulls his head out easily.
Burns is trying to control but can't.
Burns preventing any damage for now, controlling his opponent's head.
Burns wants to sweep but Braddock has passed to side control!
Burns is looking for a sweep.
And that�s the end of the round � the fighters go back to their corners.
James Braddock dominated that round.
The fighters' corners scream their final instructions, as the referee calls time. Here we go, back to the action!

Burns fails with a takedown attempt.
Burns misses with a takedown
and Braddock counters with a lovely straight right hand!
Braddock swings wildly with a right hand that was never going to find it's target.
Burns gets his takedown attempt stuffed easily
and Braddock makes him pay by landing a nice hook to the body before moving out of range.
That's three failed takedown attempts in the round for Jonathan Burns. That's going to take a lot out of him.
Both fighters are absolutely exhausted here.
That's one minute gone in the round.
Jab by Braddock.
Burns slips a jab and a cross from Braddock.
Braddock connects with a crisp jab.
Jonathan Burns seems to be the more aggressive standup fighter in this bout.
Burns tries to score a power double leg takedown but Braddock sees that one coming and sprawls well. That will dishearten Burns somewhat.
That's two minutes gone in the round.
A big left from Braddock misses.
Horrible takedown by Burns or perhaps it was just good defense by Braddock which made him look bad.
Burns with a poor takedown

and Braddock counters with a nice right hand that sends Burns toppling to the canvas! Burns scrambles and gets back to his feet - can Braddock finish him?!

Burns is rocked!
That's three minutes gone in the round.
Braddock circles away before darting back in with a big straight right hand. It connects beautifully and sends Burns tumbling to the canvas! He's out cold! Braddock wins by KO!
Ladies and gentlemen, after 3:12 of round 2, we have a winner by way of KO (Punch). James Braddock!
|
|
|
|
|
|
|
|
|
|
|
|
|
|
|
|
|
|
|
|
|
|
|
| S |
C
A |
G |
S |
C
B |
G |
|
S |
C |
G |
|
energy
A | B |
|
hype
A | B |
|
pop
A | B |
|
mgr
A | B |
|
FIGHT
RATING
35% |
|
|
|
|
|
|
