|
|
PBP Commentary |
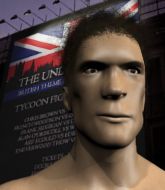
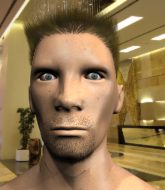
Coming up we have a super heavyweight MMA rules bout between Fender Tremolo (ranked 0 p4p, 0 weight class) and Ryo Sakazaki (ranked 0 p4p, 0 weight class). I'm sure you'll be fascinated to know that I was talking to some pointless Z list celebrity before the fight and he thought that Ryo Sakazaki was going to win. Let's see if he was right.
 |
|
 |
| 188 cm
18
190 lbs
0 - 1 - 0 |
|
179 cm
18
165 lbs
0 - 1 - 0 |
BJJ White Belt
Brawler
Big heart |
|
BJJ White Belt
Good kicks
Granite chin |
|
| |
|
Ladies and gentlemen. This fight is 3 rounds, in the super heavyweight division.
Introducing the fighter to my left, fighting out of the red corner.
With a record of
0 - 1 - 0, fighting out of Sydney, Fender Tremolo!
And introducing the fighter to my right, fighting out of the blue corner.
With a record of
0 - 1 - 0, fighting out of Sydney, Ryo Sakazaki!
The judges for this bout are Hugh Johnson, Winston Howard and Skip Squint.

The bell rings for round one and we are underway!
Tremolo tries to clinch up against the cage, rushing in the close the distance. Sakazaki manages to break the clinch and circles back to the middle of the mat.

Tremolo moves into range and clinches up with Sakazaki.
Sakazaki is looking to break free of the clinch but Tremolo has double underhooks.
Sakazaki wants to break free. God knows he wants to breaaaak freeee.
Tremolo is struggling to control the position.
Sakazaki tries to stall but Tremolo uses the opportunity to gain a better position.
The pace really dropping off here, momentarily.

Tremolo manages to break the clinch.
Sakazaki throws a head kick but Tremolo moves out of range.
Tremolo tries to clinch but Sakazaki moves away
and Sakazaki counters with a kick to the head that grazes his opponent. Tremolo is lucky that one didn't land flush.
Tremolo tries to clinch up
and Sakazaki counters with a series of strikes. Tremolo will be more careful next time no doubt.
Sakazaki throws a right high kick that is partially blocked by Tremolo.
Tremolo wants to clinch.
Tremolo is looking to clinch.

That's one minute gone in the round.
That kick from Sakazaki tenderised Tremolo's leg. Tremolo is trying to keep his angry face on.
Tremolo tries to close the distance and clinch up against the cage but Sakazaki paws at him with a jab and circles away.
Tremolo wants to clinch
and Sakazaki counters with a nice body kick.
Tremolo tries to clinch there but Sakazaki circles away.
Sakazaki lands a lovely overhand right.
Sakazaki tries a switch kick but it misses it's target.
Sakazaki throws a head kick that misses and slips in the process. He scrambles back to his feet and the fighters circle.
Tremolo staying out of range there.
Tremolo tries to close the distance and clinch up but Sakazaki swats him away and circles back towards the center.
Tremolo wants to clinch
and Sakazaki counters with a nice kick to the body.
Sakazaki thows a body shot but no joy.
A head kick misses from Sakazaki.
Sakazaki misses with a wild combination.
Tremolo closes the distance looking to clinch
and Sakazaki counters with a head kick.

That's two minutes gone in the round.
Sakazaki throws a head kick that misses.
Tremolo wants to clinch
and Sakazaki counters with a big head kick but Tremolo shrugs it off.
A left and a right from Sakazaki both land. Nice combination.
Tremolo wants to clinch up but Sakazaki keeps it at a distance.
Sakazaki misses with an uppercut
and Tremolo holds on and brings the fighters into a clinch.
Sakazaki prevents a takedown attempt there.
Sakazaki tries a knee to the head but he's missed.
Sakazaki tries to break free but Tremolo pushes him back against the cage.
Sakazaki is looking to break free of the clinch but Tremolo has double underhooks.
Tremolo swings wildly with an uppercut but Sakazaki uses good head movement to avoid it.
Sakazaki tries to land a knee to the head but misses.
Sakazaki is trying to break the clinch but Tremolo is controlling him.

That's three minutes gone in the round.
Sakazaki lands a knee to the head.
Sakazaki tries to land a shot to the body but it's blocked.
Tremolo's corner calls for him to break the clinch, which he does.
Tremolo avoids the body shot from Sakazaki.
Tremolo tries to close the distance and clinch up but Sakazaki swats him away and circles back towards the center.
Tremolo is looking to take this fight into the clinch.
Tremolo tries to clinch but fails miserably
and Sakazaki counters with a head kick.
Sakazaki circles away from the clinch attempt.
Sakazaki fails to land with a series of punches.
Tremolo tries to close the distance and clinch up against the cage but Sakazaki paws at him with a jab and circles away.
Sakazaki swats away the attempt to clinch by Tremolo.
Tremolo looks to clinch
and Sakazaki counters with an outside leg kick.
Sakazaki circles away from the clinch attempt.
Tremolo looks to clinch
and Sakazaki counters with a straight punch to the midsection.
Tremolo tries to clinch there but Sakazaki circles away.
Sakazaki delivers a nice body kick.

That's four minutes gone in the round.
Tremolo on the wrong end of a nice low kick. He's acting like it's no big deal but he doesn't want to take many more of those.
Sakazaki throws a right hand that Tremolo ducks under and follows up with a left that Tremolo also avoids with ease.
Sakazaki circles away from the clinch attempt
and Sakazaki counters with a nice body kick.
Sakazaki misses with a head kick.
Sakazaki misses with a head kick.
Sakazaki misses with a head kick.
Tremolo closes the distance but Sakazaki moves to the side
and Sakazaki counters with a nice leg kick.
Sakazaki tries to bum rush Tremolo with a series of wild strikes but Tremolo uses good footwork to avoid the assault.
Tremolo shoots in for a takedown but doesn't get it.
The crowd applaud the fighters efforts here as the round comes to an end.
Sakazaki throws a head kick but Tremolo moves out of range.
A head kick misses from Sakazaki.
Sakazaki swinging wildly here.
Tremolo takes a punch to the jaw and another one to the bread basket.
And that�s the end of the round � the fighters go back to their corners.
Ryo Sakazaki dominated that round.
That's the end of the interval. I'm sure that seemed a lot quicker than a minute for our two fighters! Back to the action.

A head kick by Sakazaki misses
and Tremolo counters by clinching up.
Sakazaki can't find room to land a body shot as Tremolo controls the action.
Sakazaki tries a knee to the head but Tremolo blocks it.
Tremolo pushes off and circles away, back to the middle of the mat.
Tremolo steps to his left, right into the path of a big body kick from Sakazaki. That one must have hurt.
A head kick misses from Sakazaki.
Sakazaki fakes with a right hand and throws a good leg kick, right into the thigh. That had to hurt Tremolo.
Tremolo tries to check the leg kick but that clearly hurt him.
Sakazaki throws a head kick that misses.
Sakazaki tries a head kick but it misses.
Sakazaki throws a sloppy head kick and Tremolo moves out of range easily.
Fender Tremolo seems to be the more aggressive standup fighter in this bout.
Sakazaki throws a head kick that misses.
Tremolo closes the distance but Sakazaki moves to the side
and Sakazaki counters with a kick to the head that grazes his opponent. Tremolo is lucky that one didn't land flush.
Tremolo wants to clinch up but Sakazaki keeps it at a distance.
Tremolo moves in looking to clinch but Sakazaki pushes him off.
That's one minute gone in the round.
Tremolo moves to clinch but Sakazaki breaks away
and Sakazaki connects with a straight left hand counter down the middle.
Tremolo bobs and weaves well there to avoid the strikes.
Sakazaki plants his feet and lands a nice head kick!
Sakazaki throws an overhand right that lands on Tremolo's shoulder, as Tremolo tries to avoid the shot.
Tremolo moves to clinch but Sakazaki breaks away
and Sakazaki counters with a quick right hand to the jaw.
Tremolo tries to clinch up against the cage, rushing in the close the distance. Sakazaki manages to break the clinch and circles back to the middle of the mat.
The fight stays on the outside here - Tremolo looks like he's thinking about clinching though.
Ryo Sakazaki is looking to keep the fight on the feet at all costs.
Sakazaki throws a head kick but Tremolo moves out of range.
Tremolo blocks a head kick by Sakazaki.
Fender Tremolo is looking to throw some combinations by the looks of things.
Sakazaki circles away from the clinch attempt.
Tremolo wants to clinch
and he gets countered with a snapping leg kick.
Tremolo moves in looking to clinch but Sakazaki pushes him off.
That's two minutes gone in the round.
Tremolo bobs and weaves well there to avoid the strikes.
Sakazaki scores with a kick to the midsection.
Tremolo tries to clinch up.
Sakazaki tries to work over Tremolo's front leg with a kick but Tremolo checks it.
Sakazaki is looking to land body kicks.
Sakazaki lands with a head kick! That's gotta hurt.
Tremolo moves out of range as Sakazaki throws a body kick.
Tremolo is looking to clinch but Sakazaki is avoiding it.
Sakazaki throws a head kick that connects with a bit of head and a bit of hand.
Sakazaki tries a switch kick but it misses it's target.
Tremolo is looking to clinch but Sakazaki is avoiding it.
Tremolo tries to clinch but is not successful on this occasion.
Sakazaki circles away from the clinch attempt
and Sakazaki counters with a leg kick.
Tremolo tries to clinch but is not successful on this occasion.
That's three minutes gone in the round.
Tremolo is looking to clinch.
Tremolo tries to clinch but Sakazaki is having none of it.
Tremolo takes a kick to the side of the head.
Sakazaki will need to tighten up his combinations if he doesn't want to gas himself out, swinging at thin air.
Tremolo takes a head kick and shrugs it off.
Tremolo tries to close the distance and clinch up but Sakazaki swats him away and circles back towards the center.
Tremolo is looking to clinch but Sakazaki is avoiding it.
Tremolo closes the distance and presses his opponent up against the cage.
A real battle for position is taking place between these two warriors.
Tremolo blocking some punches.
Tremolo tries to land a knee to the head but misses.
Tremolo blocking some punches.
Sakazaki tries to break the clinch but Tremolo is controlling the position.
Tremolo lands with a right to the head.
Tremolo using the Thai plumb to throw knees but Sakazaki has his back arched nicely, preventing the strike.
That's four minutes gone in the round.
Tremolo breaks the clinch and we're back to striking at distance.
Tremolo blocks a head kick by Sakazaki.
Sakazaki will need to tighten up his combinations if he doesn't want to gas himself out, swinging at thin air.
Tremolo keeping a good distance there, avoiding the body shot.
Sakazaki takes a swing at Tremolo's ribcage but misses.
Tremolo tries to clinch up.
Sakazaki connects with a looping left hand that seems like it dazed Tremolo momentarily.
Tremolo misses with a takedown attempt. He shot from a bit too far out.
Tremolo wants to clinch.
Tremolo dodges the punch combination from Sakazaki.
Sakazaki avoids the clinch attempt nicely.
And that�s the end of the round � the fighters go back to their corners.
Ryo Sakazaki showed his class in that round. I'd imagine he'll take it on all the scorecards.
The minute break is over - no more time for sponges and pep talks - back to the action! And we move into the final round!

Tremolo tries to clinch but Sakazaki moves away
and Sakazaki counters with a three punch combo that has Tremolo backing up. Tremolo nods at Sakazaki to acknowledge the strikes.
Tremolo moves to clinch but Sakazaki breaks away
and Sakazaki counters with a good, hard body kick but Tremolo shrugs it off.
Tremolo takes the fight into the clinch.
Sakazaki is trying to slow down the pace of the fight but Tremolo is keeping busy.
Sakazaki has had enough of the clinch and is looking to separate.
Sakazaki wants to break free but Tremolo has control.
Tremolo manages to break the clinch.
Tremolo tries to clinch
and Sakazaki counters with a head kick.
Sakazaki circles away from the clinch attempt
and Sakazaki counters with a stiff right hand.
Tremolo doesn't manage to clinch there - Sakazaki circles away.
Tremolo moves in looking to clinch but Sakazaki pushes him off.
That's one minute gone in the round.
Tremolo closes the distance looking to clinch
and Sakazaki counters with a shot to the ribs. That looked like it hurt.
Sakazaki throws a head kick that looked like it stung.
Sakazaki tries a switch kick but it misses it's target.
Tremolo avoids the head kick by Sakazaki.
Tremolo tries to clinch but fails miserably
and Sakazaki counters with a head kick. That will keep Tremolo thinking before he tries any more sloppy attacks!
Tremolo tries to grapple but his opponent circles
and Sakazaki counters with a slapping leg kick.
Tremolo tries to close the distance and clinch but Sakazaki swats him to one side with an open hand palm strike and circles away.
Tremolo tries to close the distance and clinch up against the cage but Sakazaki paws at him with a jab and circles away.
Tremolo tries to clinch but fails miserably
and Sakazaki counters with a head kick. That will keep Tremolo thinking before he tries any more sloppy attacks!
Sakazaki fakes with a right hand and throws a good leg kick, right into the thigh. That had to hurt Tremolo.
Tremolo tries to clinch but Sakazaki moves out of range.
Sakazaki wants to clinch.
That's two minutes gone in the round.
Tremolo takes a kick to the side of the head.
Tremolo tries to clinch but fails miserably
and Sakazaki counters with a head kick. That will keep Tremolo thinking before he tries any more sloppy attacks!
Sakazaki misses with a head kick.
A solid leg kick lands there for Sakazaki.
Tremolo tries to clinch there but Sakazaki circles away.
Tremolo fails in his attempt to clinch.
Tremolo fails with an attempt to clinch.
Sakazaki throws a body punch but Tremolo moves out of range.
Sakazaki cracks Tremolo with a good jab.
Tremolo closes the distance looking to clinch
and Sakazaki counters with a straight punch to the midsection.
Sakazaki swings away but doesn't land with a series of punches.
Sakazaki throws out a token jab with nothing on it.
That's three minutes gone in the round.
A nice leg kick lands there from Sakazaki.
Sakazaki keeps the fight on the outside.
Tremolo shoots in for a double leg but Sakazaki sprawls well. That's going to sap some energy.
Both fighters are breathing heavily.
Sakazaki misses with a jab, cross combination.
Ryo Sakazaki seems to be getting the better of the standup.
Sakazaki throws a push kick but Tremolo slaps the foot to one side.
Sakazaki tries a switch kick but it misses it's target.
Tremolo tries to clinch up against the cage, rushing in the close the distance. Sakazaki manages to break the clinch and circles back to the middle of the mat.
Fender Tremolo has stepped it up - he knows he needs a finish here!
Ryo Sakazaki is fighting for a decision here - he's started to take the cautious approach.
Tremolo tries to clinch up but Sakazaki circles away and keeps his distance.
Tremolo tries to grapple but his opponent circles

and Sakazaki counters by moving into the clinch.
Tremolo is hobbling a little on that front leg after taking quite a few leg kicks so far in this fight.
Tremolo controlling the action here for a moment.
Sakazaki is working hard here but doesn't seem to be able to control effectively, up against the cage.
Sakazaki has been the more effective fighter overall so far.
That's four minutes gone in the round.
The crowd are getting on the fighters' backs, as the pace has dropped off in the last minute or so.
Tremolo pushes off and circles away, back to the middle of the mat.
Tremolo tries to clinch up
and Sakazaki counters with a good low kick that Tremolo was not able to check.
Tremolo avoids the head kick by Sakazaki.
Sakazaki throws a head kick that misses and slips in the process. He scrambles back to his feet and the fighters circle.
Tremolo thows a leg kick but Sakazaki checks it
and Sakazaki counters with a big head kick but Tremolo shrugs it off.
Sakazaki misses with a double jab.
Tremolo tries to clinch but Sakazaki is having none of it.
Sakazaki throws a head kick that misses and slips in the process. He scrambles back to his feet and the fighters circle.
Sakazaki scores with a nice head shot.
Tremolo attempts a low kick but it misses it's target.
Tremolo on the wrong end of a kick to the body.
And that's the end of the fight!
Ryo Sakazaki comfortably won the final round on my scorecard.
I've got Sakazaki winning every round here. Surely the decision will go his way and he'll pick up a well deserved decision victory. Over to the ring announcer for the scorecards.
Ladies and gentlemen, after 3 rounds of action, we go to the scorecards for a decision.
Judge Hugh Johnson scores the fight 27:30
Judge Winston Howard scores the fight 27:30
Judge Skip Squint scores the fight 27:30
In favor of your winner, by unanimous decision... Ryo Sakazaki!
|
|
|
|
|
|
|
|
|
|
|
|
|
|
|
|
|
|
|
|
|
|
|
| S |
C
A |
G |
S |
C
B |
G |
|
S |
C |
G |
|
energy
A | B |
|
hype
A | B |
|
pop
A | B |
|
mgr
A | B |
|
FIGHT
RATING
55% |
|
|
|
|
|
|

