|
|
PBP Commentary |
Coming up we have a middleweight MMA rules bout between Jack Dawkins (ranked 0 p4p, 0 weight class) and Terry Krom (ranked 0 p4p, 0 weight class). Dawkins comes to the cage accompanied by Jay-Z - Empire State of Mind. Both these guys have really solid chins. Will we see a standup war or will they both decide that a knockout is unlikely and try to win the fight elsewhere?
 |
|
 |
| 186 cm
22
194 lbs
5 - 4 - 0 |
|
180 cm
24
183 lbs
10 - 4 - 0 |
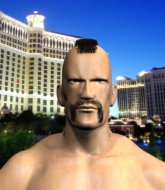
Abu Dhabi Champ
Excellent boxer
Insanely flexible |
|
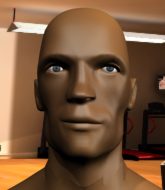
Good wrestler
World class boxer
Powerful |
|
| |
|
Ladies and gentlemen. This fight is 5 rounds, for the middleweight championship of the world!
Introducing the champion to my left, fighting out of the red corner.
With a record of
5 - 4 - 0, fighting out of Tokyo, Jack Dawkins!
And introducing the challenger to my right, fighting out of the blue corner.
With a record of
10 - 4 - 0, fighting out of Tokyo, Terry Krom!
The judges for this bout are Ren Mimura, Yasuomi Hirokawa and Sosuke Kotani.

The bell rings for round one and we are underway!
Dawkins misses with an uppercut.
Krom uses decent footwork to sidestep a right hand from Dawkins.
Dawkins rushes in with a sloppy looking punch
and Krom counters with a nice uppercut.
Dawkins uses good footwork to avoid the strikes from Krom.
Dawkins misses with a takedown attempt - Krom sprawls well and throws a nice strike on the way out which just misses.
Dawkins gets cracked there but stands up to it.
Krom blocks a jab.
Krom fakes high and swings low for a body shot but Dawkins manages to avoid it.
Dawkins closes this distance looking for a takedown but Krom circles away.
Dawkins lands an overhand left. A wild punch that just about connected.
Krom keeps the fight standing with a nice sprawl.
That's three failed takedown attempts in the round for Jack Dawkins. That's going to take a lot out of him.
Krom scores with a jab. Dawkins acknowledges it with a nod of the head.
Dawkins closes the distance and takes a jab right on the nose as he does so.
Krom thows a body shot but no joy.
Krom throws a right hand that Dawkins ducks under and follows up with a left that Dawkins also avoids with ease.
Nice takedown defense from Krom. No joy for Dawkins on that attempt.
Krom with a jab.
Dawkins misses with a right hand
and Krom connects with a straight left hand counter down the middle.

That's one minute gone in the round.
Dawkins fails with the takedown.
Dawkins shoots in but no luck this time.
A telegraphed right hand from Krom misses the target.
Dawkins lands a lovely overhand right.
Krom avoids a lazy jab quite easily.
Dawkins misses with a straight left.
Dawkins takes one to the side of the head.
Krom scores with a straight right hand, right through his opponent's guard.
Dawkins throws a hook but Krom blocks it.
Dawkins staying out of range there.
Dawkins shoots in but Krom avoids the takedown attempt easily.
Dawkins bobs and weaves well there to avoid the strikes.
Krom throws a hook to the body but it doesn't connect.
Terry Krom is looking to keep the fight on the feet at all costs.
Krom throws a body punch but Dawkins moves out of range.
Dawkins takes a solid shot to the body. That one hurt him but he's trying not to show it.
Dawkins moves away from the strike by Krom.

That's two minutes gone in the round.
Krom swings for the body but Dawkins moves out of range.
Nice sprawl there from Krom as Dawkins shoots in.
Krom keeping his hands up high there, blocking the jab from Dawkins.
Krom jabs Dawkins to the body, keeping him at a distance.
Fantastic stuff here - a very entertaining period of action, which has drawn cheers from the crowd.
Krom misses with a body shot.
Dawkins defending well as Krom loads up on a big left hand.
Krom defends well against a solid takedown attempt from Dawkins.
Dawkins slips a straight right by Krom.
Krom swings away but doesn't land with a series of punches.
Krom swings for the body but Dawkins moves out of range.
Dawkins misses the jab.
The fighters circling - Dawkins throws out the jab but it was never going to land.
Krom lands with a cross to side of his opponent's head.
Krom ducks under a wild hook from Dawkins.
Krom missing with a left hand there. Dawkins was out of range so wasted energy throwing that one.
Krom slips under a jab from Dawkins.
Dawkins shoots for a takedown but Krom saw that one coming a mile off and avoided it easily.

That's three minutes gone in the round.
Krom fails to land with a series of punches.
Dawkins changes levels and looks for a double leg takedown. Krom tries to avoid it but Dawkins manages to keep hold of a leg and drag Krom to the ground. Krom escapes though and pops straight back up to his feet.
Krom misses with a hook to the body
and Dawkins counters with a quick right hand to the jaw.
Krom moving in and out of range nicely, whilst landing the scoring shot.
Krom lands with a hook. Dawkins tried to avoid it but it clipped the top of his head.
No luck for Dawkins with that takedown attempt.
Dawkins avoids the body shot from Krom.
Dawkins fakes high and shoots in for a takedown but Krom avoids it really well and circles away.
Dawkins looks for a takedown here. Will he get it? Krom is fending him off so far but Dawkins persists. Nope, Krom circles away and we're back to standing.
Dawkins avoids the body shot from Krom.
Dawkins is really head hunting here, hardly looking to strike to the body at all.
Krom tries to land with a swinging hook to the body but Dawkins was well out of range. Poor timing from Krom.
Dawkins fails with a takedown attempt from distance.
Krom misses with a few strikes there.
Dawkins looks to land a right hand but Krom moved out of range.

That's four minutes gone in the round.
Krom swings away with a body shot that misses

and Dawkins counters with a takedown into side control.
This has been an exciting period of action!
The referee is asking the fighters to pick up the pace.
Dawkins working the head with strikes.
Dawkins trying to control the position but Krom is working away.
The fighters are pressed up against the cage, both looking to find a bit of space to work.
Krom is trying to buck Dawkins off.
The crowd are going absolutely nuts as the round comes to an end - what a fantastic round of action!
Dawkins lands a decent elbow from side control.
Dawkins landing a few strikes.
Dawkins looks up at the clock and then as Krom takes his cue and looks up at the clock too, Dawkins smacks him right in the chops with a big elbow! How rude!
And that�s the end of the round � the fighters go back to their corners.
A close round but Terry Krom will probably get the nod.
That's the end of the round. The referee orders the cornermen out of the cage so we can get back down to business.

Krom leaves Dawkins with his face pressed against the mat as he sprawls beautifully, defending against a solid takedown attempt.
Krom fakes high and swings low for a body shot but Dawkins manages to avoid it.
Krom throws an uppercut from half a mile away. Dawkins sees it coming and avoids it easily.
Krom works over Dawkins's head and body with a nice combination.
Krom throws an uppercut from half a mile away. Dawkins sees it coming and avoids it easily.
Dawkins drives through with a takedown into guard.
Dawkins prevents Krom from getting back to his feet.
Dawkins trying to control but Krom is working from the bottom.
Dawkins wants to pass the guard but Krom is keeping the position.

Dawkins drops back for a leg but he's not going to get it - he lets go and Krom dives on top into guard.

Krom stands and steps away. Dawkins gets to his feet too and we're back to the striking game.
That's one minute gone in the round.
Dawkins throws a lazy right hand but Krom sees it coming a mile off and sidesteps it easily.
Dawkins changes levels and looks for a double leg takedown. Krom tries to avoid it but Dawkins manages to keep hold of a leg and drag Krom to the ground. Krom escapes though and pops straight back up to his feet.
Dawkins takes a punch right to his stomach. That took the wind out of him momentarily.
Krom leaves Dawkins with his face pressed against the mat as he sprawls beautifully, defending against a solid takedown attempt.
That's three failed takedown attempts in the round for Jack Dawkins. That's going to take a lot out of him.
Krom slaps away a takedown attempt from Dawkins, before circling back to the center of the mat.
Krom swings away but doesn't land with a series of punches.
Krom swings and misses with a hook to the body.
Krom sizes up Dawkins with a pawing jab and scores with a straight right down the middle.
Dawkins shoots in but Krom avoids the takedown attempt easily.
Dawkins moves out of range as Krom strikes.
Krom misses with a jab and misses with a cross straight after too.
Krom slips a jab from Dawkins.
That's two minutes gone in the round.
Krom just misses with a punch to the body.
Krom throws a looping overhand right but Dawkins ducks down to avoid it.
Krom cracks Dawkins with a good shot that sees him stumbling back into the cage.
Dawkins misses with a body shot. Nice footwork from Krom.
Dawkins keeping a good distance there, avoiding the body shot.
Krom displays good takedown defense there as he swats away a double leg from Dawkins.
Krom fails to land with a series of punches.
Krom lands a right hook to the body.
Krom moving in and out of range nicely, whilst landing the scoring shot.
The fans in attendance giving it up for the two fighters, who have really let it all hang out in the last minute or so!
Dawkins shoots in with a takedown attempt and he has Krom pinned against the cage. Krom gets the underhooks and manages to circle away.
Dawkins shoots in for a takedown. He's persisting with it as Krom sprawls well. Krom wins this battle and keeps the fight standing. Dawkins gets slowly back to his feet.
A shot to the liver by Dawkins. Beautiful body shot.
That's three minutes gone in the round.
Dawkins misses with a looping left.
Dawkins slips a straight right by Krom.
Dawkins bobs and weaves into range and then changes levels and scores with a nice takedown into side control.
Dawkins sitting in side control, looking to soften his opponent up with elbows and hammerfists but Krom is avoiding damage well and looking to escape the position.
Krom is trying to improve his position.
Dawkins has been looking to land a fair amount of strikes on the ground. He might be looking to soften his opponent up in order to work for a submission.
Krom explodes and escapes back to his feet! Nice escape there!
Dawkins shoots in for a takedown but Krom shows good takedown defense.
Dawkins has his takedown stuffed
and Krom makes him pay by landing a nice hook to the body before moving out of range.
Krom swings wildly with a right hand that was never going to find it's target.
Dawkins shoots in with a takedown attempt and he has Krom pinned against the cage. Krom gets the underhooks and manages to circle away.
A punch combination from Dawkins misses.
Both fighters are absolutely exhausted here.
That's four minutes gone in the round.
Dawkins gets the takedown into side control.
Fantastic stuff here - a very entertaining period of action, which has drawn cheers from the crowd.
Krom tries to escape but Dawkins is in control.
Dawkins trying to control the action but Krom is working from the bottom.
Krom managing to avoid any damage from the strikes thrown by Dawkins.
Dawkins looks up at the clock and then as Krom takes his cue and looks up at the clock too, Dawkins smacks him right in the chops with a big elbow! How rude!
Krom is pushing Dawkins's head away, looking to escape. Dawkins manages to hold on to the position though.
As the round comes to an end the crowd are showing their appreciation for a great round of action.
Dawkins tries to score with some ground and pound. Krom controls his posture well this time though and the shots don't do any damage.
Krom looking for a sweep but Dawkins has passed into full mount! Oh no!
And that�s the end of the round � the fighters go back to their corners.
A close second round but Terry Krom will probably get the nod - 10:9.
Well, the break between rounds is over. Let's get back to the scrappin!

Krom keeping a good distance there, avoiding the body shot.
Krom throws a jab when Dawkins was well out of range.
Krom slaps away a takedown attempt from Dawkins, before circling back to the center of the mat.
Krom throws an uppercut from half a mile away. Dawkins sees it coming and avoids it easily.
Krom thows a left - swing and a miss!
Dawkins fails miserably with a takedown attempt.
Krom misses with a combination
and Dawkins connects with a straight left hand counter down the middle.
Krom looks to land a right hand but Dawkins moved out of range.
Dawkins walks straight into an uppercut. Luckily it didn't land flush.
Dawkins shoots in from a long way out. He's driving through with the takedown attempt and he eventually gets it, landing in Krom's guard.
Dawkins in full guard, throwing the ground and pound. No damage this time.
Dawkins with a flurry of punches that miss.
Dawkins pushing down on Krom's thigh, trying to pass to half guard. He's managed it... Nice work.
That's one minute gone in the round.
Krom is trying to stand up here but Dawkins is controlling him well.
Dawkins is figuring out what he wants to do next.
The ref warns both fighters not to hold the cage as they work up against the meshing.
Dawkins thumps the canvas. Not on purpose obviously - he just missed Krom's head.
Dawkins missing with the ground and pound from half guard.
Dawkins prevents Krom from standing back up.
Krom tries to push off, looking to stand up, but Dawkins manages to move to mount!
Krom tries to hold on but Dawkins pushes him away.
Dawkins lands a big elbow.
Dawkins putting on the heat here with some good ground and pound!
Dawkins with the ground and pound from mount.
We've seen a great period of action over the last minute or so - credit to both fighters for going all out!
Krom is squirming around, avoiding Dawkins's attempts to control the action.
That's two minutes gone in the round.
Krom is looking to improve his position but Dawkins isn't that keen on the idea.
Dawkins won't let Krom get back to his feet... He wants to keep the fight where it is for now.
Krom takes a big intake of breath there - he's definitely tired.
Dawkins tries to control but Krom wriggling away.
Dawkins has his opponent pinned against the cage, landing some nasty ground and pound that is really making a bit of a mess out of Krom's face.
Dawkins pausing momentarily but resumes with a couple of decent strikes that do a bit of damage.
Dawkins looking to finish Krom with some ground and pound. This is bad for Krom!
Dawkins landing shots from mount.
Krom working to try and regain half guard.
Dawkins trying to control but Krom is having none of it.
That's three minutes gone in the round.
Krom is looking to get to half guard.
BOOM! Dawkins connects with a massive shot to the dome!
Dawkins controlling from the full mount.
Krom tries to buck Dawkins off but he can't manage it.
Dawkins landing strikes from the mount and Krom is in trouble!
Dawkins can't quite control the action as he would like just now, as Krom is looking to escape.
Krom is bucking up trying to escape but Dawkins cracks him with another couple of good strikes.
That's four minutes gone in the round.
Krom squirming around on the bottom, looking to escape.
Krom is wriggling around trying to escape.
Dawkins scoring with strikes but Krom is staying in there.
The crowd cheering loudly, showing their appreciation for the quality fight we're seeing here.
Krom is trying to escape but when you're mounted that's not too easy.
Dawkins looking to control but Krom is working nicely, looking to advance position himself.
Dawkins working Krom over with strikes here.
Krom sneaks a leg under to get to half guard.
The crowd are going absolutely nuts as the round comes to an end - what a fantastic round of action!
Dawkins is trying to control. Krom wants to improve his position but can't escape this time.
Jack Dawkins overall seems to be getting the better of the ground position in the fight so far.
Dawkins looks to score some points with some ground and pound.
Krom kicks off Dawkins and gets to his feet.
And that�s the end of the round � the fighters go back to their corners.
Jack Dawkins clearly takes that round.
That's the end of the round. The referee orders the cornermen out of the cage so we can get back down to business.

No luck with that takedown attempt from Dawkins.
Terry Krom seems to be getting the better of the standup.
Dawkins throws a hook to the body but it doesn't connect.
Dawkins has a takedown stuffed.
Krom looks to score with a jab to the body but Dawkins is just out of range.
Dawkins missing with a left hand there. Krom was out of range so wasted energy throwing that one.
Krom throws a jab when Dawkins was well out of range.
Krom misses with a body shot. Nice footwork from Dawkins.
Krom fakes high and swings low for a body shot but Dawkins manages to avoid it.
Dawkins throws a lazy right hand but Krom sees it coming a mile off and sidesteps it easily.
Dawkins shoots in for a takedown. He's persisting with it as Krom sprawls well. Krom wins this battle and keeps the fight standing. Dawkins gets slowly back to his feet.
That's three failed takedown attempts in the round for Jack Dawkins. That's going to take a lot out of him.
Dawkins thows a left - swing and a miss!
Krom connects with a right hand. Dawkins shakes it off.
That's one minute gone in the round.
Krom tries to land with a swinging hook to the body but Dawkins was well out of range. Poor timing from Krom.
Dawkins staying out of range there.
Dawkins bobs and weaves well there to avoid the strikes.
Dawkins darts in and lands a nice takedown into half guard.
Dawkins trying to control the action but Krom is working from the bottom.
Dawkins seems to be working for a kimura but Krom defends the submission attempt.
Krom is trying to get back to full guard.
That's two minutes gone in the round.
Dawkins misses with a head shot. Krom uses the momentum to regain guard.
Krom wants to stand but Dawkins is controlling the position.
Dawkins stands and throws Krom's legs to the side, diving into side control.
Krom wants to escape from the position here - easier said than done!
Dawkins throwing shots but missing, from side control.
Krom avoids any damage from the ground and pound of Dawkins.
Dawkins working hard here to secure a kimura but he's not really in the right position for it.
That's three minutes gone in the round.
Krom tries to wriggle free to get back to his feet but he's given up his back! Oops.
Krom trying to control but he's just got himself in more trouble.
Krom has the hand control, trying to stop the rear naked choke.
Dawkins is persistently looking for the submission but Krom is defending it well.
Krom is trying to stand back up.
Krom is absolutely dripping with sweat - he looks exhausted.
That's four minutes gone in the round.
Krom covers up after that shot from Dawkins.
Dawkins has his opponent trapped and is landing shots. Not a good position for Krom.
Dawkins loading up with punches from the back mount - how long can Krom hold on?
The crowd are loving this. Great action here.
Krom controlling the position well but he knows he's in a bad position.
Dawkins lands with a big left hand that may well have hurt his opponent. Can Krom hold on?!
Dawkins is staying calm and holding on to the back position, whilst working on a rear naked choke. Krom is defending well though. Dawkins let's go of the attempt for now.
Krom really doesn't want to stay on the ground with Dawkins. If he can't get it back to his feet, it's only a matter of time before he'll be tapping out.
Dawkins is trying to stick to Krom's back but Krom is turning into Dawkins. He's managed to reverse the position - now he's in Dawkins's guard. Polite applause from the crowd in appreciation of some nice Jiu Jitsu by Krom.
As the round comes to an end the crowd are showing their appreciation for a great round of action.
Dawkins being controlled here, momentarily.
Dawkins escapes his hips to the side and looks to be working for an armbar. Krom gives him a little smile and shakes his head. No chance.
And that�s the end of the round � the fighters go back to their corners.
Jack Dawkins had his way with Terry Krom in that round.
That's the end of the round. The referee orders the cornermen out of the cage so we can get back down to business. This is the final round!

Krom rushes forward with a series of wild hooks but Dawkins moves out of range and avoids them all easily.
Krom stuffs the takedown.
Krom fails to land with the punch combination there - jab, cross, hook, miss, miss, miss.
Dawkins throws a hook to the side of Krom's head but Krom sees it coming and ducks under it beautifully.
Nice takedown defense from Krom. No joy for Dawkins on that attempt.
Krom throws an uppercut from half a mile away. Dawkins sees it coming and avoids it easily.
Dawkins slips a straight right by Krom.
Dawkins is trying hard to land a takedown here. Krom sprawls well and keeps this one on the feet.
That's three failed takedown attempts in the round for Jack Dawkins. That's going to take a lot out of him.
A big left from Krom misses.
Krom is the aggressor but that punch slipped nicely by Dawkins.
Dawkins throws a hook to the side of Krom's head but Krom sees it coming and ducks under it beautifully.
Krom ducks down and throws a hook to the body but Dawkins moves away.
Krom lunges in with swinging rights and lefts but Dawkins circles away quickly and effectively.
Krom throws a combination. Dawkins tries to block but a couple of punches get through.
That's one minute gone in the round.
Krom throws a body punch but Dawkins moves out of range.
Dawkins throws out a token jab with nothing on it.
Dawkins fails with the takedown.
Krom throws a combination but it was largely blocked by Dawkins.
Dawkins uses good footwork to avoid the strikes from Krom.
A really sloppy takedown attempt there from Dawkins.
Dawkins avoids the body shot from Krom.
Krom just misses with a punch to the body.
Krom misses with a looping left.
Krom moves into range and connects with a jab.
Krom stuffs the takedown.
Krom moves out of range of the strikes.
Dawkins keeping his hands up high there, blocking the jab from Krom.
That's two minutes gone in the round.
Krom misses with a wild body shot.
Dawkins shoots in looking for a double leg takedown. Krom defends it nicely.
Dawkins tries for a takedown but Krom sees it coming a mile off and avoids it easily.
Both of our modern day gladiators look out of it here - an gruelling 5 rounds of action taking it's toll on them, no doubt.
This fight brought to you by 5M nutrition - it's mmmmm tasty. Nice jab by Krom.
A combination from Krom does no damage.
Nice defenses there by Dawkins.
Krom looks to score with a jab to the body but Dawkins is just out of range.
Krom stuffs the takedown attempt from Dawkins. Dawkins gets slowly back to his feet.
Krom moves away from the strike by Dawkins.
Krom uses good footwork to get in and out, landing a nice hook.
The fans in attendance giving it up for the two fighters, who have really let it all hang out in the last minute or so!
Krom misses the shot to the body.
Dawkins slips a jab from Krom.
That's three minutes gone in the round.
Krom fakes a jab and then connects with a hook.
Krom looks to land a left hand but Dawkins moved out of range nicely.
Dawkins fakes high and shoots in for a takedown but Krom avoids it really well and circles away.
Dawkins shoots in looking for a single leg takedown. Krom is trying to defend but Dawkins finishes it well and ends up in half guard. Let's see if he can advance position further.
Krom wants to get back to his feet.
Dawkins lands a big shot. The thud that echoes around the arena is like music to the fans' ears.
Dawkins is keeping good posture, landing some ground and pound.
Krom is looking to escape.
Dawkins looking for a kimura but he'll have to free his other leg if he wants to finish that. Perhaps he's just using it as a distraction technique.
That's four minutes gone in the round.
Krom wants to improve his position but Dawkins is controlling well.
Dawkins throws a strike but Krom avoids it easily and moves to full guard.
Dawkins looking to control the position here, rather than advance.
This has been an exciting period of action!
As the round comes to an end the crowd are showing their appreciation for a great round of action.
Dawkins throwing elbows and punches but not connecting, as Krom works some decent striking defense from the bottom.
And that's the end of the fight!
I would just about give that final round to Terry Krom.
I think Krom has won this one but let's see whether the judges agree with me. Over to the ring announcer for the scorecards.
Ladies and gentlemen, after 5 rounds of action, we go to the scorecards for a decision.
Judge Ren Mimura scores the fight 47:48
Judge Yasuomi Hirokawa scores the fight 48:47
Judge Sosuke Kotani scores the fight 48:48
The fight is ruled a draw!
Jack Dawkins retains his title. It's always disappointing when a championship fight ends as a draw but that's what happens when you leave the fight in the judges hands!
|
|
|
|
|
|
|
|
|
|
|
|
|
|
|
|
|
|
|
|
|
|
|
| S |
C
A |
G |
S |
C
B |
G |
|
S |
C |
G |
|
energy
A | B |
|
hype
A | B |
|
pop
A | B |
|
mgr
A | B |
|
FIGHT
RATING
100% |
|
|
|
|
|
|
