|
|
PBP Commentary |
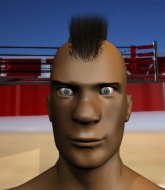
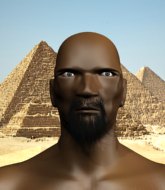
Coming up we have a featherweight MMA rules bout between Mayhem Hardy (ranked 0 p4p, 0 weight class) and Mike Mendoza (ranked 0 p4p, 0 weight class). Both fighters look fresh as a daisy as they make their way towards the cage.
 |
|
 |
| 210 cm
20
145 lbs
3 - 4 - 0 |
|
180 cm
18
150 lbs
0 - 1 - 0 |
BJJ Blue Belt
Counter striker
Good chin |
|
BJJ Blue Belt
Brawler
Solid chin |
|
| |
|
Ladies and gentlemen. This fight is 3 rounds, in the featherweight division.
Introducing the fighter to my left, fighting out of the red corner.
With a record of
3 - 4 - 0, fighting out of Las Vegas, Mayhem Hardy!
And introducing the fighter to my right, fighting out of the blue corner.
With a record of
0 - 1 - 0, fighting out of Las Vegas, Mike Mendoza!
The judges for this bout are Wesley Smith, Daniel Franklin and Tiny Johnson.

The bell rings for round one and we are underway!

Mendoza gets caught flat footed, as Hardy shoots in with a quick takedown into guard.
Hardy with a flurry of punches that miss.
Mendoza pulls Hardy in close to prevent any damage.
Mendoza lands a beautiful switch and he's in full mount! That could spell trouble for Hardy!
Hardy really does look like a pencil wearing a pair of gloves. Let's hope he has a gameplan to suit that ridiculous body shape.
Mendoza is in the full mount, landing strikes.
Mendoza looking to ground and pound but Hardy is blocking nicely.
Mendoza postures up and cracks his opponent a couple of times before moving back into close ground control. Hardy looks a forlorn figure.
Mendoza takes a little breather and maintains the position. The referee will be looking for him to stay active from such a dominant position though.
The fighters are pressed up against the cage, both looking to find a bit of space to work.

That's one minute gone in the round.
Hardy is looking to get to half guard.
Mendoza trying to control but he's not successful this time.
Mendoza controlling his opponent.
Mendoza looking to control but Hardy is working nicely, looking to advance position himself.
Mendoza connects with a couple of good shots from mount.

Mendoza has hold of Hardy's left arm, perhaps looking for a submission. The two fighters tussle over control of the isolated limb and Hardy manages to get his arm back to his side and away from danger.
Hardy tries to reverse the position but Mendoza maintains control.

That's two minutes gone in the round.
Hardy tries to hold on but Mendoza postures up.
Hardy is working to get back to half guard.
Mendoza controlling from mount.
Mendoza with a couple of short strikes.
Mendoza landing strikes, looking to finish!
Hardy swinging wildly from the bottom but he's not landing.
The fans in attendance giving it up for the two fighters, who have really let it all hang out in the last minute or so!
Hardy is trying to escape the mount.
Hardy is writhing around trying to get back to his feet.
Hardy is desperately trying to improve his position but Mendoza has a good base and remains in mount.
Mendoza lands an elbow that was bordering on illegal but the referee lets it go with a warning.

That's three minutes gone in the round.
Mendoza controlling from the full mount.
Mendoza working for a guillotine from mount but Hardy is in no mood to give up.
Hardy wants to control but Mendoza is having none of it.
Mendoza is thinking about an arm triangle here, looking to tighten it up before moving to side control. Hardy can see it coming though and defends well with a couple of strikes to the head and some good arm positioning.
Hardy working to try and regain half guard.
Hardy is working hard here to advance position.
Mendoza wants to finish this one by submission but Hardy is holding onto his waist, trying to prevent any attacks from Mendoza.

That's four minutes gone in the round.
Mendoza looking to control but Hardy is working nicely, looking to advance position himself.
Mendoza lands with some vicious ground and pound - can Hardy hang on?
Mendoza goes for an armbar but Hardy turns quickly into his guard - lovely anticipation from Hardy.
Mendoza is looking to get back to his feet but can't, whilst Hardy is controlling him.
As the round comes to an end the crowd are showing their appreciation for a great round of action.
Hardy missing there with some ground and pound from the guard.
And that�s the end of the round � the fighters go back to their corners.
Mike Mendoza dominated that round.
That's the end of the round. The referee orders the cornermen out of the cage so we can get back down to business.

Hardy slips a straight right by Mendoza.
Mendoza rushes in with a sloppy looking punch
and Hardy counters with a left and a right that stings Mendoza.
Mendoza lets the fists fly and connects with a left straight followed by a right hook.

It looks like Mayhem Hardy has been cut.

Hardy instigates a clinch.
Mendoza misses with an elbow over the top.

Hardy breaks the clinch and we return to the middle of the mat.
Hardy has managed to clinch.
Hardy prevents a body shot from Mendoza.
Mendoza misses with a short punch on the inside.
Mendoza doesn't land with the attempted body shot.
Mendoza pushes off an throws an elbow but Hardy leans to the side and avoids it. We're back to clinching against the cage.
Mendoza has a couple of punches blocked by Hardy.
A short right from Mendoza.
The crowd are loving this. Great action here.
Hardy tries to pull guard but can't drag his opponent to the mat. Mendoza just stands there and leans against the cage.
Hardy blocks an uppercut.
Hardy looking to stall.
A short body shot lands from Mendoza as the two fighters clinch.
That's one minute gone in the round.
Hardy fails to land with a short punch on the inside.
Hardy breaks the clinch.
Mendoza throws a low kick but Hardy moves out of range easily.
Mendoza swinging wildly here.
Mendoza listening to his corner there, landing a nice uppercut.
Hardy shoots in and drives through. Mendoza sprawls well.
Mendoza scores with a three punch combo!
Mendoza takes a swing at Hardy's ribcage but misses.
Hardy fakes with an overhand right and moves in to clinch with Mendoza, pushing him back against the cage.
Hardy trying to control the position but instead, Mendoza has worked for underhooks and has pushed Hardy into the cage.
Hardy pushes off and circles away, back to the middle of the mat.
That's two minutes gone in the round.
Hardy shoots in for a takedown but Mendoza shows good takedown defense there and keeps this one on the feet.
That's three failed takedown attempts in the round for Mayhem Hardy. That's going to take a lot out of him.
Hardy gets in close and instigates a clinch.
Mendoza lands a damaging elbow.
A frustrated look appears on Hardy's face as he tries to break the clinch.
A head punch blocked on the inside by Hardy.
Hardy effectively controlling the action here.
Mendoza tries to land a shot to the body but it's blocked.
Mendoza gets double underhooks to prevent a takedown attempt from Hardy.
This is a great period of action - very entertaining stuff!
Hardy misses with a punch to the body.
Hardy is working Mendoza over against the cage.
Hardy looking to slow down the pace here.
Nice elbow from Hardy.
That's three minutes gone in the round.
Mendoza lands a body punch.
Hardy tries to circle away but Mendoza has him pinned against the cage.
Hardy blocks a body shot from Mendoza.
Mendoza lands punches inside but they're not really causing much damage.
Hardy pushes off and circles away, back to the middle of the mat.
Mendoza swings away with a leg kick that misses.
No joy there for Hardy, who threw a few shots but didn't land.
Hardy takes a jab right on the nose. That must have hurt but he shrugs his shoulders and looks to return the favor.
Mendoza misses with a wild combination.
Nice jab there from Mendoza.
Hardy shoots in but no luck this time.

Mendoza gets in close and instigates a clinch.
Hardy manages to break the clinch.
That's four minutes gone in the round.
Hardy clinches.
Mendoza misses with an elbow over the top.
Hardy throws a knee to the head but misses.
Hardy wants to break free. God knows he wants to breaaaak freeee.
Mendoza prevents the takedown attempt.
Both fighters are absolutely exhausted here.
Wooooo! Give it up for these two warriors! They are putting on a show!
Hardy pulls guard.
Mendoza must be cautious of submissions here, given that his opponent has the superior Jiu Jitsu.

Hardy is looking for a guillotine. You can't force these things though and Mendoza defends well.
Mendoza makes a bit of distance and scores with some ground and pound, still in guard.
Hardy being controlled here, momentarily.
Mendoza postures up.
As the round comes to an end the crowd are showing their appreciation for a great round of action.
Mendoza engaging in some classic timewasting tactics.
And that�s the end of the round � the fighters go back to their corners.
A close second round but Mike Mendoza will probably get the nod - 10:9.
The cut man is working on Mayhem Hardy's cut.
The corners get their ten second warning. Both fighters stand from their stools and stare eachother down, ready to get back to the action. This is the final round!

Mendoza tries to close the distance and clinch up against the cage but Hardy paws at him with a jab and circles away.
Mendoza swings wildly with a couple of big hooks
and Hardy counters with a good right hand that lands right on the jaw.
Mendoza instigates a clinch.
Good anti-grappling being displayed by Mendoza as Hardy tries to tie him up.
Mendoza lands a hook to the body. It's hard to tell if that hurt Hardy or not.
Mendoza misses with a punch on the inside.
Hardy fails to pull guard.
Hardy wants a takedown.
Mendoza lands a left hand that snaps the head of Hardy backwards.
Mendoza is leaning against Hardy and scores with a nice uppercut to the body.
Hardy breaks the clinch and we return to the middle of the mat.
Both fighters are breathing heavily.
Mendoza throws a decent looking leg kick but it doesn't land clean.
Mike Mendoza seems to be the more aggressive standup fighter in this bout.
Hardy shoots in for a takedown - he's clinched up with Mendoza but Mendoza pushes him off and we're back to square one.
That's three failed takedown attempts in the round for Mayhem Hardy. That's going to take a lot out of him.
That's one minute gone in the round.
Mendoza sizes up Hardy with a pawing jab and scores with a straight right down the middle.
Mendoza fails to land with a series of punches.
Mendoza misses the shot to the body.
Mendoza throws a jab but it's blocked by Hardy.
Mayhem Hardy is looking to throw some combinations by the looks of things.
Hardy clinches up against the cage.
Hardy tries for a takedown. No joy.
Mendoza lands an uppercut.
Mendoza gets through Hardy's defenses to land a nice punch to the side of the head.
Hardy drops to a knee looking for a takedown but Mendoza gets the underhooks and prevents it.
Hardy on the defensive, avoiding the knees to the body.
A frustrated look appears on Hardy's face as he tries to break the clinch.
That's two minutes gone in the round.
Mendoza lands a left hand that snaps the head of Hardy backwards.
Hardy takes a shot to the head.
Hardy pulls guard effortlessly.
Hardy will need to keep those long limbs tucked in whilst he's on the ground, to prevent any submissions.
Mendoza pushing down on Hardy's thigh, trying to pass to half guard. He's managed it... Nice work.
Mendoza uses his free foot to push down on Hardy's thigh. Eventually he works his other foot free and he's advanced to mount - this is trouble for Hardy.
The fans in attendance giving it up for the two fighters, who have really let it all hang out in the last minute or so!
Mendoza lands with some strikes.
Mendoza controlling from mount.
Mendoza working to secure an arm triangle but it's not happening for him just yet.
The ref warns both fighters not to hold the cage as they work up against the meshing.
Hardy tries to hold on but Mendoza pushes him away.
That's three minutes gone in the round.
Mendoza can't quite control the action as he would like just now, as Hardy is looking to escape.
Mendoza is still in mount, landing shots to his trapped opponent. Hardy can't stay in a position like this for much longer.
Hardy is in all sorts of trouble here.
Mendoza blocks Hardy's feeble attempts to strike from the bottom.
Mendoza controlling his opponent.
Mendoza is working for a guillotine from mount but Hardy frees his head quite easily.
Mendoza content just to control the position here.
That's four minutes gone in the round.
Mendoza looking to control but Hardy is working nicely, looking to advance position himself.
Mendoza takes a little breather and maintains the position. The referee will be looking for him to stay active from such a dominant position though.
We must be close to a standup if these guys don't pick up the pace.
Hardy is desperately trying to improve his position but Mendoza has a good base and remains in mount.
As the round comes to an end the crowd are showing their appreciation for a great round of action.
Hardy tries to hold on but Mendoza postures up.
Hardy bucks up and manages to get a nice reversal! He's in guard on the top - nicely done!
And that's the end of the fight!
Mike Mendoza comfortably won the final round on my scorecard.
Well Mendoza has outworked and out performed his opponent in all aspects of the game today. He was simply too good and the decision should be no more than a formality. Over to the ring announcer for the scorecards.
Ladies and gentlemen, after 3 rounds of action, we go to the scorecards for a decision.
Judge Wesley Smith scores the fight 27:30
Judge Daniel Franklin scores the fight 27:30
Judge Tiny Johnson scores the fight 27:30
In favor of your winner, by unanimous decision... Mike Mendoza!
|
|
|
|
|
|
|
|
|
|
|
|
|
|
|
|
|
|
|
|
|
|
|
| S |
C
A |
G |
S |
C
B |
G |
|
S |
C |
G |
|
energy
A | B |
|
hype
A | B |
|
pop
A | B |
|
mgr
A | B |
|
FIGHT
RATING
77% |
|
|
|
|
|
|

