|
|
PBP Commentary |
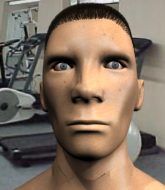
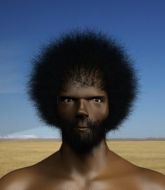
Coming up we have a featherweight MMA rules bout between Winston Dunham III (ranked 0 p4p, 0 weight class) and Mahdi Makungu (ranked 0 p4p, 0 weight class). Makungu is bouncing up and down as he enters the arena, backed by Nelly - Heart of a Champion. Mahdi Makungu has the better chin. Will he look to stand and bang today?
 |
|
 |
| 175 cm
26
155 lbs
15 - 7 - 0 |
|
174 cm
30
156 lbs
19 - 11 - 1 |
Good wrestling
Lethal high kicks
KO power |
|
Good wrestler
World class boxer
Granite chin |
|
| |
|
Ladies and gentlemen. This fight is 3 rounds, in the featherweight division.
Introducing the fighter to my left, fighting out of the red corner.
With a record of
15 - 7 - 0, fighting out of Amsterdam, Winston Dunham III!
And introducing the fighter to my right, fighting out of the blue corner.
With a record of
19 - 11 - 1, fighting out of Helsinki, Mahdi Makungu!
The judges for this bout are Paul Aken, Nard Betker and Radbod Blank.

The bell rings for round one and we are underway!
Dunham III throws an off balance right hand
and Makungu cracks him with a counter punch right on the button.
Dunham III tries to close the distance and clinch but Makungu swats him to one side with an open hand palm strike and circles away.
Dunham III swinging wildly here.
A slow jab from Makungu misses its intended target.
Dunham III takes one on the button.
Dunham III cracks the inside of Makungu's front leg.
Makungu takes a shot to the nose. Hopefully that hasn't broken it.
Dunham III throws an overhand right that lands on Makungu's shoulder, as Makungu tries to avoid the shot.
Makungu fails miserably with a takedown attempt.
Dunham III throws a combination but comes up with nothing but fresh air.

That's one minute gone in the round.
Dunham III takes one on the chin but seems OK.
Dunham III slips a jab from Makungu.
Dunham III throws a leg kick but Makungu sees it coming and checks it nicely.
Makungu tries to grapple but his opponent circles
and Dunham III cracks him with a counter punch right on the button.
Makungu staying out of range there.
Makungu tries to clinch up.
Nice defenses there by Dunham III.
Makungu lands with a cross.
Dunham III throws a combination but comes up with nothing but fresh air.

That's two minutes gone in the round.
Makungu throws a leg kick
and Dunham III counters with a straight right hand.
Makungu swinging wildly here.
Dunham III throws a nice inside leg kick.
Dunham III looking to take his opponent's legs away with the low kicks.
Makungu dives in and grabs Dunham III's left leg, looking for a takedown. Dunham III pushes down on Makungu's head and hops out.
Makungu lands with a nice body punch.
The fans in attendance giving it up for the two fighters, who have really let it all hang out in the last minute or so!
Dunham III missing with a left hand there. Makungu was out of range so wasted energy throwing that one.
Makungu lands with a right hand.
Makungu throws a shot from downtown. Dunham III moves away and avoids it.
Makungu fails with a takedown attempt.
Winston Dunham III has stuffed three takedown attempts in the round now. That's going to take a lot out of Mahdi Makungu.

That's three minutes gone in the round.
Dunham III throws out a powerful jab.

It looks like Mahdi Makungu has been cut.
Dunham III blocks a jab.
Dunham III stuffs a takedown. It's all about dictating where the fight takes place and Dunham III wants it to stay on the feet.
Dunham III closes the distance and takes a jab right on the nose as he does so.
Makungu listening to his corner there, landing a nice uppercut.
Makungu looks to land a combination. Dunham III sees it coming but can only parry a couple of the shots.
Makungu slips under a jab from Dunham III.
A big left from Dunham III misses.
Makungu getting the better of the striking in that exchange.
Dunham III with a body punch. A glancing blow.

That's four minutes gone in the round.
Makungu swings away but doesn't land with a series of punches.
Dunham III walks into a left hand.
Dunham III tries a switch kick but it misses it's target.
Wooooo! Give it up for these two warriors! They are putting on a show!
Dunham III uses some good footwork to avoid the body shot by Makungu.

Makungu shoots in with a lovely double leg takedown. Dunham III manages to land in full guard to minimise the damage.
The referee is asking the fighters to pick up the pace.
Dunham III preventing the ground and pound from doing any damage.
Makungu missing there with some ground and pound from the guard.
As the round comes to an end the crowd are showing their appreciation for a great round of action.
Dunham III looking to sweep here. No luck so far.
Makungu slows down the pace of the fight for a moment. He'll need to remain active if he doesn't want to see the fight stood back up.
Makungu advances to half guard.
And that�s the end of the round � the fighters go back to their corners.
Mahdi Makungu dominated that round.
The cut man is working on Mahdi Makungu's cut.
That's the end of the interval. I'm sure that seemed a lot quicker than a minute for our two fighters! Back to the action.

A cross from Makungu lands.
Makungu lands a nice shot that snaps Dunham III's head back.
Dunham III fakes low and throws an overhand right that catches Makungu on the side of the head.
Makungu throws an ugly left hook that misses
and Makungu takes a counter punch right on the button for his troubles.
A big left from Dunham III misses.
Makungu throws a hook but Dunham III avoids it easily.
Makungu loads up on a big right hand but Dunham III slips the punch.
Makungu throws a hard body shot but it just misses.
Makungu throws a big shot that misses.
Makungu misses with a lunging right hand
letting Dunham III counter with a right hand.
Makungu might want to mix his strikes up a bit more. He's just going for head shots at the moment and that can become a bit predictable.
Makungu throws a hard body shot but it just misses.
That's one minute gone in the round.
Makungu throws a hook to the body but it doesn't connect.
Dunham III throws a wild body kick that Makungu sees coming a mile off.
Makungu punishes Dunham III's body with a nice straight punch.
Dunham III misses with an uppercut.
Makungu lands a jab to the nose.
A shot to the liver by Dunham III. Beautiful body shot.
The sound of bone on bone echoes around the arena as Dunham III checks a leg kick.
Dunham III uses some good footwork to avoid the body shot by Makungu.
Makungu scores with a punch to the head.
Makungu misses with a body shot.
Dunham III checks the leg kick.
That's two minutes gone in the round.
A jab from Makungu misses.
Makungu stooping low to avoid any incoming strikes and then lunges in with an uppercut come cross that lands flush.
Nice body punch from Makungu.
Makungu has a takedown stuffed.
Winston Dunham III is looking to keep the fight on the feet at all costs.
Makungu with poor footwork there. He got himself in a bit of a tangle, enabling Dunham III to score with a decent uppercut.
Makungu throws an uppercut from half a mile away. Dunham III sees it coming and avoids it easily.
Makungu throws a hook but Dunham III avoids it easily.
We've seen a great period of action over the last minute or so - credit to both fighters for going all out!
Dunham III cracks Makungu with an open hand slap.
Makungu swings and misses with a hook to the body.
That's three minutes gone in the round.
Makungu misses with a body shot.
Makungu with a body punch. A glancing blow.
Dunham III moves into range and connects with a jab.
Dunham III darts in and out, connecting with a jab.
Dunham III connects with a good right hand that stumbles Makungu. Makungu circles away out of range and recomposes himself.
A big left from Makungu misses.
Makungu throws a hard body shot but it just misses.
Makungu displaying good standup as he scores with a three punch combination.
A jab from Dunham III misses.
Makungu connects with a jab.
That's four minutes gone in the round.
Dunham III circles away from the clinch attempt
and Dunham III counters with a good right hand that lands right on the jaw.
Makungu moves out of range of the strikes.
Dunham III lands with a nice low kick. That'll leave a bruise.
Dunham III keeping his hands up high there, blocking the jab from Makungu.
Makungu lands a lovely overhand right.
The fans in attendance giving it up for the two fighters, who have really let it all hang out in the last minute or so!
Dunham III moves out of range of the strikes.
As the round comes to an end the crowd are showing their appreciation for a great round of action.
Makungu throws an off balance right hand
and Dunham III counters with a straight right hand.
Dunham III dances in quickly and lands a nice inside leg kick on Makungu. That did some damage!
Dunham III uses good head movement to avoid the hook from Makungu.
And that�s the end of the round � the fighters go back to their corners.
A close second round but Mahdi Makungu will probably get the nod - 10:9.
The cut man is working on Mahdi Makungu's cut.
The minute break is over - no more time for sponges and pep talks - back to the action! So, we enter the final round. Let's see if either fighter can bring us a finish, or whether we're going to the judges scorecards.

Makungu uses decent footwork to sidestep a right hand from Dunham III.
Makungu defending well as Dunham III loads up on a big left hand.
Dunham III is the aggressor but that punch slipped nicely by Makungu.
Makungu lands a straight punch to the body, keeping Dunham III at a distance.
Makungu thuds his right hand into Dunham III's forehead from close range. That could be painful for both fighters.
Makungu is the aggressor but that punch slipped nicely by Dunham III.
Makungu throws a lazy right hand but Dunham III sees it coming a mile off and sidesteps it easily.
Makungu scores with a jab to the jaw.
Makungu lands a jab followed by a nice looking cross.
Makungu misses with a body shot.
Dunham III connects with a crisp jab.
That's one minute gone in the round.
Dunham III ducks under a wild hook from Makungu.
Dunham III throws a body kick that digs right into the meat.
Makungu displays some good footwork, moving neatly out of range as Dunham III throws out the jab.
Dunham III doesn't manage to clinch there - Makungu circles away.
Dunham III looks like he's developed a pretty tasty lump over his left eye. He'll need to avoid taking much more damage to that.
Makungu wings a very wild body shot but it does the job and lands to the midsection.
Makungu avoids a lazy jab quite easily.
Makungu misses with a body shot. Nice footwork from Dunham III.
Makungu doesn't manage to clinch there - Dunham III circles away.
Dunham III lands with a thumping leg kick.
Makungu fakes high and swings low for a body shot but Dunham III manages to avoid it.
That's two minutes gone in the round.
Makungu tried to score with a low kick but Dunham III checks it.
Dunham III takes a punch right to his stomach. That took the wind out of him momentarily.
Makungu looks to land a left hand but Dunham III moved out of range nicely.
Makungu throws a looping left and ducks down for a takedown. He's got his arms around Dunham III's waist but Dunham III gets an underhook and avoids the takedown by throwing Makungu off to one side.
Mahdi Makungu seems to be getting the better of the standup.
Dunham III swings away but doesn't land with a series of punches.
Dunham III throws a lazy right hand but Makungu sees it coming a mile off and sidesteps it easily.
Dunham III connects with a leg kick. Makungu looked like he was expecting something else and didn't defend it.
Makungu misses with a right hand
and Dunham III counters nicely by changing levels and landing a hook to the body.
Mahdi Makungu seems to be the more aggressive standup fighter in this bout.
Makungu takes a big intake of breath there - he's definitely tired.
This has been an exciting period of action!
Dunham III avoids a punch combination nicely.
Dunham III takes one on the chin but seems OK.
That's three minutes gone in the round.
Dunham III throws a hook but Makungu avoids it easily.
Makungu moves out of range of the strikes.
Makungu takes a swing at Dunham III's ribcage but misses.
Makungu scores with a takedown into Dunham III's guard.
Makungu throwing elbows and punches but not connecting, as Dunham III works some decent striking defense from the bottom.
A big thud reverberates around the arena there as Makungu accidentally thumps the mat. Hopefully he's not broken his hand.
Makungu has the superior BJJ but he's also working some ground strikes into his gameplan.
Makungu is pushing down on Dunham III's leg trying to pass to half guard. Dunham III is fighting to maintain full guard but Makungu has managed to sneak the leg through.
Makungu throws a strike but Dunham III avoids it easily and moves to full guard.
Winston Dunham III has stepped it up - he knows he needs a finish here!
Makungu is looking to work some ground and pound but Dunham III has wrist control.
Mahdi Makungu is fighting for a decision - hopefully he's judged it right and he's actually winning the fight.
That's four minutes gone in the round.
Dunham III pulls Makungu in close to prevent any damage.
Makungu wants to pass the guard but Dunham III is keeping the position.
Makungu throwing strikes but missing.
Dunham III keeping moving, preventing Makungu from controlling successfully.
The fighters are pressed up against the cage, both looking to find a bit of space to work.
As the round comes to an end the crowd are showing their appreciation for a great round of action.
Dunham III avoiding any damage from the ground and pound.
And that's the end of the fight!
Mahdi Makungu comfortably won the final round on my scorecard.
Well Makungu has outworked and out performed his opponent in all aspects of the game today. He was simply too good and the decision should be no more than a formality. Over to the ring announcer for the scorecards.
Ladies and gentlemen, after 3 rounds of action, we go to the scorecards for a decision.
Judge Paul Aken scores the fight 27:30
Judge Nard Betker scores the fight 27:30
Judge Radbod Blank scores the fight 27:30
In favor of your winner, by unanimous decision... Mahdi Makungu!
|
|
|
|
|
|
|
|
|
|
|
|
|
|
|
|
|
|
|
|
|
|
|
| S |
C
A |
G |
S |
C
B |
G |
|
S |
C |
G |
|
energy
A | B |
|
hype
A | B |
|
pop
A | B |
|
mgr
A | B |
|
FIGHT
RATING
56% |
|
|
|
|
|
|

