|
|
PBP Commentary |
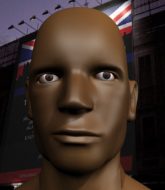
Coming up we have a welterweight MMA rules bout between Remy Hoost (ranked 0 p4p, 0 weight class) and Stevie Why (ranked 0 p4p, 0 weight class). Chooooooooon! I think Hoost might be my favorite fighter, now he's come out to Man With A Harmonica. The crowd giving both fighters a great reception on their way into the arena. That's good to see.
 |
|
 |
| 181 cm
27
178 lbs
16 - 8 - 0 |
|
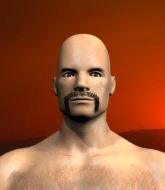
180 cm
30
180 lbs
19 - 14 - 0 |
Good wrestling
Excellent boxer
Granite chin |
|
Good wrestler
Excellent boxer
Powerful |
|
| |
|
Ladies and gentlemen. This fight is 3 rounds, in the welterweight division.
Introducing the fighter to my left, fighting out of the red corner.
With a record of
16 - 8 - 0, fighting out of Las Vegas, Remy Hoost!
And introducing the fighter to my right, fighting out of the blue corner.
With a record of
19 - 14 - 0, fighting out of Las Vegas, Stevie Why!
The judges for this bout are Daniel Franklin, Stewart Dunkirk and Tiny Johnson.

The bell rings for round one and we are underway!
Hoost scores with a nice right hand.
Why shoots in with a takedown attempt and he has Hoost pinned against the ropes. Hoost gets the underhooks and manages to circle away.
Why misses with a left hand
and Hoost counters with a nice low kick that buckles Why's knee momentarily.
Why shoots in looking for a takedown. Hoost tries to sprawl out of it but Why keeps driving through. The fighters are pinned against the ropes. Hoost manages to get underhooks and after a bit of a struggle, circles away and we're back to standing.
Hoost fakes the leg kick and cracks Why in the body.
Hoost defends well against a solid takedown attempt from Why.
Remy Hoost has stuffed three takedown attempts in the round now. That's going to take a lot out of Stevie Why.
Why shoots in for a takedown - he's clinched up with Hoost but Hoost pushes him off and we're back to square one.

Why darts in and clinches Hoost up against the ropes.
Hoost wants to get back to striking at distance but Why won't allow it.

Hoost breaks the clinch.

That's one minute gone in the round.
Hoost scores with a nice body kick.
Why shoots in for a takedown. "Ole!" shouts Hoost as he jumps to the side.
A telegraphed right hand from Why misses the target.
A telegraphed takedown attempt from Why is defended easily by Hoost.
A nice inside leg kick there by Hoost. That's going to slow Why down.
Why fails miserably with a takedown attempt.
Hoost connects with a leg kick. He turned his hip over nicely there.
A head kick misses from Hoost.

That's two minutes gone in the round.
Hoost avoids a punch combination nicely.
Why misses the shot to the body.
Hoost displays good takedown defense there as he swats away a double leg from Why.
Hoost works Why's body with a nice hook.
Why walks into a straight right hand from Hoost.
The crowd cheering loudly, showing their appreciation for the quality fight we're seeing here.
An inside leg kick lands from Hoost.
Hoost fakes a jab and scores with a low kick.
Hoost stuffs the takedown attempt from Why. Why gets slowly back to his feet.

That's three minutes gone in the round.
No luck for Why with that takedown attempt.
Why shoots in looking for a takedown. Hoost tries to sprawl out of it but Why keeps driving through. The fighters are pinned against the ropes. Hoost manages to get underhooks and after a bit of a struggle, circles away and we're back to standing.
Why looks gassed!
Hoost uses some good footwork to avoid the body shot by Why.
A good leg kick by Hoost.
Hoost fakes with a right hand and throws a good leg kick, right into the thigh. That had to hurt Why.
Hoost throws a jab to the body, straight down the pipe. Boom. That sent Why stumbling backwards but he manages to regain his composure quickly.
Hoost fakes a jab and scores with a low kick.

That's four minutes gone in the round.
That kick from Hoost tenderised Why's leg. Why is trying to keep his angry face on.
Why moves into range and throws a combination. A nice jab followed by a hook to the body.
Hoost lands a slapping body shot.
Hoost lands a slapping body shot.
The crowd are loving this. Great action here.
Hoost lands a nice looking body shot.
Why keeping a good distance there, avoiding the body shot.
A cross from Hoost lands.
That kick from Hoost tenderised Why's leg. Why is trying to keep his angry face on.
As the round comes to an end the crowd are showing their appreciation for a great round of action.
Hoost looking to take his opponent's legs away with the low kicks.
Hoost changes levels and scores with a jab to the body.
Why shoots for a double leg takedown but Hoost sprawls well. He's pushed Why's face into the mat and manages to get back to his feet relatively easily.
And that�s the end of the round � the fighters go back to their corners.
Remy Hoost dominated that round.
That's time! Back to the action!

Ouch! a nice leg kick from Hoost, right into the meat.
Hoost keeping a good distance there, avoiding the body shot.
Why is trying desperately to land a takedown but Hoost is having absolutely none of it. This is turning into a bit of a nightmare for Why.
Why tries to close the distance and clinch but Hoost swats him to one side with an open hand palm strike and circles away.
Remy Hoost is winning the standup battle so far.
Why tries to close the distance and clinch but Hoost swats him to one side with an open hand palm strike and circles away.
A chopping leg kick lands by Hoost.
Hoost moves out of range of the strikes.
Why shoots in but Hoost avoids the takedown attempt easily.
Hoost moves into range and lands a nice leg kick.
Why takes a shot right to the bread basket.
Hoost works the jab nicely.
That's one minute gone in the round.
Hoost throws a nice outside leg kick.
Hoost fakes a couple of low kicks, before throwing one on the third attempt. It connects and Why has to reset his feet before getting ready to engage.
Hoost displays good takedown defense there as he swats away a double leg from Why.
Why is breathing heavily.
A nice leg kick lands there from Hoost.
That kick from Hoost tenderised Why's leg. Why is trying to keep his angry face on.
Hoost lands a leg kick. The shin dug right into the meat of the thigh.
Why misses with a wild combination.
Hoost is looking to wear down Why with body shots, infact he's throwing more body shots than head shots at the moment.
Hoost bobs and weaves and then throws a good body kick.
Stevie Why is looking to throw some combinations by the looks of things.
Hoost lands a nice looking body shot.
That's two minutes gone in the round.
Hoost lands with a kick to the ribs.
Fantastic stuff here - a very entertaining period of action, which has drawn cheers from the crowd.
No luck for Why with that takedown attempt.
Remy Hoost has stuffed three takedown attempts in the round now. That's going to take a lot out of Stevie Why.
Hoost looks to land a combination. Why sees it coming but can only parry a couple of the shots.
Remy Hoost is looking to keep the fight on the feet at all costs.
Why takes a body punch but keeps moving.
Ooooh, nice body kick lands from Hoost. Why shrugs it off though.
Hoost connects nicely with a jab. Noted by the judges no doubt.
Hoost throws a combination but comes up with nothing but fresh air.
Some wild striking there from Why.
Hoost throws a quick head kick that skims the top of Why's head.
That's three minutes gone in the round.
Hoost looks to land a combination but Why avoids it well.
Ouch! a nice leg kick from Hoost, right into the meat.

Why gets a double leg takedown into Hoost's guard.
Hoost on his back here. We all know that wrestlers don't like being on their back so let's see if Hoost tries to get out of the position.
If this pace continues, the referee will definitely step in and force a standup.
Why stops Hoost from standing up.
The fighters are trapped in the ropes so we're going to have a reposition here. The ref calls for a break and repositions the fighters in the center of the ring.
Why wants to pass the guard but Hoost is keeping the position.
Why is persisting with the attempt to improve his position.
Hoost wants to stand but Why is controlling the position.
That's four minutes gone in the round.
Hoost keeping moving, preventing Why from controlling successfully.
Why is looking to work some ground and pound but Hoost has wrist control.
Why wants to pass the guard but Hoost is keeping the position.
As the round comes to an end the crowd are showing their appreciation for a great round of action.

Well, the referee has seen enough. Neither fighter is active enough on the ground so he's stood them back up.
Why shoots in for a takedown but doesn't get it.
And that�s the end of the round � the fighters go back to their corners.
Remy Hoost dominated that second round.
That's the end of the round. The referee orders the cornermen out of the ring so we can get back down to business. This is the final round!

Why has his takedown stuffed
and Hoost counters with a three punch combo that has Why backing up. Why nods at Hoost to acknowledge the strikes.
Stevie Why seems to be the more aggressive standup fighter in this bout.
Why fails with the takedown.
Why shoots in with a takedown attempt and he has Hoost pinned against the ropes. Hoost gets the underhooks and manages to circle away.
Remy Hoost has stuffed three takedown attempts in the round now. That's going to take a lot out of Stevie Why.
A shot to the liver by Hoost. Beautiful body shot.
Why's leg has a nasty welt from taking a succession of leg kicks. That must be slowing him down.
Hoost throws a body kick but he was well out of range there.
Hoost scores with a slapping inside leg kick.
Hoost lands with a thumping leg kick.
Why takes a big intake of breath there - he's definitely tired.
That's one minute gone in the round.
Why doesn't succeed with the takedown
and Hoost counters with a good, hard body kick but Why shrugs it off.
Hoost with a nice looking leg kick. You could hear that one land in a back row.
A slapping leg kick lands for Hoost.
Hoost scores with a jab to the head.
Hoost buckles his opponent's knee momentarily with a nice leg kick.
The fighters are starting to perspire pretty heavily.
Hoost lands an overhand right.
Hoost stuns Why with a nice body shot, before stepping back out of range.
Why walks forward, straight into a front kick from Hoost.
Hoost fakes a couple of low kicks, before throwing one on the third attempt. It connects and Why has to reset his feet before getting ready to engage.
That's two minutes gone in the round.
Wooooo! Give it up for these two warriors! They are putting on a show!
No luck with that takedown attempt from Why.
Why avoids the body shot from Hoost.
Why on the wrong end of a nice low kick. He's acting like it's no big deal but he doesn't want to take many more of those.
Hoost lands a leg kick and bounces back out of range.
Why shoots in but Hoost avoids the takedown attempt easily.
Why drops his hands and takes a jab to the jaw for his troubles.
Why tries to clinch but Hoost moves out of range.
Hoost moves into range and throws a lovely three punch combination.
That's three minutes gone in the round.
Hoost displaying good standup as he scores with a three punch combination.
Why shoots and misses
and Hoost counters with a lovely shot to the body.
Why takes a kick to the side of the head.
Hoost lands with a cross.
Hoost slips in close and lands a nice hook before moving back out of range.
Why with poor footwork there. He got himself in a bit of a tangle, enabling Hoost to score with a decent uppercut.
Why has developed a nice purple lump on his ribcage, as a result of some heavy body kicks from Hoost.
No luck for Why with that takedown attempt.
Stevie Why has stepped it up - he knows he needs a finish here!
Hoost moves into range and lands a nice leg kick.
Remy Hoost is fighting for a decision here - he's started to take the cautious approach.
That's four minutes gone in the round.
Hoost feints and then cracks Why's leading leg with a nice low kick. He's obviously looking to slow Why down.
Why doesn't succeed with the takedown
and Hoost counters with a good right hand that lands right on the jaw.
Hoost fakes a jab and scores with a low kick.
Hoost lands a leg kick. The shin dug right into the meat of the thigh.
This is a great period of action - very entertaining stuff!
Hoost moves into range and throws a lovely three punch combination.
Why looks for a takedown here. Will he get it? Hoost is fending him off so far but Why persists. Nope, Hoost circles away and we're back to standing.
As the round comes to an end the crowd are showing their appreciation for a great round of action.
A thudding body kick lands there by Hoost!
And that's the end of the fight!
Remy Hoost showed his dominance in that final round.
Well I reckon that's a shut out for Hoost, winning every round. Will the judges agree? They are the ones who matter, even if they are often depressingly incompetent. Over to the ring announcer for the scorecards.
Ladies and gentlemen, after 3 rounds of action, we go to the scorecards for a decision.
Judge Daniel Franklin scores the fight for Remy Hoost!
Judge Stewart Dunkirk scores the fight for Remy Hoost!
Judge Tiny Johnson scores the fight for Remy Hoost!
Remy Hoost wins by unanimous decision!
|
|
|
|
|
|
|
|
|
|
|
|
|
|
|
|
|
|
|
|
|
|
|
| S |
C
A |
G |
S |
C
B |
G |
|
S |
C |
G |
|
energy
A | B |
|
hype
A | B |
|
pop
A | B |
|
mgr
A | B |
|
FIGHT
RATING
36% |
|
|
|
|
|
|
