|
|
PBP Commentary |
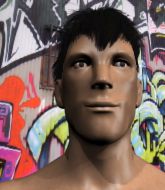
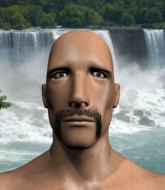
Coming up we have a light heavyweight MMA rules bout between Bret Sane (ranked 0 p4p, 0 weight class) and Klas Jenny II (ranked 0 p4p, 0 weight class). Sane comes to the cage accompanied by Domination. Both fighters look fresh as a daisy as they make their way towards the cage.
 |
|
 |
| 185 cm
21
211 lbs
3 - 6 - 0 |
|
191 cm
27
210 lbs
6 - 6 - 0 |
BJJ Blue Belt
Good kicks
Granite chin |
|
BJJ Blue Belt
World class MT
Determined |
|
| |
|
Ladies and gentlemen. This fight is 5 rounds, in the light heavyweight division.
Introducing the fighter to my left, fighting out of the red corner.
With a record of
3 - 6 - 0, fighting out of Las Vegas, Bret Sane!
And introducing the fighter to my right, fighting out of the blue corner.
With a record of
6 - 6 - 0, fighting out of Las Vegas, Klas Jenny II!
The judges for this bout are Stewart Dunkirk, George Francis and Alan Glass.

The bell rings for round one and we are underway!

The fight moves into the clinch position.
Jenny II crunches a lovely knee into Sane's ribcage.
Jenny II lands a knee to the head there! That was nasty!
Jenny II keeps control of Sane as he tries to wriggle out of the double underhooks.
Sane wants a takedown.
Jenny II lands a nice knee to the body.
Sane is breathing heavily.
We've seen a great period of action over the last minute or so - credit to both fighters for going all out!
Jenny II lands a nice elbow.

It looks like Bret Sane has been cut.
Nice elbow from Jenny II.
Jenny II scores a nice knee to the body.
Jenny II scores with a knee to the head.
Jenny II with the Thai clinch, lands a knee to the head.
Sane takes an elbow to the temple.
Jenny II using the Thai clinch to land knees to the body.
Jenny II utilising his Muay Thai to score with a knee to the body.
Jenny II with a knee to the head.
Jenny II landing knees to the head.

That's one minute gone in the round.
Jenny II landing knees to the body.
Jenny II lands an elbow inside that Sane shrugs off.
Jenny II lands a nice elbow.
Jenny II crunches a lovely knee into Sane's ribcage.
Sane takes a knee to the side of the body.
Jenny II gets an overhook and lands an elbow to the side of the head.
Jenny II lands a nice elbow.
Jenny II lands an elbow just above Sane 's eye.
Sane has Jenny II pressed up against the cage and is working for takedown. Jenny II manages to improve position though and keeps the fight standing.
Jenny II lands a nice elbow from the clinch.
Jenny II working Sane over with knees to the body.
Jenny II lands an elbow inside.
Jenny II lands a glancing elbow in the clinch.
The crowd are loving this. Great action here.
Jenny II connects with a nasty looking knee right to Sane's face.
Jenny II unloads a knee to the mid-section.

That's two minutes gone in the round.
Nice elbow from Jenny II.
Jenny II landing knees to the body.
Jenny II lands an elbow that stopped Sane in his tracks for a moment.
Jenny II lands a nice knee to the body.
A knee to the head by Jenny II.
Jenny II lands a knee to the head.
Sane is trying to stall.
Jenny II lands a nice elbow from the clinch.
Jenny II landing knees to the body.
Jenny II using the Thai clinch to land knees to the body.
Sane wants to break the clinch but can't.
Nice elbow from Jenny II.
Knees to the body from Jenny II.
Jenny II landing knees to the head.

That's three minutes gone in the round.
Sane is trying to break free.
Jenny II stops a takedown attempt from Sane.
That's three failed takedown attempts in the round for Bret Sane. That's going to take a lot out of him.
Jenny II lands a damaging elbow.
Jenny II lands an elbow that stopped Sane in his tracks for a moment.
Sane takes an elbow to the temple.
Jenny II gets underhooks to prevent Sane's takedown attempt.
Jenny II lands a nice elbow.
Jenny II lands an elbow just above Sane 's eye.
Sane tries to score a body lock takedown but Jenny II shows good agility there to stay on his feet.
Sane takes an elbow to the temple.
Jenny II creates a bit of space for himself and sneaks an elbow through Sane's defenses.
Knees to the body from Jenny II.
Sane takes a knee to the side of the body.
Jenny II connects with a knee to the head.

That's four minutes gone in the round.
Jenny II gets an overhook and lands an elbow to the side of the head.
Sane is trying to force a seperation but Jenny II has the dominant position.
Jenny II landing knees to the body. They look like they could hurt.
Jenny II unloads a knee to the mid-section. Sane lets out a prehistoric sounding urrrrgh.
The crowd are loving this. Great action here.
Sane wants to strike at distance but he can't break free of the clinch.
Sane fails to pull guard.
Jenny II comes over the top with an elbow. That landed flush.
Jenny II lands a knee to the body.
Jenny II lands an elbow inside.
Jenny II scores a nice knee to the body.
Jenny II creates a bit of space for himself and sneaks an elbow through Sane's defenses.
The crowd are going absolutely nuts as the round comes to an end - what a fantastic round of action!
Jenny II lands a glancing elbow in the clinch.
Nice elbow from Jenny II.
Jenny II landing knees to the body.
Knees to the body from Jenny II.
And that�s the end of the round � the fighters go back to their corners.
Klas Jenny II dominated that round.
The cut man is working on Bret Sane's cut.
That's the end of the round. The referee orders the cornermen out of the cage so we can get back down to business.

That kick from Jenny II tenderised Sane's leg. Sane is trying to keep his angry face on.
Jenny II is looking to clinch.
That kick from Jenny II tenderised Sane's leg. Sane is trying to keep his angry face on.
Jenny II tries to close the distance and clinch but Sane swats him to one side with an open hand palm strike and circles away.

Jenny II has taken the fight to the clinch.
Klas Jenny II seems to be working more effectively in the clinch in the fight so far.
Come on Sane - let's have some action - none of this stalling nonsense.
Jenny II has been the more effective fighter overall so far.
Jenny II crunches a lovely knee into Sane's ribcage.
Sane tries to break the clinch but Jenny II is controlling the position.
Jenny II lands a glancing elbow in the clinch.
Jenny II lands a knee to the head there! That was nasty!
A nice glancing elbow lands by Jenny II.
Jenny II lands a good knee to the midsection. Sane won't want to take too many of those.
Jenny II lands an elbow inside that Sane shrugs off.
Fantastic stuff here - a very entertaining period of action, which has drawn cheers from the crowd.
Jenny II utilising his Muay Thai to score with a knee to the body.
Both fighters are absolutely exhausted here.
A knee to the head by Jenny II.
That's one minute gone in the round.
Jenny II lands a nice elbow from the clinch.
Jenny II lands an elbow inside that Sane shrugs off.
Sane is trying to force a seperation but Jenny II has the dominant position.
Sane takes a knee right on the jaw!
Sane pushes off and fires off an elbow that misses, before clinching up again, against the cage.
A knee to the head by Jenny II.
Sane is looking to break free of the clinch but Jenny II has double underhooks.
Sane is trying to break free.
Jenny II with a knee to the head.
Sane has hold of a leg and is looking for a trip takedown. Jenny II avoids it nicely though and we remain in the clinch.
Jenny II working Sane over with knees to the body.
Sane jumps guard but Jenny II stands there with Sane around his waist. Sane gives up and drops back to his feet. We remain in the clinch.
Sane tries to land a knee to the body but he is off balance and Jenny II avoids it.
That's two minutes gone in the round.
Nice elbow from Jenny II.
Jenny II using the Thai clinch to land knees to the body.
Jenny II lands a damaging elbow.
Jenny II avoiding damage as Sane throws knees to the body.
Jenny II unloads a knee to the mid-section. Sane lets out a prehistoric sounding urrrrgh.
Jenny II unloads a knee to the mid-section.
Jenny II working Sane over with knees to the body.
Jenny II landing some nice looking knees to the body.
Kneeeeees! The crowd are calling for knees to the body. Jenny II obliges.
Sane drops to a knee looking for a takedown but Jenny II gets the underhooks and prevents it.
That's three failed takedown attempts in the round for Bret Sane. That's going to take a lot out of him.
This is a great period of action - very entertaining stuff!
Jenny II using the Thai clinch to land knees to the body.
Kneeeeees! The crowd are calling for knees to the body. Jenny II obliges.
That's three minutes gone in the round.
Jenny II lands a damaging elbow.
Jenny II lands a glancing elbow in the clinch.
Both guys are working to get underhooks.
Sane is trying to work out of this bad position, with his back against the cage.
Jenny II landing knees to the head.

Sane is working on a single leg takedown against the cage. Jenny II can't fight it off and eventually Sane manages to take the fight to the floor. Jenny II looks annoyed but at least he's managed to land in guard.
It looks like the ref is thinking about a standup.
Sane looking to pass the guard.

Jenny II kicks Sane off and gets to his feet.
Sane shoots in but Jenny II avoids the takedown attempt easily.
Klas Jenny II seems to be the more aggressive standup fighter in this bout.
Sane tries to keep at a distance but Jenny II has taken the fight into the clinch.
That's four minutes gone in the round.
Kneeeeees! The crowd are calling for knees to the body. Jenny II obliges.
Kneeeeees! The crowd are calling for knees to the body. Jenny II obliges.
Jenny II using the Thai clinch to land knees to the body.
The crowd cheering loudly, showing their appreciation for the quality fight we're seeing here.
Sane looking to stall.
Jenny II lands a damaging elbow.
Jenny II lands a nice elbow from the clinch.
A nice glancing elbow lands by Jenny II.
Sane takes a knee to the side of the body.
As the round comes to an end the crowd are showing their appreciation for a great round of action.
Jenny II lands a damaging elbow.
Sane takes a knee right on the jaw!
Sane tries to pull guard but can't drag his opponent to the mat. Jenny II just stands there and leans against the cage.
And that�s the end of the round � the fighters go back to their corners.
Klas Jenny II showed his class in that round. I'd imagine he'll take it on all the scorecards.
The cut man is working on Bret Sane's cut.
The fighters get back to their feet, the hooter sounds and we're back to the action!

A punch combination from Sane misses.
Sane pulls out of a head kick attempt.
Jenny II doesn't manage to clinch there - Sane circles away.
Sane tries to score a power double leg takedown but Jenny II sees that one coming and sprawls well. That will dishearten Sane somewhat.
Jenny II closes the distance and clinches.
Jenny II lands a glancing elbow in the clinch.
Jenny II is trying to wear down his opponent with knees to the body.
A nice glancing elbow lands by Jenny II.
Jenny II working Sane over with knees to the body.
We've seen a great period of action over the last minute or so - credit to both fighters for going all out!
Jenny II lands a glancing elbow in the clinch.
Jenny II with the Thai clinch, lands a knee to the head.
Both fighters are breathing heavily.
Jenny II crunches a lovely knee into Sane's ribcage.
Jenny II lands an elbow inside.
That's one minute gone in the round.
Jenny II scores a nice knee to the body.
Jenny II with a knee to the head.
Nice elbow from Jenny II.
Jenny II with a knee to the head.
Jenny II tries to land a knee to the head but misses.
Jenny II throws an elbow that misses.
Jenny II is looking to score with knees to the body. Maybe he'll change it up and go body then head. Sane is defending well for now.
Sane managing to block the knees to the body from Jenny II.
Sane fails to pull the fight into his guard.
Sane wants to strike at distance but he can't break free of the clinch.
Jenny II comes over the top with an elbow. That landed flush.
Sane takes a knee to the side of the body.
Sane tries to break free but Jenny II pushes him back against the cage.
Sane throws a punch but it's blocked by Jenny II.
Sane is looking for a takedown up against the cage. Jenny II gets underhooks though and prevents the takedown attempt.
That's three failed takedown attempts in the round for Bret Sane. That's going to take a lot out of him.
That's two minutes gone in the round.
Jenny II putting his Muay Thai to good use. He has Sane in a tight clinch and is doing some damage with knees to the body.
Jenny II lands a knee to the head there! That was nasty!
Jenny II landing knees to the body. They look like they could hurt.
Jenny II throws a vicious knee straight up the middle but Sane blocks it with crossed arms.
Jenny II throws a knee to the head but misses.
Sane missing with knees to the body.
Jenny II prevents the takedown attempt.
Jenny II lands a nice elbow from the clinch.
This has been an exciting period of action!
Sane wants to push off and get back to the center of the mat but Jenny II has him pressed against the cage.
Sane takes an elbow to the forehead.
Sane tries to break free but Jenny II pushes him back against the cage.
Knees in the clinch landing for Jenny II.
Sane tries to jump guard but he falls flat on his backside. Jenny II smiles and moves away.
Sane tries to check the leg kick but that clearly hurt him.
That's three minutes gone in the round.
Jenny II closes the distance and presses his opponent up against the cage.
Sane misses with the head strike.
Jenny II landing knees to the body. They look like they could hurt.
Jenny II lands a damaging elbow.
Jenny II landing some nice looking knees to the body.
Sane takes a knee right on the jaw!
With the two fighters working up against the cage, Jenny II just misses with a elbow thrown towards Sane's brow.
Sane jumps guard but his hands slip and he falls flat on his back. Well, he's made himself look a right mug there, as Jenny II walks away with a smile on his face. Sane gets slowly back to his feet and shakes his head.
Jenny II has managed to clinch.
Jenny II landing some nice looking knees to the body.
Jenny II connects with a nasty looking knee right to Sane's face.
Jenny II lands a good knee to the midsection. Sane won't want to take too many of those.
Jenny II comes over the top with an elbow. That landed flush.
That's four minutes gone in the round.
Sane's corner are urging him to control the action in the clinch for a moment, rather than mount any serious offense. I'm sure the crowd appreciate those instructions... not.
Sane working hard to break the clinch.
Jenny II lands a nice elbow.
Knees to the body from Jenny II.
Sane takes a knee to the side of the body.
The crowd are loving this. Great action here.
Jenny II lands an elbow just above Sane 's eye.
Jenny II with the Thai clinch, lands a knee to the head.
Jenny II is trying to wear down his opponent with knees to the body.
As the round comes to an end the crowd are showing their appreciation for a great round of action.
Jenny II tries to land a knee to the head but misses.
Jenny II prevents Sane from breaking the clinch.
Jenny II lands a glancing elbow in the clinch.
A knee to the head by Jenny II.
And that�s the end of the round � the fighters go back to their corners.
Klas Jenny II really dominated that round.
The cut man is working on Bret Sane's cut.
The minute break is over - no more time for sponges and pep talks - back to the action!

Sane avoids the clinch attempt nicely.
Jenny II takes the fight into the clinch.
A frustrated look appears on Sane's face as he tries to break the clinch.
Sane is trying to break the clinch but Jenny II has him pressed against the cage.
Jenny II landing knees to the head.
Sane taking a breather.
Sane fails to pull the fight into his guard.
Jenny II putting his Muay Thai to good use. He has Sane in a tight clinch and is doing some damage with knees to the body.
Jenny II lands a nice elbow from the clinch.
Jenny II unloads a knee to the mid-section. Sane lets out a prehistoric sounding urrrrgh.
Jenny II lands a knee to the head there! That was nasty!
Jenny II lands an elbow inside.
Sane takes a knee to the side of the body.
It's got to the stage where if one of these guys blows hard enough, the other might fall over.
This is a great period of action - very entertaining stuff!
Jenny II is trying to wear down his opponent with knees to the body.
That's one minute gone in the round.
Jenny II tries a knee to the head but Sane blocks it.

Sane's corner calls for him to break the clinch, which he does.
Jenny II uses good head movement to avoid the hook from Sane.
Jenny II throws a head kick that half lands.
Jenny II avoids the head kick by Sane.
Sane shakes his hands off, looking to compose himself, but takes a jab to the jaw whilst he does it.
The fight stays on the outside here - Jenny II looks like he's thinking about clinching though.
Sane fails miserably with a takedown attempt.
Jenny II moves into the clinch successfully.
Jenny II scores with a knee to the head.
Jenny II lands a good knee to the midsection. Sane won't want to take too many of those.
Sane managing to block the knees to the body from Jenny II.
Sane changes levels and goes for a takedown here. Jenny II fights it off and pushes away nicely.
That's three failed takedown attempts in the round for Bret Sane. That's going to take a lot out of him.
That's two minutes gone in the round.
Jenny II clinches.
Jenny II lands an elbow inside that Sane shrugs off.
Jenny II lands an elbow just above Sane 's eye.
Sane is trying to stall.
Sane takes an elbow to the forehead.
The crowd cheering loudly, showing their appreciation for the quality fight we're seeing here.
Sane fails to pull the fight into his guard.
Sane is working for takedown but Jenny II is calmly controlling the position for now.
Jenny II lands a nice elbow from the clinch.
Jenny II lands an elbow just above Sane 's eye.
Jenny II landing some nice looking knees to the body.
That's three minutes gone in the round.
Jenny II working Sane over with knees to the body.
Knees in the clinch landing for Jenny II.
Jenny II with the Thai clinch, lands a knee to the head.
Jenny II connects with a knee to the head.
Jenny II tries to land knees in the clinch but Sane avoids the damage to the body.
Jenny II lands a knee to the body.
A nice glancing elbow lands by Jenny II.
Sane is looking for a takedown up against the cage. Jenny II gets underhooks though and prevents the takedown attempt.
Jenny II lands an elbow that stopped Sane in his tracks for a moment.
Sane tries a knee to the head but Jenny II blocks it.
Sane takes an elbow to the forehead.
Sane taking a breather.
Jenny II comes over the top with an elbow. That landed flush.
Jenny II creates a bit of space for himself and sneaks an elbow through Sane's defenses.
Jenny II connects with a knee to the head.
That's four minutes gone in the round.
Sane gets control of Jenny II's arms and successfully pulls guard. Sane will no doubt be looking for submissions off his back.
Jenny II stands up from Sane's guard - Jenny II perhaps looking for a knockout.
This has been an exciting period of action!
Jenny II scores with a nice strike.
Sane shoots in for a takedown. "Ole!" shouts Jenny II as he jumps to the side.
Jenny II throws a head kick that Sane semi-blocks.
Jenny II tries to clinch up against the cage, rushing in the close the distance. Sane manages to break the clinch and circles back to the middle of the mat.
Jenny II showing good head movement there, avoiding the strikes from Sane.
As the round comes to an end the crowd are showing their appreciation for a great round of action.
Jenny II throws a head kick that connects with a bit of head and a bit of hand.
Sane throws a sloppy head kick and Jenny II moves out of range easily.
Jenny II clinches with his opponent.
And that�s the end of the round � the fighters go back to their corners.
Klas Jenny II dominated that fourth round.
The cut man is working on Bret Sane's cut.
Well, the break between rounds is over. Let's get back to the scrappin! This is the final round!

Jenny II has managed to clinch.
Jenny II is trying to wear down his opponent with knees to the body.
Jenny II lands a good knee to the midsection. Sane won't want to take too many of those.
Jenny II scores a nice knee to the body.
Sane is looking to control Jenny II's arms but Jenny II gets an underhook and turns him. Now Sane has his back to the cage.
Knees in the clinch landing for Jenny II.
Sane takes a knee right on the jaw!
Jenny II scores with a knee to the head.
Sane is trying to work out of this bad position, with his back against the cage.
Jenny II utilising his Muay Thai to score with a knee to the body.
Sane takes an elbow to the temple.
This has been an exciting period of action!
Sane avoiding damage as Jenny II throws knees to the body.
Sane has Jenny II pressed up against the cage and is working for takedown. Jenny II manages to improve position though and keeps the fight standing.
Jenny II landing knees to the head.
Both of our modern day gladiators look out of it here - an gruelling 5 rounds of action taking it's toll on them, no doubt.
That's one minute gone in the round.
Jenny II lands an elbow that stopped Sane in his tracks for a moment.
Sane wants to get back to striking at distance but Jenny II won't allow it.
Jenny II utilising his Muay Thai to score with a knee to the body.
Jenny II gets an overhook and lands an elbow to the side of the head.
Sane tries to take the fight to the ground by pulling guard but can't manage it.
Jenny II lands a nice elbow from the clinch.
Jenny II with the Thai clinch, lands a knee to the head.
Jenny II tries to land a knee to the body but he is off balance and Sane avoids it.
Sane jumps guard but Jenny II stands there with Sane around his waist. Sane gives up and drops back to his feet. We remain in the clinch.
That's three failed takedown attempts in the round for Bret Sane. That's going to take a lot out of him.
Jenny II lands a nice knee to the body.
Jenny II lands a good knee to the midsection. Sane won't want to take too many of those.
Sane is trying to push Jenny II away but Jenny II has him pressed against the cage, so he's going nowhere.
That's two minutes gone in the round.
Sane looks like he'd prefer to be striking at range right now.
Jenny II lands a damaging elbow.
Jenny II landing knees to the body.
Nice elbow from Jenny II.
Sane blocks a knee to the body. He'll have a nicely bruised forearm in the morning.
Sane wants to push off and get back to the center of the mat but Jenny II has him pressed against the cage.
Sane jumps guard but his hands slip and he falls flat on his back. Well, he's made himself look a right mug there, as Jenny II walks away with a smile on his face. Sane gets slowly back to his feet and shakes his head.
Sane fakes with an overhand right and moves in to clinch with Jenny II, pushing him back against the cage.
Good anti-grappling being displayed by Jenny II as Sane tries to tie him up.
Jenny II lands an elbow just above Sane 's eye.
Kneeeeees! The crowd are calling for knees to the body. Jenny II obliges.
Fantastic stuff here - a very entertaining period of action, which has drawn cheers from the crowd.
Jenny II with a knee to the head.
Jenny II managing to block the knees to the body from Sane.
Jenny II gets an overhook and lands an elbow to the side of the head.
That's three minutes gone in the round.
Jenny II is trying to wear down his opponent with knees to the body.
Sane takes a knee to the side of the body.
Jenny II lands an elbow inside.
Jenny II with an attempt at a knee that misses.
Jenny II missing with knees to the body.
Sane avoids a wild elbow strike from Jenny II.
An uppercut on the inside fails to land for Sane.
Sane looking for a takedown.
Jenny II is pressed up against the cage. Sane has hold of a leg and is looking to drag Jenny II down to the mat. Jenny II avoids the attempt though and has circled away. We're back to striking at a distance.
Jenny II clinches with his opponent.
Klas Jenny II is fighting for a decision - hopefully he's judged it right and he's actually winning the fight.
Jenny II scores a nice knee to the body.
Sane tries to jump guard but he falls flat on his backside. Jenny II smiles and moves away.
Jenny II takes the fight into the clinch.
That's four minutes gone in the round.
Jenny II utilising his Muay Thai to score with a knee to the body.
Jenny II connects with a nasty looking knee right to Sane's face.
Sane is trying to break the clinch but Jenny II has him pressed against the cage.
Sane takes a knee to the side of the body.
This is a great period of action - very entertaining stuff!
Jenny II lands a damaging elbow.
Jenny II with the Thai clinch, lands a knee to the head.
Jenny II lands a knee to the head there! That was nasty!
As the round comes to an end the crowd are showing their appreciation for a great round of action.
Sane throws an elbow but it misses.
Sane fails to pull the fight into his guard.
Bret Sane has stepped it up - he knows he needs a finish here!
Sane wants to break the clinch but can't.
Jenny II working Sane over with knees to the body.
And that's the end of the fight!
Klas Jenny II comfortably won the final round on my scorecard.
I've got Jenny II winning every round here. Surely the decision will go his way and he'll pick up a well deserved decision victory. Over to the ring announcer for the scorecards.
Ladies and gentlemen, after 5 rounds of action, we go to the scorecards for a decision.
Judge Stewart Dunkirk scores the fight 45:50
Judge George Francis scores the fight 45:50
Judge Alan Glass scores the fight 44:50
In favor of your winner, by unanimous decision... Klas Jenny II!
|
|
|
|
|
|
|
|
|
|
|
|
|
|
|
|
|
|
|
|
|
|
|
| S |
C
A |
G |
S |
C
B |
G |
|
S |
C |
G |
|
energy
A | B |
|
hype
A | B |
|
pop
A | B |
|
mgr
A | B |
|
FIGHT
RATING
100% |
|
|
|
|
|
|
