|
|
PBP Commentary |
Coming up we have a lightweight MMA rules bout between Alejandro Mora (ranked 0 p4p, 0 weight class) and Doc Holliday (ranked 0 p4p, 0 weight class). Over to our ring announcer for the fighter introductions!
 |
|
 |
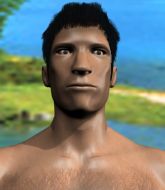
| 185 cm
24
164 lbs
8 - 2 - 0 |
|
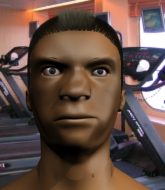
175 cm
24
165 lbs
7 - 3 - 0 |
Good wrestling
Excellent boxer
Cardio machine |
|
Good wrestler
Excellent boxer
Good gas tank |
|
| |
|
Ladies and gentlemen. This fight is 3 rounds, in the lightweight division.
Introducing the fighter to my left, fighting out of the red corner.
With a record of
8 - 2 - 0, fighting out of Montreal, Alejandro Mora!
And introducing the fighter to my right, fighting out of the blue corner.
With a record of
7 - 3 - 0, fighting out of New York, Doc Holliday!
The judges for this bout are Trevor Gratis, Gregory Folan and Dillan Fox.

The bell rings for round one and we are underway!
Holliday tries for a takedown but Mora sees it coming a mile off and avoids it easily.
Jab, jab by Holliday - just one landing.
Mora fails to land the takedown.
Holliday leaves Mora with his face pressed against the mat as he sprawls beautifully, defending against a solid takedown attempt.
Holliday throws a head kick that misses and slips in the process. He scrambles back to his feet and the fighters circle.
Mora looks to score with a combo but nothing lands.
A punch combination from Mora misses.
Mora bobs and weaves well there to avoid the strikes.
Mora throws a front kick aimed at Holliday's knee but Holliday avoids it well.
Mora uses some good footwork to avoid the body shot by Holliday.
Holliday misses with a series of wild punches.
Holliday scores with a shot to the body.
Mora avoids a lazy jab quite easily.
Holliday doesn't react quick enough there as he takes a shot to the body.
Mora connects with a lovely right hand, straight down the pipe.

That's one minute gone in the round.
Mora will need to tighten up his combinations if he doesn't want to gas himself out, swinging at thin air.
A telegraphed takedown attempt from Holliday is defended easily by Mora.
Holliday is moving around nicely and scores here with a single head shot.
Mora lunges in with swinging rights and lefts but Holliday circles away quickly and effectively.
Mora tries to land with a swinging hook to the body but Holliday was well out of range. Poor timing from Mora.
No luck with that takedown attempt from Mora.
That's three failed takedown attempts in the round for Alejandro Mora. That's going to take a lot out of him.
Holliday doesn't manage to clinch there - Mora circles away.
Holliday jabs Mora to the body, keeping him at a distance.
Mora throws a shot to the body.
Holliday looking to land some kicks to the body here.
A chopping leg kick lands by Holliday.
Holliday clobbers Mora with an overhand right that has the crowd gasping. That made a horrendous noise.
Holliday walks straight into a jab right on the nose. That one stung - he's blinking and trying to clear his head.

That's two minutes gone in the round.
Mora misses with a telegraphed body shot
and he gets countered with a snapping leg kick.
Mora ducks down and throws a hook to the body but Holliday moves away.
Holliday with a nice looking leg kick. You could hear that one land in a back row.
This is a great period of action - very entertaining stuff!
Holliday looks to land a combination. Mora sees it coming but can only parry a couple of the shots.
A leg kick checked by Mora.
Holliday misses with a hook. Mora ducked under it nicely.
Holliday checks a leg kick.
Holliday pulls out of a head kick attempt.
A nice combination there by Mora.
Mora throws a wild combination but nothing lands.
Mora closes the distance and clinches up with Holliday, looking for a takedown. Mora pushes Holliday against the cage but Holliday circles to the side and manages to break the clinch.
Mora is looking to wear down Holliday with body shots, infact he's throwing more body shots than head shots at the moment.

Mora dives in and scores a takedown into Holliday's guard.
It looks like the ref is thinking about a standup.
Holliday avoiding any damage from the ground and pound.
Mora missing there with some ground and pound from the guard.

That's three minutes gone in the round.
Holliday keeping moving, preventing Mora from controlling successfully.
Holliday not looking particularly offensive just at the moment.
Mora stands up and looks to throw the legs aside to pass to side control. Holliday swivels though and keeps the full guard.
Mora throws a strike but Holliday rolls with it and manages to sweep. Now he's in guard on top.

Mora looking for submissions off his back, moving his hips, looking for an opening.
Holliday is sitting in guard, working some ground and pound.
Holliday wants to control from the top but Mora keeps moving.
Mora looking for a guillotine here but Holliday defends easily.

That's four minutes gone in the round.
Mora controls Holliday momentarily but Holliday frees himself.
Mora keeping moving, preventing Holliday from controlling successfully.
Holliday postures up to throw the ground and pound strikes but they don't connect.
Holliday trying to control but Mora is working from the bottom.
Holliday working some ground and pound from guard but it's not doing any damage.
Holliday passes easily into side control. Nice work.
As the round comes to an end the crowd are showing their appreciation for a great round of action.
Mora is not content to let Holliday control the position.
The referee asks Holliday politely if he wouldn't mind getting on with it and actually doing something. Holliday prefers to stall for the moment though.
And that�s the end of the round � the fighters go back to their corners.
A close round but Doc Holliday will probably get the nod.
That's the end of the round. The referee orders the cornermen out of the cage so we can get back down to business.

The sound of bone on bone echoes around the arena as Mora checks a leg kick.
Mora throws a jab, cross combination which is slipped
and Holliday counters with a right hand to the body.
Holliday throws a leg kick but Mora sees it coming and moves out of range.
Mora wants to clinch.
Holliday slips a straight right by Mora.
Holliday cracks the inside of Mora's front leg.
Holliday connects with a leg kick. He turned his hip over nicely there.
Doc Holliday seems to be getting the better of the standup.
Mora shoots in for a double leg but Holliday sprawls well. That's going to sap some energy.
Holliday scores with a crisp jab that stopped Mora in his tracks.
Mora circles away from the clinch attempt.
Sloppy strikes from Holliday. Those never looked like landing.
A clash of legs there as Mora blocks the low kick.
Mora slips under a jab.
Mora pulls out of a head kick attempt.
Mora throws a nice looking combination but Holliday bobs and weaves to avoid any damage.
That's one minute gone in the round.
Mora scores with a nice looking left hook and follows it up with an uppercut!
Mora throws a leg kick but he was too far away and it doesn't land.
Holliday throws a nice inside leg kick.
Holliday keeps the fight standing with a nice sprawl.
Both fighters are absolutely exhausted here.
Holliday slips a straight right by Mora.
Alejandro Mora is looking to throw some combinations by the looks of things.
Holliday swings wildly with a right hand that was never going to find it's target.
Holliday defends well against a solid takedown attempt from Mora.
That's three failed takedown attempts in the round for Alejandro Mora. That's going to take a lot out of him.
Holliday fails to land with the punch combination there - jab, cross, hook, miss, miss, miss.
Mora takes one on the chin but seems OK.
Holliday ducks down and throws a hook to the body but Mora moves away.
Mora tries to check the leg kick but that clearly hurt him.
Holliday tries to clinch but Mora moves out of range.
Mora will have to do better than that with his takedown attempts.
Holliday lands with a nice combination. Mora backs away looking to recover.
That's two minutes gone in the round.
Wooooo! Give it up for these two warriors! They are putting on a show!
Mora swings and misses with a hook to the body.
Holliday tries to land a leg kick but Mora saw it coming and moves away.
A swing and a miss from Holliday.
Holliday tries to score with an inside leg kick but telegraphs it and Mora is able to avoid easily.
Holliday is the aggressor but that punch slipped nicely by Mora.
Mora tries to work over Holliday's front leg with a kick but Holliday checks it.
A jab from Holliday misses.
Horrible takedown by Holliday or perhaps it was just good defense by Mora which made him look bad.
Holliday lands with a kick to the ribs.
Mora dips down and scores with a jab to the body.
Holliday wants to clinch up but Mora keeps it at a distance.
Horrible takedown by Mora or perhaps it was just good defense by Holliday which made him look bad.
Mora misses with a takedown attempt. He shot from a bit too far out.
Doc Holliday seems to be the more aggressive standup fighter in this bout.
That's three minutes gone in the round.
Mora has a takedown stuffed.
Mora shoots in looking for a double leg takedown. Holliday defends it nicely.
Mora lunges in with an uppercut that skims his opponent's chin.
Mora shoots in and gets a takedown into half guard. Mora showed some decent athleticism there.
Holliday is trying to control but can't.
Mora with the ground and pound but Holliday uses the opportunity to regain guard.
Mora throwing strikes from guard but Holliday blocks nicely.
That's four minutes gone in the round.
Mora throwing elbows and punches but not connecting, as Holliday works some decent striking defense from the bottom.
Mora is looking to work some ground and pound but Holliday has wrist control.
Mora postures up and lands some nice ground and pound.
Mora loading up with the ground and pound but he's missing more than he's landing in this flurry.
Mora thows a big elbow that misses.
Mora has been looking to land a fair amount of strikes on the ground. He might be looking to soften his opponent up in order to work for a submission.
Mora sitting in guard, not really doing much.
Mora slips nicely into half guard.
And that�s the end of the round � the fighters go back to their corners.
A close second round but Doc Holliday will probably get the nod - 10:9.
That's time! Mora's corner gives him a slap on the ass as he gets ready to fight. The crowd applaud as we get ready to start the final round!

Nice jab there from Holliday.
Holliday connects with a good right hand that stumbles Mora. Mora circles away out of range and recomposes himself.
Holliday lands three nice shots there - that looked like it hurt!
Holliday shoots in with a takedown attempt and he has Mora pinned against the cage. Mora gets the underhooks and manages to circle away.
The fighters circling - Mora throws out the jab but it was never going to land.
Holliday throws a wild body kick that Mora sees coming a mile off.
Holliday fakes high and swings low for a body shot but Mora manages to avoid it.
Holliday wings a very wild body shot but it does the job and lands to the midsection.
Holliday displays good takedown defense there as he swats away a double leg from Mora.
Mora closes the distance and scores a nice trip takedown into half guard. Holliday did well to prevent Mora getting side control.
Mora is looking for a kimura. It's going to be difficult to finish that from half guard though and Holliday defends it well.
That's one minute gone in the round.
Mora tries to pass the half guard into mount. Holliday knows what he's doing though and prevents the attempt.
Both fighters are breathing heavily.
Holliday manages to get to full guard.
Mora slows down the pace of the fight, as he sits in guard.
Mora wants to control from the top but Holliday keeps moving.
That's two minutes gone in the round.
A big thud reverberates around the arena there as Mora accidentally thumps the mat. Hopefully he's not broken his hand.
Holliday manages to land a sweep and now he's in mount on top!
Mora is in a horrible position here, under a barrage of strikes, he's managing to avoid any damage.
Holliday looking to finish Mora with some ground and pound. This is bad for Mora!
Mora tries to lock up and control but Holliday gives him a forearm to the face and pushes him away.
Holliday landing strikes from the mount and Mora is in trouble!
Mora is trying to stand up.
Holliday looking to control but Mora is working nicely, looking to advance position himself.
This has been an exciting period of action!
Holliday raining down hammerfists from mount.
That's three minutes gone in the round.
Mora can't escape the position.
Mora is in a horrible position here. Holliday smacks him with another shot as he tries to escape the position.
Alejandro Mora overall seems to be getting the better of the ground position in the fight so far.
Holliday putting on the heat here with some good ground and pound!
Holliday scoring with some good ground and pound from mount here. Will he manage to finish Mora?

Mora is rocked!
Holliday lands with some strikes.
Oh Mora is still in real trouble! Will he be able to recover?!!
Mora is squirming around, avoiding Holliday's attempts to control the action.
The fighters are pressed up against the cage, both looking to find a bit of space to work.
Holliday raining down hammerfists from mount.
BOOM! Holliday connects with a massive shot to the dome!
The crowd cheering loudly, showing their appreciation for the quality fight we're seeing here.
Mora sneaks a leg back under and regains half guard and is working straight away to try and get back to guard. He hasn't managed just yet though.
Mora keeping control of the leg, stopping his opponent passing to mount.
Holliday trying to control the pace.
Doc Holliday is fighting for a decision - hopefully he's judged it right and he's actually winning the fight.
That's four minutes gone in the round.

The ref stands the fighters back up, due to lack of action by Doc Holliday.
Mora throws a series of punches but Holliday avoids them all with ease.
Holliday wants to slow Mora down by chopping away at his legs.
Mora seems to have got his legs back now.
Holliday dips down and scores with a jab to the body.
As the round comes to an end the crowd are showing their appreciation for a great round of action.

Holliday drives through with a takedown into Mora's guard. Let's see what he can do from the top position.
Mora bucks up whilst keeping hold of a body lock, managing to reverse the position. Now he's in top in Holliday's guard.
Alejandro Mora has stepped it up - he knows he needs a finish here!
Mora has gone for a leg lock! Holliday slips out almost immediately though and dives into Mora's guard.
Mora striking off his back but it's not causing Holliday any problems.
And that's the end of the fight!
Doc Holliday comfortably won the final round on my scorecard.
Well Holliday has outworked and out performed his opponent in all aspects of the game today. He was simply too good and the decision should be no more than a formality. Over to the ring announcer for the scorecards.
Ladies and gentlemen, after 3 rounds of action, we go to the scorecards for a decision.
Judge Trevor Gratis scores the fight 27:30
Judge Gregory Folan scores the fight 27:30
Judge Dillan Fox scores the fight 27:30
In favor of your winner, by unanimous decision... Doc Holliday!
After the big win, Doc Holliday made sure to do all the important stuff like thanking his sponsors TFP Graphics - Pit Inc and telling the interviewer how much he loves him.
|
|
|
|
|
|
|
|
|
|
|
|
|
|
|
|
|
|
|
|
|
|
|
| S |
C
A |
G |
S |
C
B |
G |
|
S |
C |
G |
|
energy
A | B |
|
hype
A | B |
|
pop
A | B |
|
mgr
A | B |
|
FIGHT
RATING
100% |
|
|
|
|
|
|
