|
|
PBP Commentary |
Coming up we have a bantamweight MMA rules bout between Rick Cartside (ranked 0 p4p, 0 weight class) and Jack Trades (ranked 0 p4p, 0 weight class). Jack Trades has the better chin. Will he look to stand and bang today?
 |
|
 |
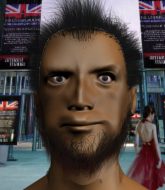
| 170 cm
19
140 lbs
0 - 0 - 0 |
|
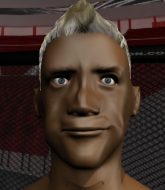
156 cm
22
135 lbs
1 - 2 - 0 |
BJJ Blue Belt
Brawler
Big heart |
|
BJJ Blue Belt
Excellent MT
Very confident |
|
| |
|
Ladies and gentlemen. This fight is 3 rounds, in the bantamweight division.
Introducing the fighter to my left, fighting out of the red corner.
With a record of
0 - 0 - 0, fighting out of Sydney, Rick Cartside!
And introducing the fighter to my right, fighting out of the blue corner.
With a record of
1 - 2 - 0, fighting out of Sydney, Jack Trades!
The judges for this bout are Skip Squint, Hugh Johnson and Eliza Hachem.

The bell rings for round one and we are underway!
A head kick from Trades lands but Cartside takes it in his stride.

Cartside is rocked!
A head kick misses from Trades.
Oh Cartside is still all over the place! His legs are completely gone! Will he be able to recover?!!
Trades throws a head kick but Cartside moves out of range.
Cartside seems to have got his legs back now.
Cartside takes a head kick and keeps coming.

Trades gets taken down but at least he's managed to land in guard.
Trades is looking to get back to his feet but can't, whilst Cartside is controlling him.
Cartside is stalling in the full guard.
Trades is looking to stand up but Cartside isn't so interested in that idea.
Cartside showing good wrestling skills to control the position.
The ref warns both fighters not to hold the cage as they work up against the meshing.
Trades wants to stand but Cartside is controlling the position.

That's one minute gone in the round.
Cartside sitting in guard, not really doing much.
Both fighters really going for it on the ground here!
Cartside won't allow Trades to get back to his feet.

The referee has ruled that neither fighter is active enough on the ground and has stood them back up.
Cartside fails with the takedown.
Cartside blocks a head kick by Trades.
Cartside bobs and weaves into range and then changes levels and scores with a nice takedown into side control.
Trades looks gassed!
Cartside moving around in side mount but really he's just happy to control for now.
Trades is pushing Cartside's head away, looking to escape. Cartside manages to hold on to the position though.
Cartside controls the position.
Cartside prevents Trades from escaping the position.
Trades is being controlled here.
Cartside has knee on belly and moves into mount.
Trades is trying to stand.

That's two minutes gone in the round.
Cartside controlling from mount.
Trades is not a happy chappy� he wants out of there.
Cartside will need to keep those long limbs tucked in whilst he's on the ground, to prevent any submissions.
Trades tries to buck Cartside off but Cartside takes his back!
Trades is trying to stand back up.
Cartside slows the pace down here. Having a little breather whilst he's in a dominant position, looking to rest and regain some energy, ready to go for the finish.
Trades is keeping busy.
Trades looking to stop the rear naked choke attempt by controlling the hands.

That's three minutes gone in the round.
Trades is using up a lot of energy trying to get back to his feet. Perhaps he should improve his position first.
Cartside is controlling his opponent, waiting for an opportunity to finish.
Trades is trying to get back to his feet but he's not managed it yet.

That's four minutes gone in the round.
A few boos can be heard. I'm sure they will multiply if the fighters don't pick up the pace.
The fighters are pressed up against the cage, both looking to find a bit of space to work.
Trades is keeping busy.
Trades is trying to get back to his feet but he's not managed it yet.
I would not like to be Trades right now.
Cartside seems to have a rather negative gameplan on the ground. He seems keen to just score the takedown and hold down Trades for as long as he can get away with.
Cartside's ground tactics aren't going to win him many fans. Let's hope he's got fireworks for us if he gets back to his feet because he's not doing much on the ground.
Cartside has controlled the position for a good 20 seconds, which will no doubt be starting to frustrate his opponent.
The referee stands the fighters back up. Rick Cartside just wasn't active enough from the dominant position.
Trades misses with a head kick.
And that�s the end of the round � the fighters go back to their corners.
Rick Cartside dominated that round.
The corners get their ten second warning. Both fighters stand from their stools and stare eachother down, ready to get back to the action.

Cartside fails miserably with a takedown attempt.
A head kick misses from Trades.
Cartside looks for a takedown here. Will he get it? Trades is fending him off so far but Cartside persists. Nope, Trades circles away and we're back to standing.
Trades throws a head kick that misses and slips in the process. He scrambles back to his feet and the fighters circle.
Excellent takedown into side control there by Cartside.
Cartside prevents Trades from escaping the position.
Cartside passes to full mount! That's big trouble for Trades!
You get the feeling that Trades really doesn't like being in this position too much.
Cartside looking to control but Trades is working nicely, looking to advance position himself.
Both fighters are absolutely exhausted here.
Trades really wants to buck Cartside off and get back to his feet.
Cartside sitting in mount, just looking to control for the moment.

Cartside is in full mount, looking to secure a guillotine but Trades is surviving well by controlling Cartside's body position as best he can.
That's one minute gone in the round.
Trades wants to use the cage to get back to his feet here.
Cartside controlling the pace for now.
You get the feeling that Trades really doesn't like being in this position too much.
Cartside controlling his opponent.
Trades is looking to get back to his feet - it's going to be hard from this position.
Cartside controlling from the full mount.
Trades wants to get back to his feet.
Cartside forces the positional change into back control.
Trades is trying to stand back up.
That's two minutes gone in the round.
The crowd are starting to boo a lack of action.
Trades showing good submission defense here.
Trades wants to get back to his feet.
Cartside keeps control of the position easily here as Trades tries to buck him off.
Trades wants to get back to his feet.
Cartside controlling the position well here. Trades rolled but Cartside kept the hooks locked in and stayed in the dominant position.
That's three minutes gone in the round.
Trades has the hand control, trying to stop the rear naked choke.
Cartside controlling from the back.
Trades controlling the position well but he knows he's in a bad position.
Cartside controls the position.
The referee stands the fighters back up. Rick Cartside just wasn't active enough from the dominant position.
Trades throws a sloppy head kick and Cartside moves out of range easily.
Cartside avoids the head kick by Trades.
Cartside closes the distance and gets a double leg, slamming Trades to the mat! Trades manages to get full guard.
Cartside content to stall in guard here.
That's four minutes gone in the round.
Cartside stops Trades from standing up.
Cartside trying to control the position from guard on top but Trades is wriggling around, looking for whatever he can.
Trades wants to get back to his feet but Cartside is in a dominant position and won't allow it.
Cartside controls the pace of the fight for a moment.
Cartside prevents Trades from getting back to his feet.
Cartside is pushing down on Trades's leg trying to pass to half guard. Trades is fighting to maintain full guard but Cartside has managed to sneak the leg through.
Cartside passes to full mount!
Trades is looking to get back to his feet - it's going to be hard from this position.
Cartside content just to control the position here.
Trades is really trying hard to get back to his feet.
Cartside content just to control the position here.
And that�s the end of the round � the fighters go back to their corners.
Rick Cartside dominated that second round.
The corners get their ten second warning. Both fighters stand from their stools and stare eachother down, ready to get back to the action. This is the final round!

Trades tries a head kick but it misses.

Cartside rushes Trades and presses him up against the cage.
Cartside tries to pull guard but Trades won't allow it.
Cartside tries to pull guard but Trades won't allow it.
Trades with a knee to the head.
Cartside tries to take the fight to the ground by pulling guard but can't manage it.
That's three failed takedown attempts in the round for Rick Cartside. That's going to take a lot out of him.
Trades with an attempt at a knee that misses.
Trades tries a knee to the head but he's missed.
Trades tries to land a knee to the head but misses.
Cartside jumps guard but Trades stands there with Cartside around his waist. Cartside gives up and drops back to his feet. We remain in the clinch.
Trades throws a knee to the head but misses.
Trades throws a vicious knee straight up the middle but Cartside blocks it with crossed arms.
Trades throws a vicious knee straight up the middle but Cartside blocks it with crossed arms.
Trades wants to break the clinch but can't.
Trades throws a knee to the head but misses.
Cartside tries to pull guard but can't drag his opponent to the mat. Trades just stands there and leans against the cage.
Cartside jumps guard but Trades stands there with Cartside around his waist. Cartside gives up and drops back to his feet. We remain in the clinch.
Cartside has hold of a leg and is looking for a trip takedown. Trades avoids it nicely though and we remain in the clinch.
Trades throws a knee to the head but misses.
Cartside fails to pull guard.
Trades tries to land a knee to the head but Cartside blocks with his arms.
Both fighters are breathing heavily.
Trades throws a vicious knee straight up the middle but Cartside blocks it with crossed arms.
Trades lands a knee to the head there! That was nasty!
Trades throws a vicious knee straight up the middle but Cartside blocks it with crossed arms.
Cartside tries to take the fight to the ground by pulling guard but can't manage it.
Trades throws a knee to the head but misses.
That's one minute gone in the round.
Trades with an attempt at a knee that misses.
Trades misses with a knee to the head.
Trades lands a knee to the head.
A knee to the head by Trades.
Trades with an attempt at a knee that misses.
Trades tries to land a knee to the head but misses.
Cartside tries to pull guard but can't drag his opponent to the mat. Trades just stands there and leans against the cage.
Cartside fails to pull guard.
Cartside tries to pull guard but Trades holds him up against the cage and eventually Cartside drops back down to his feet.
Cartside jumps guard but Trades stands there with Cartside around his waist. Cartside gives up and drops back to his feet. We remain in the clinch.
Cartside takes a knee right on the jaw!
Cartside has managed to pull guard. Let's see whether he can work an aggressive guard. It will also be interesting to see what tactics Trades uses from the top position.
Rick Cartside overall seems to be getting the better of the ground position in the fight so far.
Trades stopping the sweep attempt from Cartside.
Trades has decided he wants to stand but the closed guard of Cartside is proving hard to escape from.
Cartside pulls Trades in to control the position.

Cartside is working an open guard so Trades takes the opportunity to get back to his feet.
Trades throws a sloppy head kick and Cartside moves out of range easily.
Trades throws a head kick that misses and slips in the process. He scrambles back to his feet and the fighters circle.
Cartside blocks a head kick by Trades.
Trades tries a head kick but it misses.
A head kick misses from Trades.
That's two minutes gone in the round.
Trades pulls out of a head kick attempt.
Cartside blocks a head kick by Trades.
Trades throws a sloppy head kick and Cartside moves out of range easily.
Trades throws a head kick that misses.
Cartside drops down and drives through with a powerful takedown into guard.
Trades is looking to get back to his feet but can't, whilst Cartside is controlling him.
Cartside slows down the pace of the fight, as he sits in guard.
Cartside sneaks a leg through and gets to half guard. That was like a knife through butter how easily he passed Trades's guard.
Trades is trying to stand up here but Cartside is controlling him well.
Cartside is trying for a guillotine from the top but the pressure isn't in the right place so Trades is just riding it out for now. Cartside eventually gives up the hold.
Cartside trying to control the pace.
That's three minutes gone in the round.
The referee stands the fighters back up. Rick Cartside just wasn't active enough from the dominant position.
Cartside throws a looping left and ducks down for a takedown. He's got his arms around Trades's waist but Trades gets an underhook and avoids the takedown by throwing Cartside off to one side.
Rick Cartside is looking to throw some combinations by the looks of things.
Trades lands a high kick!
Trades pulls out of a head kick attempt.
Cartside fails with the takedown.
Trades lands with a head kick! That's gotta hurt.
Cartside closes this distance looking for a takedown but Trades circles away.
That's four minutes gone in the round.
Trades throws a sloppy head kick and Cartside moves out of range easily.
Cartside drives through with a really nice takedown into side control.
Cartside is moving around in side control but his primary objective seems to be to maintain the position.
Trades tries to escape but Cartside is in control.
Cartside taking a breather here.
Trades is putting a lot of effort into getting back to his feet here.
Cartside controlling the position from side mount.
Trades is looking to work his way out of this bad position but Cartside is controlling him well.
And that's the end of the fight!
Rick Cartside showed his dominance in that final round.
Well I reckon that's a shut out for Cartside, winning every round. Will the judges agree? They are the ones who matter, even if they are often depressingly incompetent. Over to the ring announcer for the scorecards.
Ladies and gentlemen, after 3 rounds of action, we go to the scorecards for a decision.
Judge Skip Squint scores the fight 30:27
Judge Hugh Johnson scores the fight 30:27
Judge Eliza Hachem scores the fight 30:27
In favor of your winner, by unanimous decision... Rick Cartside!
|
|
|
|
|
|
|
|
|
|
|
|
|
|
|
|
|
|
|
|
|
|
|
| S |
C
A |
G |
S |
C
B |
G |
|
S |
C |
G |
|
energy
A | B |
|
hype
A | B |
|
pop
A | B |
|
mgr
A | B |
|
FIGHT
RATING
59% |
|
|
|
|
|
|
