|
|
PBP Commentary |
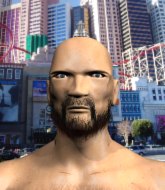
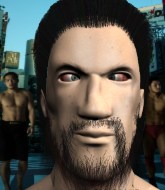
Coming up we have a super heavyweight MMA rules bout between Scrappy Cocoa (ranked 0 p4p, 0 weight class) and Joey West (ranked 0 p4p, 0 weight class). West has a niggling injury. He would have liked to come in 100% fit but that's not always possible. These two fighters really are very evenly matched on the feet - it will be fascinating to see who can assert themselves in that aspect of the fight.
 |
|
 |
| 190 cm
18
300 lbs
0 - 0 - 0 |
|
225 cm
24
300 lbs
0 - 4 - 0 |
BJJ Blue Belt
Brawler
Granite chin |
|
BJJ White Belt
Brawler
Solid chin |
|
| |
|
Ladies and gentlemen. This fight is 3 rounds, in the super heavyweight division.
Introducing the fighter to my left, fighting out of the red corner.
With a record of
0 - 0 - 0, fighting out of Tokyo, Scrappy Cocoa!
And introducing the fighter to my right, fighting out of the blue corner.
With a record of
0 - 4 - 0, fighting out of Tokyo, Joey West!
The judges for this bout are Shigeki Sano, Tatsuya Matsuyama and Taro Takaoka.

The bell rings for round one and we are underway!
Cocoa throws a looping left and ducks down for a takedown. He's got his arms around West's waist but West gets an underhook and avoids the takedown by throwing Cocoa off to one side.
Cocoa fails with a rather predictable takedown attempt.
Cocoa throws a series of strikes that have West backpedaling.
West looks gassed!
West defends well against a solid takedown attempt from Cocoa.
That's three failed takedown attempts in the round for Scrappy Cocoa. That's going to take a lot out of him.
No joy there for Cocoa, who threw a few shots but didn't land.
Cocoa leaves West with his face pressed against the mat as he sprawls beautifully, defending against a solid takedown attempt.

West looking to shoot here. He's gone for it and he's landed a takedown into mount! Oh, that's bad for Cocoa!
Cocoa really trying hard to get back to half guard here.
Wooooo! Give it up for these two warriors! They are putting on a show!
Cocoa wants to control but West is having none of it.
Cocoa is desperately trying to get back to half guard.

That's one minute gone in the round.
West tries to control but Cocoa wriggling away.
Cocoa regains half guard.
Cocoa is trying to stand up here but West is controlling him well.
The fighters are battling for position here. Cocoa manages to regain full guard. Nice work.
West won't allow Cocoa to sweep him here.

Cocoa pushes West off and gets back to his feet.

That's two minutes gone in the round.
No luck with that takedown attempt from Cocoa.
West looks frustrated there after his takedown attempt is stuffed easily.
Cocoa fails with a takedown attempt from distance.
Cocoa dives in and grabs West's left leg, looking for a takedown. West pushes down on Cocoa's head and hops out.
West decides to change it up a bit and drives through with a nice takedown into half guard.
The crowd cheering loudly, showing their appreciation for the quality fight we're seeing here.
West tries to pass the half guard into mount. Cocoa knows what he's doing though and prevents the attempt.
West is just content to waste time from the top position. Cocoa takes advantage of the situation and regains full guard.

That's three minutes gone in the round.
West won't allow Cocoa to sweep him here.
West must be cautious of submissions here, given that his opponent has the superior Jiu Jitsu.
West postures up and lands a big shot to Cocoa's brow.
West trying to stand up but can't free himself from Cocoa's guard.
The fighters are pressed up against the cage, both looking to find a bit of space to work.
West stands up and looks to throw the legs aside to pass to side control. Cocoa swivels though and keeps the full guard.

Cocoa working from the bottom, still in full guard. He's managed to get a loose triangle. West doesn't seem to be doing much to defend here, obviously he feels comfortable in the position. West manages to throw the legs off his shoulder and he's back into guard - no problem.

That's four minutes gone in the round.
West wants to control from the top but Cocoa keeps moving.
Cocoa is working the butterfly guard. He manages to land a nice scissor sweep and is now in half guard on the top. Nice move.
As the round comes to an end the crowd are showing their appreciation for a great round of action.
Cocoa throwing shots but they're hitting the canvas more than the man.
And that�s the end of the round � the fighters go back to their corners.
That was a close round but I would say that Scrappy Cocoa will probably get the nod.
The cut man is working on Joey West's cut.
The referee calls time. The cornermen exit stage left and we're back to business.

Cocoa misses with a few strikes there.
No joy there for West, who threw a few shots but didn't land.
Cocoa fakes high and shoots in for a takedown but West avoids it really well and circles away.
Cocoa misses with a body shot.
Scrappy Cocoa is looking to throw some combinations by the looks of things.
Cocoa misses with a wild body shot.

Cocoa clinches with his opponent.
West is working for a takedown up against the cage. He can't get it on this occasion though.

Cocoa jumps into guard, dragging West to the mat.
West is breathing heavily.
Cocoa has a closed guard, preventing anything of note from happening. Perhaps he's looking to stall.
The ref warns both fighters not to hold the cage as they work up against the meshing.
That's one minute gone in the round.
Cocoa manages to land a sweep and now he's in mount on top!
Cocoa takes a little breather and maintains the position. The referee will be looking for him to stay active from such a dominant position though.
Poor strikes thrown by Cocoa there. More accuracy and less frantic strikes would help!
That's two minutes gone in the round.
Cocoa landing strikes from the mount.
Cocoa misses with a head shot.
Cocoa misses with a series of strikes from mount. He'll no doubt be working on his ground and pound when he gets back to the gym.
Cocoa content just to control the position here.
Cocoa manages to capitalize on a mistake by West to take his back!
Cocoa is working hard for the rear naked choke here.
Scrappy Cocoa overall seems to be getting the better of the ground position in the fight so far.
West just trying to survive but Cocoa is wriggling into a better position, looking to finish.
That's three minutes gone in the round.
West covering up well under a series of strikes from Cocoa.
Cocoa has his hand under the chin of his opponent looking for the choke. He's nearly got it! This one could be all over! But no, West has freed his hand and lives to survive another� well, another couple of seconds at least!
Cocoa thows a huge left but connects with the canvas and not his opponent.
Cocoa has good solid back control here.
West trying to control but he's just got himself in more trouble.
Cocoa could do with losing a few pounds - he looks very soft around the mid section, to put it politely.
That's four minutes gone in the round.
Cocoa is hanging on to West's back as he tries to escape.
Cocoa controlling the position well here. West rolled but Cocoa kept the hooks locked in and stayed in the dominant position.
Cocoa throwing lazy shots from the back mount that aren't doing any damage.
The crowd applaud the fighters efforts here as the round comes to an end.
Cocoa is looking for the choke from the back position but West is controlling his hands well.
Cocoa trying desperately to keep hold of the dominant position.
And that�s the end of the round � the fighters go back to their corners.
Scrappy Cocoa dominated that second round.
The cut man is working on Joey West's cut.
The referee calls time. The cornermen exit stage left and we're back to business. The crowd applaud as we get ready to start the final round!

West shoots in looking for a takedown. Cocoa tries to sprawl out of it but West keeps driving through. The fighters are pinned against the cage. Cocoa manages to get underhooks and after a bit of a struggle, circles away and we're back to standing.
Cocoa shoots in looking for a takedown but West manages to keep the fight standing, pushing Cocoa's face into the canvas for good measure before circling away.
Cocoa gets to the clinch - let's see what his plan is here.
Cocoa tries to pull guard but West won't allow it.
Cocoa wants a takedown but no success here.
That's three failed takedown attempts in the round for Scrappy Cocoa. That's going to take a lot out of him.
The referee is keeping an eye on West - much more stalling and he will separate the fighters.
Cocoa goes for a body shot but it's blocked.

Cocoa manages to break the clinch.
Both fighters are breathing heavily.
That's one minute gone in the round.
Cocoa shoots in looking for a double leg takedown. West defends it nicely.
Cocoa shoots for a double leg takedown but West sprawls well. He's pushed Cocoa's face into the mat and manages to get back to his feet relatively easily.
West dodges the punch combination from Cocoa.
Cocoa fails with the takedown.
West lands with a nice body kick.
West shoots in looking for a takedown. Cocoa tries to sprawl out of it but West keeps driving through. The fighters are pinned against the cage. Cocoa manages to get underhooks and after a bit of a struggle, circles away and we're back to standing.
That's two minutes gone in the round.
West displays good takedown defense there as he swats away a double leg from Cocoa.
Cocoa wants to clinch but West slips to the side
and West counters with a head kick.
Cocoa leaves West with his face pressed against the mat as he sprawls beautifully, defending against a solid takedown attempt.
West shoots in for a takedown. "I don't think so" says Cocoa as he avoids it easily.
Cocoa fails with a takedown attempt.
West is trying hard to land a takedown here. Cocoa sprawls well and keeps this one on the feet.
Cocoa shoots in looking for a takedown but West manages to keep the fight standing, pushing Cocoa's face into the canvas for good measure before circling away.
That's three minutes gone in the round.
West closes the distance and gets a double leg, slamming Cocoa to the mat! Cocoa manages to get full guard.
Hammerfist, elbow! yells West's corner. There ya go! There ya go!
West's corner is telling him to maintain position.
West won't allow Cocoa to sweep him here.

West stands up from guard. Let's bang!
Cocoa stalks West and leaps in with a furious combination of punches. Uppercuts and crosses smash into West's face. West staggers backwards, shaken.
Cocoa closes the distance and presses his opponent up against the cage.
West gets double underhooks and manages to take the fight to the ground.
We've seen a great period of action over the last minute or so - credit to both fighters for going all out!
West loading up with the ground and pound but he's missing more than he's landing in this flurry.
Cocoa is doing well to control the posture of his opponent and prevent any damage.
Cocoa might be looking to lock onto one of his opponent's long limbs for a submission, whilst we're on the ground.
That's four minutes gone in the round.
West trying to control the position from guard on top but Cocoa is wriggling around, looking for whatever he can.
Cocoa is trying to control the position but West postures up.
West really doesn't want to stay on the ground with Cocoa. If he can't get it back to his feet, it's only a matter of time before he'll be tapping out.
Cocoa is going to have to think about doing something other than just controlling because West is managing to avoid having the position dictated to him.
We must be close to a standup if these guys don't pick up the pace.

We're going to have a standup here because Scrappy Cocoa wasn't active enough for the referee's liking.
No luck with that takedown attempt from Cocoa.
The crowd applaud the fighters efforts here as the round comes to an end.
Cocoa's hands are dropping dangerously low here and West connects clean with a right hook that sends him down to one knee! Cocoa scrambles back to his feet.
Joey West has stepped it up - he knows he needs a finish here!
Scrappy Cocoa is fighting for a decision here - he's started to take the cautious approach.
Cocoa throws a jab to the body, straight down the pipe. Boom. That sent West stumbling backwards but he manages to regain his composure quickly.
And that's the end of the fight!
Joey West comfortably won the final round on my scorecard.
Well Cocoa has outscored his opponent in every aspect of the fight today. Only a scarily incompetent judge or two will keep him from a well deserved win... Over to the ring announcer for the scorecards.
Ladies and gentlemen, after 3 rounds of action, we go to the scorecards for a decision.
Judge Shigeki Sano scores the fight 29:28
Judge Tatsuya Matsuyama scores the fight 29:28
Judge Taro Takaoka scores the fight 29:28
In favor of your winner, by unanimous decision... Scrappy Cocoa!
|
|
|
|
|
|
|
|
|
|
|
|
|
|
|
|
|
|
|
|
|
|
|
| S |
C
A |
G |
S |
C
B |
G |
|
S |
C |
G |
|
energy
A | B |
|
hype
A | B |
|
pop
A | B |
|
mgr
A | B |
|
FIGHT
RATING
46% |
|
|
|
|
|
|
