|
|
PBP Commentary |
Coming up we have a lightweight MMA rules bout between Alejandro Mora (ranked 0 p4p, 0 weight class) and Doc Holliday (ranked 0 p4p, 0 weight class). Doc Holliday has the better chin. Will he look to stand and bang today?
 |
|
 |
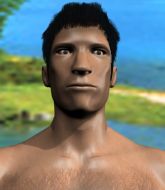
| 185 cm
25
164 lbs
9 - 3 - 0 |
|
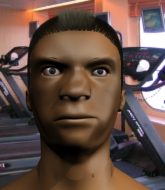
175 cm
25
165 lbs
8 - 4 - 0 |
Abu Dhabi Champ
Excellent boxer
Insanely flexible |
|
Good wrestler
World class boxer
Good gas tank |
|
| |
|
Ladies and gentlemen. This fight is 3 rounds, in the lightweight division.
Introducing the fighter to my left, fighting out of the red corner.
With a record of
9 - 3 - 0, fighting out of Montreal, Alejandro Mora!
And introducing the fighter to my right, fighting out of the blue corner.
With a record of
8 - 4 - 0, fighting out of New York, Doc Holliday!
The judges for this bout are Gregory Folan, Steve Smith and Alec Ball.

The bell rings for round one and we are underway!
Good exchange - Holliday coming out on top.
Holliday circles away from the clinch attempt
and Holliday connects with a straight left hand counter down the middle.
An inside leg kick lands from Holliday.
Holliday lands a right hook to the body.

Holliday closes the distance and pushes Mora back into the cage.
Holliday makes some space for himself and lands an uppercut.
Holliday pushes Mora back against the cage and lands a hook to the side of the head.
Mora wants to get back to striking at distance but Holliday won't allow it.
Mora has a body lock and is looking for a takedown. Holliday is bouncing around trying to prevent the takedown and somehow he has indeed managed to stay on his feet.
Holliday is looking to break free of the clinch but Mora has double underhooks.
Holliday prevents the takedown attempt.
Mora is looking to break free of the clinch but Holliday has double underhooks.
Mora has Holliday pushed against the cage.
Mora can't break the clinch.

That's one minute gone in the round.
Good anti-grappling being displayed by Holliday as Mora tries to tie him up.
A frustrated look appears on Mora's face as he tries to break the clinch.

Mora breaks the clinch and we're back to striking at distance.

Holliday fakes a strike and closes the distance, dragging Mora to the ground. Holliday is now in Mora's guard.
Mora seems keen to control rather than go for a submission, at least for now.
Holliday wants to control from the top but Mora keeps moving.
Mora has his hands on Holliday's head, controlling the position.
Mora tries to land a sweep but no joy.
Holliday content to strike from guard, landing some decent shots.
Holliday won't allow Mora to get back to his feet.
Holliday stopping the sweep attempt from Mora.

That's two minutes gone in the round.
Holliday postures up.
Mora is really struggling to control Holliday but he's trying to hold on to the position.

The referee decides to stand the fighters back up, due to lack of activity on the part of Alejandro Mora.
Holliday misses with a half-hearted attempt at a head kick.
Mora lands a slapping body shot.
We've seen a great period of action over the last minute or so - credit to both fighters for going all out!
Holliday throws a nice inside leg kick.
Holliday looks to land a body kick but Mora moved away.
Mora fails miserably with a takedown attempt.
That's three failed takedown attempts in the round for Alejandro Mora. That's going to take a lot out of him.
Holliday tries to land with a swinging hook to the body but Mora was well out of range. Poor timing from Holliday.
Mora tries a low kick but Holliday avoids it.
Holliday shoots for a double leg takedown but Mora sprawls well. He's pushed Holliday's face into the mat and manages to get back to his feet relatively easily.
A telegraphed takedown attempt from Mora is defended easily by Holliday.
Mora ducks down and throws a hook to the body but Holliday moves away.

That's three minutes gone in the round.
Mora pushing out the jab but it's not landing.

Mora feints and then dives in with a takedown. That was a long way out but the feint bought him enough time to close the distance and complete the takedown. Now we'll play guard for a bit and see who can get the better of that position.
Mora trying to pass the guard. He's being very persistent here but Holliday manages to land a sweep and now he's on top!
Holliday connects with a couple of short punches.

Mora is active off his back here, looking for submissions.
Holliday controlling from the guard. I say controlling but really, he's stalling.
Mora is looking for a guillotine. You can't force these things though and Holliday defends well.
The ref warns both fighters not to hold the cage as they work up against the meshing.

Holliday is trying to work a guillotine from the top, or something like that? Don't know how he thinks he's going to get a finish from there.
Holliday postures up.

That's four minutes gone in the round.
Holliday slows down the pace of the fight for a moment. He'll need to remain active if he doesn't want to see the fight stood back up.
Mora is working from a closed guard but he's struggling to control his opponent.
Holliday is looking to advance position but Mora has hit a scissor sweep - now he's on top in mount!
The crowd are loving this. Great action here.
Mora with good strikes from the mount here!
Mora landing punches.
Mora throws some wild stikes that Holliday manages to avoid easily.
Mora scoring with strikes but Holliday is staying in there.
The crowd are going absolutely nuts as the round comes to an end - what a fantastic round of action!
Mora thowing shots but they're missing.
Mora trying to control but Holliday is having none of it.
And that�s the end of the round � the fighters go back to their corners.
Alejandro Mora dominated that round.
Well, the break between rounds is over. Let's get back to the scrappin!

Holliday moves out of range of the strikes.
Holliday throws a right hand that misses
and Mora counters with a nice body shot.
Holliday stuns Mora with a nice body shot, before stepping back out of range.
Holliday stuffs the takedown attempt from Mora. Mora gets slowly back to his feet.
Mora closes the distance and scores a nice trip takedown into half guard. Holliday did well to prevent Mora getting side control.
Mora not throwing his punches with enough precision this time.
Mora is looking to advance position but Holliday won't allow it.
The fighters are pressed up against the cage, both looking to find a bit of space to work.
Mora looks to score some points with some ground and pound.
Mora not landing any meaningful shots this time.
Mora not landing any meaningful shots this time.
Alejandro Mora overall seems to be getting the better of the ground position in the fight so far.
That's one minute gone in the round.
Mora is looking to take a break and control but Holliday is keeping him honest, looking to work from the bottom.
Holliday avoiding damage under a succession of punches from Mora.
Mora trying to control the action but Holliday is working from the bottom.
Holliday is looking to improve his position.
Mora seems very keen to just sit and control from half guard but Holliday does not like that idea so much and is remaining active off his back.
Mora missing with the ground and pound from half guard.
Mora landing with strikes to the body and head, softening up his opponent.
Holliday is controlling Mora's position as best he can from this difficult position.
That's two minutes gone in the round.
Mora throws a strike but Holliday avoids it easily and moves to full guard.
Holliday avoiding any damage from the ground and pound.
Holliday is trying to keep Mora in close.
Mora trying to control but Holliday is working from the bottom.
Holliday being controlled here, momentarily.
Mora throws a big elbow that misses.
That's three minutes gone in the round.
Mora looking to pass the guard.
Mora throws a strike but Holliday rolls with it and manages to sweep. Now he's in guard on top.
There's a bit of a scramble here and now Mora is on top in guard.
Mora postures up in Holliday's guard and throws a big left but Holliday blocks it.
Holliday keeping moving, preventing Mora from controlling successfully.
Holliday preventing the ground and pound from doing any damage.
Mora wants to control from the top but Holliday keeps moving.
That's four minutes gone in the round.
Mora throwing shots from guard but he's hitting more mat than opponent.
Mora postures up to throw the ground and pound strikes but they don't connect.
Mora throwing strikes from guard but Holliday blocks nicely.
Mora trying to control the position from guard on top but Holliday is wriggling around, looking for whatever he can.
The crowd applaud the fighters efforts here as the round comes to an end.
Holliday trying to control the position.

The referee has ruled that neither fighter is active enough on the ground and has stood them back up.
Good shot there by Holliday.
And that�s the end of the round � the fighters go back to their corners.
Alejandro Mora dominated that second round.
That's the end of the round. The referee orders the cornermen out of the cage so we can get back down to business. The crowd applaud as we get ready to start the final round!

Holliday scores with a crisp jab that stopped Mora in his tracks.
Holliday turns his hip over beautifully as he lands a nice leg kick.
Mora shoots in but no luck this time.
Mora misses with a double jab.
Holliday lands a jab to the nose.
Mora takes a jab right on the kisser.
Mora moves into range and throws a lovely three punch combination.
Mora moves out of range of the body kick from Holliday.
Mora throws a right and a left that both miss.
A clash of legs there as Holliday blocks the low kick.
Mora misses with a double jab.
Mora wants to clinch.
Holliday connects with a nice looking jab.
Holliday looks to score with a jab to the body but Mora is just out of range.
Doc Holliday seems to be the more aggressive standup fighter in this bout.
Mora is looking to take this fight into the clinch.
That's one minute gone in the round.
Holliday swings wildly with a right hand that was never going to find it's target.
Holliday has his head slapped from side to side by a 3 punch combination. That must have hurt him.
Holliday connects with a crisp jab.
Mora shoots in looking for a takedown. Holliday tries to sprawl out of it but Mora keeps driving through. The fighters are pinned against the cage. Holliday manages to get underhooks and after a bit of a struggle, circles away and we're back to standing.
Alejandro Mora is looking to throw some combinations by the looks of things.
Mora tries to land with a swinging hook to the body but Holliday was well out of range. Poor timing from Mora.
Holliday sizes up Mora with a pawing jab and scores with a straight right down the middle.
Holliday cracks the inside of Mora's front leg.
Mora tries to clinch but Holliday moves out of range.

Mora clinches up with Holliday and pushes him back against the cage.
Mora tries for a takedown but Holliday manages to get underhooks.
That's three failed takedown attempts in the round for Alejandro Mora. That's going to take a lot out of him.
Mora is trying to work out of this bad position, with his back against the cage.
A shot in the inside from Holliday.
That's two minutes gone in the round.
Holliday drops down for a takedown but doesn't get it.
Holliday lands a right uppercut that snaps the head of Mora backwards.
Mora is trying to work for a single leg takedown but Holliday pulls him back up using the underhooks.
Holliday is looking to take this one to the mat.
Doc Holliday has stepped it up - he knows he needs a finish here!
Holliday pulls guard.
The crowd cheering loudly, showing their appreciation for the quality fight we're seeing here.
Mora throwing shots from guard but he's hitting more mat than opponent.
Holliday is working from a closed guard but he's struggling to control his opponent.
Mora sneaks a leg through and gets to half guard. That was like a knife through butter how easily he passed Holliday's guard.
Mora stalling away here and it's allowed Holliday to slip out his trapped foot and regain full guard.
That's three minutes gone in the round.
Mora is looking to work some ground and pound but Holliday has wrist control.
Mora stands up and looks to throw the legs aside to pass to side control. Holliday swivels though and keeps the full guard.
Holliday working the defensive guard well to avoid strikes from Mora.
Mora throwing elbows and punches but not connecting, as Holliday works some decent striking defense from the bottom.
Holliday bucks up whilst keeping hold of a body lock, managing to reverse the position. Now he's in top in Mora's guard.
Holliday trying to pass the guard but can't manage it just yet.
Holliday controls the pace of the fight for a moment.
Holliday preventing the sweep.
Holliday throwing shots from guard but he's hitting more mat than opponent.
That's four minutes gone in the round.
Mora looking for submissions off his back, moving his hips, looking for an opening.
Both fighters are breathing heavily.
Holliday stands up and looks to throw the legs aside to pass to side control. Mora swivels though and keeps the full guard.
Holliday preventing the sweep.
Holliday working from the guard for now, landing some ground and pound.
Mora keeping moving, preventing Holliday from controlling successfully.
Mora looking for a sweep. Not yet Mora, not yet.
Holliday throwing strikes from guard but Mora blocks nicely.
Holliday won't allow Mora to sweep him here.
This is a great period of action - very entertaining stuff!
As the round comes to an end the crowd are showing their appreciation for a great round of action.
Holliday content to strike from guard, landing some decent shots.
Holliday postures up and lands a big shot to Mora's brow.
Alejandro Mora is fighting for a decision here - he's started to take the cautious approach.
Mora is trying to control the position but Holliday postures up.
Holliday is working Mora over from the guard. He should look to pass the guard and do a little more damage with these strikes.
And that's the end of the fight!
Doc Holliday comfortably won the final round on my scorecard.
I think Mora has won this one but let's see what the judges have to say. Over to the ring announcer for the scorecards.
Ladies and gentlemen, after 3 rounds of action, we go to the scorecards for a decision.
Judge Gregory Folan scores the fight 29:28
Judge Steve Smith scores the fight 29:28
Judge Alec Ball scores the fight 29:28
In favor of your winner, by unanimous decision... Alejandro Mora!
|
|
|
|
|
|
|
|
|
|
|
|
|
|
|
|
|
|
|
|
|
|
|
| S |
C
A |
G |
S |
C
B |
G |
|
S |
C |
G |
|
energy
A | B |
|
hype
A | B |
|
pop
A | B |
|
mgr
A | B |
|
FIGHT
RATING
76% |
|
|
|
|
|
|

