|
|
PBP Commentary |
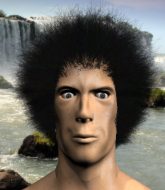
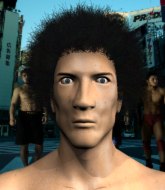
Coming up we have a heavyweight MMA rules bout between Riley Free (ranked 0 p4p, 0 weight class) and Carl Understand (ranked 0 p4p, 0 weight class). Carl Understand is the more experienced fighter, so let's see if that makes a difference tonight.
 |
|
 |
| 199 cm
21
265 lbs
3 - 0 - 0 |
|
180 cm
19
240 lbs
5 - 3 - 0 |
BJJ Purple Belt
Excellent MT
Very quick |
|
BJJ Blue Belt
Brawler
Knockout power |
|
| |
|
Ladies and gentlemen. This fight is 3 rounds, in the heavyweight division.
Introducing the fighter to my left, fighting out of the red corner.
With a record of
3 - 0 - 0, fighting out of Las Vegas, Riley Free!
And introducing the fighter to my right, fighting out of the blue corner.
With a record of
5 - 3 - 0, fighting out of Las Vegas, Carl Understand!
The judges for this bout are Gwen Towbar, Robert Twigg and Chris Downing.

The bell rings for round one and we are underway!
Free throws a head kick that misses and slips in the process. He scrambles back to his feet and the fighters circle.

Understand tries to keep at a distance but Free has taken the fight into the clinch.
Free lands a hook to the side of the head.
Free prevents the takedown attempt.
Understand tries to jump guard but he falls flat on his backside. Free smiles and moves away.
Free stuns Understand with a nice body shot, before stepping back out of range.
Free blocks the body kick.
The sound of bone on bone echoes around the arena as Free checks a leg kick.
Carl Understand seems to be the more aggressive standup fighter in this bout.
Understand missing with a left hand there. Free was out of range so wasted energy throwing that one.
Understand misses with a looping left.

Free shoots in with a lovely double leg takedown. Understand manages to land in full guard to minimise the damage.
Free stopping the sweep attempt from Understand.
Free seems content to control from guard here. He's going to have to remain active though if he doesn't want to get stood back up.

That's one minute gone in the round.
Free has controlled the position for a good 20 seconds, which will no doubt be starting to frustrate his opponent.
Free slips effortlessly into side control - very nice.
Free tries to land with some ground and pound but misses.
The ref warns both fighters not to hold the cage as they work up against the meshing.
Understand managing to avoid any damage from the strikes thrown by Free.

Free working hard here to secure a kimura but he's not really in the right position for it.
Free is trying to get an arm triangle but Understand is defending well.
We're hearing some news coming in from back stage. It's official - Understand has eaten all the pies!

That's two minutes gone in the round.
Free thinks about going for a far side armbar but bails out and retains the dominant position instead.
Understand wants to get back to his feet.
Understand tries to work a leg under to get back to half guard but Free wriggles his own leg back out and remains in side control.
Free working hard here to secure a kimura but he's not really in the right position for it.
Free tries for a kimura. Not really close to a finish though.
Understand really doesn't want to stay on the ground with Free. If he can't get it back to his feet, it's only a matter of time before he'll be tapping out.

That's three minutes gone in the round.
Understand dodges the ground and pound from Free.
Free will need to keep those long limbs tucked in whilst he's on the ground, to prevent any submissions.
Free advances to mount.
Understand takes a big shot to the head but keeps on trying to improve his position.
A nice elbow there by Free.
Free goes for an armbar but he's fallen flat on his backside there and now Understand is on top in guard.
Wooooo! Give it up for these two warriors! They are putting on a show!
There's a bit of a scramble here and now Free is on top in guard.

That's four minutes gone in the round.
Free slows down the pace of the fight, as he sits in guard.
Understand is trying to control the position from the bottom.
Free controlling from the guard. I say controlling but really, he's stalling.
As the round comes to an end the crowd are showing their appreciation for a great round of action.
Free slips nicely into half guard.
Free wants to work for an arm triangle but Understand is really keeping half guard well and defending the submission attempt.
And that�s the end of the round � the fighters go back to their corners.
Riley Free dominated that round.
Well, the break between rounds is over. Let's get back to the scrappin!

Free defending well as Understand loads up on a big left hand.
Free scores with a sloppy punch to the body. Not much technique there but it did the business.
Free getting the better of the striking in that exchange.
Understand misses with a body shot. Nice footwork from Free.
Understand takes a big uppercut there. He seems a bit wobbly but no, he's OK.
Understand takes a solid shot to the body. That one hurt him but he's trying not to show it.
Free darts in and clinches Understand up against the cage.
Free is leaning against Understand and scores with a nice uppercut to the body.
We've seen a great period of action over the last minute or so - credit to both fighters for going all out!
Understand tries to take the fight to the ground by pulling guard but can't manage it.
Free lands a body punch in the clinch.
Free lands a shot to the body.
A short right from Free on the inside.

Understand is rocked!
Understand is breathing heavily.
Free is trying to trip Understand. He has hold of a leg but Understand is hopping around, keeping his balance for the moment. Free persists though and gets the takedown into guard.
Understand is still in real trouble! Can Free finish him?
Free loads up on a big left hand. Understand felt that one! He's just covering up now, not defending himself intelligently - Free looks towards the ref and unloads with 3 more big shots and the ref has no choice but to stop the fight! Understand can't hide his disappointment, as Free celebrates the victory.
Ladies and gentlemen, after 1:59 of round 2, we have a winner by way of TKO (Strikes). Riley Free!
|
|
|
|
|
|
|
|
|
|
|
|
|
|
|
|
|
|
|
|
|
|
|
| S |
C
A |
G |
S |
C
B |
G |
|
S |
C |
G |
|
energy
A | B |
|
hype
A | B |
|
pop
A | B |
|
mgr
A | B |
|
FIGHT
RATING
100% |
|
|
|
|
|
|
