|
|
PBP Commentary |
Coming up we have a heavyweight MMA rules bout between Hardy Swagger (ranked 0 p4p, 0 weight class) and Claymore Longshanks (ranked 0 p4p, 0 weight class). We have two fighters making their debuts here, so let's see who comes out of this one with their first professional victory.
 |
|
 |
| 198 cm
18
278 lbs
0 - 0 - 0 |
|
193 cm
18
280 lbs
0 - 0 - 0 |
BJJ Blue Belt
Solid Muay Thai
Good in bed |
|
BJJ Blue Belt
Solid Muay Thai
Solid chin |
|
| |
|
Ladies and gentlemen. This fight is 3 rounds, in the heavyweight division.
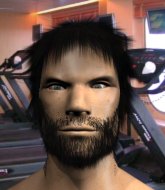
Introducing the fighter to my left, fighting out of the red corner.
With a record of
0 - 0 - 0, fighting out of Los Angeles, Hardy Swagger!
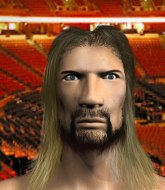
And introducing the fighter to my right, fighting out of the blue corner.
With a record of
0 - 0 - 0, fighting out of Los Angeles, Claymore Longshanks!
The judges for this bout are Daniel Bishop, Donald Grub and Chris Edwards.

The bell rings for round one and we are underway!
Swagger wants to clinch up but Longshanks keeps it at a distance.
Swagger wants to clinch up but Longshanks keeps it at a distance.
Longshanks misses with the combination.
Longshanks lands with a hook. Swagger tried to avoid it but it clipped the top of his head.
Swagger lands a head shot.
Longshanks throws a leg kick but Swagger moved away.

The fight moves into the clinch position.
Swagger wants a takedown but no success here.

Swagger tightens his grip and picks Longshanks up, before dumping him to the ground. Longshanks manages to land in guard.
The fans in attendance giving it up for the two fighters, who have really let it all hang out in the last minute or so!
Longshanks wants to control the position but Swagger says "no thanks buddy" and passes to half guard.
Longshanks trying to control but Swagger postures up.
Longshanks avoiding damage under a succession of punches from Swagger.

That's one minute gone in the round.
Longshanks tries to get to full guard but Swagger has control of the leg.
The fighters are battling for position here. Longshanks manages to regain full guard. Nice work.

Swagger stands up from Longshanks's guard - Swagger perhaps looking for a knockout.

Longshanks shoots in and gets a takedown into Swagger's guard.
There's a bit of a scramble here and now Swagger is on top in guard.
Swagger won't allow Longshanks to sweep him here.
Longshanks wants to get back to his feet but he's too absorbed in his own little project and Swagger manages to pass to side control.
Longshanks trying to control from the bottom.

That's two minutes gone in the round.
Longshanks is looking to improve his position.
Swagger trying to control from half guard but Longshanks is working away.
The fans in attendance giving it up for the two fighters, who have really let it all hang out in the last minute or so!
Longshanks makes his way to full guard. A much better position for Longshanks.
Swagger looking to pass the guard.
Longshanks keeping moving, preventing Swagger from controlling successfully.

That's three minutes gone in the round.
Longshanks is trying to control the position from the bottom.
Swagger seems content to control from guard here. He's going to have to remain active though if he doesn't want to get stood back up.

Hardy Swagger has forced the referee to step in and bring the fight back to the feet.
Longshanks tries to clinch up.
Longshanks shoots in from a long way out. He's driving through with the takedown attempt and he eventually gets it, landing in Swagger's guard.
Longshanks stands up and looks to throw the legs aside to pass to side control. Swagger swivels though and keeps the full guard.
Longshanks throws a big right hand that misses.
The ref warns both fighters not to hold the cage as they work up against the meshing.

That's four minutes gone in the round.
Swagger avoiding any damage from the ground and pound.
Longshanks won't allow Swagger to sweep him here.
Longshanksis looking to pass into half guard but Swagger pushes him away with his feet and jumps on top - now Swagger is in guard.
Swagger trying to control the position from guard on top but Longshanks is wriggling around, looking for whatever he can.
Longshanks is looking to stand up but Swagger isn't so interested in that idea.
Swagger trying to control but Longshanks is working from the bottom.
As the round comes to an end the crowd are showing their appreciation for a great round of action.
Swagger won't allow Longshanks to sweep him here.
Longshanks keeping moving, preventing Swagger from controlling successfully.
And that�s the end of the round � the fighters go back to their corners.
A close round but Claymore Longshanks will probably get the nod.
The referee calls time. The cornermen exit stage left and we're back to business.

Longshanks shoots in looking for a single leg takedown. Swagger is trying to defend but Longshanks finishes it well and ends up in half guard. Let's see if he can advance position further.

Longshanks is trying to work for a kimura but Swagger is defending well.
Longshanks sitting in half guard, looking to land shots. Swagger defending well though.
Longshanks trying to control the action but Swagger is working from the bottom.
Longshanks is looking to stall here but Swagger recovers full guard.

Swagger looking for submissions off his back, moving his hips, looking for an opening.
That's one minute gone in the round.
Longshanks wanted to stand there but Swagger had control of the position.
Swagger looking to hit a scissor sweep but Longshanks is one step ahead there.
Swagger striking off his back but it's not causing Longshanks any problems.
Swagger is controlling Longshanks's posture.
Swagger is throwing his legs up, looking for submissions. Longshanks is aware though and is defending well.
That's two minutes gone in the round.
Longshanks trying to control but Swagger is working from the bottom.
The fighters are pressed up against the cage, both looking to find a bit of space to work.
Longshanks pressing down on his opponent's thigh, looking to pass guard. Swagger is keeping the position for now.
Longshanks wants to control from the top but Swagger keeps moving.

OK we're going to have a standup here. Claymore Longshanks hasn't been effective enough on the ground and the referee wants a restart.

Swagger takes the fight into the clinch.
Longshanks manages to pull guard. Let's see whether he can land a sub off his back.
That's three minutes gone in the round.
Longshanks is trying to control the position but Swagger postures up.
Longshanks working a defensive guard but Swagger passes into half guard.
Longshanks wants to control but Swagger is keeping busy and won't allow it.
Swagger wants to get back to his feet.
Swagger throwing punches and elbows but they're not doing any damage.
Longshanks is looking to control Swagger's leg but it's slowly edging free. Can Longshanks avoid being mounted?
Swagger wants to pass to mount but Longshanks is defending the position.
That's four minutes gone in the round.
Longshanks trying to control from the bottom.
Claymore Longshanks has forced the referee to step in and restart the fight on the feet.
Swagger fails with an attempt to clinch.
Swagger fakes a head punch and goes low to the body. Nicely done.
Longshanks is trying hard to land a takedown here. Swagger sprawls well and keeps this one on the feet.
Longshanks misses with a body kick.
Longshanks slips under a jab.
Swagger gets a double leg takedown into Longshanks's guard.
Longshanks is breathing heavily.
The crowd cheering loudly, showing their appreciation for the quality fight we're seeing here.
Swagger controlling from the top position.
The crowd applaud the fighters efforts here as the round comes to an end.
Longshanks looking to control.
And that�s the end of the round � the fighters go back to their corners.
A close second round but Claymore Longshanks will probably get the nod - 10:9.
The corners get their ten second warning. Both fighters stand from their stools and stare eachother down, ready to get back to the action. Let's get this one finished - here comes the final round!

Swagger shoots in looking for a takedown. Longshanks tries to sprawl out of it but Swagger keeps driving through. The fighters are pinned against the cage. Longshanks manages to get underhooks and after a bit of a struggle, circles away and we're back to standing.
Longshanks dives in and grabs Swagger's left leg, looking for a takedown. Swagger pushes down on Longshanks's head and hops out.
Swagger rushes Longshanks and pushes him back against the cage in a clinch.
Longshanks is trying to pull guard but Swagger has him pressed against the cage.

Longshanks pushes off and circles away, back to the middle of the mat.
Longshanks looks for a takedown here. Will he get it? Swagger is fending him off so far but Longshanks persists. Nope, Swagger circles away and we're back to standing.
Hardy Swagger has stuffed three takedown attempts in the round now. That's going to take a lot out of Claymore Longshanks.
Swagger closes the distance and clinches.
Swagger tries to score a body lock takedown but Longshanks shows good agility there to stay on his feet.
Both fighters working to control the clinch.
Swagger could do with losing a few pounds - he looks very soft around the mid section, to put it politely.
Swagger is pressed up against the cage. Longshanks has hold of a leg and is looking to drag Swagger down to the mat. Swagger avoids the attempt though and has circled away. We're back to striking at a distance.
Longshanks shoots in but no luck this time.
Longshanks takes a big intake of breath there - he's definitely tired.
That's one minute gone in the round.
Longshanks looks to score with a jab to the body but Swagger is just out of range.
Swagger tries to close the distance and clinch but Longshanks swats him to one side with an open hand palm strike and circles away.
Swagger tries to close the distance and clinch up against the cage but Longshanks paws at him with a jab and circles away.
Longshanks takes a body kick right on the floating rib. Ouchie.
Longshanks shoots in for a takedown. He's persisting with it as Swagger sprawls well. Swagger wins this battle and keeps the fight standing. Longshanks gets slowly back to his feet.
Swagger bobs and weaves into range and then changes levels and scores with a nice takedown into side control.
Swagger decides to stand back up. Swagger steps back and let's Longshanks get back to his feet.
Longshanks tries for a takedown but Swagger sees it coming a mile off and avoids it easily.
Longshanks shoots in looking for a takedown but Swagger manages to keep the fight standing, pushing Longshanks's face into the canvas for good measure before circling away.
Swagger gets a takedown into half guard.
Hardy Swagger has stepped it up - he knows he needs a finish here!
That's two minutes gone in the round.
We've seen a great period of action over the last minute or so - credit to both fighters for going all out!
Swagger uses his free foot to push down on Longshanks's thigh. Eventually he works his other foot free and he's advanced to mount - this is trouble for Longshanks.
Longshanks avoids a series of strikes thrown by Swagger.
Longshanks is in a horrible position here, under a barrage of strikes, he's managing to avoid any damage.
Longshanks blocking the ground and pound.
Longshanks avoids a series of strikes thrown by Swagger.
Swagger looking to secure an arm triangle but Longshanks defends it well.
Longshanks wants to hold on but Swagger pushes him away.
That's three minutes gone in the round.
Swagger looking to control but Longshanks is working nicely, looking to advance position himself.
Longshanks wriggling around on the bottom manages to avoid the strikes thrown by Swagger.
Swagger looking to control and managing it successfully.
Swagger looking to control but Longshanks is working nicely, looking to advance position himself.
Longshanks is desperately trying to get back to half guard.
That's four minutes gone in the round.
Swagger unloads with some shots from mount but Longshanks bucks and avoids them well.
Swagger wants to control the pace but Longshanks is squirming around nicely.
Swagger wants to finish this one by submission but Longshanks is holding onto his waist, trying to prevent any attacks from Swagger.
As the round comes to an end the crowd are showing their appreciation for a great round of action.
Longshanks tries to hold on but Swagger postures up.
And that's the end of the fight!
Hardy Swagger showed his dominance in that final round.
I think Longshanks has won this one but let's see whether the judges agree with me. Over to the ring announcer for the scorecards.
Ladies and gentlemen, after 3 rounds of action, we go to the scorecards for a decision.
Judge Daniel Bishop scores the fight 29:29
Judge Donald Grub scores the fight 29:28
Judge Chris Edwards scores the fight 29:29
The fight is ruled a majority draw!
|
|
|
|
|
|
|
|
|
|
|
|
|
|
|
|
|
|
|
|
|
|
|
| S |
C
A |
G |
S |
C
B |
G |
|
S |
C |
G |
|
energy
A | B |
|
hype
A | B |
|
pop
A | B |
|
mgr
A | B |
|
FIGHT
RATING
56% |
|
|
|
|
|
|

