|
|
PBP Commentary |
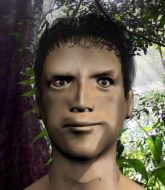
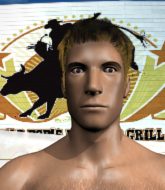
Coming up we have a heavyweight MMA rules bout between Stan Gage (ranked 0 p4p, 0 weight class) and Jaim Grymaunch (ranked 0 p4p, 0 weight class). Grymaunch has chosen Into The Battle - Ensifurm as his entrance music. Jaim Grymaunch has the better chin. Will he look to stand and bang today?
 |
|
 |
| 196 cm
27
233 lbs
7 - 4 - 0 |
|
196 cm
30
270 lbs
10 - 7 - 0 |
BJJ Purple Belt
Basic striking
Experienced |
|
Decent wrestler
Excellent boxer
Granite chin |
|
| |
|
Ladies and gentlemen. This fight is 3 rounds, in the heavyweight division.
Introducing the fighter to my left, fighting out of the red corner.
With a record of
7 - 4 - 0, fighting out of Amsterdam, Stan Gage!
And introducing the fighter to my right, fighting out of the blue corner.
With a record of
10 - 7 - 0, fighting out of Amsterdam, Jaim Grymaunch!
The judges for this bout are Wagner Zegers, Nard Betker and Paul Aken.

The bell rings for round one and we are underway!

Grymaunch pushes Gage up against the cage in a clinch.
Grymaunch with an attempt at a knee that misses.
The pace slowing considerably in the clinch, as Grymaunch takes a break from that fighting nonsense to think about the finer things in life.
Gage is working hard here but doesn't seem to be able to control effectively, up against the cage.
Gage drops to a knee looking for a takedown but Grymaunch gets the underhooks and prevents it.
Gage wants a takedown.

Grymaunch gets control of Gage's arms and successfully pulls guard. Grymaunch will no doubt be looking for submissions off his back.
Grymaunch has a closed guard, preventing anything of note from happening. Perhaps he's looking to stall.

Gage drops back for a leg! It's a sloppy attempt though and Gage jumps back into guard quickly, to retain the dominant position.
Gage drops back, looking for a kneebar! Grymaunch looks panicked! The fighters roll across the mat, one looking to finish, one looking to escape. Grymaunch looks to have wriggled free... Yes, he's got his leg free and he's dived into side control! Good work there from Grymaunch!

That's one minute gone in the round.

Grymaunch thinks about going for a far side armbar but bails out and retains the dominant position instead.
Gage misses with a strike from the bottom.
Grymaunch looking for an arm triangle but it's way too loose to do anything.
Gage manages to get back to half guard.
Grymaunch is looking for a kimura but he's never going to get it from there.
Nice strikes from Grymaunch there.
Gage trying to control here.
The fighters are pressed up against the cage, both looking to find a bit of space to work.

That's two minutes gone in the round.
Grymaunch is trying to get back to his feet now but his leg is trapped.
Grymaunch not landing any meaningful shots this time.
Grymaunch content to sit in half guard and control for a moment.
Gage looking for submissions from an awkward position here.
Gage looking for submissions off his back.
Gage won't allow Grymaunch to pass to mount.
Gage tries to get to full guard but Grymaunch has control of the leg.

That's three minutes gone in the round.
Grymaunch working Gage over with strikes.
Grymaunch looking for a kimura but he'll have to free his other leg if he wants to finish that. Perhaps he's just using it as a distraction technique.
Gage is trying to maintain the position but Grymaunch is very close to passing his half guard.
Grymaunch is sneakily working for an arm triangle but Gage sees it coming and defends easily.
Grymaunch is looking for an arm triangle, whilst trying to pass to side control. Gage doesn't seem that keen to cooperate though. No luck this time Grymaunch.
Gage looking for submissions off his back.

That's four minutes gone in the round.

Grymaunch stands up from half guard.
Grymaunch shoots in with a takedown attempt and he has Gage pinned against the cage. Gage gets the underhooks and manages to circle away.
Grymaunch throws a right hand that Gage ducks under and follows up with a left that Gage also avoids with ease.
Grymaunch looks frustrated there after his takedown attempt is stuffed easily.
The crowd applaud the fighters efforts here as the round comes to an end.
Grymaunch moves into range and clinches up with Gage.
Gage drops down looking for an ankle pick but Grymaunch pulls his leg out and moves away.
That's three failed takedown attempts in the round for Stan Gage. That's going to take a lot out of him.
Gage fails with a takedown attempt from distance.
And thats the end of the round the fighters go back to their corners.
Jaim Grymaunch dominated that round.
That's time! Back to the action!

Gage has his takedown stuffed
and Grymaunch counters by clinching up.
Grymaunch pulls guard.
Grymaunch is pulling down on Gage's head. It's preventing any offense from Gage, at least for the moment.
Gage with a nice head shot there.
Jaim Grymaunch has got the better of the ground game so far.
Gage missing there with some ground and pound from the guard.
Gage is working the ground and pound from guard. He might want to try advancing position though to get more of an impact.
Grymaunch keeping moving, preventing Gage from controlling successfully.
Grymaunch seems keen to control Gage's posture.
Gage is looking to work some ground and pound but Grymaunch has wrist control.
That's one minute gone in the round.
Gage is trying to work a guillotine from the top, or something like that? Don't know how he thinks he's going to get a finish from there.
Gage wants to control from the top but Grymaunch keeps moving.
Gage postures up in Grymaunch's guard and throws a big left but Grymaunch blocks it.
The ref warns both fighters not to hold the cage as they work up against the meshing.
Gage postures up to throw the ground and pound strikes but they don't connect.
Grymaunch is edging up against the cage. He's using the cage to get back to his feet. Nice work there - the fighters are clinched.
That's two minutes gone in the round.

Grymaunch breaks the clinch.
Gage shoots for a double leg takedown but Grymaunch sprawls well. He's pushed Gage's face into the mat and manages to get back to his feet relatively easily.
Gage fails to land the takedown.
That's three failed takedown attempts in the round for Stan Gage. That's going to take a lot out of him.
Gage fails with a takedown attempt.
Gage has his takedown stuffed
and Grymaunch counters with a crisp hook to the side of the head.
Both fighters are absolutely exhausted here.
The crowd are loving this. Great action here.
Grymaunch rushes Gage and pushes him back against the cage in a clinch.
Grymaunch gets underhooks to prevent Gage's takedown attempt.

Gage wants the takedown. Grymaunch is fighting it off but Gage persists and manages to bring the fight to the ground, ending up in Grymaunch's guard against the cage.
Gage throws an elbow that misses. Grymaunch uses the momentum to reverse the position. He's now in Gage's guard. Nice move by Grymaunch!
Grymaunch stands up from Gage's guard - Grymaunch perhaps looking for a knockout.
Grymaunch drives through with a takedown into guard.
That's three minutes gone in the round.
Grymaunch is sitting in guard, working some ground and pound.
Grymaunch scoring with some ground and pound.
Gage is working an open guard here, looking to improve his position. No doubt that will leave him open to counters but at least he's being more offensive.
Grymaunch wants to control from the top but Gage keeps moving.
Gage is active off his back here, looking for submissions.
Grymaunch content to strike from guard, landing some decent shots.
Gage is trying to control the position but Grymaunch postures up.
Grymaunch showing good wrestling skills to control the position.
Grymaunch must be cautious of submissions here, given that his opponent has the superior Jiu Jitsu.
Grymaunch makes a bit of distance and scores with some ground and pound, still in guard.
That's four minutes gone in the round.
Grymaunch postures up and lands some nice ground and pound.
The crowd cheering loudly, showing their appreciation for the quality fight we're seeing here.
Gage working for a triangle but Grymaunch defends it easily.
Grymaunch content to strike from guard, landing some decent shots.
Gage is working actively off his back, looking to secure an arm or perhaps work for a triangle.
Grymaunch lands a couple of digs.
The crowd are going absolutely nuts as the round comes to an end - what a fantastic round of action!
Gage working for a triangle but Grymaunch defends it easily.
Grymaunch lands a couple of decent looking shots.
And thats the end of the round the fighters go back to their corners.
Jaim Grymaunch showed his class in that round. I'd imagine he'll take it on all the scorecards.
Well, the break between rounds is over. Let's get back to the scrappin! This is the final round!

Grymaunch rushes Gage and pushes him back against the cage in a clinch.
Gage tries for a takedown but Grymaunch manages to get underhooks.
Gage has Grymaunch pressed up against the cage and is working for takedown. Grymaunch manages to improve position though and keeps the fight standing.
Grymaunch tries to land a knee to the head but misses.
Grymaunch breaks the clinch and we're back to striking at distance.
Grymaunch gets a clinch.
Grymaunch gets underhooks to prevent Gage's takedown attempt.
That's three failed takedown attempts in the round for Stan Gage. That's going to take a lot out of him.
Gage wants a takedown but no success here.
Gage tries for a takedown but Grymaunch manages to get underhooks.
Grymaunch drags the fight down to the ground.
Grymaunch is adopting a defensive guard.
Both fighters are breathing heavily.
That's one minute gone in the round.
Grymaunch avoiding any damage from the ground and pound.
Gage stands up and looks to throw the legs aside to pass to side control. Grymaunch swivels though and keeps the full guard.
Grymaunch keeping moving, preventing Gage from controlling successfully.
Grymaunch scrambles and gets back to his feet.
Grymaunch scores with a hook.
Gage fails with a takedown attempt.
Grymaunch keeps the fight standing with a nice sprawl.
That's two minutes gone in the round.
BOOM! Grymaunch lands a beautiful left hook that drops Gage. Gage tries to recover but Grymaunch is having none of it, landing more punishing shots from mount. One final crushing shot and Gage lies motionless on the canvas. The fight is over!
Ladies and gentlemen, after 2:11 of round 3, we have a winner by way of TKO (Strikes). Jaim Grymaunch!
Jaim Grymaunch decided to thank the fans in attendance for making a great atmosphere. It seemed to go down pretty well.
|
|
|
|
|
|
|
|
|
|
|
|
|
|
|
|
|
|
|
|
|
|
|
| S |
C
A |
G |
S |
C
B |
G |
|
S |
C |
G |
|
energy
A | B |
|
hype
A | B |
|
pop
A | B |
|
mgr
A | B |
|
FIGHT
RATING
100% |
|
|
|
|
|
|
