|
|
PBP Commentary |
Coming up we have a welterweight MMA rules bout between Danny Haze (ranked 0 p4p, 0 weight class) and Gerald T Inglewood (ranked 0 p4p, 0 weight class). The crowd seem to be enjoying Inglewood's choice of entrance music: Cant Be touched. Over to our ring announcer for the fighter introductions!
 |
|
 |
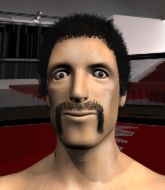
| 178 cm
19
178 lbs
5 - 1 - 0 |
|
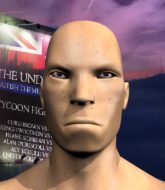
187 cm
23
155 lbs
12 - 10 - 0 |
Good wrestling
Brawler
Self confident |
|
BJJ Blue Belt
Excellent MT
Powerful |
|
| |
|
Ladies and gentlemen. This fight is 3 rounds, in the welterweight division.
Introducing the fighter to my left, fighting out of the red corner.
With a record of
5 - 1 - 0, fighting out of London, Danny Haze!
And introducing the fighter to my right, fighting out of the blue corner.
With a record of
12 - 10 - 0, fighting out of London, Gerald T Inglewood!
The judges for this bout are James Atkins, Colin Fotheringham and Sam Margolis.

The bell rings for round one and we are underway!
Haze tries to shoot in for a takedown. He's got hold of a leg but Inglewood swivels and escapes.
Inglewood fails with an attempt to clinch.

Haze tries to keep at a distance but Inglewood has taken the fight into the clinch.
Haze tries to take the fight to the ground by pulling guard but can't manage it.
Haze tries to score a body lock takedown but Inglewood shows good agility there to stay on his feet.
That's three failed takedown attempts in the round for Danny Haze. That's going to take a lot out of him.
Haze tries to pull guard but Inglewood won't allow it.
Haze tries for a takedown. No joy.
Haze looking for a takedown.
Haze wants to take the fight to the mat but Inglewood manages to get underhooks and keep the fight in the clinch.
Haze is trying to break the clinch but Inglewood has him pressed against the cage.
Haze has Inglewood pushed against the cage.
Inglewood has Haze pressed against the cage.

That's one minute gone in the round.

Inglewood's corner calls for him to break the clinch, which he does.
Haze shoots for a takedown but Inglewood saw that one coming a mile off and avoided it easily.
Inglewood is a painfully thin specimen of a man. You do wonder whether a good body kick would snap him clean in two.
Inglewood is looking to clinch.
Inglewood tries to clinch up.
Haze closes this distance looking for a takedown but Inglewood circles away.
Haze is breathing heavily.
Haze throws a leg kick but Inglewood checks it.
Haze gets his takedown attempt stuffed easily
and Inglewood counters into the clinch. Nicely done.
Inglewood cracks Haze with a nice body shot.
Haze is trying to push Inglewood away but Inglewood has him pressed against the cage, so he's going nowhere.
Haze is looking for a takedown.
Haze is looking for a takedown.
A right handed body shot lands from Inglewood.
Inglewood breaks the clinch.

That's two minutes gone in the round.
Nice sprawl there from Inglewood as Haze shoots in.
Haze keeps the fight on the outside.
Inglewood tries to close the distance and clinch up but Haze swats him away and circles back towards the center.
Inglewood has managed to clinch.
The referee calls for Inglewood to work.
Haze tries for a takedown. No joy.
Inglewood leaning his opponent against the cage.
Wooooo! Give it up for these two warriors! They are putting on a show!
A right hand to the body from Inglewood.
Come on Inglewood - let's have some action - none of this stalling nonsense.
Inglewood pushes Haze back against the cage and unloads with a body punch.

That's three minutes gone in the round.
Haze tries to pull guard but Inglewood won't allow it.
Nice body punch from Inglewood - that landed with a thud.
Inglewood pushes off and circles away, back to the middle of the mat.
Inglewood drives through and clinches with Haze against the cage.
Inglewood's corner calls for him to break the clinch, which he does.
Haze swats away the attempt to clinch by Inglewood.
Inglewood clinches up against the cage.
Inglewood works for underhooks and lands a body shot in the process.
Haze has a body lock and is looking for a takedown. Inglewood is bouncing around trying to prevent the takedown and somehow he has indeed managed to stay on his feet.
Inglewood utilising his Muay Thai to score with a knee to the body.
Haze takes a knee to the side of the body.

That's four minutes gone in the round.
Haze is trying to slow down the pace of the fight but Inglewood is keeping busy.
Inglewood is defending well against a takedown attempt.
Inglewood breaks the clinch.
Inglewood tries to clinch up but Haze circles away and keeps his distance.
Inglewood is looking to clinch.
Haze closes this distance looking for a takedown but Inglewood circles away.
Inglewood tries to clinch up but Haze circles away and keeps his distance.
Inglewood darts in and clinches Haze up against the cage.
This has been an exciting period of action!
Inglewood lands a hook to the body. It's hard to tell if that hurt Haze or not.
As the round comes to an end the crowd are showing their appreciation for a great round of action.
Inglewood avoiding damage.
Inglewood pushes off and circles away, back to the middle of the mat.
And thats the end of the round the fighters go back to their corners.
Gerald T Inglewood dominated that round.
The fighters' corners scream their final instructions, as the referee calls time. Here we go, back to the action!

Inglewood forces Haze back against the cage and clinches.
Haze jumps guard but Inglewood turns him against the cage and keeps the fight standing.
Haze drops down for a takedown but doesn't get it.
Inglewood is pressed up against the cage. Haze has hold of a leg and is looking to drag Inglewood down to the mat. Inglewood avoids the attempt though and has circled away. We're back to striking at a distance.
That's three failed takedown attempts in the round for Danny Haze. That's going to take a lot out of him.
Inglewood darts in and clinches Haze up against the cage.
Haze is working for a takedown up against the cage. He can't get it on this occasion though.
Haze tries for a takedown but Inglewood manages to get underhooks.
Knees in the clinch landing for Inglewood.
Haze tries for a takedown but Inglewood manages to get underhooks.
Both fighters are absolutely exhausted here.
Haze tries to pull guard but can't drag his opponent to the mat. Inglewood just stands there and leans against the cage.
A bit of stalling here from Inglewood.
That's one minute gone in the round.
Haze tries to take the fight to the ground by pulling guard but can't manage it.
Inglewood breaks the clinch and we're back to striking at distance.
Inglewood wants to clinch up but Haze keeps it at a distance.
Haze keeps the fight on the outside.
Inglewood wants to clinch up but Haze keeps it at a distance.
Inglewood clinches with his opponent.
The step up in weight doesn't seem to be a problem for Inglewood. He's performing admirably here against the bigger man.
Haze is looking for a takedown up against the cage. Inglewood gets underhooks though and prevents the takedown attempt.
Inglewood will no doubt start fighting again in a minute but for now he's just having a little rest, leaning Haze up against the cage.
Inglewood unloads a knee to the mid-section. Haze lets out a prehistoric sounding urrrrgh.
That's two minutes gone in the round.
Haze is working for a takedown up against the cage. He can't get it on this occasion though.
Inglewood content to slow the pace in the clinch.
Inglewood stays in close to his opponent and throws a right hand to the body.
Inglewood lands a nice looking hook to the body, against the cage.
Good body shot from Inglewood.
Haze can't get the takedown.
Inglewood is stalling here.
Haze jumps guard but his hands slip and he falls flat on his back. Well, he's made himself look a right mug there, as Inglewood walks away with a smile on his face. Haze gets slowly back to his feet and shakes his head.
Inglewood tries to clinch but Haze moves out of range.
Inglewood clinches.
Wooooo! Give it up for these two warriors! They are putting on a show!
A hook to the body from Inglewood.
That's three minutes gone in the round.
Inglewood pushes Haze back against the cage and unloads with a body punch.
Inglewood breaks from the clinch.
Inglewood moves in looking to clinch but Haze pushes him off.
Inglewood is looking to clinch.
Haze circles away from the clinch attempt.
Haze swats away the attempt to clinch by Inglewood.
Inglewood wants to clinch.
Inglewood closes the distance and clinches.
Haze is trying to pull guard but Inglewood turns him against the cage and we stay in the clinch.
Haze is working on a leg, looking for a takedown but Inglewood is defending well.
Haze is trying to pull guard but Inglewood has him pressed against the cage.
Haze can't get the takedown.
Gerald T Inglewood seems to be working more effectively in the clinch in the fight so far.
That's four minutes gone in the round.
Inglewood lands a knee to the body.
Inglewood cracks Haze with a nice body shot.
Inglewood lands a body punch.
Inglewood works on Haze's body with a couple of short punches.
Nice body punch from Inglewood.
Inglewood crunches a lovely knee into Haze's ribcage.
Inglewood breaks the clinch.
Wow, both these guys are really going for it!
Inglewood is looking to clinch but Haze is avoiding it.
Haze swats away the attempt to clinch by Inglewood.
The fans in attendance giving it up for the two fighters, who have really let it all hang out in the last minute or so!
Inglewood gets in close and instigates a clinch.
As the round comes to an end the crowd are showing their appreciation for a great round of action.
Haze takes a knee to the side of the body.
Inglewood avoids the elbow strike from Haze, against the cage.
And thats the end of the round the fighters go back to their corners.
Gerald T Inglewood showed his class in that round. I'd imagine he'll take it on all the scorecards.
That's time! Haze's corner gives him a slap on the ass as he gets ready to fight. So, we enter the final round. Let's see if either fighter can bring us a finish, or whether we're going to the judges scorecards.

Inglewood is looking to take this fight into the clinch.
Inglewood takes the fight into the clinch.
Inglewood controlling the action here for a moment.
Haze blocks a knee to the body. He'll have a nicely bruised forearm in the morning.
Haze jumps guard but Inglewood stands there with Haze around his waist. Haze gives up and drops back to his feet. We remain in the clinch.
Haze wants a takedown but no success here.
Inglewood displaying some good clinch control by pressing Haze up against the cage.
Haze changes levels and goes for a takedown here. Inglewood fights it off and pushes away nicely.
That's three failed takedown attempts in the round for Danny Haze. That's going to take a lot out of him.
Both fighters are breathing heavily.
That's one minute gone in the round.
Inglewood fails in his attempt to clinch.
Inglewood fakes with an overhand right and moves in to clinch with Haze, pushing him back against the cage.
Haze goes for a takedown in the clinch but Inglewood prevents it.
Inglewood landing some nice looking knees to the body.
Haze wants a takedown but no success here.
Haze jumps guard but his hands slip and he falls flat on his back. Well, he's made himself look a right mug there, as Inglewood walks away with a smile on his face. Haze gets slowly back to his feet and shakes his head.
Inglewood fails in his attempt to clinch.
Inglewood moves into the clinch.
Haze fails to pull guard.
That's two minutes gone in the round.
Inglewood prevents the takedown attempt.
Inglewood utilising his Muay Thai to score with a knee to the body.
Inglewood putting his Muay Thai to good use. He has Haze in a tight clinch and is doing some damage with knees to the body.
Nice body punch from Inglewood.
Inglewood digs a right hand underneath Haze's ribcage. Haze let out a lung full of air as it connected.
Inglewood is trying to wear down his opponent with knees to the body.
Inglewood lands a body punch.
Inglewood lands a nice knee to the body.
We've seen a great period of action over the last minute or so - credit to both fighters for going all out!
Inglewood lands a shot to the body.
Inglewood's corner calls for him to break the clinch, which he does.
That's three minutes gone in the round.
Inglewood tries to clinch up against the cage, rushing in the close the distance. Haze manages to break the clinch and circles back to the middle of the mat.
Inglewood tries to clinch there but Haze circles away.
Inglewood defends well against a solid takedown attempt from Haze.
Inglewood tries to close the distance and clinch up against the cage but Haze paws at him with a jab and circles away.
The fight stays on the outside here - Inglewood looks like he's thinking about clinching though.
Inglewood tries to clinch up but Haze circles away and keeps his distance.
Inglewood pushes Haze up against the cage in a clinch.
Haze is working for a takedown up against the cage. He can't get it on this occasion though.
Inglewood breaks the clinch and we return to the middle of the mat.
Inglewood clinches up against the cage.
Inglewood breaks from the clinch.
Haze circles away from the clinch attempt.
Inglewood closes the distance and clinches.
Inglewood breaks from the clinch.
Inglewood clinches up against the cage.
Haze drops down for a takedown but doesn't get it.
That's four minutes gone in the round.
Inglewood works on Haze's body with a couple of short punches.
Inglewood will no doubt start fighting again in a minute but for now he's just having a little rest, leaning Haze up against the cage.
The fans in attendance giving it up for the two fighters, who have really let it all hang out in the last minute or so!
Inglewood lands a good knee to the midsection. Haze won't want to take too many of those.
Inglewood has been the more effective fighter overall so far.
Inglewood manages to get underhooks and slows down the pace for a moment.
As the round comes to an end the crowd are showing their appreciation for a great round of action.
Haze is looking for a takedown up against the cage. Inglewood gets underhooks though and prevents the takedown attempt.
And that's the end of the fight!
Gerald T Inglewood comfortably won the final round on my scorecard.
Well Inglewood has outworked and out performed his opponent in all aspects of the game today. He was simply too good and the decision should be no more than a formality. Over to the ring announcer for the scorecards.
Ladies and gentlemen, after 3 rounds of action, we go to the scorecards for a decision.
Judge James Atkins scores the fight 27:30
Judge Colin Fotheringham scores the fight 27:30
Judge Sam Margolis scores the fight 27:30
In favor of your winner, by unanimous decision... Gerald T Inglewood!
|
|
|
|
|
|
|
|
|
|
|
|
|
|
|
|
|
|
|
|
|
|
|
| S |
C
A |
G |
S |
C
B |
G |
|
S |
C |
G |
|
energy
A | B |
|
hype
A | B |
|
pop
A | B |
|
mgr
A | B |
|
FIGHT
RATING
55% |
|
|
|
|
|
|
