|
|
PBP Commentary |
Coming up we have a lightweight MMA rules bout between Matias Alderson (ranked 0 p4p, 0 weight class) and Danny Mera (ranked 0 p4p, 0 weight class). Alderson kept the crowd waiting but all that was forgotten when his ring entrance music started. The incomparable musical genius that is Dark moon High tide. Mera is bouncing up and down as he enters the arena, backed by The Automatic - Monster. Matias Alderson could well score a knockout today. He has the power to get to Danny Mera's chin.
 |
|
 |
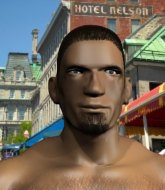
| 170 cm
27
168 lbs
12 - 6 - 0 |
|
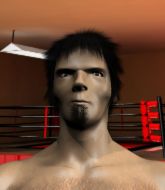
170 cm
26
160 lbs
11 - 10 - 0 |
Powerful takedowns
Brawler
Very strong |
|
Decent wrestler
Decent boxing
Powerful |
|
| |
|
Ladies and gentlemen. This fight is 3 rounds, in the lightweight division.
Introducing the fighter to my left, fighting out of the red corner.
With a record of
12 - 6 - 0, fighting out of St Petersburg, Matias Alderson!
And introducing the fighter to my right, fighting out of the blue corner.
With a record of
11 - 10 - 0, fighting out of St Petersburg, Danny Mera!
The judges for this bout are Aleksandr Martynov, Dmitry Maklakov and Valeri Chadov.

The bell rings for round one and we are underway!

Mera clinches up with Alderson and pushes him back against the cage.
Mera lands a hook to the side of the head.
Alderson will no doubt start fighting again in a minute but for now he's just having a little rest, leaning Mera up against the cage.
Alderson lands a nice knee to the body.
Mera lands with a right to the head.
Alderson stalling against the cage.
Mera softening up his opponent with strikes, against the cage.
Alderson trying to stall but Mera improves his position.

Alderson escapes the clinch and we're back to striking.
Mera lands a nice shot to the body.
Mera throws a big shot that misses.
Alderson shoots in but no luck this time.
Fantastic stuff here - a very entertaining period of action, which has drawn cheers from the crowd.
Mera getting the better of the striking in that exchange.

Alderson shoots in and gets a takedown into half guard. Alderson showed some decent athleticism there.

That's one minute gone in the round.
Alderson throwing punches and elbows but they're not doing any damage.
Mera is refusing to be controlled, as Alderson sits in half guard.
Mera wants to get back to his feet.
The ref warns both fighters not to hold the cage as they work up against the meshing.
Mera is trying to maintain the position but Alderson is very close to passing his half guard.

Mera looking for submissions off his back.
Mera is trying to get back to full guard.
Alderson tries to pass to full mount but Mera defends it.
Alderson stops Mera from getting back to his feet.

That's two minutes gone in the round.
Alderson sitting in half guard, looking to land shots. Mera defending well though.
Mera is looking to regain full guard. Not this time though.
Alderson lands with a punch from half guard.
Mera wants to improve his position but Alderson is controlling well.
Alderson trying to control the action but Mera is working from the bottom.
Mera is looking to get back to is feet but Alderson passes into side control.
We get told so often about how wrestlers don't like to be on their backs. Let's see if Mera can do anything to dispel that myth.
Mera is trying to get back to half guard.

Alderson working hard here to secure a kimura but he's not really in the right position for it.

That's three minutes gone in the round.
Mera is working hard to escape and get back to his feet. After a battle for position, Alderson asserts his dominance and retains side control.
Alderson trying to control the action but Mera is working from the bottom.
Mera tries to get back to half guard but can't.
Mera is persisting with the attempt to improve his position.

That's four minutes gone in the round.
Alderson is trying to land an Americana. He has the arm isolated but Mera is keeping cool and he's avoided the danger for now.
Mera wants to escape from the position here - easier said than done!

Alderson decides to stand up, so the ref orders Mera to his feet.
Mera tries to sprawl but Alderson drives through with a takedown into half guard.
Mera is trying to escape back to his feet but Alderson uses the scramble to pass into side control.
Alderson is looking to take a break and control but Mera is keeping him honest, looking to work from the bottom.
This has been an exciting period of action!
As the round comes to an end the crowd are showing their appreciation for a great round of action.
Alderson tries for an arm triangle. That looks pretty tight to me. Is this one over!?! Possibly, maybe, no Alderson has let go of the choke. Obviously it wasn't as tight as we thought!
And that�s the end of the round � the fighters go back to their corners.
Matias Alderson dominated that round.
That's time! Alderson's corner gives him a slap on the ass as he gets ready to fight.

Alderson swats away the attempt to clinch by Mera.
Alderson avoids the body shot from Mera.
Mera gets caught on his heels momentarily as he allows Alderson to score an easy takedown into full guard.
Alderson trying to control the position from guard on top but Mera is wriggling around, looking for whatever he can.
Mera seems keen to control Alderson's posture.
Mera trying to control the position.
That's one minute gone in the round.
If this pace continues, the referee will definitely step in and force a standup.
Alderson stopping the sweep attempt from Mera.
Matias Alderson overall seems to be getting the better of the ground position in the fight so far.

It looks like we're going to have a standup here. Neither fighter is doing enough on the ground.

Excellent takedown into side control there by Mera.
Alderson on the wrong end of some ground and pound.
Mera is chipping away with strikes.
Alderson is looking to get back to his feet here but Mera is keeping cool and he's managed to take Alderson's back.
Mera tries to get the hooks in deep but Alderson pushed the leg off.
Mera is trying to stick to Alderson's back but Alderson is turning into Mera. He's managed to reverse the position - now he's in Mera's guard. Polite applause from the crowd in appreciation of some nice Jiu Jitsu by Alderson.
Alderson wants to control from the top but Mera keeps moving.

Mera manages to escape and get back to his feet.
That's two minutes gone in the round.
Mera tries to clinch but Alderson moves out of range.
Wooooo! Give it up for these two warriors! They are putting on a show!
Alderson ducks under a wild hook from Mera.
Alderson misses with a takedown attempt. He shot from a bit too far out.
Alderson takes a punch right to his stomach. That took the wind out of him momentarily.
Mera tries to close the distance and clinch up but Alderson swats him away and circles back towards the center.
Mera fails with an attempt to clinch.
Danny Mera seems to be the more aggressive standup fighter in this bout.
Alderson uses some good footwork to avoid the body shot by Mera.
Matias Alderson is looking to throw some combinations by the looks of things.
Mera looks to score with a jab to the body but Alderson is just out of range.
A slow jab from Mera misses its intended target.
Alderson lands a beauty of a right hand that gets the crowd cheering.
Mera misses with a body shot. Nice footwork from Alderson.
Alderson swinging wildly here.
Alderson shoots in for a takedown. "I don't think so" says Mera as he avoids it easily.
Both fighters are absolutely exhausted here.
Mera tries to clinch up but Alderson circles away and keeps his distance.
That's three minutes gone in the round.
Alderson slips a straight right by Mera.
Alderson closes the distance and clinches up with Mera, looking for a takedown. Alderson pushes Mera against the cage but Mera circles to the side and manages to break the clinch.
That's three failed takedown attempts in the round for Matias Alderson. That's going to take a lot out of him.
Alderson shoots in but no luck this time.
Mera scores with a straight right hand, right through his opponent's guard.
Alderson looks to land a combination but Mera avoids it well.
Alderson misses with a takedown attempt - Mera sprawls well and throws a nice strike on the way out which just misses.
Mera lands a jab to Alderson's midsection.
Mera fakes a jab and then connects with a hook.
Alderson walks straight into an uppercut. Luckily it didn't land flush.
Mera gets a clinch.
A body shot lands from Mera.
This has been an exciting period of action!
An uppercut to the body lands inside from Mera.
Alderson's head jolts backwards as he takes an uppercut right on the button!
Mera lands a right hand.
That's four minutes gone in the round.
Mera tries to land a shot to the body but it's blocked.
Mera misses with a knee to the head.
Alderson can't break the clinch.
Mera working some nice short punches in the clinch.
Mera tries to land a knee to the body but he is off balance and Alderson avoids it.
Alderson tries to break the clinch but Mera is controlling the position.
Alderson blocks an elbow strike.
Mera lands with a light punch inside.
Mera lands a short shot on the inside that snaps the head of Alderson backwards.
Alderson using the Thai plumb to throw knees but Mera has his back arched nicely, preventing the strike.
Mera swings away with an uppercut that misses.
As the round comes to an end the crowd are showing their appreciation for a great round of action.
Mera misses with the head strike.
Alderson blocking some punches.
Mera tries to land a shot to the body but it's blocked.
And that�s the end of the round � the fighters go back to their corners.
Danny Mera showed his class in that round. I'd imagine he'll take it on all the scorecards.
The corners get their ten second warning. Both fighters stand from their stools and stare eachother down, ready to get back to the action. The crowd applaud as we get ready to start the final round!

Mera just misses with a punch to the body.
Alderson takes a shot right to the liver - Bas would have been proud of that punch.
Alderson is trying hard to land a takedown here. Mera sprawls well and keeps this one on the feet.
Mera throws a hook but Alderson avoids it easily.
Mera scores with a punch to the head.
Alderson takes a shot to the body in his stride.
Danny Mera seems to be getting the better of the standup.
Alderson lands a jab. Then a cross. Then finally a nice hook to the body. Good work there by Alderson.
Alderson walks into a straight right hand from Mera.
Mera scores with a decent looking hook.

Alderson is rocked!
Mera tries to close the distance and clinch up against the cage but Alderson paws at him with a jab and circles away.
Oh Alderson is still all over the place! His legs are completely gone! Will he be able to recover?!!
This is a great period of action - very entertaining stuff!
Mera lands with a nice body punch.
A big right from Mera misses.
Mera wants to clinch.
Both fighters are breathing heavily.
Alderson shoots in for a takedown. "I don't think so" says Mera as he avoids it easily.
Alderson seems to have got his legs back now.
That's one minute gone in the round.
Mera misses with a straight left.
Alderson fails with a takedown attempt.
That's three failed takedown attempts in the round for Matias Alderson. That's going to take a lot out of him.
Mera pushes forward with a 1-2 combination that forces Alderson back to the cage. Mera follows up with a solid lead hook to the liver.
Mera connects with a solid leg kick.
Mera circles and sees the opportunity to plant his feet and throw a really nice straight left hand that drops Alderson to the canvas! Alderson doesn't know where he is but he's trying to survive - Mera keeps piling on the pressure and forces the referee to step in! This one is aaaaaall over!
Ladies and gentlemen, after 1:29 of round 3, we have a winner by way of TKO (Strikes). Danny Mera!
Danny Mera made sure to mention his sponsor, PEGASUS FIGHT WEAR ( $ 7 and Laundering 90% ) in his post fight interview.
|
|
|
|
|
|
|
|
|
|
|
|
|
|
|
|
|
|
|
|
|
|
|
| S |
C
A |
G |
S |
C
B |
G |
|
S |
C |
G |
|
energy
A | B |
|
hype
A | B |
|
pop
A | B |
|
mgr
A | B |
|
FIGHT
RATING
100% |
|
|
|
|
|
|
