|
|
PBP Commentary |
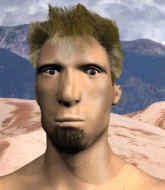
Coming up we have a light heavyweight MMA rules bout between Jason Hardwick (ranked 0 p4p, 0 weight class) and John Beasly (ranked 0 p4p, 0 weight class). Chooooooooon! I think Hardwick might be my favorite fighter, now he's come out to Elephant Man - Pon Di River. Both fighters look fresh as a daisy as they make their way towards the cage.
 |
|
 |
| 193 cm
25
220 lbs
14 - 8 - 0 |
|
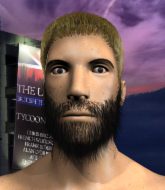
183 cm
25
200 lbs
1 - 0 - 0 |
Good wrestling
Solid boxing
Very quick |
|
BJJ Purple Belt
Decent boxing
Determined |
|
| |
|
Ladies and gentlemen. This fight is 3 rounds, in the light heavyweight division.
Introducing the fighter to my left, fighting out of the red corner.
With a record of
14 - 8 - 0, fighting out of London, Jason Hardwick!
And introducing the fighter to my right, fighting out of the blue corner.
With a record of
1 - 0 - 0, fighting out of London, John Beasly!
The judges for this bout are Steven Brown, Richard Clark and Andrew Berry.

The bell rings for round one and we are underway!
Beasly has his hands up protecting his head but a hook from Hardwick finds it's way round the side to connect with Beasly's head.
A punch combination from Beasly misses.
Hardwick takes a swing at Beasly's ribcage but misses.
Hardwick misses with a hook to the body
and Beasly counters with a series of strikes. Hardwick will be more careful next time no doubt.
Beasly swinging wildly here.

Hardwick drops down and drives through with a powerful takedown into guard.
Beasly is trying to keep Hardwick in close.
A big thud reverberates around the arena there as Hardwick accidentally thumps the mat. Hopefully he's not broken his hand.
The ref warns both fighters not to hold the cage as they work up against the meshing.

That's one minute gone in the round.
Hardwick wants to pass the guard but Beasly is keeping the position.
Hardwick is frustrating his opponent with some stalling tactics from top position.

The ref stands the fighters back up because Jason Hardwick just wasn't active enough.
Beasly throws a combination but it was largely blocked by Hardwick.
A cross from Hardwick lands.

It looks like John Beasly has been cut.
Beasly looks to score with a combo but nothing lands.
Hardwick keeps his opponent at a distance with a nice jab.

That's two minutes gone in the round.
Beasly feints a jab promting Hardwick to slip. Beasly then demonstrates his capabilities by jabbing again. Hardwick slips again and ducks right into an uppercut.
Beasly swings away but doesn't land with a series of punches.

Hardwick clinches.
A quick uppercut on the inside from Hardwick.
Beasly takes a shot to the head.
Beasly changes levels and goes for a takedown here. Hardwick fights it off and pushes away nicely.
Fantastic stuff here - a very entertaining period of action, which has drawn cheers from the crowd.
Beasly takes a jab on the nose there. A little bit of blood seems to be coming out. Hopefully that won't affect his breathing.
Beasly misses with the combination.

That's three minutes gone in the round.
Hardwick throws an overhand right that lands on Beasly's shoulder, as Beasly tries to avoid the shot.
Hardwick slips in close and lands a nice hook before moving back out of range.
Hardwick misses with a looping left.
Hardwick is looking for a takedown here. He's shot in and has managed to get it, finishing up in Beasly's half guard.
Hardwick takes advantage of the dominant position to land a couple of big hammer fists.
Still in half guard, Hardwick seems content to control.
Hardwick wants to free his trapped foot but Beasly is holding on for dear life with his legs.

That's four minutes gone in the round.
Hardwick keeping composed on the top, looking to control the action.
Beasly wants to control but Hardwick is keeping busy and won't allow it.
Hardwick with a momentary lay and pray from half guard.
The fans in attendance giving it up for the two fighters, who have really let it all hang out in the last minute or so!
Jason Hardwick has forced the referee to step in and bring the fight back to the feet.
Beasly staying out of range there.
As the round comes to an end the crowd are showing their appreciation for a great round of action.
Hardwick darts in and clinches Beasly up against the cage.
Beasly has hold of a leg and is looking for a trip takedown. Hardwick avoids it nicely though and we remain in the clinch.
Hardwick lands a shoulder strike that jolts his opponent's head backwards.
And that�s the end of the round � the fighters go back to their corners.
Jason Hardwick dominated that round.
The cut man is working on John Beasly's cut.
That's time! Hardwick's corner gives him a slap on the ass as he gets ready to fight.

Hardwick comes forward and lands a shot to the body, then darts back out of range.
Sloppy strikes from Beasly. Those never looked like landing.
Hardwick throws a loose over hand right and dives in with a double leg takedown. Beasly tries to sprawl but it's too late and the fighters hit the mat. Hardwick is in Beasly's guard.
Hardwick working some ground and pound from guard but it's not doing any damage.

Hardwick gets to his feet - Beasly follows without any prompting.
Beasly staying out of range there.
Hardwick fakes with an overhand right and moves in to clinch with Beasly, pushing him back against the cage.
Hardwick lands a shoulder strike.
Hardwick works for underhooks and lands a body shot in the process.
Hardwick has Beasly pressed against the cage.
That's one minute gone in the round.
Hardwick gets a warning from the ref for wasting time.
With the fighters clinched against the cage, Hardwick creates a bit of distance for himself and scores with a nice uppercut.
Hardwick lands a nice uppercut.

Hardwick escapes the clinch and we're back to striking.
Hardwick rushes Beasly and presses him up against the cage.
Hardwick working on landing some head shots here - that one got through nicely.
That's two minutes gone in the round.
Hardwick lands a nice looking hook to the body, against the cage.
Hardwick can't find room to land a body shot as Beasly controls the action.
Hardwick pushes off and circles away, back to the middle of the mat.
Hardwick misses with a hook
and Beasly counters with a three punch combo that has Hardwick backing up. Hardwick nods at Beasly to acknowledge the strikes.
Hardwick looks to throw the jab but Beasly is out of range.
John Beasly is looking to keep the fight on the feet at all costs.
Hardwick bobbing and weaving, closes the distance and lands a hook to the side of Beasly's head.
Jason Hardwick is winning the standup battle so far.
Beasly on the wrong end of a nice jab.
We've seen a great period of action over the last minute or so - credit to both fighters for going all out!
Hardwick throws a jab when Beasly was well out of range.
John Beasly is looking to throw some combinations by the looks of things.
Hardwick misses with a wild body shot.
Jason Hardwick seems to be the more aggressive standup fighter in this bout.
Hardwick shoots in with a lovely double leg takedown. Beasly manages to land in full guard to minimise the damage.
That's three minutes gone in the round.
Hardwick postures up.
Hardwick not doing a lot at the moment. He'll have to show some more aggression or the fight will get stood up.
Hardwick throwing strikes from guard but Beasly blocks nicely.
Hardwick slows down the pace of the fight for a moment. He'll need to remain active if he doesn't want to see the fight stood back up.
That's four minutes gone in the round.
We're going to have a standup here because Jason Hardwick wasn't active enough for the referee's liking.
Hardwick misses with a hook. Beasly ducked under it nicely.
A shot to the liver by Hardwick. Beautiful body shot.
Hardwick moves into the clinch successfully.
A left hand lands to the body for Hardwick.
Hardwick throws a hook to the body. More of an arm punch but it's all scoring with the judges.
Beasly is breathing heavily.
Beasly drops down looking for an ankle pick but Hardwick pulls his leg out and moves away.
The crowd cheering loudly, showing their appreciation for the quality fight we're seeing here.
A looping hook to the body misses from Hardwick. Beasly does a little dance to reset his feet.
As the round comes to an end the crowd are showing their appreciation for a great round of action.
Hardwick takes a step towards his opponent and connects with a left hand, before circling away.
And that�s the end of the round � the fighters go back to their corners.
Jason Hardwick dominated that second round.
The cut man is working on John Beasly's cut.
That's the end of the round. The referee orders the cornermen out of the cage so we can get back down to business. This is the final round!

Beasly misses with a double jab
and Hardwick counters by moving into the clinch. Good anticipation by Hardwick.
Hardwick breaks from the clinch.
Hardwick misses with a looping right.
Beasly ducks under a wild hook from Hardwick.
Hardwick rushes Beasly and presses him up against the cage.
Hardwick displaying some good clinch control by pressing Beasly up against the cage.
Beasly is looking for a takedown up against the cage. Hardwick gets underhooks though and prevents the takedown attempt.
Beasly is trying to work for a single leg takedown but Hardwick pulls him back up using the underhooks.
That's one minute gone in the round.
Hardwick tries to throw a body punch but Beasly avoids it by throwing Hardwick back against the cage.
Hardwick working on landing some head shots here - that one got through nicely.
Hardwick lands a body punch.
Beasly is looking for a takedown up against the cage. Hardwick gets underhooks though and prevents the takedown attempt.
Jason Hardwick has stuffed three takedown attempts in the round now. That's going to take a lot out of John Beasly.
Beasly takes a big intake of breath there - he's definitely tired.
Hardwick gets a trip takedown into half guard.
Hardwick stalling.
Hardwick trying to mount his opponent but Beasly defends it.
Jason Hardwick overall seems to be getting the better of the ground position in the fight so far.
That's two minutes gone in the round.
Hardwick not throwing his punches with enough precision this time.
Beasly taking some punishment here, with Hardwick in his half guard.

Hardwick wants to work for an arm triangle but Beasly is really keeping half guard well and defending the submission attempt.
Fantastic stuff here - a very entertaining period of action, which has drawn cheers from the crowd.
Hardwick is looking to pass the guard... He's managed it - he's now in full mount!
Hardwick raining down hammerfists from mount.
That's three minutes gone in the round.
Hardwick lands a big elbow.
Hardwick takes a little breather and maintains the position. The referee will be looking for him to stay active from such a dominant position though.
Hardwick working for a guillotine from mount but Beasly is in no mood to give up.
Hardwick sitting in mount, just looking to control for the moment.
That's four minutes gone in the round.
A nice elbow there by Hardwick.
Hardwick lands an elbow that was bordering on illegal but the referee lets it go with a warning.
That has opened up John Beasly's cut even more.
Fantastic stuff here - a very entertaining period of action, which has drawn cheers from the crowd.
Hardwick lands an elbow that was bordering on illegal but the referee lets it go with a warning.

Beasly is rocked!
The cut above John Beasly's eye is starting to cause him problems now.
The referee calls the doctor in to look at John Beasly's cut. Oh no, the doctor has called an end to the bout!
Ladies and gentlemen, after 4:58 of round 3, we have a winner by way of TKO (Cut). Jason Hardwick!
Our winner, Jason Hardwick, made sure he spent some time buttering up the crowd during his post fight interview, which will no doubt bring him a few more fans.
|
|
|
|
|
|
|
|
|
|
|
|
|
|
|
|
|
|
|
|
|
|
|
| S |
C
A |
G |
S |
C
B |
G |
|
S |
C |
G |
|
energy
A | B |
|
hype
A | B |
|
pop
A | B |
|
mgr
A | B |
|
FIGHT
RATING
44% |
|
|
|
|
|
|
