|
|
PBP Commentary |
Coming up we have a light heavyweight MMA rules bout between Markus Sizemore (ranked 0 p4p, 0 weight class) and Nick Horton (ranked 0 p4p, 0 weight class). Horton has chosen Ironman as his entrance music. Well, I have no idea who's going to take this one!
 |
|
 |
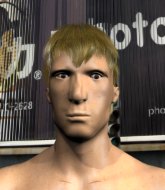
| 175 cm
18
200 lbs
5 - 4 - 0 |
|
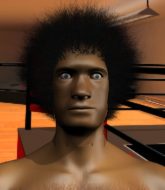
177 cm
18
210 lbs
3 - 5 - 0 |
Good wrestling
Brawler
Experienced |
|
BJJ Blue Belt
Brawler
Granite chin |
|
| |
|
Ladies and gentlemen. This fight is 3 rounds, in the light heavyweight division.
Introducing the fighter to my left, fighting out of the red corner.
With a record of
5 - 4 - 0, fighting out of Sydney, Markus Sizemore!
And introducing the fighter to my right, fighting out of the blue corner.
With a record of
3 - 5 - 0, fighting out of Sydney, Nick Horton!
The judges for this bout are Hugh Johnson, Bruno Hogan and Donatello Bradman.

The bell rings for round one and we are underway!
Sizemore avoids the head kick by Horton.
Horton avoids the head kick by Sizemore.
Sizemore fails with an attempt to clinch.

Sizemore looking to score a takedown here. Horton is defending well but Sizemore drives through and ends up in Horton's guard.
Sizemore passes into half guard.
Horton is pressing down on Sizemore's left leg trying to get back to full guard. He's managed it.
Horton is trying to control the position from the bottom.

Sizemore decides to stand up and beckons his opponent to follow.
Sizemore displays good takedown defense there as he swats away a double leg from Horton.
Horton shoots in for a takedown but Sizemore shows good takedown defense.

That's one minute gone in the round.
Horton looks for a takedown here. Will he get it? Sizemore is fending him off so far but Horton persists. Nope, Sizemore circles away and we're back to standing.
Markus Sizemore has stuffed three takedown attempts in the round now. That's going to take a lot out of Nick Horton.
Sizemore misses with a body kick.
Sizemore tries to clinch up.
Sizemore avoids the clinch attempt nicely.
Sizemore throws a sloppy head kick and Horton moves out of range easily.
Horton tries for a takedown but Sizemore circles away easily
and Sizemore counters with a low kick, right behind Horton 's knee.
Horton tries to clinch up but Sizemore circles away and keeps his distance.
Horton tries to shoot in for a takedown. He's got hold of a leg but Sizemore swivels and escapes.
Horton looks gassed!
Horton fakes with the hands and throws a leg kick but Sizemore is out of range.
Sizemore throws a wild body kick that Horton sees coming a mile off.
Horton looks frustrated there after his takedown attempt is stuffed easily.

That's two minutes gone in the round.
A telegraphed takedown attempt from Horton is defended easily by Sizemore.

Sizemore gets a clinch.
Sizemore tries to throw a body punch but Horton avoids it by throwing Sizemore back against the cage.

Horton breaks the clinch.
Sizemore throws a series of punches but Horton moves out of range.
Sizemore throws the overhand right but ducks down into a quick takedown attempt. Horton was covering up waiting for the punch and Sizemore finishes the takedown easily into guard.
Wooooo! Give it up for these two warriors! They are putting on a show!
Sizemore decides he's had enough of playing guard and decides to stand. Come on Horton, up you get!

That's three minutes gone in the round.
Horton fails to land the takedown.
Sizemore throws a nice looking combination but Horton bobs and weaves to avoid any damage.
Sizemore is looking to clinch but Horton is avoiding it.
Sizemore drives through with a takedown into guard.
Horton wants to hit a switch here but Sizemore passes into full mount! Oh no, disaster for Horton there!
Sizemore tucks in and makes sure he doesn't lose the dominant position.

That's four minutes gone in the round.
Sizemore lands a couple of nice shots there from mount.
Horton tries to get back to half guard but can't.
Sizemore looking to control and managing it successfully.
Wooooo! Give it up for these two warriors! They are putting on a show!
As the round comes to an end the crowd are showing their appreciation for a great round of action.
Sizemore trying to control but he's not successful this time.
And that�s the end of the round � the fighters go back to their corners.
Markus Sizemore dominated that round.
The referee calls time. The cornermen exit stage left and we're back to business.

Horton closes the distance and clinches up with Sizemore, looking for a takedown. Horton pushes Sizemore against the cage but Sizemore circles to the side and manages to break the clinch.
Sizemore keeping at a good range here, avoiding a leg kick.
Sizemore throws a head kick that misses.
Sizemore misses with a takedown attempt - Horton sprawls well and throws a nice strike on the way out which just misses.
Horton tries to land with a swinging hook to the body but Sizemore was well out of range. Poor timing from Horton.
Sizemore could do with losing a few pounds - he looks very soft around the mid section, to put it politely.
Horton tries for a takedown but Sizemore circles away easily
so Sizemore counters with a double leg into guard. Good agility.
Horton is trying to control the position but Sizemore postures up.
The fighters are pressed up against the cage, both looking to find a bit of space to work.
Sizemore trying to pass the guard but can't manage it just yet.
Horton keeping moving, preventing Sizemore from controlling successfully.
That's one minute gone in the round.
Sizemore won't allow Horton to sweep him here.
Sizemore has to be careful here, sitting in the guard of a superior BJJ player.
Horton is breathing heavily.
Sizemore is taking a break and basically stalling. The referee will not allow him to do that for long.

The ref stands the fighters back up because Markus Sizemore just wasn't active enough.
Horrible takedown by Horton or perhaps it was just good defense by Sizemore which made him look bad.
Markus Sizemore has stuffed three takedown attempts in the round now. That's going to take a lot out of Nick Horton.
Sizemore tries to clinch but is not successful on this occasion.
A really sloppy takedown attempt there from Horton.
Horton swats away the attempt to clinch by Sizemore.
Sizemore shoots in and gets a takedown into Horton's guard.
That's two minutes gone in the round.
Sizemore pressing down on his opponent's thigh, looking to pass guard. Horton is keeping the position for now.

Horton had isolated an arm as going for a kimura. Sizemore defends it easily.
Sizemore content to stall in guard here.
Horton not looking particularly offensive just at the moment.
Sizemore not doing a lot at the moment. He'll have to show some more aggression or the fight will get stood up.
That's three minutes gone in the round.
The referee looks like he's ready to step in and stand the fighters back up.
Horton looking to sweep here. No luck so far.
Horton keeping full guard, as Sizemore tries to pass.
We're going to have a standup here because Markus Sizemore wasn't active enough for the referee's liking.

Horton gets a clinch.
Horton has hold of a leg and is looking for a trip takedown. Sizemore avoids it nicely though and we remain in the clinch.
Horton keeps control of Sizemore as he tries to wriggle out of the double underhooks.
Sizemore keeps control of Horton as he tries to wriggle out of the double underhooks.
Horton has dropped down and is looking to force the takedown but it's defended by Sizemore after a bit of a struggle.
Sizemore is trying to force a seperation but Horton has the dominant position.
That's four minutes gone in the round.
Horton wants a takedown.
Sizemore wants to get back to striking at distance but Horton won't allow it.
Sizemore looks like he'd prefer to be striking at range right now.
Horton is looking to take this one to the mat.
Sizemore tries to jump guard but he falls flat on his backside. Horton smiles and moves away.
Sizemore tries to close the distance and clinch up but Horton swats him away and circles back towards the center.
Sizemore fails with an attempt to clinch.
The crowd applaud the fighters efforts here as the round comes to an end.
Horton shoots and misses
and Sizemore counters with a nice double leg into side control. Horton won't be happy with that.
Markus Sizemore overall seems to be getting the better of the ground position in the fight so far.
The fans in attendance giving it up for the two fighters, who have really let it all hang out in the last minute or so!
Sizemore creates a bit of distance and throws down some hard shots.
And that�s the end of the round � the fighters go back to their corners.
Markus Sizemore dominated that second round.
The fighters get back to their feet, the hooter sounds and we're back to the action! Ladies and gentlemen, this is the final round!

Sizemore shoots in for a takedown! He's got it and he's managed to land in full mount! That's better than Sizemore was expecting from the takedown attempt, I'm sure!
Horton is squirming around, avoiding Sizemore's attempts to control the action.
A nice elbow there by Sizemore.
Sizemore wants to control the pace but Horton is squirming around nicely.
Sizemore working Horton over with strikes here.
Horton is writhing around trying to get back to his feet.
Horton takes a big intake of breath there - he's definitely tired.
That's one minute gone in the round.
Sizemore content just to control the position here.
Sizemore is landing with some decent strikes but Horton is trying to advance his position so the referee is letting the fight continue.
Sizemore sitting in mount, just looking to control for the moment.
Horton is trying desperately to improve position.
Sizemore knows he needs to get back to his feet asap. He's simply no match for Horton on the ground.
Sizemore connects with a couple of good shots from mount.
That's two minutes gone in the round.
Sizemore scores with a couple of good head shots there.
Sizemore scoring with strikes but Horton is staying in there.
Horton wants to hold on but Sizemore pushes him away.
Sizemore tucks in and makes sure he doesn't lose the dominant position.
Horton looking to escape from mount but he's given up his back!

Sizemore is working for the rear naked choke. He has one arm under the chin but Horton has hold of the other arm. A bit of a stalemate here.
Sizemore trying desperately to keep hold of the dominant position.
That's three minutes gone in the round.
Good control from Sizemore.
Sizemore is not going to allow Horton to sit and survive in this position.
Sizemore is looking for the choke from the back position but Horton is controlling his hands well.
That's four minutes gone in the round.
The crowd hopeful of a finish here - Sizemore's supporters are on their feet, screaming for him to go for the rear naked choke.
Sizemore looking to break Horton's wrist control so he can sink in the choke. Horton remaining controlled and patient though - he really has to keep calm otherwise Sizemore will wrap this one up with the rear naked choke!
Sizemore doesn't have the hooks in and Horton manages to turn into his guard.
Sizemore looking to control.
Sizemore managing to control the position.
Sizemore looking for a sweep. Not yet Sizemore, not yet.
The crowd applaud the fighters efforts here as the round comes to an end.
And that's the end of the fight!
Markus Sizemore showed his dominance in that final round.
Well Sizemore has outscored his opponent in every aspect of the fight today. Only a scarily incompetent judge or two will keep him from a well deserved win... Over to the ring announcer for the scorecards.
Ladies and gentlemen, after 3 rounds of action, we go to the scorecards for a decision.
Judge Hugh Johnson scores the fight 30:27
Judge Bruno Hogan scores the fight 30:27
Judge Donatello Bradman scores the fight 30:27
In favor of your winner, by unanimous decision... Markus Sizemore!
A loyal slave to those sponsorship dollars, Markus Sizemore made sure he mentioned Nature's Edge Nutrition, along with how happy he was to win his fight.
|
|
|
|
|
|
|
|
|
|
|
|
|
|
|
|
|
|
|
|
|
|
|
| S |
C
A |
G |
S |
C
B |
G |
|
S |
C |
G |
|
energy
A | B |
|
hype
A | B |
|
pop
A | B |
|
mgr
A | B |
|
FIGHT
RATING
47% |
|
|
|
|
|
|
