|
|
PBP Commentary |
Coming up we have a welterweight MMA rules bout between Andrew Wellington (ranked 0 p4p, 0 weight class) and Nate Johnson (ranked 0 p4p, 0 weight class). The key to victory for Andrew Wellington has got to be keeping the fight on the feet.
 |
|
 |
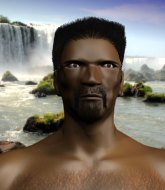
| 182 cm
22
175 lbs
0 - 1 - 0 |
|
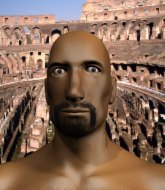
180 cm
19
175 lbs
1 - 2 - 0 |
BJJ Blue Belt
Improved boxing
KO power |
|
BJJ Blue Belt
Brawler
Granite chin |
|
| |
|
Ladies and gentlemen. This fight is 3 rounds, in the welterweight division.
Introducing the fighter to my left, fighting out of the red corner.
With a record of
0 - 1 - 0, fighting out of Tokyo, Andrew Wellington!
And introducing the fighter to my right, fighting out of the blue corner.
With a record of
1 - 2 - 0, fighting out of Tokyo, Nate Johnson!
The judges for this bout are Hirohito Nitta, Tatsuya Matsuyama and Ren Mimura.

The bell rings for round one and we are underway!
Johnson shoots in for a takedown but doesn't get it.
Johnson waving his hands out infront of him, looking to distract Wellington.
Johnson throws a series of punches but Wellington avoids them all with ease.
Wellington misses with a low kick.
Wellington wants to clinch up but Johnson keeps it at a distance.
Johnson takes a shot to the body in his stride.
Wellington circles away from the clinch attempt.
Johnson misses with a body shot
enabling Wellington to counter with a crisp jab.
Wellington wants to clinch

and Johnson counters with a nice single leg takedown and he's in Wellington's guard now.
Johnson looks gassed!
Johnson trying to pass the guard but can't manage it just yet.
Wellington manages to sweep nicely, so he's now on top. Johnson manages to get himself to full guard.
Wooooo! Give it up for these two warriors! They are putting on a show!
Wellington stands up over Johnson, holding his feet. He dives back in and lands a decent shot to the head.
Wellington stands up over Johnson, holding his feet. He dives back in and lands a decent shot to the head.
Wellington passes Johnson's right leg, so he's now in half guard.

That's one minute gone in the round.
Nice strikes from Wellington there.
Johnson won't allow Wellington to pass to mount.
Wellington is stalling here. Johnson is in no mood to hang around though. He's locked up a kimura from the bottom! Wellington seems to be keeping calm but he's forced to roll out of the hold and Johnson has ended up in side control on the top. Nice work.
Wellington is looking to regain half guard here but Johnson keeps moving and retains side control.

Johnson working hard here to secure a kimura but he's not really in the right position for it.
Wellington is trying to get back to half guard.
Wellington sneaks back into half guard.
Wellington is looking to improve his position.
The ref warns both fighters not to hold the cage as they work up against the meshing.

That's two minutes gone in the round.
There's not a lot going on here and the crowd are letting the fighters know they're not willing to tolerate a lack of action.
Wellington looking for submissions from an awkward position here.
Wellington is trying to maintain the position but Johnson is very close to passing his half guard.
Wellington throws a sloppy strike from the bottom. He's now off balance and Johnson manages to pass to side control.
Wellington is trying to get back to half guard. He's pushing on Johnson's leg. He's managed it. Nice work.
Johnson trying to pass the guard but Wellington defending well.
Wellington wants to get back to full guard.
Wellington is working hard here to advance position.

That's three minutes gone in the round.
Wellington punching from the bottom.
Wellington throws a strike from the bottom that misses.
Wellington is not content to let Johnson control the position.
Wellington is working for an escape here. He's hooked one of Johnson's legs and he's managed to sneak out and take Johnson's back!
Wellington gets his hands free as Johnson looks to control.
Wellington doesn't have the hooks in and Johnson manages to turn into his guard.
Johnson trying to control the position from guard on top but Wellington is wriggling around, looking for whatever he can.
Johnson slips nicely into half guard.
Johnson trying to control the action but Wellington is working from the bottom.
Wellington trying to control here.

That's four minutes gone in the round.
The crowd are hurling abuse towards the fighters... You can hardly blame them though because there isn't a lot going on in the fight.
Johnson prevents Wellington from improving his position.
Johnson wants to lay and pray for a moment but Wellington keeps working.
Johnson is just sitting in half guard, waiting for something to happen.
Johnson thows a huge punch but Wellington dodges it nicely.
Johnson is keen to just control but Wellington is a slippery customer.

The referee has ruled that neither fighter is active enough on the ground and has stood them back up.
Wellington tries to clinch but fails miserably

and Johnson counters into the clinch. Nicely done.
Johnson tries to take the fight to the ground by pulling guard but can't manage it.

Johnson escapes the clinch and we're back to striking.
Johnson throws a looping left and ducks down for a takedown. He's got his arms around Wellington's waist but Wellington gets an underhook and avoids the takedown by throwing Johnson off to one side.
And that�s the end of the round � the fighters go back to their corners.
Andrew Wellington dominated that round.
OK. That's time! The bell goes and we're back to the action.

Johnson closes the distance and takes a jab right on the nose as he does so.
Wellington lands three nice shots there - that looked like it hurt!
Johnson shoots in for a takedown - he's clinched up with Wellington but Wellington pushes him off and we're back to square one.
Wellington closes the distance but Johnson moves to the side
and Johnson holds on and brings the fighters into a clinch.
Wellington wants to break free. God knows he wants to breaaaak freeee.
Johnson tries to take the fight to the ground by pulling guard but can't manage it.
Johnson is working for takedown but Wellington is calmly controlling the position for now.
Andrew Wellington has stuffed three takedown attempts in the round now. That's going to take a lot out of Nate Johnson.
Johnson is trying to slow down the pace in the clinch, to catch his breath.
Johnson escapes the clinch and we're back to striking.
Johnson avoids a punch combination nicely.
Johnson checks a low kick from Wellington.
Wellington throws a right and a left that Johnson avoids nicely.
Wellington tries a switch kick but it misses it's target.
Andrew Wellington is looking to throw some combinations by the looks of things.
That's one minute gone in the round.
Wellington fails to land with the punch combination there - jab, cross, hook, miss, miss, miss.
Both fighters are absolutely exhausted here.
Johnson fakes an overhand right and shoots for a takedown. Wellington sprawls well initially but Johnson persists and gets the takedown into half guard.
Wellington tries to roll over but Johnson keeps him under control.
Johnson lands a big shot. The thud that echoes around the arena is like music to the fans' ears.
Wellington is looking to improve his position.
Johnson is keen to just control but Wellington is a slippery customer.
Johnson is looking to pass the guard... He's managed it - he's now in full mount!
Wellington is bucking up trying to escape but Johnson cracks him with another couple of good strikes.
Johnson is landing with some decent strikes but Wellington is trying to advance his position so the referee is letting the fight continue.
Johnson looking to control and managing it successfully.
Wellington is desperately trying to get back to half guard.
That's two minutes gone in the round.
Johnson working for a submission but Wellington is keeping him at bay.
Johnson trying to control but Wellington is having none of it.
Wellington is trying to escape the mount.
Wellington flailing away with punches but nothing is landing.
Johnson looking to control and managing it successfully.
Wellington really trying hard to get back to half guard here.
That's three minutes gone in the round.
Johnson avoids the attempt from Wellington to control.
Johnson jumps to side control looking for an arm triangle but Wellington manages to avoid the submission attempt.
It looks like we're going to have a standup here. Neither fight is doing enough on the ground.
Johnson checks a low kick from Wellington.
Johnson scores a takedown into full mount!
Wellington is looking to get to half guard.
Johnson landing punches.

Wellington is rocked!
Johnson cracks Wellington with a big head shot that has him covering up instantly! He's rolled onto his side and the referee has seen enough - this one is aaaaaaaaaaall over!
Ladies and gentlemen, after 4:05 of round 2, we have a winner by way of TKO (Strikes). Nate Johnson!
|
|
|
|
|
|
|
|
|
|
|
|
|
|
|
|
|
|
|
|
|
|
|
| S |
C
A |
G |
S |
C
B |
G |
|
S |
C |
G |
|
energy
A | B |
|
hype
A | B |
|
pop
A | B |
|
mgr
A | B |
|
FIGHT
RATING
46% |
|
|
|
|
|
|
