|
|
PBP Commentary |
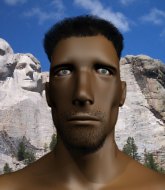
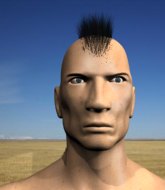
Coming up we have a featherweight MMA rules bout between Takeshita Otsuma (ranked 0 p4p, 0 weight class) and Loyd Griggs (ranked 0 p4p, 0 weight class). Takeshita Otsuma has a significant reach advantage - let's see if he can make it count.
 |
|
 |
| 198 cm
20
155 lbs
2 - 3 - 1 |
|
175 cm
22
153 lbs
0 - 0 - 0 |
BJJ Purple Belt
Brawler
Experienced |
|
BJJ White Belt
Good kicks
Granite chin |
|
| |
|
Ladies and gentlemen. This fight is 3 rounds, in the featherweight division.
Introducing the fighter to my left, fighting out of the red corner.
With a record of
2 - 3 - 1, fighting out of Tokyo, Takeshita Otsuma!
And introducing the fighter to my right, fighting out of the blue corner.
With a record of
0 - 0 - 0, fighting out of Tokyo, Loyd Griggs!
The judges for this bout are Shirou Masuda, Taro Takaoka and Yuuki Gou.

The bell rings for round one and we are underway!
Griggs tries to score a power double leg takedown but Otsuma sees that one coming and sprawls well. That will dishearten Griggs somewhat.
Griggs tries to shoot in for a takedown. He's got hold of a leg but Otsuma swivels and escapes.

Otsuma gets a clinch.
Otsuma wants to take the fight to the mat but Griggs manages to get underhooks and keep the fight in the clinch.

Otsuma pulls guard.
Griggs wants to pass the guard but Otsuma is keeping the position.
Otsuma is trying to stand up but he's not managed so far.
Griggs stays in close to Otsuma's body and controls the position.
Otsuma utilising some decent striking defenses from the guard, preventing the ground and pound.

That's one minute gone in the round.
Otsuma controls Griggs momentarily but Griggs frees himself.
Otsuma will need to keep those long limbs tucked in whilst he's on the ground, to prevent any submissions.

The ref stands the fighters back up. Takeshita Otsuma wasn't doing enough on the ground.
Otsuma throws out a leg kick but Griggs moves out of range and Otsuma only half commits.
Griggs throws the kick towards the body but Otsuma avoids it.
Otsuma misses with a wild combination.
Griggs scores with a nice one two combo and darts back out of range to avoid anything coming in the opposite direction.
Griggs misses with an uppercut.
Otsuma shoots in for a takedown but Griggs shows good takedown defense there and keeps this one on the feet.
Griggs tries for a takedown but Otsuma sees it coming a mile off and avoids it easily.
Takeshita Otsuma has stuffed three takedown attempts in the round now. That's going to take a lot out of Loyd Griggs.
The fighters circle momentarily. Griggs darts into range and connects with a nice straight punch.

That's two minutes gone in the round.
Otsuma clinches with his opponent.
Otsuma looks like he'd prefer to be striking at range right now.
Griggs tries to take the fight to the ground by pulling guard but can't manage it.
Griggs is trying to break the clinch but Otsuma is controlling him.
Otsuma jumps into guard, dragging Griggs to the mat.
Griggs looking to pass the guard.
Griggs wanted to stand there but Otsuma had control of the position.

Otsuma is looking for a triangle but Griggs pushes his legs off easily.
The crowd cheering loudly, showing their appreciation for the quality fight we're seeing here.
Otsuma keeping moving, preventing Griggs from controlling successfully.

That's three minutes gone in the round.
Griggs really doesn't want to stay on the ground with Otsuma. If he can't get it back to his feet, it's only a matter of time before he'll be tapping out.
Otsuma pulls Griggs in close to prevent any damage.
Griggs must be cautious of submissions here, given that his opponent has the superior Jiu Jitsu.
Griggs controlling from the guard. I say controlling but really, he's stalling.

OK we're going to have a standup here. Loyd Griggs hasn't been effective enough on the ground and the referee wants a restart.
Otsuma tries to clinch but is not successful on this occasion.
Otsuma throws a left and a right that both miss
and Griggs counters with a shot to the ribs. That looked like it hurt.
Nice sprawl there from Griggs as Otsuma shoots in.
Griggs tries to shoot in for a takedown. He's got hold of a leg but Otsuma swivels and escapes.

That's four minutes gone in the round.
Otsuma swings wildly with a couple of big hooks
and Griggs counters with a head kick.
A really sloppy takedown attempt there from Griggs.
Griggs connects with a right hand. Otsuma shakes it off.
Griggs shoots for a takedown but Otsuma saw that one coming a mile off and avoided it easily.
Sloppy strikes from Griggs. Those never looked like landing.
Griggs fakes high and shoots in for a takedown but Otsuma avoids it really well and circles away.
Otsuma stuffs a takedown. It's all about dictating where the fight takes place and Otsuma wants it to stay on the feet.
Griggs looks gassed!
As the round comes to an end the crowd are showing their appreciation for a great round of action.
Otsuma shoots in for a takedown but doesn't get it.
And that�s the end of the round � the fighters go back to their corners.
That was a close round but I would say that Takeshita Otsuma will probably get the nod.
Well, the break between rounds is over. Let's get back to the scrappin!

Griggs swats away the attempt to clinch by Otsuma.
Otsuma shoots in for a takedown. He's persisting with it as Griggs sprawls well. Griggs wins this battle and keeps the fight standing. Otsuma gets slowly back to his feet.
Griggs looks to clinch
and Otsuma counters with a kick to the head that grazes his opponent. Griggs is lucky that one didn't land flush.
Good standup being displayed there by Griggs as he connects with a hook.
Otsuma instigates a clinch.
Otsuma is trying to break the clinch but Griggs is controlling him.
Otsuma is trying to push Griggs away but Griggs has him pressed against the cage, so he's going nowhere.
Otsuma goes for a takedown attempt but Griggs pushes him away and we're back to fighting at a distance.
Otsuma misses with a takedown attempt. He shot from a bit too far out.
That's three failed takedown attempts in the round for Takeshita Otsuma. That's going to take a lot out of him.
Griggs has a takedown stuffed.
Both fighters are absolutely exhausted here.
That's one minute gone in the round.
Griggs tries to grapple but his opponent circles
and Otsuma counters by moving into the clinch. Good anticipation by Otsuma.
Otsuma has hold of a leg and is looking for a trip takedown. Griggs avoids it nicely though and we remain in the clinch.
Griggs wants a takedown.
Otsuma really does look like a pencil wearing a pair of gloves. Let's hope he has a gameplan to suit that ridiculous body shape.
Griggs is looking for a takedown.
Griggs tries to pull guard but can't drag his opponent to the mat. Otsuma just stands there and leans against the cage.
Otsuma wants to take the fight to the mat but Griggs manages to get underhooks and keep the fight in the clinch.
Griggs is trying to pull guard but being pressed up against the cage enables Otsuma to keep the fight standing.
Otsuma successfully pulls guard.
Griggs looking to sit in guard and control but Otsuma gets the butterfly guard and sweeps. He's now in the guard on the top.
That's two minutes gone in the round.
Otsuma stands and throws Griggs's legs to the side, diving into side control.
Griggs is trying to get back to half guard.
Both fighters take a look at the clock.
Otsuma wants to control but Griggs is keeping him busy.
That's three minutes gone in the round.
Griggs tries to buck Otsuma off but Otsuma is having none of it.
Griggs looks to move to half guard but instead Otsuma has passed into mount! Damn!
The ref warns both fighters not to hold the cage as they work up against the meshing.
Griggs wants to control but Otsuma is having none of it.
Otsuma lands a big elbow.
That's four minutes gone in the round.
Otsuma content just to control the position here.
Griggs is working to get back to half guard.
Otsuma is working for a guillotine from mount but Griggs frees his head quite easily.
Otsuma seems to be looking to move to his opponent's back but Griggs is holding on tight.
The crowd applaud the fighters efforts here as the round comes to an end.
Otsuma landing shots from mount.
And that�s the end of the round � the fighters go back to their corners.
Takeshita Otsuma dominated that second round.
OK. That's time! The bell goes and we're back to the action. This is the final round!

Otsuma slaps away a takedown attempt from Griggs, before circling back to the center of the mat.
Griggs wants to clinch.
Griggs moves in looking to clinch but Otsuma pushes him off.
Griggs wants to clinch up but Otsuma keeps it at a distance.
Otsuma closes the distance and looks for a trip takedown... aaaand he's got it - Otsuma lands in his opponent's guard.
Otsuma trying to control the position from guard on top but Griggs is wriggling around, looking for whatever he can.
Otsuma throws a big elbow that misses.
That's one minute gone in the round.

Griggs working for a triangle but Otsuma defends it easily.
Griggs tries to land a sweep but no joy.
Otsuma content to stall in guard here.
Otsuma stopping the sweep attempt from Griggs.
Griggs being controlled here, momentarily.
That's two minutes gone in the round.
We've had a lack of effective grappling in the last minute or so, which could well see a referee standup.
Griggs is working actively off his back, looking to secure an arm or perhaps work for a triangle.
The fighters are pressed up against the cage, both looking to find a bit of space to work.
Griggs can't keep his opponent in guard - Otsuma advances to half guard, no doubt looking to mount.
Griggs is in trouble now - Otsuma has advanced to mount!
That's three minutes gone in the round.
Otsuma can't quite control the action as he would like just now, as Griggs is looking to escape.
Otsuma postures up and cracks his opponent a couple of times before moving back into close ground control. Griggs looks a forlorn figure.
Otsuma is working for a guillotine from mount but Griggs frees his head quite easily.
Griggs is looking to get to half guard.
Otsuma working the ground and pound effectively.
That's four minutes gone in the round.
Otsuma trying to control but Griggs is having none of it.
Otsuma dominating with strikes here.
Takeshita Otsuma overall seems to be getting the better of the ground position in the fight so far.
Griggs really trying hard to get back to half guard here.
Otsuma looking to secure an arm triangle but Griggs defends it well.
Loyd Griggs has stepped it up - he knows he needs a finish here!
Takeshita Otsuma is fighting for a decision here - he's started to take the cautious approach.
Wooooo! Give it up for these two warriors! They are putting on a show!
The crowd applaud the fighters efforts here as the round comes to an end.
Griggs is working to get back to half guard.
And that's the end of the fight!
Takeshita Otsuma showed his dominance in that final round.
Well I reckon that's a shut out for Otsuma, winning every round. Will the judges agree? They are the ones who matter, even if they are often depressingly incompetent. Over to the ring announcer for the scorecards.
Ladies and gentlemen, after 3 rounds of action, we go to the scorecards for a decision.
Judge Shirou Masuda scores the fight 30:27
Judge Taro Takaoka scores the fight 30:27
Judge Yuuki Gou scores the fight 29:28
In favor of your winner, by unanimous decision... Takeshita Otsuma!
|
|
|
|
|
|
|
|
|
|
|
|
|
|
|
|
|
|
|
|
|
|
|
| S |
C
A |
G |
S |
C
B |
G |
|
S |
C |
G |
|
energy
A | B |
|
hype
A | B |
|
pop
A | B |
|
mgr
A | B |
|
FIGHT
RATING
42% |
|
|
|
|
|
|
