|
|
PBP Commentary |
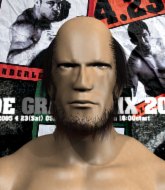
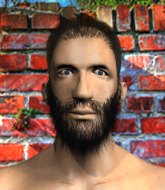
Coming up we have a featherweight MMA rules bout between Kelsey Curtis (ranked 0 p4p, 0 weight class) and Bucky The Badger (ranked 0 p4p, 0 weight class). Both fighters look fresh as a daisy as they make their way towards the cage.
 |
|
 |
| 171 cm
24
155 lbs
9 - 2 - 0 |
|
160 cm
23
149 lbs
11 - 0 - 0 |
Abu Dhabi Champ
Excellent boxer
Insanely flexible |
|
Good wrestler
World class MT
Granite chin |
|
| |
|
Ladies and gentlemen. This fight is 5 rounds, for the featherweight championship of the world!
Introducing the champion to my left, fighting out of the red corner.
With a record of
9 - 2 - 0, fighting out of Sydney, Kelsey Curtis!
And introducing the challenger to my right, fighting out of the blue corner.
With a record of
11 - 0 - 0, fighting out of Sydney, Bucky The Badger!
The judges for this bout are John Mangel, Skip Squint and Steve Erwin.

The bell rings for round one and we are underway!
The Badger lands a nice leg kick that just misses Curtis's sensitive parts.
Curtis moves away from the strike by The Badger.
The Badger connects with a jab.
The Badger throws a quick inside leg kick.
Curtis shoots in for a takedown. He's persisting with it as The Badger sprawls well. The Badger wins this battle and keeps the fight standing. Curtis gets slowly back to his feet.
The Badger throws a low kick but his opponent is out of range.
The Badger displays good takedown defense there as he swats away a double leg from Curtis.
The Badger doesn't manage to clinch there - Curtis circles away.
The Badger scores with a jab to the jaw.

That's one minute gone in the round.
Curtis checks a leg kick.
The Badger looking to take his opponent's legs away with the low kicks.
The Badger buckles his opponent's knee momentarily with a nice leg kick.
Curtis looks for a takedown here. Will he get it? The Badger is fending him off so far but Curtis persists. Nope, The Badger circles away and we're back to standing.
That's three failed takedown attempts in the round for Kelsey Curtis. That's going to take a lot out of him.
Curtis shoots in for a takedown but The Badger shows good takedown defense.
The Badger lands with a straight right. Curtis didn't see that one coming.
The Badger throws an uppercut from half a mile away. Curtis sees it coming and avoids it easily.
Good work by Curtis as he checks the leg kick.
The Badger misses with a low kick.
The Badger is looking to score with low kicks.

That's two minutes gone in the round.
The Badger swings for the body but Curtis moves out of range.
Curtis fails with a takedown attempt.
The Badger tries to clinch but Curtis moves out of range.
Curtis takes one on the chin but seems OK.
The Badger connects with a leg kick. He turned his hip over nicely there.
Curtis takes a shot right to the liver - Bas would have been proud of that punch.

Curtis shoots in for a takedown and gets it.
Curtis will need to keep those long limbs tucked in whilst he's on the ground, to prevent any submissions.
The crowd are loving this. Great action here.
The referee must be thinking about standing these guys back up.

Curtis looking for a kimura but he'll have to free his other leg if he wants to finish that. Perhaps he's just using it as a distraction technique.

That's three minutes gone in the round.
Curtis thows a wild elbow that connects with the canvas.
The Badger trying to control from the bottom.
Curtis is nestled in close to The Badger, controlling him well. He's worked in a nice elbow to the side of the head as well, for good measure.
The Badger is looking to improve his position.
Curtis missing with the ground and pound from half guard.
Curtis thows a huge punch but The Badger dodges it nicely.
Curtis is thwarting The Badger's attempts to control the position.
Curtis not throwing his punches with enough precision this time.

That's four minutes gone in the round.
Curtis is looking for a kimura here.
The Badger is looking to improve his position.
The fighters are pressed up against the cage, both looking to find a bit of space to work.
Curtis is looking for an arm triangle, whilst trying to pass to side control. The Badger doesn't seem that keen to cooperate though. No luck this time Curtis.
Curtis seems to be looking for submissions.
And that�s the end of the round � the fighters go back to their corners.
A close round but Bucky The Badger will probably get the nod.
The fighters' corners scream their final instructions, as the referee calls time. Here we go, back to the action!

The Badger jabs Curtis right on the nose. Curtis blinks but takes it well.
The Badger throws the left hand but Curtis avoids the punch easily.
The Badger throws a nice head kick!
Some bone on bone action there as Curtis checks a low kick. Luckily it wasn't a particularly hard one.
Curtis fails with a rather predictable takedown attempt.
Curtis shoots in for a takedown but doesn't get it.
The Badger lands with a nice body punch.
The Badger slaps away a takedown attempt from Curtis, before circling back to the center of the mat.
That's three failed takedown attempts in the round for Kelsey Curtis. That's going to take a lot out of him.
That's one minute gone in the round.
Curtis takes a body kick right on the floating rib. Ouchie.
The Badger is looking to slow Curtis down with leg kicks.
Bucky The Badger is looking to keep the fight on the feet at all costs.
Good leg kick by The Badger there. It's the ones that make that thud noise that hurt and that was an almighty thud.
Curtis fails with a takedown attempt from distance.
Curtis is trying hard to land a takedown here. The Badger sprawls well and keeps this one on the feet.
Curtis walks into a jab.

The Badger gets a clinch.
The Badger lands a body punch in the clinch.
Curtis takes an elbow to the temple.
A short right from The Badger.
That's two minutes gone in the round.
A short uppercut from The Badger.
The Badger misses the knee to the body. Nice hip positioning from Curtis.
Curtis gets double underhooks and manages to take the fight to the ground.
Wooooo! Give it up for these two warriors! They are putting on a show!
Curtis throws a big elbow that misses.
The Badger has Curtis pulled in close to control his posture.
Curtis is holding a leg here, probably looking for an ankle lock - he drops back and goes for it! The Badger is in trouble! Is it all over??? No! The Badger has escaped and now he's on top!
The ref warns both fighters not to hold the cage as they work up against the meshing.
Curtis not looking particularly offensive just at the moment.
Curtis looking for a sweep. Not yet Curtis, not yet.
Curtis utilising some decent striking defenses from the guard, preventing the ground and pound.
That's three minutes gone in the round.
Curtis lands a beautiful switch and he's in full mount! That could spell trouble for The Badger!
Kelsey Curtis overall seems to be getting the better of the ground position in the fight so far.
The Badger is bucking up trying to escape but Curtis cracks him with another couple of good strikes.
The Badger is working to get back to half guard.
Curtis is still in mount, landing shots to his trapped opponent. The Badger can't stay in a position like this for much longer.
Curtis controlling the pace for now.
The Badger in a bad spot here, taking shots to the head.
The Badger really doesn't want to stay on the ground with Curtis. If he can't get it back to his feet, it's only a matter of time before he'll be tapping out.
We've seen a great period of action over the last minute or so - credit to both fighters for going all out!
Curtis looking to finish with strikes here!
The Badger wants to hold on but Curtis pushes him away.
The Badger is in all sorts of trouble here.
That's four minutes gone in the round.
The Badger regains half guard.
Curtis is sneakily working for an arm triangle but The Badger sees it coming and defends easily.
Curtis is looking for a kimura. It's going to be difficult to finish that from half guard though and The Badger defends it well.
The Badger wants to get back to full guard.
Curtis passes the half guard and he's now in mount! Big trouble for The Badger!
Curtis throws an elbow from mount that misses. Lucky escape for The Badger because Curtis loaded up on that one.
As the round comes to an end the crowd are showing their appreciation for a great round of action.
The Badger is looking to get to half guard.
The Badger is in a horrible position here, under a barrage of strikes, he's managing to avoid any damage.
And that�s the end of the round � the fighters go back to their corners.
That was a close second round but I would say that Kelsey Curtis will probably get the nod.
That's time! Curtis's corner gives him a slap on the ass as he gets ready to fight.

Curtis shoots in for a takedown but The Badger shows good takedown defense.
The Badger stuffs a takedown. It's all about dictating where the fight takes place and The Badger wants it to stay on the feet.
Horrible takedown by Curtis or perhaps it was just good defense by The Badger which made him look bad.
That's three failed takedown attempts in the round for Kelsey Curtis. That's going to take a lot out of him.
A punch lands to the side of Curtis 's head but he takes it in his stride.
Curtis closes the distance and clinches up, looking for a takedown. He shifts his weight and gets a nice trip into half guard.
The Badger gets full guard.
Curtis has been looking to land a fair amount of strikes on the ground. He might be looking to soften his opponent up in order to work for a submission.
The Badger is pulling down on Curtis's head to control his posture.
The Badger looking to hit a scissor sweep but Curtis is one step ahead there.
That's one minute gone in the round.
The Badger avoiding any damage from the ground and pound.
Curtis throwing shots from guard but he's hitting more mat than opponent.
Curtis in full guard, throwing the ground and pound. No damage this time.
The Badger bucks up whilst keeping hold of a body lock, managing to reverse the position. Now he's in top in Curtis's guard.
Curtis working the defensive guard well to avoid strikes from The Badger.
Curtis striking off his back but it's not causing The Badger any problems.
Curtis controls The Badger momentarily but The Badger frees himself.
The Badger must be cautious of submissions here, given that his opponent has the superior Jiu Jitsu.
Curtis lands a beautiful switch and he's in full mount! That could spell trouble for The Badger!
The Badger tries to hold on but Curtis postures up.
That's two minutes gone in the round.
Curtis with some aggressive grappling here. He's looking for submissions here, rather than waiting for the opportunity to counter.
Curtis throws an elbow from mount that misses. Lucky escape for The Badger because Curtis loaded up on that one.
Curtis punishing his opponent with strikes.
Curtis looks like he's working for a submission but he's not found anything just yet.
Curtis in mount throwing good strikes here, bouncing his opponent's head off the canvas.
This is a great period of action - very entertaining stuff!
Curtis jumps to the side looking to secure the arm triangle�. Ooooh, that looks tight� The Badger is gargling but he's managed to escape! Nice work there by The Badger and Curtis has given up the dominant position trying to land that submission.
Curtis tries to score with some ground and pound. The Badger controls his posture well this time though and the shots don't do any damage.
The Badger manages to get back to half guard.
That's three minutes gone in the round.
The Badger is trying to control but can't.
Curtis wants to free his trapped foot but The Badger is holding on for dear life with his legs.
Curtis is working for a submission of some sort.
Curtis is working for submissions here but there's nothing on.
The Badger is looking to improve his position.
Curtis drops an elbow to the side of The Badger's head.
The Badger works his way to full guard. Good work.
The Badger is working an open guard here, looking to improve his position. No doubt that will leave him open to counters but at least he's being more offensive.
That's four minutes gone in the round.
Curtis sneaks a leg through and gets to half guard. That was like a knife through butter how easily he passed The Badger's guard.
Curtis missing with some ground and pound from the half guard.
The Badger regains full guard. Nicely done.
Curtis drops back looking for a leg! The Badger is in trouble here! The fighters roll with the hold and The Badger manages to kick Curtis off! Curtis jumps back into The Badger's guard.
The Badger is working an open guard here, looking to improve his position. No doubt that will leave him open to counters but at least he's being more offensive.
The Badger has his hands on Curtis's head, controlling the position.
As the round comes to an end the crowd are showing their appreciation for a great round of action.
Curtis drops back for a leg! It's a sloppy attempt though and Curtis jumps back into guard quickly, to retain the dominant position.
And that�s the end of the round � the fighters go back to their corners.
Kelsey Curtis clearly takes that round.
That's time! Back to the action!

Curtis fakes high and shoots in for a takedown but The Badger avoids it really well and circles away.
The Badger bobs and weaves and throws out a fast jab that snaps Curtis's head backwards.
Nice body punch from The Badger.
We've had a slow start to the round here - hopefully the action picks up.
Curtis takes a head kick and keeps coming.
Bucky The Badger seems to be getting the better of the standup.
The Badger keeps the fight standing with a nice sprawl.
The Badger lands a glancing blow to the side of Curtis's head.
That's one minute gone in the round.
The Badger forces Curtis back against the cage and clinches.
A left hand lands to the body for The Badger.
Curtis wants to strike at distance but he can't break free of the clinch.
The Badger working some nice short punches in the clinch.
The Badger throws an elbow that misses.
The Badger looks to throw an elbow but misses.
The Badger lands with a left to the head.
Curtis tries for a takedown. No joy.
That's three failed takedown attempts in the round for Kelsey Curtis. That's going to take a lot out of him.
It's got to the stage where if one of these guys blows hard enough, the other might fall over.
The Badger tries a body shot but Curtis blocks it.
Curtis managing to block the knees to the body from The Badger.
The Badger lands an elbow inside that Curtis shrugs off.
The Badger goes for a body shot but it's blocked.
The Badger lands a shot to the body.
The Badger stays in close to his opponent and throws a right hand to the body.
That's two minutes gone in the round.
Curtis avoids the elbow strike from The Badger, against the cage.
The Badger lands a shoulder strike that jolts his opponent's head backwards.
The crowd are loving this. Great action here.
The Badger is pressed up against the cage. Curtis has hold of a leg and is looking to drag The Badger down to the mat. The Badger avoids the attempt though and has circled away. We're back to striking at a distance.
Curtis moves forwards but The Badger connects with a nice, crisp jab.
Curtis has his front leg slapped to the side - a nice low kick landing there from The Badger.
Curtis takes a shot to the nose. Hopefully that hasn't broken it.
The Badger tries to clinch but Curtis moves out of range.
The Badger paws at his opponent with the jab and then lunges in with a straight, right on the button.
The Badger throws a low kick but his opponent is out of range.
Curtis shoots in but The Badger avoids the takedown attempt easily.
That's three minutes gone in the round.
The Badger smiles there as he lands a nice right hand right on the button.
The Badger throws a head kick but Curtis moves out of range.
The Badger tries to close the distance and clinch up against the cage but Curtis paws at him with a jab and circles away.
Oooooooooooh, not good. A low kick from The Badger lands where it shouldn't have, right in the... well, you know what he did? He kicked him in the penis. He's injured, injured bad. The referee sends both fighters to their corners and Curtis has 5 minutes to recover. He's OK now though... a thumbs up from Curtis and we're back underway with a touch of gloves.
The Badger throws out a token jab with nothing on it.
The Badger throws a series of punches but Curtis moves out of range.
Curtis throws the left hand but The Badger avoids the punch easily.
The Badger throws a leg kick that misses.
That's four minutes gone in the round.
The Badger moves into the clinch.
A bit of stalling here from The Badger.
Curtis takes a shot to the head.
The Badger misses with an elbow over the top.
The Badger holding his opponent close, against the cage.
Curtis has dropped down and is working for a takedown. The Badger is trying to keep an underhook but Curtis manages to get the takedown into half guard.
Curtis looking to pass the half guard. Not this time.
Curtis is looking for a kimura here.
As the round comes to an end the crowd are showing their appreciation for a great round of action.
Curtis is keen to just control but The Badger is a slippery customer.
And that�s the end of the round � the fighters go back to their corners.
Bucky The Badger dominated that fourth round.
OK. That's time! The bell goes and we're back to the action. This is the final round!

Curtis walks into a left hand.
The Badger tries to clinch but is not successful on this occasion.
Curtis on the wrong end of a nice jab.
Curtis manages to get an easy takedown there - catching The Badger on his heels. He'll look to pass The Badger's guard now, I'm sure.
The Badger wants to sweep here but Curtis controlling him for the moment.
Curtis landing with the ground and pound.
The Badger is working an open guard here, looking to improve his position. No doubt that will leave him open to counters but at least he's being more offensive.
The Badger controls Curtis momentarily but Curtis frees himself.
That's one minute gone in the round.
There's a bit of a scramble here and now The Badger is on top in guard.
The Badger slows down the pace of the fight for a moment. He'll need to remain active if he doesn't want to see the fight stood back up.
Curtis is pulling down on The Badger's head to control his posture.
Curtis has controlled the position for a good 20 seconds, which will no doubt be starting to frustrate his opponent.
Curtis is trying to control the position but The Badger postures up.

Kelsey Curtis has forced the referee to step in and bring the fight back to the feet.
A nice combination there by The Badger.
That's two minutes gone in the round.
The Badger clobbers Curtis with an overhand right that has the crowd gasping. That made a horrendous noise.
Curtis fails with the takedown.
Curtis shoots in looking for a takedown. The Badger tries to sprawl out of it but Curtis keeps driving through. The fighters are pinned against the cage. The Badger manages to get underhooks and after a bit of a struggle, circles away and we're back to standing.
Both of our modern day gladiators look out of it here - an gruelling 5 rounds of action taking it's toll on them, no doubt.
Curtis on the wrong end of a nice low kick. He's acting like it's no big deal but he doesn't want to take many more of those.
The Badger scores with a nice head shot.
Curtis throws a looping left and ducks down for a takedown. He's got his arms around The Badger's waist but The Badger gets an underhook and avoids the takedown by throwing Curtis off to one side.
That's three failed takedown attempts in the round for Kelsey Curtis. That's going to take a lot out of him.
That's three minutes gone in the round.
The Badger scores with a slapping inside leg kick.
The Badger connects with a solid leg kick.
Curtis looks for a takedown but The Badger sprawls well.
Curtis misses with a straight right.
The Badger scores with a punch to the gut of his opponent.
No luck for Curtis with that takedown attempt.
The Badger lands with an overhand left.
That's four minutes gone in the round.
The Badger lands a beauty of a right hand that gets the crowd cheering.
The Badger lands a leg kick. The shin dug right into the meat of the thigh.
Curtis closes the distance and clinches up with The Badger, looking for a takedown. Curtis pushes The Badger against the cage but The Badger circles to the side and manages to break the clinch.
The Badger is looking to slow Curtis down with leg kicks.
A jab from The Badger finds it's way through Curtis's defenses.
The crowd applaud the fighters efforts here as the round comes to an end.
The Badger misses with a jab, cross combination.
Curtis closes the distance and takes a jab right on the nose as he does so.
Curtis on the receiving end of a decent leg kick there by The Badger. The Badger obviously looking to wear him down.
And that's the end of the fight!
Bucky The Badger comfortably won the final round on my scorecard.
I think The Badger has won this one but let's see whether the judges agree with me. Over to the ring announcer for the scorecards.
Ladies and gentlemen, after 5 rounds of action, we go to the scorecards for a decision.
Judge John Mangel scores the fight 47:48
Judge Skip Squint scores the fight 47:48
Judge Steve Erwin scores the fight 47:48
In favor of your winner, by unanimous decision... Bucky The Badger!
Bucky The Badger is the new featherweight champion!
Bucky The Badger made sure to mention his sponsor, Hell's Balls Recovery (160) in his post fight interview.
|
|
|
|
|
|
|
|
|
|
|
|
|
|
|
|
|
|
|
|
|
|
|
| S |
C
A |
G |
S |
C
B |
G |
|
S |
C |
G |
|
energy
A | B |
|
hype
A | B |
|
pop
A | B |
|
mgr
A | B |
|
FIGHT
RATING
86% |
|
|
|
|
|
|
