|
|
PBP Commentary |
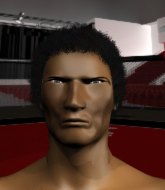
Coming up we have a light heavyweight MMA rules bout between Dwight Bean (ranked 0 p4p, 0 weight class) and Dee Stirling (ranked 0 p4p, 0 weight class). We have two fighters making their debuts here, so let's see who comes out of this one with their first professional victory.
 |
|
 |
| 194 cm
18
205 lbs
0 - 0 - 0 |
|
180 cm
18
200 lbs
0 - 0 - 0 |
BJJ White Belt
Basic striking
Granite chin |
|
BJJ Blue Belt
Brawler
Determined |
|
| |
|
Ladies and gentlemen. This fight is 3 rounds, in the light heavyweight division.
Introducing the fighter to my left, fighting out of the red corner.
With a record of
0 - 0 - 0, fighting out of London, Dwight Bean!
And introducing the fighter to my right, fighting out of the blue corner.
With a record of
0 - 0 - 0, fighting out of London, Dee Stirling!
The judges for this bout are James Ackerman, Donald Grub and Richard Clark.

The bell rings for round one and we are underway!
A really sloppy takedown attempt there from Bean.
Bean defends well against a solid takedown attempt from Stirling.
Stirling shoots in but Bean avoids the takedown attempt easily.
Stirling looks frustrated there after his takedown attempt is stuffed easily.
Dwight Bean has stuffed three takedown attempts in the round now. That's going to take a lot out of Dee Stirling.
Bean tries for a takedown but Stirling sees it coming a mile off and avoids it easily.
Bean shoots for a double leg takedown but Stirling sprawls well. He's pushed Bean's face into the mat and manages to get back to his feet relatively easily.

Stirling closes the distance and pushes Bean back into the cage.
Stirling tries to score a body lock takedown but Bean shows good agility there to stay on his feet.
Bean can't get the takedown.
Stirling changes levels and goes for a takedown here. Bean fights it off and pushes away nicely.
Bean throws a series of punches but Stirling avoids them all with ease.
Bean displays good takedown defense there as he swats away a double leg from Stirling.

That's one minute gone in the round.
Bean shoots for a double leg takedown but Stirling sprawls well. He's pushed Bean's face into the mat and manages to get back to his feet relatively easily.
Bean fails with a takedown attempt from distance.
Stirling displays good takedown defense there as he swats away a double leg from Bean.
Bean gets tackled into the cage by Stirling. Stirling maintains the clinch.
Bean lands with a good tight uppercut to the head.
Stirling blocks an uppercut.
Stirling wants to break the clinch but can't.
Stirling scores with a nice hook to the head.
Bean misses with a punch to the body.
Stirling looks like he'd prefer to be striking at range right now.

Bean has dropped down and is working for a takedown. Stirling is trying to keep an underhook but Bean manages to get the takedown into half guard.
The referee claps his hands together and tells the fighters to work.
Bean trying to control the action but Stirling is working from the bottom.
Bean is breathing heavily.

That's two minutes gone in the round.
Stirling is looking to control Bean's leg but it's slowly edging free. Can Stirling avoid being mounted?
Stirling is positioning himself well to prevent Bean advancing to mount.
Bean knows he needs to get back to his feet asap. He's simply no match for Stirling on the ground.
Bean throws a strike but Stirling avoids it easily and moves to full guard.
The fans in attendance giving it up for the two fighters, who have really let it all hang out in the last minute or so!
Bean tries to free his leg and advance position but Stirling is retaining full guard.
Stirling lands a beautiful switch and he's in full mount! That could spell trouble for Bean!
Bean is desperately trying to improve his position but Stirling has a good base and remains in mount.
Bean on his back here. We all know that wrestlers don't like being on their back so let's see if Bean tries to get out of the position.
Bean is looking to get back to his feet - it's going to be hard from this position.
Stirling landing strikes from the mount.
Stirling looking to ground and pound but Bean is blocking nicely.

That's three minutes gone in the round.

Stirling is standing up, even though he is in mount.
Dwight Bean seems to be the more aggressive standup fighter in this bout.
Bean will have to do better than that with his takedown attempts.
Bean shoots in looking for a double leg takedown. Stirling defends it nicely.
Stirling gets to the clinch - let's see what his plan is here.

Stirling breaks the clinch.

Stirling is looking for a takedown here. He's shot in and has managed to get it, finishing up in Bean's half guard.
Stirling not landing any meaningful shots this time.
Bean tries to roll over but Stirling keeps him under control.
Stirling decides to stand up.

That's four minutes gone in the round.
Stirling shoots in and drives through. Bean sprawls well.
This is a great period of action - very entertaining stuff!
Stirling shoots in for a double leg but Bean sprawls well. That's going to sap some energy.
Stirling has a takedown stuffed.
The fighters are starting to get sweaty, which will make takedowns a bit more tricky.
Bean tries to score a power double leg takedown but Stirling sees that one coming and sprawls well. That will dishearten Bean somewhat.
Bean keeps the fight standing with a nice sprawl.
As the round comes to an end the crowd are showing their appreciation for a great round of action.
Stirling leaves Bean with his face pressed against the mat as he sprawls beautifully, defending against a solid takedown attempt.
And that�s the end of the round � the fighters go back to their corners.
Dee Stirling dominated that round.
That's the end of the interval. I'm sure that seemed a lot quicker than a minute for our two fighters! Back to the action.

Stirling has a takedown stuffed.
Stirling keeps the fight standing with a nice sprawl.
Dwight Bean is looking to throw some combinations by the looks of things.
Stirling moves into the clinch.
Bean is looking to score with knees to the body. Maybe he'll change it up and go body then head. Stirling is defending well for now.
Bean lands a damaging elbow.
Bean lands a nice trip takedown into half guard.
The fighters are pressed up against the cage, both looking to find a bit of space to work.
Stirling tries to get to full guard but Bean has control of the leg.
Stirling has the superior BJJ but he's also working some ground strikes into his gameplan.
Stirling is working for an escape here. He's hooked one of Bean's legs and he's managed to sneak out and take Bean's back!
Both fighters are absolutely exhausted here.
Stirling controlling well, preventing Bean from escaping the position.
Bean is trying to get back to his feet but he's not managed it yet.
That's one minute gone in the round.
The crowd hopeful of a finish here - Stirling's supporters are on their feet, screaming for him to go for the rear naked choke.
Dee Stirling has got the better of the ground game so far.
Bean covering up well and avoiding damage.
So, who will make the next big move? In this position it could be crucial.
Bean controlling the position well but he knows he's in a bad position.
Bean trying to control but not successfully.

Bean defends a rear naked choke attempt by controlling one of Stirling's arms.
Bean defends a rear naked choke attempt by controlling one of Stirling's arms.
That's two minutes gone in the round.
Will Stirling go for the finish here or will he try and keep control of the position?
Stirling missing with punches from the back.
Stirling trying to control momentarily.
You can see the frustration on Bean's face� He knows he is in trouble unless he improves his position sooner rather than later.
That's three minutes gone in the round.
Bean wants to get back to his feet.
Stirling keeps control of the position easily here as Bean tries to buck him off.
Bean defending nicely against the rear naked choke attempt.
Bean trying to get back to his feet but Stirling is in full control for now.
Stirling missing with punches from the back.
That's four minutes gone in the round.
Stirling is looking for the choke from the back position but Bean is controlling his hands well.
Stirling trying to control.
Bean is in bad spot here.
Bean is trying to get back to his feet but Stirling has full control of the position and if anything, Bean has just worked his way into a worse spot.
Stirling keeps control of the position as Bean tries to break free.
Bean covering up well under a series of strikes from Stirling.
The ref warns both fighters not to hold the cage as they work up against the meshing.
The crowd applaud the fighters efforts here as the round comes to an end.
Bean controlling the position well but he knows he's in a bad position.
And that�s the end of the round � the fighters go back to their corners.
Dee Stirling showed his class in that round. I'd imagine he'll take it on all the scorecards.
The corners get their ten second warning. Both fighters stand from their stools and stare eachother down, ready to get back to the action. Ladies and gentlemen, this is the final round!

Bean stuffs the takedown.
Good standup being displayed there by Stirling as he connects with a hook.
Bean fails with the takedown.
Bean closes the distance and clinches up, looking for a takedown. He shifts his weight and gets a nice trip into half guard.
Stirling moves into full guard.
Bean throws an elbow that misses. Stirling uses the momentum to reverse the position. He's now in Bean's guard. Nice move by Stirling!
Bean wants to get back to his feet but Stirling is in a dominant position and won't allow it.
Both fighters are breathing heavily.
That's one minute gone in the round.
Stirling content to stall in guard here.
Bean keeping moving, preventing Stirling from controlling successfully.
Bean utilising some decent striking defenses from the guard, preventing the ground and pound.
Bean will need to keep those long limbs tucked in whilst he's on the ground, to prevent any submissions.
We must be close to a standup if these guys don't pick up the pace.
Stirling advances to half guard.
Bean is staying active underneath Stirling, who seems content to just control the action from this position.
Stirling passes the half guard and he's now in mount! Big trouble for Bean!
Stirling wants to control the pace but Bean is squirming around nicely.
That's two minutes gone in the round.
Stirling has hold of Bean's left arm, perhaps looking for a submission. The two fighters tussle over control of the isolated limb and Bean manages to get his arm back to his side and away from danger.
Stirling throwing sloppy strikes, which aren't doing any damage.
Stirling won't let Bean get back to his feet... He wants to keep the fight where it is for now.
Stirling controlling the position easily from mount.
Bean wants to get back to his feet.
Bean tries to improve his position but instead Stirling has taken his back!
That's three minutes gone in the round.
Bean tries to escape the position.
Stirling punches the canvas rather than the man.
Bean avoids the strikes from Stirling.
Stirling is looking cool and calm here, just waiting for a good opportunity to attack and finish the fight from this dominant position.
Stirling lands a couple of good shots to his opponent's body and a final shot to the head. Good little attack there by Stirling.
Stirling is working really hard to secure the rear naked choke. Bean defends successfully for a significant amount of time. Both fighters are looking very determined.
Stirling is staying calm and holding on to the back position, whilst working on a rear naked choke. Bean is defending well though. Stirling let's go of the attempt for now.
That's four minutes gone in the round.
Bean trying to control but he's just got himself in more trouble.
Stirling is looking to finish the fight by rear naked choke. Bean knows exactly what he's got planned though, so he's defending well. Maybe a few strikes would soften Bean for a finish.
So, who will make the next big move? In this position it could be crucial.
Bean rolls, trying to escape but Stirling keeps control of the position.
Dwight Bean has stepped it up - he knows he needs a finish here!
Dee Stirling is fighting for a decision - hopefully he's judged it right and he's actually winning the fight.
The crowd applaud the fighters efforts here as the round comes to an end.
Bean holding both Stirling 's hands and preventing any damage.
And that's the end of the fight!
Dee Stirling comfortably won the final round on my scorecard.
Well Stirling has outworked and out performed his opponent in all aspects of the game today. He was simply too good and the decision should be no more than a formality. Over to the ring announcer for the scorecards.
Ladies and gentlemen, after 3 rounds of action, we go to the scorecards for a decision.
Judge James Ackerman scores the fight 27:30
Judge Donald Grub scores the fight 27:30
Judge Richard Clark scores the fight 27:30
In favor of your winner, by unanimous decision... Dee Stirling!
|
|
|
|
|
|
|
|
|
|
|
|
|
|
|
|
|
|
|
|
|
|
|
| S |
C
A |
G |
S |
C
B |
G |
|
S |
C |
G |
|
energy
A | B |
|
hype
A | B |
|
pop
A | B |
|
mgr
A | B |
|
FIGHT
RATING
65% |
|
|
|
|
|
|
