|
|
PBP Commentary |
Coming up we have a heavyweight MMA rules bout between Markus Sizemore (ranked 0 p4p, 0 weight class) and Rylan Hunter (ranked 0 p4p, 0 weight class). Rylan Hunter will no doubt be trying to keep this one on the feet, where he has a distinct advantage.
 |
|
 |
| 175 cm
19
200 lbs
11 - 5 - 0 |
|
195 cm
19
220 lbs
6 - 7 - 0 |
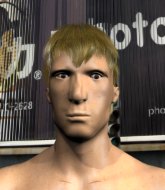
Good wrestling
Brawler
Experienced |
|
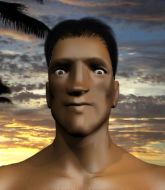
BJJ White Belt
Basic striking
Determined |
|
| |
|
Ladies and gentlemen. This fight is 5 rounds, in the heavyweight division.
Introducing the fighter to my left, fighting out of the red corner.
With a record of
11 - 5 - 0, fighting out of Sydney, Markus Sizemore!
And introducing the fighter to my right, fighting out of the blue corner.
With a record of
6 - 7 - 0, fighting out of Sydney, Rylan Hunter!
The judges for this bout are John Mangel, Summer Carpenter and Skip Squint.

The bell rings for round one and we are underway!

Hunter shoots in and gets a takedown into half guard. Hunter showed some decent athleticism there.

Hunter seems to be looking for submissions.
Hunter thumps the canvas. Not on purpose obviously - he just missed Sizemore's head.
Sizemore could do with losing a few pounds - he looks very soft around the mid section, to put it politely.
Sizemore is trying to control but can't.
Hunter wants to control but Sizemore is keeping him busy.
Sizemore is trying to control but can't.
Sizemore on his back here. We all know that wrestlers don't like being on their back so let's see if Sizemore tries to get out of the position.
Sizemore is trying is best to control the position here.
Hunter with the ground and pound but Sizemore uses the opportunity to regain guard.
Sizemore keeping full guard, as Hunter tries to pass.

Sizemore is looking for a guillotine. You can't force these things though and Hunter defends well.

That's one minute gone in the round.
Hunter stops Sizemore from standing up.
Sizemore is active off his back here, looking for submissions.
Hunter pushing down on Sizemore's thigh, trying to pass to half guard. He's managed it... Nice work.
Sizemore wants to control but Hunter is keeping busy.
Sizemore is looking to improve his position.
Sizemore is trying to stand.

That's two minutes gone in the round.
Hunter thows a wild elbow that connects with the canvas.
Hunter trying to mount his opponent but Sizemore defends it.
Hunter looking for a kimura but he'll have to free his other leg if he wants to finish that. Perhaps he's just using it as a distraction technique.
Sizemore trying to control here.
Sizemore won't allow Hunter to pass to mount.

That's three minutes gone in the round.
Hunter is trying to advance to mount but he's lost his balance and Sizemore reverses the position - he's now on top in Hunter's guard.
Sizemore with a nice head shot there.
Sizemore trying to pass the guard but can't manage it just yet.
Hunter keeping moving, preventing Sizemore from controlling successfully.
Sizemore connects with a couple of short punches.

Sizemore decides to stand up and beckons his opponent to follow.
Nice takedown defense from Hunter. No joy for Sizemore on that attempt.
Sizemore fails with the takedown.

That's four minutes gone in the round.

Hunter gets a clinch.
Hunter is looking for a takedown up against the cage. Sizemore gets underhooks though and prevents the takedown attempt.
Hunter looking for a takedown.
Hunter is working on a single leg takedown against the cage. Sizemore can't fight it off and eventually Hunter manages to take the fight to the floor. Sizemore looks annoyed but at least he's managed to land in guard.
The ref warns both fighters not to hold the cage as they work up against the meshing.
Fantastic stuff here - a very entertaining period of action, which has drawn cheers from the crowd.
Sizemore escapes his hips to the side and looks to be working for an armbar. Hunter gives him a little smile and shakes his head. No chance.
Hunter won't allow Sizemore to sweep him here.
As the round comes to an end the crowd are showing their appreciation for a great round of action.
Hunter wants to control from the top but Sizemore keeps moving.
And that�s the end of the round � the fighters go back to their corners.
A close round but Rylan Hunter will probably get the nod.
That's the end of the round. The referee orders the cornermen out of the cage so we can get back down to business.

Sizemore defends well against a solid takedown attempt from Hunter.

Sizemore shoots in for a takedown and gets it. Let's see what he's got on the mat.
Sizemore wants to pass the guard but Hunter is keeping the position.
Hunter is trying to control the position from the bottom.
Sizemore trying to control the position from guard on top but Hunter is wriggling around, looking for whatever he can.
Sizemore pressing down on his opponent's thigh, looking to pass guard. Hunter is keeping the position for now.
Hunter is working actively off his back, looking to secure an arm or perhaps work for a triangle.
That's one minute gone in the round.
Sizemore stays in close to Hunter's body and controls the position.
The referee must be thinking about standing these guys back up.

The ref stands the fighters back up because Markus Sizemore just wasn't active enough.
Hunter shoots in with a takedown attempt and he has Sizemore pinned against the cage. Sizemore gets the underhooks and manages to circle away.
Sizemore looks for a takedown but Hunter sprawls well.
That's two minutes gone in the round.
Hunter shoots in for a takedown but doesn't get it.
Markus Sizemore has stuffed three takedown attempts in the round now. That's going to take a lot out of Rylan Hunter.
Sizemore closes the distance and looks for a trip takedown... aaaand he's got it - Sizemore lands in his opponent's guard.
Hunter looking for submissions from the bottom here. Moving his hips around, possibly looking for an armbar.
The fighters are pressed up against the cage, both looking to find a bit of space to work.
Sizemore showing good wrestling skills to control the position.
Sizemore might be looking to lock onto one of his opponent's long limbs for a submission, whilst we're on the ground.
That's three minutes gone in the round.
Hunter isolates an arm and boxes in a triangle. Sizemore stacks Hunter on his neck as he steps over and passes to the side. He's now in a much more dominant position where he can look to do some serious damage. Nice move by Sizemore!
Hunter can't do much from the bottom here.
Sizemore advances to full mount.
Sizemore wants to control the pace but Hunter is squirming around nicely.
That's four minutes gone in the round.
Sizemore is in the full mount, landing strikes.
Sizemore trying to control but Hunter is having none of it.
Sizemore is in full mount, looking to secure a guillotine but Hunter is surviving well by controlling Sizemore's body position as best he can.
Sizemore jumps to side control looking for an arm triangle but Hunter manages to avoid the submission attempt.
The crowd applaud the fighters efforts here as the round comes to an end.
Sizemore looks up at the clock and then as Hunter takes his cue and looks up at the clock too, Sizemore smacks him right in the chops with a big elbow! How rude!
And that�s the end of the round � the fighters go back to their corners.
Markus Sizemore dominated that second round.
That's the end of the round. The referee orders the cornermen out of the cage so we can get back down to business.

Nice takedown defense from Sizemore. No joy for Hunter on that attempt.
Sizemore stuffs the takedown.
Sizemore looking for a takedown here - he's got it.
Sizemore works a leg free and moves into half guard.
The referee calls for the fighters to work.
Hunter tries to roll over but Sizemore keeps him under control.
Markus Sizemore overall seems to be getting the better of the ground position in the fight so far.
Sizemore takes a deep breath and rests his weight momentarily on top of his opponent, to control the position.
Hunter trying to control but Sizemore postures up.

Hunter manages to escape and get back to his feet!
That's one minute gone in the round.
Sizemore throws out a loose jab but Hunter uses good head movement to avoid it.
Markus Sizemore is looking to throw some combinations by the looks of things.
Hunter gets his takedown attempt stuffed easily
and Sizemore counters with a shoot takedown into half guard.
Markus Sizemore has stuffed three takedown attempts in the round now. That's going to take a lot out of Rylan Hunter.
Sizemore wants to pass the guard but Hunter is defending well.
Sizemore is controlling the pace.
Sizemore trying to control from half guard but Hunter is working away.
Sizemore stalling.
That's two minutes gone in the round.
The ref stands the fighters back up. Markus Sizemore wasn't doing enough on the ground.
Hunter tries to clinch up against the cage, rushing in the close the distance. Sizemore manages to break the clinch and circles back to the middle of the mat.
Hunter swings and misses with a hook to the body.
Hunter gets taken down but at least he's managed to land in guard.
This is a great period of action - very entertaining stuff!
Sizemore wants to control from the top but Hunter keeps moving.
Hunter trying to keep a closed guard but Sizemore is proving a slippery customer.
That's three minutes gone in the round.
Hunter is working actively from the bottom, looking for submissions. He's escaped his hips to the side and he's going for an armbar! Sizemore has his hands clasped together but Hunter extends an breaks Sizemore's desperate grasp, forcing a tap out due to armbar! Nice BJJ displayed there by Hunter.
Ladies and gentlemen, after 3:28 of round 3, we have a winner by way of Submission (Armbar). Rylan Hunter!
|
|
|
|
|
|
|
|
|
|
|
|
|
|
|
|
|
|
|
|
|
|
|
| S |
C
A |
G |
S |
C
B |
G |
|
S |
C |
G |
|
energy
A | B |
|
hype
A | B |
|
pop
A | B |
|
mgr
A | B |
|
FIGHT
RATING
53% |
|
|
|
|
|
|
