|
|
PBP Commentary |
Coming up we have a lightweight MMA rules bout between Connor Cozad (ranked 0 p4p, 0 weight class) and Hellson Ballswick (ranked 0 p4p, 0 weight class). Fingers crossed for an exciting fight - I'm sure both fighters are looking for a nice under the table bonus!
 |
|
 |
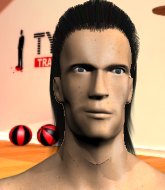
| 173 cm
28
158 lbs
23 - 11 - 0 |
|
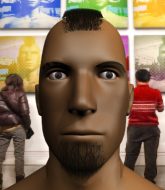
175 cm
31
157 lbs
15 - 25 - 1 |
Abu Dhabi Champ
Excellent boxer
Cardio machine |
|
Good wrestler
Excellent MT
Good gas tank |
|
| |
|
Ladies and gentlemen. This fight is 3 rounds, in the lightweight division.
Introducing the fighter to my left, fighting out of the red corner.
With a record of
23 - 11 - 0, fighting out of London, Connor Cozad!
And introducing the fighter to my right, fighting out of the blue corner.
With a record of
15 - 25 - 1, fighting out of London, Hellson Ballswick!
The judges for this bout are Daniel Bishop, Andrew Berry and Sam Margolis.

The bell rings for round one and we are underway!

Cozad closes the distance and pushes Ballswick back into the cage.
Ballswick tries to pull guard but Cozad forces him back to his feet, against the cage.
Ballswick has a couple of punches blocked by Cozad.
Ballswick tries a shoulder strike but it doesn't do any damage.
Ballswick tries to pull guard but Cozad holds him up against the cage and eventually Ballswick drops back down to his feet.
Cozad gets double underhooks to prevent a takedown attempt from Ballswick.
Connor Cozad has stuffed three takedown attempts in the round now. That's going to take a lot out of Hellson Ballswick.
Ballswick jumps guard but his hands slip and he falls flat on his back. Well, he's made himself look a right mug there, as Cozad walks away with a smile on his face. Ballswick gets slowly back to his feet and shakes his head.
Ballswick cracks Cozad with an open hand slap.

Ballswick instigates a clinch.
Cozad prevents Ballswick from breaking the clinch.
Cozad wants a takedown but no success here.
Ballswick is looking for a takedown up against the cage. Cozad gets underhooks though and prevents the takedown attempt.
Ballswick swings away with an uppercut that misses.

That's one minute gone in the round.

Ballswick ties up his opponent against the cage and manages to drag the fight down to the ground. Ballswick no doubt will be looking to work submissions from his guard.
We could do with one of the fighters taking the initiative a bit more on the ground - they're both waiting to capitalize on a mistake.

Ballswick is looking for a triangle but Cozad pushes his legs off easily.
Cozad pushing down on Ballswick's thigh, trying to pass to half guard. He's managed it... Nice work.
Ballswick is trying to get back to full guard.
Ballswick is refusing to be controlled, as Cozad sits in half guard.

Cozad is looking for an arm triangle, whilst trying to pass to side control. Ballswick doesn't seem that keen to cooperate though. No luck this time Cozad.
Ballswick tries to get to full guard but Cozad has control of the leg.
Cozad is thinking about going for an arm triangle but he can't free his leg.

That's two minutes gone in the round.
Ballswick is looking to sinch up a guillotine here but Cozad pulls his head out easily.
Cozad is sneakily working for an arm triangle but Ballswick sees it coming and defends easily.

Cozad decides he's had enough of the ground and stands up.
Ballswick gets a clinch.
Ballswick pulls guard effortlessly.
This is a great period of action - very entertaining stuff!
Ballswick has his foot on Cozad's thigh. He's trying to push off and get in position for a triangle, I think. Cozad works his way back into a safe position though.
Cozad trying to control the position from guard on top but Ballswick is wriggling around, looking for whatever he can.

That's three minutes gone in the round.
Cozad wants to stand but Ballswick is controlling his posture from full guard.
Ballswick is active off his back here, looking for submissions.
Ballswick has his foot on Cozad's thigh. He's trying to push off and get in position for a triangle, I think. Cozad works his way back into a safe position though.
Cozad trying to control the position from guard on top but Ballswick is wriggling around, looking for whatever he can.
Ballswick looking for a guillotine here but Cozad defends easily.
Cozad drops back for a leg! It's a sloppy attempt though and Cozad jumps back into guard quickly, to retain the dominant position.
Ballswick wants to stand up but Cozad is controlling him.

That's four minutes gone in the round.
Cozad throwing strikes from guard but Ballswick blocks nicely.
Cozad won't allow Ballswick to get back to his feet.
Ballswick working a defensive guard here.
Cozad decides to stand up and beckons his opponent to follow.
Ballswick gets to the clinch - let's see what his plan is here.
Ballswick goes for a takedown attempt but Cozad pushes him away and we're back to fighting at a distance.
As the round comes to an end the crowd are showing their appreciation for a great round of action.
Ballswick closes the distance and clinches.
And that�s the end of the round � the fighters go back to their corners.
Hellson Ballswick dominated that round.
That's time! Back to the action!

Ballswick connects with a looping left hand that seems like it dazed Cozad momentarily.
Cozad clinches up with Ballswick and pushes him back against the cage.
Ballswick misses with a short punch on the inside.
Ballswick prevents the takedown attempt.
Cozad fails to pull guard.
Ballswick has clasped his hands together around Cozad's back... aaand, he's got a takedown into side control. Nicely done.
Hellson Ballswick has got the better of the ground game so far.
Ballswick is looking to take a break and control but Cozad is keeping him honest, looking to work from the bottom.
Cozad can't do much from the bottom here.

Ballswick decides to stand up, so the ref orders Cozad to his feet.
Connor Cozad is looking to throw some combinations by the looks of things.
Cozad moves into the clinch.
Cozad tries for a takedown but Ballswick manages to get underhooks.
That's three failed takedown attempts in the round for Connor Cozad. That's going to take a lot out of him.
That's one minute gone in the round.
Cozad is looking for a takedown.
A quick uppercut on the inside from Ballswick.
Ballswick successfully pulls guard.
Cozad advances position into side control!
Ballswick is trying to get back to his feet.
Cozad tries for an arm triangle. That looks pretty tight to me. Is this one over!?! Possibly, maybe, no Cozad has let go of the choke. Obviously it wasn't as tight as we thought!
The ref warns both fighters not to hold the cage as they work up against the meshing.
Cozad misses with a strike but at least he's keeping busy, looking to cause some damage - that will still help him when it comes to the judges scorecards.
Ballswick is working hard to escape and get back to his feet. After a battle for position, Cozad asserts his dominance and retains side control.
Ballswick can't do much from the bottom here.
That's two minutes gone in the round.
Cozad in side control, working for a kimura. He's got hold of an arm and he's torquing it... Ballswick is tapping! That's the end of the fight!
Ladies and gentlemen, after 2:25 of round 2, we have a winner by way of Submission (Kimura). Connor Cozad!
Connor Cozad very nearly forgot to thank Fossington & Blythe: Gentlemen's Fight Attire amongst all the excitement of his win but just as the interview came to a close, he screamed their name. Hopefully he'll get a few nice freebies in the mail as a thank you.
|
|
|
|
|
|
|
|
|
|
|
|
|
|
|
|
|
|
|
|
|
|
|
| S |
C
A |
G |
S |
C
B |
G |
|
S |
C |
G |
|
energy
A | B |
|
hype
A | B |
|
pop
A | B |
|
mgr
A | B |
|
FIGHT
RATING
59% |
|
|
|
|
|
|
