|
|
PBP Commentary |
Coming up we have a featherweight MMA rules bout between Luke Taylor Ii (ranked 0 p4p, 0 weight class) and Johnny Blaze (ranked 0 p4p, 0 weight class). Rumors backstage are that the fighters have been paid to keep it standing but we know that would never happen in MMA!
 |
|
 |
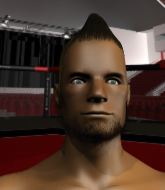
| 175 cm
24
154 lbs
1 - 1 - 0 |
|
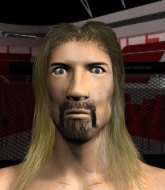
176 cm
24
145 lbs
1 - 2 - 0 |
BJJ Blue Belt
Excellent boxer
Granite chin |
|
BJJ Blue Belt
Counter striker
Tends to cut |
|
| |
|
Ladies and gentlemen. This fight is 3 rounds, in the featherweight division.
Introducing the fighter to my left, fighting out of the red corner.
With a record of
1 - 1 - 0, fighting out of Montreal, Luke Taylor Ii!
And introducing the fighter to my right, fighting out of the blue corner.
With a record of
1 - 2 - 0, fighting out of Montreal, Johnny Blaze!
The judges for this bout are Steve Smith, Elvis Blanc and Gregory Folan.

The bell rings for round one and we are underway!
Taylor Ii misses with a few strikes there.
Taylor Ii tries to close the distance and clinch up against the cage but Blaze paws at him with a jab and circles away.
Blaze shoots in for a double leg but Taylor Ii sprawls well. That's going to sap some energy.
Blaze throws a right and a left that Taylor Ii avoids nicely.
Taylor Ii shoots in but no luck this time.
Horrible takedown by Taylor Ii or perhaps it was just good defense by Blaze which made him look bad.

Blaze gets a takedown into half guard.
If this pace continues, the referee will definitely step in and force a standup.
Taylor Ii avoiding damage under a succession of punches from Blaze.
Blaze not landing any meaningful shots this time.

Blaze is looking for a kimura but he's never going to get it from there.

Taylor Ii pushes Blaze off and gets back to his feet.

That's one minute gone in the round.
Taylor Ii throws a two punch combo that lands nicely.
Taylor Ii tries for a takedown but Blaze sees it coming a mile off and avoids it easily.
That's three failed takedown attempts in the round for Luke Taylor Ii. That's going to take a lot out of him.

Blaze fakes with an overhand right and moves in to clinch with Taylor Ii, pushing him back against the cage.
A frustrated look appears on Taylor Ii's face as he tries to break the clinch.
Blaze is working on a single leg takedown against the cage. Taylor Ii can't fight it off and eventually Blaze manages to take the fight to the floor. Taylor Ii looks annoyed but at least he's managed to land in guard.
Blaze looks gassed!
Taylor Ii is trying to stand up but he's not managed so far.
Blaze tries to free his leg and advance position but Taylor Ii is retaining full guard.
The fighters are pressed up against the cage, both looking to find a bit of space to work.
Blaze trying to control the position from guard on top but Taylor Ii is wriggling around, looking for whatever he can.
Blaze prevents Taylor Ii from getting back to his feet.

That's two minutes gone in the round.
Taylor Ii trying desperately to get back to his feet here but he's not having any joy at all. He's going to tire himself out if he's not careful.
Taylor Ii is working an open guard here, looking to improve his position. No doubt that will leave him open to counters but at least he's being more offensive.
Taylor Ii avoiding any damage from the ground and pound.
Blaze not doing a lot at the moment. He'll have to show some more aggression or the fight will get stood up.
The crowd are loving this. Great action here.
Taylor Ii is trying to control the position from the bottom.

OK we're going to have a standup here. Johnny Blaze hasn't been effective enough on the ground and the referee wants a restart.
Taylor Ii throws a right hand that Blaze ducks under and follows up with a left that Blaze also avoids with ease.
Blaze avoids the clinch attempt nicely.
Blaze on the wrong end of a vicious looking body shot.
Blaze takes a really solid shot there but just smiles back and shrugs his shoulders.

That's three minutes gone in the round.
Taylor Ii throws a right hand that Blaze ducks under and follows up with a left that Blaze also avoids with ease.
Taylor Ii tries for a takedown but Blaze sees it coming a mile off and avoids it easily.
Blaze shoots in for a takedown - he's clinched up with Taylor Ii but Taylor Ii pushes him off and we're back to square one.
Luke Taylor Ii seems to be the more aggressive standup fighter in this bout.
Taylor Ii throws a series of punches but Blaze avoids them all with ease.
Taylor Ii closes the distance and lands a one-two.
Taylor Ii fails with an attempt to clinch.
Blaze fakes a couple of low kicks, before throwing one on the third attempt. It connects and Taylor Ii has to reset his feet before getting ready to engage.
Taylor Ii pushes forward with a 1-2 combination that forces Blaze back to the cage. Taylor Ii follows up with a solid lead hook to the liver.
Blaze stuffs a takedown. It's all about dictating where the fight takes place and Blaze wants it to stay on the feet.
Taylor Ii closes the distance looking to clinch
and Blaze moves into the clinch.

That's four minutes gone in the round.
Taylor Ii is trying to break the clinch but Blaze has him pressed against the cage.
Taylor Ii prevents a takedown attempt there.
Taylor Ii is trying to break the clinch but Blaze has him pressed against the cage.

Blaze breaks the clinch and we're back to striking at distance.
Blaze tries for a takedown but Taylor Ii sees it coming a mile off and avoids it easily.
No luck with that takedown attempt from Blaze.
As the round comes to an end the crowd are showing their appreciation for a great round of action.
A right-left combo lands from Taylor Ii.
Taylor Ii works his jab well there, keeping his opponent at a distance.
And that�s the end of the round � the fighters go back to their corners.
That was a close round but I would say that Luke Taylor Ii will probably get the nod.
The corners get their ten second warning. Both fighters stand from their stools and stare eachother down, ready to get back to the action.

Taylor Ii looks to land a combination but Blaze avoids it well.
A combination from Taylor Ii does no damage.
Blaze showing good head movement there, avoiding the strikes from Taylor Ii.
Taylor Ii is looking to clinch.
Taylor Ii fails with a rather predictable takedown attempt.
Blaze closes this distance looking for a takedown but Taylor Ii circles away.
Taylor Ii avoids a kick to the body.
Taylor Ii throws a right and a left that both miss.
Taylor Ii tries to clinch up but Blaze circles away and keeps his distance.
Both fighters are absolutely exhausted here.
That's one minute gone in the round.
Taylor Ii fails to land the takedown.
Blaze closes the distance and clinches up with Taylor Ii, looking for a takedown. Blaze pushes Taylor Ii against the cage but Taylor Ii circles to the side and manages to break the clinch.
Taylor Ii throws a series of strikes that have Blaze backpedaling.
Taylor Ii moves in looking to clinch but Blaze pushes him off.
Taylor Ii throws a body kick, spinning off balance
and Blaze counters into the clinch. Nicely done.
Blaze breaks from the clinch.
Taylor Ii looks to score with a combo but nothing lands.
Taylor Ii closes the distance but Blaze moves to the side
so Blaze counters with a double leg into guard. Good agility.
Blaze throwing elbows and punches but not connecting, as Taylor Ii works some decent striking defense from the bottom.
Taylor Ii looking to control.
The ref warns both fighters not to hold the cage as they work up against the meshing.
That's two minutes gone in the round.
Blaze throws a big elbow that misses.
Blaze must be cautious of submissions here, given that his opponent has the superior Jiu Jitsu.
This has been an exciting period of action!
Blaze wants to control from the top but Taylor Ii keeps moving.
Taylor Ii looking to sweep here. No luck so far.
Taylor Ii manages to escape and get back to his feet.
Taylor Ii fails with a rather predictable takedown attempt.
That's three failed takedown attempts in the round for Luke Taylor Ii. That's going to take a lot out of him.
Blaze shoots in but Taylor Ii avoids the takedown attempt easily.
A momentary lapse in concentration from Taylor Ii enables Blaze to shoot in and score with a neat double leg. Taylor Ii manages to secure a closed guard as the fighters hit the mat.
Blaze looking to pass the guard.
Blaze stops Taylor Ii from standing up.
That's three minutes gone in the round.
Blaze trying to control but Taylor Ii is working from the bottom.
Taylor Ii trying to control the position.
If this pace continues, the referee will definitely step in and force a standup.
Taylor Ii has a closed guard, preventing anything of note from happening. Perhaps he's looking to stall.

We're going to have a standup here because Luke Taylor Ii wasn't active enough for the referee's liking.
Taylor Ii feints a jab promting Blaze to slip. Taylor Ii then demonstrates his capabilities by jabbing again. Blaze slips again and ducks right into an uppercut.
Luke Taylor Ii is looking to throw some combinations by the looks of things.
Blaze closes the distance, clinches up and gets a nice trip takedown into side control. Very smooth.
That's four minutes gone in the round.
Blaze working away.
Johnny Blaze has got the better of the ground game so far.
Blaze prevents Taylor Ii from escaping the position.
Blaze lands a decent elbow from side control.
Taylor Ii being controlled for a moment.
Taylor Ii is positioning himself to get back to half guard.
As the round comes to an end the crowd are showing their appreciation for a great round of action.
Taylor Ii wants to get back to his feet but Blaze drags him back down.
Taylor Ii tries to work a leg under to get back to half guard but Blaze wriggles his own leg back out and remains in side control.
And that�s the end of the round � the fighters go back to their corners.
A close second round but Johnny Blaze will probably get the nod - 10:9.
Well, the break between rounds is over. Let's get back to the scrappin! This is the final round!

Blaze tries for a takedown but Taylor Ii sees it coming a mile off and avoids it easily.
Blaze misses with a body kick.
Blaze darts in and lands a nice takedown into half guard.
Taylor Ii is looking to regain full guard. Not this time though.
Blaze is thinking about going for an arm triangle but he can't free his leg.
Taylor Ii is trying to stand back up but Blaze is controlling him

Taylor Ii looking to work for a kimura from the bottom.
Taylor Ii is trying to control but can't.
Both fighters are breathing heavily.
That's one minute gone in the round.
Blaze wants to take a breather but Taylor Ii is having none of it.
Taylor Ii is looking to regain full guard. Not this time though.
Taylor Ii is looking to escape.
Taylor Ii tries to kick Blaze off in order to stand up. Blaze Avoids the leg push though and dives into side control.

Blaze stands up and beckons Taylor Ii to his feet.
Blaze slips in close and lands a nice hook before moving back out of range.
Taylor Ii moves out of range of the body kick.
Taylor Ii rushes forward with a series of wild hooks but Blaze moves out of range and avoids them all easily.
Taylor Ii throws a right and a left that both miss.
That's two minutes gone in the round.
Taylor Ii looks to score with a combo but nothing lands.
Blaze shoots in and drives through. Taylor Ii sprawls well.
Taylor Ii throws a right and a left that Blaze avoids nicely.
Blaze dives in and grabs Taylor Ii's left leg, looking for a takedown. Taylor Ii pushes down on Blaze's head and hops out.
Luke Taylor Ii has stuffed three takedown attempts in the round now. That's going to take a lot out of Johnny Blaze.
Blaze is looking to clinch but Taylor Ii is avoiding it.
Taylor Ii uses good footwork to get in and out and land a nice right hand before Blaze has time to react.
Taylor Ii tries a head kick but it misses.
A telegraphed takedown attempt from Taylor Ii is defended easily by Blaze.
Taylor Ii leaves Blaze with his face pressed against the mat as he sprawls beautifully, defending against a solid takedown attempt.
That's three minutes gone in the round.
Taylor Ii wants to clinch.
No joy there for Taylor Ii, who threw a few shots but didn't land.
Taylor Ii ducks low and lands a nice hook to the body of his opponent.
Taylor Ii swinging wildly here.

Taylor Ii takes the fight into the clinch.
That's four minutes gone in the round.
Taylor Ii is trying to break the clinch but Blaze is controlling him.
Blaze jumps guard.
Blaze bucks up whilst keeping hold of a body lock, managing to reverse the position. Now he's in top in Taylor Ii's guard.
Taylor Ii trying to keep a closed guard but Blaze is proving a slippery customer.
Taylor Ii manages to land a sweep and now he's in mount on top!
Blaze avoids a series of strikes thrown by Taylor Ii.
The crowd applaud the fighters efforts here as the round comes to an end.
Taylor Ii throwing sloppy strikes, which aren't doing any damage.
Taylor Ii throws some wild stikes that Blaze manages to avoid easily.
And that's the end of the fight!
That was a close round. You could make an argument for either fighter but I would give it to Luke Taylor Ii.
I think Taylor Ii has won this one but let's see what the judges have to say. Over to the ring announcer for the scorecards.
Ladies and gentlemen, after 3 rounds of action, we go to the scorecards for a decision.
Judge Steve Smith scores the fight 29:29
Judge Elvis Blanc scores the fight 29:28
Judge Gregory Folan scores the fight 28:30
The fight is ruled a draw!
|
|
|
|
|
|
|
|
|
|
|
|
|
|
|
|
|
|
|
|
|
|
|
| S |
C
A |
G |
S |
C
B |
G |
|
S |
C |
G |
|
energy
A | B |
|
hype
A | B |
|
pop
A | B |
|
mgr
A | B |
|
FIGHT
RATING
56% |
|
|
|
|
|
|
