|
|
PBP Commentary |
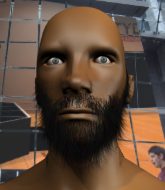
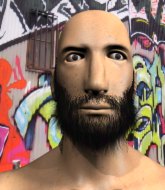
Coming up we have a middleweight MMA rules bout between Karl Pilkers (ranked 0 p4p, 0 weight class) and Greg Harmer (ranked 0 p4p, 0 weight class). Greg Harmer will no doubt be looking to use his reach advantage to good effect.
 |
|
 |
| 182 cm
25
192 lbs
0 - 0 - 0 |
|
193 cm
20
186 lbs
1 - 0 - 0 |
BJJ White Belt
Solid boxing
Granite chin |
|
BJJ White Belt
Brawler
Determined |
|
| |
|
Ladies and gentlemen. This fight is 3 rounds, in the middleweight division.
Introducing the fighter to my left, fighting out of the red corner.
With a record of
0 - 0 - 0, fighting out of Las Vegas, Karl Pilkers!
And introducing the fighter to my right, fighting out of the blue corner.
With a record of
1 - 0 - 0, fighting out of Las Vegas, Greg Harmer!
The judges for this bout are Gwen Towbar, Robert Twigg and George Francis.

The bell rings for round one and we are underway!
Pilkers throws a head kick but Harmer moves out of range.

Harmer gets tackled into the cage by Pilkers. Pilkers maintains the clinch.
Harmer misses the knee to the body. Nice hip positioning from Pilkers.
Pilkers on the defensive, avoiding the knees to the body.
Pilkers wants to break free but Harmer has control.
Harmer tries to land a knee to the head but misses.

Pilkers breaks the clinch.

Pilkers scores with a takedown into Harmer's guard.
Harmer looks gassed!
The referee claps his hands together and tells the fighters to work.

Pilkers stands and steps away. Harmer gets to his feet too and we're back to the striking game.
Harmer gets tackled into the cage by Pilkers. Pilkers maintains the clinch.
Pilkers tries to pull guard but Harmer won't allow it.

Harmer manages to break the clinch.
Harmer tries to clinch but Pilkers moves away
and Pilkers moves into the clinch.
The crowd are loving this. Great action here.
Pilkers prevents Harmer from breaking the clinch.
Pilkers taking a break, stalling in the clinch.

That's one minute gone in the round.
Harmer misses with a short punch on the inside.
Pilkers is pushing Harmer up against the cage, for a bit of lean and pray action. Action being used the in the loosest possible sense of the word.
Harmer lands a left hand.
Pilkers breaks the clinch and we're back to striking at distance.
Pilkers throws a head kick but Harmer moves out of range.
Pilkers throws a head kick but Harmer moves out of range.
Pilkers throws the kick towards the body but Harmer avoids it.
Pilkers shoots in with a lovely double leg takedown. Harmer manages to land in full guard to minimise the damage.
Pilkers might be looking to lock onto one of his opponent's long limbs for a submission, whilst we're on the ground.
Pilkers is intent on slowing down the pace of the fight, simply looking to control.

Pilkers drops back looking for a leg! Harmer is in trouble here! The fighters roll with the hold and Harmer manages to kick Pilkers off! Pilkers jumps back into Harmer's guard.

That's two minutes gone in the round.
Pilkers tries to free his leg and advance position but Harmer is retaining full guard.
Pilkers advances to half guard.

That's three minutes gone in the round.
Pilkers keeping composed on the top, looking to control the action.
Harmer really doesn't want to stay on the ground with Pilkers. If he can't get it back to his feet, it's only a matter of time before he'll be tapping out.

The ref stands the fighters back up because Karl Pilkers just wasn't active enough.
The fight moves into the clinch position.
Harmer is trying to work out of this bad position, with his back against the cage.
Pilkers tries to break free but Harmer pushes him back against the cage.
Pilkers avoids the elbow strike from Harmer, against the cage.
Knees in the clinch landing for Pilkers.

That's four minutes gone in the round.
Pilkers breaks from the clinch.
Pilkers darts in and clinches Harmer up against the cage.
Pilkers pushes off and circles away, back to the middle of the mat.
Pilkers closes this distance looking for a takedown but Harmer circles away.
Pilkers lands a jab to Harmer's midsection.
Pilkers fakes with an overhand right and moves in to clinch with Harmer, pushing him back against the cage.
Pilkers breaks the clinch and we're back to striking at distance.
Pilkers instigates a clinch.
Pilkers drags the fight down to the ground.
The crowd are loving this. Great action here.
Pilkers working for submissions but it's allowed Harmer to get to half guard.
The ref warns both fighters not to hold the cage as they work up against the meshing.
As the round comes to an end the crowd are showing their appreciation for a great round of action.
Pilkers is looking for a sweep. Harmer is wise to his cunning plan and keeps the top position.
And that�s the end of the round � the fighters go back to their corners.
Karl Pilkers dominated that round.
That's the end of the interval. I'm sure that seemed a lot quicker than a minute for our two fighters! Back to the action.

Pilkers throws a head kick that misses and slips in the process. He scrambles back to his feet and the fighters circle.
Harmer throws a hook but Pilkers blocks it.
Danga de danga de dang - Pilkers scores with a four punch combination!
Pilkers has Harmer up against the cage in a clinch.
Pilkers prevents a body shot from Harmer.
The pace slowing considerably in the clinch, as Pilkers takes a break from that fighting nonsense to think about the finer things in life.
Harmer lands with a light punch inside.
Harmer misses with a knee to the head.
Harmer gets double underhooks to prevent a takedown attempt from Pilkers.
Harmer breaks from the clinch.
Pilkers keeps the fight on the outside.
Both fighters are absolutely exhausted here.
That's one minute gone in the round.
Harmer tries to close the distance and clinch but Pilkers swats him to one side with an open hand palm strike and circles away.
Pilkers rushes Harmer and presses him up against the cage.
Harmer stops a takedown attempt from Pilkers.
Harmer tries to circle away but Pilkers has him pinned against the cage.
Harmer scores with a knee to the head.
Pilkers blocks an elbow strike from Harmer.
Pilkers displaying some good clinch control by pressing Harmer up against the cage.
Pilkers pushes off and circles away, back to the middle of the mat.
Harmer leaves Pilkers with his face pressed against the mat as he sprawls beautifully, defending against a solid takedown attempt.
That's three failed takedown attempts in the round for Karl Pilkers. That's going to take a lot out of him.
Harmer moves out of range of the body kick from Pilkers.
Harmer wants to clinch.
Harmer tries to clinch but fails miserably
and Pilkers counters with a nice double leg into side control. Harmer won't be happy with that.
That's two minutes gone in the round.
This is a great period of action - very entertaining stuff!
Pilkers tries to land with some ground and pound but misses.
The fighters are pressed up against the cage, both looking to find a bit of space to work.
Pilkers controlling from side mount.
Pilkers working the ground and pound but Harmer is defending the strikes.
Pilkers has had enough of the ground for now and decides to stand.
That's three minutes gone in the round.
Harmer fails with an attempt to clinch.
Pilkers fakes with an overhand right and moves in to clinch with Harmer, pushing him back against the cage.
A shot in the inside from Harmer.
Pilkers stalling the fight.
Harmer has Pilkers pressed against the cage, preventing Pilkers from circling away and getting back to striking at range.
Pilkers tries to jump guard but he falls flat on his backside. Harmer smiles and moves away.
The fight stays on the outside here - Pilkers looks like he's thinking about clinching though.

The fight moves into the clinch position.
Pilkers misses with an elbow strike.
That's four minutes gone in the round.
An uppercut to the body lands inside from Pilkers.
Harmer lands a hook to the body. It's hard to tell if that hurt Pilkers or not.
Harmer with an attempt at a knee that misses.
Pilkers tries to land a knee to the body but he is off balance and Harmer avoids it.
Harmer trying to land knees to the body.
Harmer's corner calls for him to break the clinch, which he does.
Harmer works his jab well there, keeping his opponent at a distance.
Harmer darts in trying to clinch
and Pilkers holds on and brings the fighters into a clinch.
As the round comes to an end the crowd are showing their appreciation for a great round of action.
Harmer works on Pilkers's body with a couple of short punches.
Harmer prevents a takedown attempt there.
An uppercut to the body lands inside from Harmer.
And that�s the end of the round � the fighters go back to their corners.
Karl Pilkers dominated that second round.
That's the end of the round. The referee orders the cornermen out of the cage so we can get back down to business. This is the final round!

Harmer tries to clinch up.
Karl Pilkers is looking to throw some combinations by the looks of things.
Harmer tries to clinch up
and Pilkers counters with a lovely shot to the body.
A head kick misses from Harmer.
Pilkers gets a clinch.
Pilkers ties up his opponent against the cage and manages to drag the fight down to the ground. Pilkers no doubt will be looking to work submissions from his guard.
Pilkers controlling Harmer's posture.
We've had a lack of effective grappling in the last minute or so, which could well see a referee standup.

Well, the referee has seen enough. Neither fighter is active enough on the ground so he's stood them back up.
Pilkers shoots in and gets a takedown into Harmer's guard.
Karl Pilkers overall seems to be getting the better of the ground position in the fight so far.
Harmer is trying to hold Pilkers in close to prevent damage but Pilkers has managed to pass into half guard.
Pilkers looks over to his corner - he wants some instructions but his corner are not responding.
Both fighters are breathing heavily.
That's one minute gone in the round.
Pilkers is thinking about going for an arm triangle but he can't free his leg.
That's two minutes gone in the round.
The crowd are starting to boo a lack of action.
Pilkers is controlling the pace.
Karl Pilkers has forced the referee to step in and bring the fight back to the feet.
Pilkers misses with a takedown attempt. He shot from a bit too far out.
Harmer throws a left and a right that both miss
and Pilkers counters with a crisp hook to the side of the head.
Harmer closes the distance looking to clinch
and Pilkers counters with a two punch combo.
That's three minutes gone in the round.
Harmer tries to clinch but Pilkers moves away
and Pilkers counters with a two punch combo.
A chopping leg kick lands by Harmer.
Pilkers avoids a punch combination nicely.
Harmer closes the distance but Pilkers moves to the side
and Pilkers counters with a nice shoot takedown that brings the fighters to the ground.
Harmer trying to control the position.
The referee wants the fighters to be more active or he's going to reset them on the feet.
Pilkers stops Harmer from standing up.
That's four minutes gone in the round.

Greg Harmer has forced the referee to step in and restart the fight on the feet.
Pilkers fails miserably with a takedown attempt.
A jab from Harmer finds it's way through Pilkers's defenses.
Harmer misses with a straight right.
Harmer is looking to clinch but Pilkers is avoiding it.
Pilkers gets the takedown into side control.
We've seen a great period of action over the last minute or so - credit to both fighters for going all out!
Pilkers trying to control the position but Harmer is working away.
Pilkers tries for an arm triangle. That looks pretty tight to me. Is this one over!?! Possibly, maybe, no Pilkers has let go of the choke. Obviously it wasn't as tight as we thought!
Greg Harmer has stepped it up - he knows he needs a finish here!
Karl Pilkers is fighting for a decision here - he's started to take the cautious approach.
The crowd applaud the fighters efforts here as the round comes to an end.
Pilkers takes advantage of some sloppy striking from Harmer to pass into mount.
And that's the end of the fight!
Karl Pilkers showed his dominance in that final round.
Well Pilkers has outscored his opponent in every aspect of the fight today. Only a scarily incompetent judge or two will keep him from a well deserved win... Over to the ring announcer for the scorecards.
Ladies and gentlemen, after 3 rounds of action, we go to the scorecards for a decision.
Judge Gwen Towbar scores the fight 30:27
Judge Robert Twigg scores the fight 30:27
Judge George Francis scores the fight 30:27
In favor of your winner, by unanimous decision... Karl Pilkers!
|
|
|
|
|
|
|
|
|
|
|
|
|
|
|
|
|
|
|
|
|
|
|
| S |
C
A |
G |
S |
C
B |
G |
|
S |
C |
G |
|
energy
A | B |
|
hype
A | B |
|
pop
A | B |
|
mgr
A | B |
|
FIGHT
RATING
46% |
|
|
|
|
|
|
