|
|
PBP Commentary |
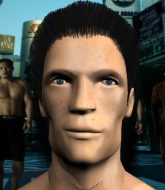
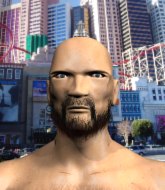
Coming up we have a bantamweight MMA rules bout between Ryo Kuma (ranked 0 p4p, 0 weight class) and Sol Solved (ranked 0 p4p, 0 weight class). Kuma comes to the cage accompanied by Zetsubou Billy. Sol Solved has the better chin. Will he look to stand and bang today?
 |
|
 |
| 166 cm
22
136 lbs
1 - 1 - 0 |
|
160 cm
18
135 lbs
0 - 0 - 0 |
BJJ Blue Belt
Excellent MT
Cuts easily |
|
BJJ Blue Belt
Brawler
Granite chin |
|
| |
|
Ladies and gentlemen. This fight is 3 rounds, in the bantamweight division.
Introducing the fighter to my left, fighting out of the red corner.
With a record of
1 - 1 - 0, fighting out of Tokyo, Ryo Kuma!
And introducing the fighter to my right, fighting out of the blue corner.
With a record of
0 - 0 - 0, fighting out of Tokyo, Sol Solved!
The judges for this bout are Shigeki Fujiwara, Shirou Masuda and Shigeki Sano.

The bell rings for round one and we are underway!
Kuma tries a switch kick but it misses it's target.
Solved swinging wildly here.
Solved circles away from the clinch attempt

and Solved holds on and brings the fighters into a clinch.
Solved will no doubt start fighting again in a minute but for now he's just having a little rest, leaning Kuma up against the cage.
Solved drops to a knee looking for a takedown but Kuma gets the underhooks and prevents it.
Solved lands with a light punch inside.
With the fighters up against the cage, Solved throws an elbow but misses.
Solved looks like he'd prefer to be striking at range right now.
Kuma taking a breather.

That's one minute gone in the round.
Solved tries to break free but Kuma pushes him back against the cage.
Solved tries to break free but Kuma pushes him back against the cage.
A short body shot lands from Solved as the two fighters clinch.
Solved jumps guard but Kuma stands there with Solved around his waist. Solved gives up and drops back to his feet. We remain in the clinch.
Kuma stalling in the clinch but Solved improves position.
Kuma tries to break the clinch but Solved is controlling the position.
Kuma has had enough of the clinch and is looking to separate.
Kuma on the defensive, avoiding the knees to the body.
Kuma with the Thai clinch. He's looking to land a big knee but he's not managed it this time.
Solved has dropped down and is looking to force the takedown but it's defended by Kuma after a bit of a struggle.
Ryo Kuma has stuffed three takedown attempts in the round now. That's going to take a lot out of Sol Solved.
Kuma is trying to break free.
Kuma misses with an elbow strike.
Kuma is trying to work out of this bad position, with his back against the cage.

That's two minutes gone in the round.
Solved wants to break free. God knows he wants to breaaaak freeee.
Kuma connects with a nasty looking knee right to Solved's face.
Solved tries for a takedown. No joy.
Solved is trying to force a seperation but Kuma has the dominant position.
Kuma working hard to break the clinch.
Kuma wants to strike at distance but he can't break free of the clinch.

Solved pulls guard.
We could do with one of the fighters taking the initiative a bit more on the ground - they're both waiting to capitalize on a mistake.
The referee looks like he's ready to step in and stand the fighters back up.
Solved has control of Kuma's left arm, preventing Kuma from doing any damage.
Kuma stopping the sweep attempt from Solved.
Kuma trying to control but Solved is working from the bottom.

That's three minutes gone in the round.
Solved is looking to get back to his feet but can't, whilst Kuma is controlling him.

The ref stands the fighters back up. Ryo Kuma wasn't doing enough on the ground.
Kuma rushes forward with a series of wild hooks but Solved moves out of range and avoids them all easily.
Solved shoots in looking for a takedown. Kuma tries to sprawl out of it but Solved keeps driving through. The fighters are pinned against the cage. Kuma manages to get underhooks and after a bit of a struggle, circles away and we're back to standing.
Ryo Kuma is looking to keep the fight on the feet at all costs.
Solved dives in and grabs Kuma's left leg, looking for a takedown. Kuma pushes down on Solved's head and hops out.
Solved tries to clinch up.
No luck with that takedown attempt from Solved.
Solved looks gassed!
That kick from Kuma tenderised Solved's leg. Solved is trying to keep his angry face on.

That's four minutes gone in the round.
Nice takedown defense from Kuma. No joy for Solved on that attempt.
Ryo Kuma seems to be the more aggressive standup fighter in this bout.
A combination from Kuma does no damage.
Solved takes a head kick and keeps coming.
Solved circles away from the clinch attempt.
Solved scores with a jab to the jaw of his opponent.
Solved fails with a takedown attempt.
Kuma scores with a one two! Solved had his feet all tangled up there and couldn't avoid the strikes.
Solved fakes high and shoots in for a takedown but Kuma avoids it really well and circles away.
The crowd applaud the fighters efforts here as the round comes to an end.
Kuma throws a head kick that Solved semi-blocks.
And that�s the end of the round � the fighters go back to their corners.
A close round but Sol Solved will probably get the nod.
The minute break is over - no more time for sponges and pep talks - back to the action!

Solved stumbles momentarily as he takes a strong leg kick from Kuma.
Solved shoots for a takedown but Kuma saw that one coming a mile off and avoided it easily.
A nice leg kick lands there from Kuma.
Solved shoots in for a takedown. "Ole!" shouts Kuma as he jumps to the side.
Solved moves into the clinch.
Solved takes a knee to the side of the body.
A battle for position here, against the cage.
Solved pushes Kuma back against the cage and unloads with a body punch.
A frustrated look appears on Solved's face as he tries to break the clinch.

Kuma escapes the clinch and we're back to striking.
Solved misses with a double jab.
Solved is breathing heavily.
That's one minute gone in the round.
Solved fails with a rather predictable takedown attempt.
Ryo Kuma has stuffed three takedown attempts in the round now. That's going to take a lot out of Sol Solved.
Kuma throws a series of punches but Solved moves out of range.
Kuma misses with a body kick.
The fighters are going at a pretty good pace and they're both starting to sweat now.
Kuma lands a head kick!
Solved misses with a telegraphed body shot
and Kuma counters with a leg kick.
Solved fails to land with the punch combination there - jab, cross, hook, miss, miss, miss.
Kuma fakes with a right hand and throws a good leg kick, right into the thigh. That had to hurt Solved.
Kuma lands a leg kick that knocks Solved off balance momentarily.
Kuma tries to clinch but fails miserably
and Solved moves into the clinch.
Solved jumps guard but Kuma stands there with Solved around his waist. Solved gives up and drops back to his feet. We remain in the clinch.
Solved wants to strike at distance but he can't break free of the clinch.
That's two minutes gone in the round.
Kuma tries to break free but Solved pushes him back against the cage.
Solved content to slow the pace in the clinch.
Kuma has had enough of the clinch but Solved keeps him there for the moment.
Solved keeps the fight in the clinch, despite Kuma's efforts to push away.
Solved blocks a knee to the body. He'll have a nicely bruised forearm in the morning.
Kuma is trying to break free.
Kuma trying to stall but Solved improves his position.
Kuma on the defensive, avoiding the knees to the body.
Kuma tries to break the clinch but Solved is controlling the position.
Kuma is defending well against a takedown attempt.
Solved drops to a knee looking for a takedown but Kuma gets the underhooks and prevents it.
That's three minutes gone in the round.
Both fighters working to control the clinch.
Solved avoiding damage.
Kuma trying to control the position but instead, Solved has worked for underhooks and has pushed Kuma into the cage.
Solved wants to break the clinch but can't.
Solved lands a shot to the body.
Solved is working on a leg, looking for a takedown but Kuma is defending well.
That's four minutes gone in the round.
Solved tries to take the fight to the ground by pulling guard but can't manage it.
The pace really dropping off here, momentarily.
Kuma is trying to work out of this bad position, with his back against the cage.
Kuma looks like he'd prefer to be striking at range right now.
Solved gets control of Kuma's arms and successfully pulls guard. Solved will no doubt be looking for submissions off his back.
Kuma has decided he wants to stand but the closed guard of Solved is proving hard to escape from.
Kuma trying to control but Solved is working from the bottom.
The crowd applaud the fighters efforts here as the round comes to an end.
Solved looking to sweep using the butterfly guard but Kuma puts pay to that idea as he passes nicely into half guard.
And that�s the end of the round � the fighters go back to their corners.
That was a close second round but I would say that Ryo Kuma will probably get the nod.
The minute break is over - no more time for sponges and pep talks - back to the action! This is the final round!

Left hook, right uppercut from Kuma.
Left hook, right uppercut from Solved.
Solved closes the distance and pushes Kuma back into the cage.
Solved displaying some good clinch control by pressing Kuma up against the cage.
Solved gets control of Kuma's arms and successfully pulls guard. Solved will no doubt be looking for submissions off his back.
Solved wants to stand and escape but Kuma is having none of it.
Kuma won't allow Solved to sweep him here.
Kuma missing there with some ground and pound from the guard.

Solved has his foot on Kuma's thigh. He's trying to push off and get in position for a triangle, I think. Kuma works his way back into a safe position though.
Solved takes a big intake of breath there - he's definitely tired.
Kuma is pushing down on Solved's leg trying to pass to half guard. Solved is fighting to maintain full guard but Kuma has managed to sneak the leg through.
Kuma is trying to control the action in half guard but Solved is working away on the bottom, looking perhaps to get back to full guard.
That's one minute gone in the round.
Solved slips a foot under and gets full guard. Nice work.
Kuma is looking to stand up but Solved won't let him.
The ref warns both fighters not to hold the cage as they work up against the meshing.

Solved wriggles free and stands up.
Kuma throws a combination but it was largely blocked by Solved.
Kuma feints a jab promting Solved to slip. Kuma then demonstrates his capabilities by jabbing again. Solved slips again and ducks right into an uppercut.
Kuma leaves Solved with his face pressed against the mat as he sprawls beautifully, defending against a solid takedown attempt.
Solved takes a solid shot to the body. That one hurt him but he's trying not to show it.
Solved gets to the clinch - let's see what his plan is here.
That's two minutes gone in the round.
Kuma is trying to work out of this bad position, with his back against the cage.
Solved has Kuma pressed against the cage, preventing Kuma from circling away and getting back to striking at range.
With the two fighters working up against the cage, Kuma just misses with a elbow thrown towards Solved's brow.
Solved is trying to work out of this bad position, with his back against the cage.
Solved successfully pulls guard.
Solved working for a triangle but Kuma defends it easily.
Kuma stops Solved from standing up.
Solved throwing some rather feeble looking strikes off his back.

Kuma stands up from Solved's guard - Kuma perhaps looking for a knockout.
That's three minutes gone in the round.
Kuma lands a jab, followed by a cross and another cross, as Solved backs up against the cage.
Solved shoots in for a takedown - he's clinched up with Kuma but Kuma pushes him off and we're back to square one.
A head kick from Kuma lands but Solved takes it in his stride.
Solved avoids a punch combination nicely.
Solved shoots in looking for a takedown but Kuma manages to keep the fight standing, pushing Solved's face into the canvas for good measure before circling away.
Ryo Kuma has stuffed three takedown attempts in the round now. That's going to take a lot out of Sol Solved.
Solved tries to clinch up against the cage, rushing in the close the distance. Kuma manages to break the clinch and circles back to the middle of the mat.
Ryo Kuma is looking to throw some combinations by the looks of things.
Kuma fakes the leg kick and cracks Solved in the body.
Solved takes a swing at Kuma's ribcage but misses.
That's four minutes gone in the round.
Kuma lands a kick to the ribs of his opponent. Nice work there - in and out in a flash.
Solved moves into range and clinches up with Kuma.
Kuma is looking to break free of the clinch but Solved has double underhooks.
A short right from Solved on the inside.
Kuma wants to break free. God knows he wants to breaaaak freeee.
Solved is looking to score with knees to the body. Maybe he'll change it up and go body then head. Kuma is defending well for now.
Solved drops down looking for an ankle pick but Kuma pulls his leg out and moves away.
Solved fails to land the takedown.
As the round comes to an end the crowd are showing their appreciation for a great round of action.
Kuma rushes forward with a series of wild hooks but Solved moves out of range and avoids them all easily.
And that's the end of the fight!
I would just about give that final round to Sol Solved.
I think Solved has won this one but let's see whether the judges agree with me. Over to the ring announcer for the scorecards.
Ladies and gentlemen, after 3 rounds of action, we go to the scorecards for a decision.
Judge Shigeki Fujiwara scores the fight 28:29
Judge Shirou Masuda scores the fight 28:29
Judge Shigeki Sano scores the fight 28:29
In favor of your winner, by unanimous decision... Sol Solved!
|
|
|
|
|
|
|
|
|
|
|
|
|
|
|
|
|
|
|
|
|
|
|
| S |
C
A |
G |
S |
C
B |
G |
|
S |
C |
G |
|
energy
A | B |
|
hype
A | B |
|
pop
A | B |
|
mgr
A | B |
|
FIGHT
RATING
52% |
|
|
|
|
|
|
