|
|
PBP Commentary |
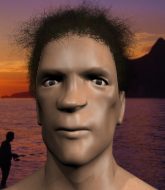
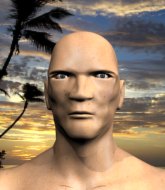
Coming up we have a welterweight MMA rules bout between Chris Aldred (ranked 0 p4p, 0 weight class) and Sean Dead (ranked 0 p4p, 0 weight class). Dead has chosen Limp Bizkit - My Way as his entrance music. We have two fighters making their debuts here, so let's see who comes out of this one with their first professional victory.
 |
|
 |
| 172 cm
22
175 lbs
0 - 0 - 0 |
|
184 cm
20
170 lbs
0 - 0 - 0 |
BJJ Blue Belt
Brawler
Good chin |
|
BJJ White Belt
Brawler
Determined |
|
| |
|
Ladies and gentlemen. This fight is 3 rounds, in the welterweight division.
Introducing the fighter to my left, fighting out of the red corner.
With a record of
0 - 0 - 0, fighting out of London, Chris Aldred!
And introducing the fighter to my right, fighting out of the blue corner.
With a record of
0 - 0 - 0, fighting out of London, Sean Dead!
The judges for this bout are Steven Brown, Richard Clark and Sam Margolis.

The bell rings for round one and we are underway!
A telegraphed takedown attempt from Aldred is defended easily by Dead.

Dead closes the distance and clinches.

Dead is fighting off a takedown attempt but Aldred is just too persistent for him and manages to trip Dead to the mat. Dead regains guard as soon as the fighters hit the mat.
Aldred prevents Dead from getting back to his feet.
Aldred throwing strikes from guard but Dead blocks nicely.
Aldred stays in close to Dead's body and controls the position.
Aldred wants to control from the top but Dead keeps moving.
Dead is trying to stand up but he's not managed so far.
Aldred looking to pass the guard.

That's one minute gone in the round.

The referee decides to stand the fighters back up, due to lack of activity on the part of Chris Aldred.
Aldred tries a switch kick but it misses it's target.
That kick from Dead tenderised Aldred's leg. Aldred is trying to keep his angry face on.
Dead has Aldred up against the cage in a clinch.
Dead is defending well against a takedown attempt.

Dead breaks the clinch and we're back to striking at distance.
Dead scores with a kick to the body.
Dead closes the distance and clinches.
Aldred is trying to break the clinch but Dead has him pressed against the cage.
Dead breaks the clinch and we're back to striking at distance.

That's two minutes gone in the round.

Aldred has closed the distance and engaged Dead in a clinch.
Aldred fails to pull the fight into his guard.
That's three failed takedown attempts in the round for Chris Aldred. That's going to take a lot out of him.
Aldred drops down for a takedown but doesn't get it.
This has been an exciting period of action!
Dead escapes the clinch and we're back to striking.
Aldred moves into the clinch.
Aldred is looking to take this one to the mat.
Aldred jumps guard but Dead turns him against the cage and keeps the fight standing.
Dead manages to break the clinch.
Dead lands a kick to the ribs of his opponent. Nice work there - in and out in a flash.
Aldred is breathing heavily.

That's three minutes gone in the round.
Dead throws a right high kick that is partially blocked by Aldred.

It looks like Chris Aldred has been cut.
Dead lands a body shot.
Dead changes levels and scores with a jab to the body.
Aldred tries to keep at a distance but Dead has taken the fight into the clinch.
Dead pushes off and circles away, back to the middle of the mat.
The crowd cheering loudly, showing their appreciation for the quality fight we're seeing here.
Dead is looking to slow Aldred down with leg kicks.

Dead lands a big head kick that sends Aldred tumbling to the mat! Dead takes a step backwards and waves Aldred back to his feet - he wants the finish!

Aldred is rocked!
Dead moves into range and clinches up with Aldred.
Oh Aldred is still all over the place! His legs are completely gone! Will he be able to recover?!!
Dead breaks from the clinch.
Aldred seems to have got his legs back now.
A kick lands to the mid section there for Dead.
Dead forces Aldred back against the cage and clinches.

That's four minutes gone in the round.
Dead pushes off and circles away, back to the middle of the mat.
The fight moves into the clinch position.
Aldred working hard to break the clinch.
Dead pushes off and circles away, back to the middle of the mat.
Dead takes the fight into the clinch.
Dead's corner calls for him to break the clinch, which he does.
The crowd are going absolutely nuts as the round comes to an end - what a fantastic round of action!
Dead misses with a jab, cross combination.
Aldred misses with a takedown attempt. He shot from a bit too far out.
Dead closes the distance and clinches.
And that�s the end of the round � the fighters go back to their corners.
Sean Dead dominated that round.
The cut man is working on Chris Aldred's cut.
That's the end of the interval. I'm sure that seemed a lot quicker than a minute for our two fighters! Back to the action.

Aldred fails with a rather predictable takedown attempt.
Dead avoids the head kick by Aldred.
A really sloppy takedown attempt there from Aldred.
Nice sprawl there from Dead as Aldred shoots in.
That's three failed takedown attempts in the round for Chris Aldred. That's going to take a lot out of him.
Dead connects with a body shot.
Dead with a nice looking leg kick. You could hear that one land in a back row.
Dead shuffles to his left behind two crisp jabs. Aldred eats them both and turns towards Dead to reposition himself and eats a stinging right hand-left hook combo.
Chris Aldred's cut is getting worse.
The fans in attendance giving it up for the two fighters, who have really let it all hang out in the last minute or so!
Dead fakes with an overhand right and moves in to clinch with Aldred, pushing him back against the cage.
Both fighters are absolutely exhausted here.
Dead gets an overhook and lands an elbow to the side of the head.
Dead gets through Aldred's defenses to land a nice punch to the side of the head.
Aldred wants to push off and get back to the center of the mat but Dead has him pressed against the cage.
That's one minute gone in the round.
Aldred tries to land knees in the clinch but Dead avoids the damage to the body.
Dead escapes the clinch and we're back to striking.
Dead throws a sloppy head kick and Aldred moves out of range easily.
Aldred shoots in looking for a double leg takedown. Dead defends it nicely.
Dead fakes with an overhand right and moves in to clinch with Aldred, pushing him back against the cage.
Dead pushes off and circles away, back to the middle of the mat.
Aldred shoots in for a takedown but Dead shows good takedown defense there and keeps this one on the feet.
Dead is looking to slow Aldred down with leg kicks.
Aldred gets tackled into the cage by Dead. Dead maintains the clinch.
That's two minutes gone in the round.
Aldred wants a takedown.
Dead breaks the clinch and we're back to striking at distance.
Dead connects with a high kick.
This is a great period of action - very entertaining stuff!
Dead slaps away a takedown attempt from Aldred, before circling back to the center of the mat.
Dead gets a clinch.
Dead manages to break the clinch.
Dead darts in and clinches Aldred up against the cage.
Dead escapes the clinch and we're back to striking.
Sean Dead is looking to keep the fight on the feet at all costs.
Aldred avoids a kick to the body.
Good leg kick by Dead there. It's the ones that make that thud noise that hurt and that was an almighty thud.
That's three minutes gone in the round.
Dead gets a clinch.
Dead is defending well against a takedown attempt.
Dead breaks the clinch and we return to the middle of the mat.
Dead ducks down and throws a hook to the body but Aldred moves away.
Dead gets in close and instigates a clinch.
Aldred is looking to control Dead's arms but Dead gets an underhook and turns him. Now Aldred has his back to the cage.
Dead manages to break the clinch.
Aldred shoots in and drives through. Dead sprawls well.
Dead has been the more effective fighter overall so far.
Dead has taken the fight to the clinch.
Aldred stalling in the clinch but Dead improves position.
Dead breaks the clinch and we return to the middle of the mat.
That's four minutes gone in the round.
Danga de danga de dang - Dead scores with a four punch combination!
Chris Aldred's cut is bleeding quite badly. He's got to try and protect it.
Dead thows a body kick. Aldred tries to catch it but that hurt him.
Fantastic stuff here - a very entertaining period of action, which has drawn cheers from the crowd.
Dead scores to the head and body with a nice combination!
Jeez, Chris Aldred's cut is really nasty now. The referee must be thinking about getting that checked.
Dead scores with a head kick. Aldred tried to block it but didn't get his arm up in time.
Dead lands a head kick. Aldred smiles back at him and beckons him forward.
The referee calls the doctor in to look at Chris Aldred's cut. Oh no, the doctor has called an end to the bout!
Ladies and gentlemen, after 4:36 of round 2, we have a winner by way of TKO (Cut). Sean Dead!
Sean Dead took to the microphone after his victory and thanked his sponsors, Bloodsport Nutrition (100% Genuine) for their support in the buildup to the fight.
|
|
|
|
|
|
|
|
|
|
|
|
|
|
|
|
|
|
|
|
|
|
|
| S |
C
A |
G |
S |
C
B |
G |
|
S |
C |
G |
|
energy
A | B |
|
hype
A | B |
|
pop
A | B |
|
mgr
A | B |
|
FIGHT
RATING
64% |
|
|
|
|
|
|

