|
|
PBP Commentary |
Coming up we have a featherweight MMA rules bout between Mr White (ranked 0 p4p, 0 weight class) and Jay Colmen (ranked 0 p4p, 0 weight class). White comes to the cage accompanied by yes. Both fighters look fresh as a daisy as they make their way towards the cage.
 |
|
 |
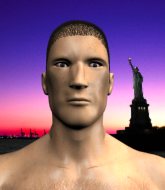
| 182 cm
31
158 lbs
26 - 14 - 0 |
|
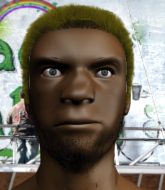
170 cm
35
147 lbs
31 - 11 - 0 |
Abu Dhabi Champ
World class boxer
Insanely flexible |
|
ADCC Champion
World class boxer
Granite chin |
|
| |
|
Ladies and gentlemen. This fight is 3 rounds, in the featherweight division.
Introducing the fighter to my left, fighting out of the red corner.
With a record of
26 - 14 - 0, fighting out of London, Mr White!
And introducing the fighter to my right, fighting out of the blue corner.
With a record of
31 - 11 - 0, fighting out of Montreal, Jay Colmen!
The judges for this bout are James Ackerman, James Glass and Daniel Bishop.

The bell rings for round one and we are underway!
White shoots and misses
and Colmen counters with a leg kick that reverborates around the arena.
White shoots in but no luck this time.

A momentary lapse in concentration from White enables Colmen to shoot in and score with a neat double leg. White manages to secure a closed guard as the fighters hit the mat.
We may be looking at a referee standup if the pace doesn't pick up soon.
White keeping full guard, as Colmen tries to pass.
The ref warns both fighters not to hold the cage as they work up against the meshing.

Colmen avoids a guillotine attempt easily.
Colmen trying to control the position from guard on top but White is wriggling around, looking for whatever he can.
White looking for submissions off his back, moving his hips, looking for an opening.
White has an active guard here but Colmen has managed to pass into half guard.
White tries to get to full guard but Colmen has control of the leg.

That's one minute gone in the round.

Colmen is sneakily working for an arm triangle but White sees it coming and defends easily.
White wants to improve his position but Colmen is controlling well.
White is trying to control but can't.
Colmen is just sitting in half guard, waiting for something to happen.
Colmen trying to pass the guard but White defending well.
Colmen wants to take a breather but White is having none of it.
White tries to get to full guard but Colmen has control of the leg.

That's two minutes gone in the round.
Colmen lands with a punch from half guard.
Colmen is trying to control. White wants to improve his position but can't escape this time.
White looking for submissions from an awkward position here.
Colmen tries to pass to full mount but White defends it.
White is trying to get back to full guard.
White is in trouble now - Colmen has advanced to mount!
Colmen is looking to secure an arm. He's managed it! He's pivoting for an armbar - that looks tight! But White has managed to get out of it and now he's in a dominant position. Nice work from White!
The crowd cheering loudly, showing their appreciation for the quality fight we're seeing here.
Colmen is working the butterfly guard. He manages to land a nice scissor sweep and is now in half guard on the top. Nice move.
White is looking to regain full guard. Not this time though.

That's three minutes gone in the round.
Colmen tries to stand but his hand is stuck under White.
White taking some punishment here, with Colmen in his half guard.
Colmen sitting in half guard, looking to land shots. White defending well though.
White is looking to improve his position.
White looking to work for a kimura from the bottom.
White is not content to let Colmen control the position.
White regains full guard. Nicely done.
White escapes his hips to the side and looks to be working for an armbar. Colmen gives him a little smile and shakes his head. No chance.
White is looking for a guillotine. You can't force these things though and Colmen defends well.

That's four minutes gone in the round.
Colmen trying to control but White is working from the bottom.
White is trying to keep Colmen in close.
White wants to sweep here but Colmen controlling him for the moment.
White working for submissions but it's allowed Colmen to get to half guard.
The crowd are loving this. Great action here.
As the round comes to an end the crowd are showing their appreciation for a great round of action.
Colmen is looking to pass the guard... He's managed it - he's now in full mount!
White is desperately trying to improve his position but Colmen has a good base and remains in mount.
And that�s the end of the round � the fighters go back to their corners.
Jay Colmen dominated that round.
OK. That's time! The bell goes and we're back to the action.

Nice body kick there by Colmen.
Colmen misses the jab.
A left lands for White.
Colmen scores with a jab to the body.
White takes a push kick to the midsection and stumbles backwards.
Colmen tries to score with an inside leg kick but telegraphs it and White is able to avoid easily.
White looking to throw a kick but he's pulled out of it.

Colmen closes the distance and clinches.

White pulls guard effortlessly.
Colmen pushes down on White's leg and manages to get into half guard.
Colmen is trying for a guillotine from the top but the pressure isn't in the right place so White is just riding it out for now. Colmen eventually gives up the hold.
We've seen a great period of action over the last minute or so - credit to both fighters for going all out!
White won't allow Colmen to pass to mount.
That's one minute gone in the round.
White looking for submissions off his back.
Colmen seems to be working for a kimura but White defends the submission attempt.
White moves his hips nicely and gets into full guard.
White is looking for a triangle but Colmen pushes his legs off easily.
White manages to land a sweep and now he's in mount on top!
Colmen is wriggling around trying to escape.
White avoids the attempt from Colmen to control.
That's two minutes gone in the round.
White postures up and cracks his opponent a couple of times before moving back into close ground control. Colmen looks a forlorn figure.
Colmen is looking to improve his position but White isn't that keen on the idea.
Colmen is bucking up trying to escape but White cracks him with another couple of good strikes.
The fighters are pressed up against the cage, both looking to find a bit of space to work.
White looking to ground and pound his opponent to a finish here.
This is a great period of action - very entertaining stuff!
Colmen in a bad spot here, taking shots to the head.
Colmen takes a big shot to the head but keeps on trying to improve his position.
White lands a couple of nice shots there from mount.
Colmen is working to get back to half guard.
Colmen manages to regain half guard. Good work.
Colmen is doing well to avoid being mounted. He's controlling the position at the moment.
Colmen wants to control but White is keeping busy.
That's three minutes gone in the round.
White looking for a kimura but he'll have to free his other leg if he wants to finish that. Perhaps he's just using it as a distraction technique.
Colmen trying to control from the bottom.
Mr White overall seems to be getting the better of the ground position in the fight so far.
Colmen wants to improve his position but White is controlling well.
White sitting in half guard, looking to land shots. Colmen defending well though.
Colmen is looking for a sweep. White is wise to his cunning plan and keeps the top position.
Colmen wants to control but White is keeping busy and won't allow it.
White throwing shots but they're hitting the canvas more than the man.
Colmen moves into full guard.
That's four minutes gone in the round.
White landing with the ground and pound.
Colmen tries to strike from the bottom.
Colmen escapes his hips to the side and looks to be working for an armbar. White gives him a little smile and shakes his head. No chance.
White in full guard, throwing the ground and pound. No damage this time.
White trying to control but Colmen is working from the bottom.
White trying to land body shots but he keeps hitting the mat.
Colmen looking for a sweep. Not yet Colmen, not yet.
The crowd are going absolutely nuts as the round comes to an end - what a fantastic round of action!
White trying to pass the guard but can't manage it just yet.
White throws a big right hand that misses.
Wooooo! Give it up for these two warriors! They are putting on a show!
White passes Colmen's right leg, so he's now in half guard.
White sitting in half guard, looking to land shots. Colmen defending well though.
And that�s the end of the round � the fighters go back to their corners.
Mr White dominated that second round.
The minute break is over - no more time for sponges and pep talks - back to the action! And we move into the final round!

White takes a step towards his opponent and connects with a left hand, before circling away.
White throws a looping left and ducks down for a takedown. He's got his arms around Colmen's waist but Colmen gets an underhook and avoids the takedown by throwing White off to one side.
Jay Colmen seems to be the more aggressive standup fighter in this bout.
Colmen is pinned up against the cage taking some big shots here. The referee is looking closely deciding whether he should stop the fight.
A nice inside leg kick there by Colmen. That's going to slow White down.
Colmen slips in close and lands a nice hook before moving back out of range.
Colmen throws a hard body shot but it just misses.
Colmen throws a body punch but White moves out of range.
White avoids a lazy jab quite easily.
Colmen moves out of range of the leg kick from White.
White tries a switch kick but it misses it's target.
White falls off balance throwing a combination
and Colmen counters nicely by changing levels and landing a hook to the body.
Good shot there by Colmen.
That's one minute gone in the round.
Sloppy strikes from White. Those never looked like landing.
Colmen throws a sloppy head kick and White moves out of range easily.
Colmen lands a nice shot to the body.
White bobs and weaves well there to avoid the strikes.
An inside leg kick from White misses.
Colmen keeping his hands up high there, blocking the jab from White.
White moves out of range of the body kick.
Colmen throws a head kick that misses.
Colmen fails to land with the punch combination there - jab, cross, hook, miss, miss, miss.
White throws a body kick but he was well out of range there.
Jay Colmen seems to be getting the better of the standup.
The sound of bone on bone echoes around the arena as Colmen checks a leg kick.
White takes a thudding leg kick, right into the meat of the thigh.
That's two minutes gone in the round.
Colmen goes for a spinning back kick but it misses.
White fails in his attempt to clinch.
Colmen pivots, looking for a leg kick but White is out of range and Colmen settles back down.
White throws an uppercut from half a mile away. Colmen sees it coming and avoids it easily.
Colmen scores with a hook.
Colmen pushes White away with a front kick.
Colmen pulls out of a head kick attempt.
Colmen keeps the fight standing with a nice sprawl.
White has his front leg slapped to the side - a nice low kick landing there from Colmen.
White gets tackled into the cage by Colmen. Colmen maintains the clinch.
This has been an exciting period of action!

Colmen's corner calls for him to break the clinch, which he does.
That's three minutes gone in the round.
White blocks a head kick by Colmen.
White takes one on the button.
White throws a nice looking combination but Colmen bobs and weaves to avoid any damage.
Colmen smiles there as he lands a nice right hand right on the button.

White is rocked!
Colmen scores with a kick to the midsection.
Oh White is still all over the place! His legs are completely gone! Will he be able to recover?!!
Both fighters are breathing heavily.
Colmen lands a nice looking kick to the body. White takes a step back to recover.
Colmen drops a shoulder and throws an uppercut that cracks White right on the button. White goes down! Colmen follows him to the mat and finishes the job with more strikes! Colmen gets the win via TKO!
Ladies and gentlemen, after 3:29 of round 3, we have a winner by way of TKO (Strikes). Jay Colmen!
A loyal slave to those sponsorship dollars, Jay Colmen made sure he mentioned Punishment Nutrition - All 159Q products now $75, along with how happy he was to win his fight.
|
|
|
|
|
|
|
|
|
|
|
|
|
|
|
|
|
|
|
|
|
|
|
| S |
C
A |
G |
S |
C
B |
G |
|
S |
C |
G |
|
energy
A | B |
|
hype
A | B |
|
pop
A | B |
|
mgr
A | B |
|
FIGHT
RATING
100% |
|
|
|
|
|
|

