|
|
PBP Commentary |
Coming up we have a middleweight MMA rules bout between Tom Haverford (ranked 0 p4p, 0 weight class) and Nir Sosa (ranked 0 p4p, 0 weight class). Chooooooooon! I think Haverford might be my favorite fighter, now he's come out to Jay-Z & Kanye West - N** In Paris. These two fighters really are very evenly matched on the feet - it will be fascinating to see who can assert themselves in that aspect of the fight.
 |
|
 |
| 180 cm
27
190 lbs
5 - 2 - 0 |
|
180 cm
19
200 lbs
3 - 1 - 0 |
BJJ Purple Belt
Solid boxing
Good chin |
|
BJJ Purple Belt
Excellent boxer
Solid chin |
|
| |
|
Ladies and gentlemen. This fight is 5 rounds, in the middleweight division.
Introducing the fighter to my left, fighting out of the red corner.
With a record of
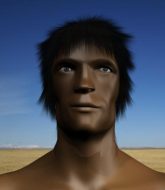
5 - 2 - 0, fighting out of Las Vegas, Tom Haverford !
And introducing the fighter to my right, fighting out of the blue corner.
With a record of
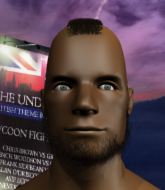
3 - 1 - 0, fighting out of Las Vegas, Nir Sosa!
The judges for this bout are Frank Dennis, Wesley Smith and Gwen Towbar.

The bell rings for round one and we are underway!
Sosa tries to land with a swinging hook to the body but Haverford was well out of range. Poor timing from Sosa.

Haverford clinches.
Haverford landing some nice looking knees to the body.
Haverford misses the knee to the body. Nice hip positioning from Sosa.
Sosa is looking to control Haverford 's arms but Haverford gets an underhook and turns him. Now Sosa has his back to the cage.
Haverford misses with a shot to the kidneys.
Haverford blocks an uppercut.
Sosa blocks an elbow strike from Haverford .
Haverford trying to land knees to the body.
Sosa avoids a wild elbow strike from Haverford .
A short right from Sosa on the inside.
Haverford tries a knee to the head but Sosa blocks it.
Haverford stalling in the clinch but Sosa improves position.
With the fighters clinched against the cage, Sosa creates a bit of distance for himself and scores with a nice uppercut.
Sosa lands a nice uppercut.
Haverford trying to land knees to the body.
Sosa works on Haverford 's body with a couple of short punches.
We've seen a great period of action over the last minute or so - credit to both fighters for going all out!
Haverford works on Sosa's body with a couple of short punches.
Haverford trying to land knees to the body.
A short body shot lands from Sosa as the two fighters clinch.
Haverford misses the knee to the body. Nice hip positioning from Sosa.

That's one minute gone in the round.
Sosa throws a punch but it's blocked by Haverford .
A real battle for position is taking place between these two warriors.
Haverford landing knees to the head.
Sosa lands with a light punch inside.
Sosa throws a head punch that misses.
Sosa lands a shoulder strike.
Sosa is looking to control Haverford 's arms but Haverford gets an underhook and turns him. Now Sosa has his back to the cage.
The pace really dropping off here, momentarily.
Sosa looking to slow down the pace here.
A right handed body shot lands from Haverford .
Sosa avoiding damage as Haverford throws knees to the body.
A head punch on the inside from Sosa fails to land.
Sosa avoiding damage as Haverford throws knees to the body.
Haverford misses with a knee to the head.
Good body shot from Sosa.
Sosa is trying to slow down the pace of the fight but Haverford is keeping busy.

That's two minutes gone in the round.
Haverford misses the knee to the body. Nice hip positioning from Sosa.
Sosa pushes Haverford back against the cage and unloads with a body punch.
Haverford throws a knee to the head but misses.
The crowd are loving this. Great action here.
Sosa blocks a knee to the body. He'll have a nicely bruised forearm in the morning.
Nice body punch from Sosa.
Haverford throws a nice elbow but it doesn't land.
Sosa tries a body shot but Haverford blocks it.
Haverford is looking to score with knees to the body. Maybe he'll change it up and go body then head. Sosa is defending well for now.
Haverford is looking to score with knees to the body. Maybe he'll change it up and go body then head. Sosa is defending well for now.
Haverford misses the knee to the body. Nice hip positioning from Sosa.
Haverford is looking to score with knees to the body. Maybe he'll change it up and go body then head. Sosa is defending well for now.
Haverford misses with a knee strike.
Haverford missing with knees to the body.
Sosa stalling in the clinch but Haverford improves position.
Sosa tries to land a shot to the body but it's blocked.
Sosa lands a shoulder strike that jolts his opponent's head backwards.
Haverford is looking to control Sosa's arms but Sosa gets an underhook and turns him. Now Haverford has his back to the cage.
Haverford is looking to score with knees to the body. Maybe he'll change it up and go body then head. Sosa is defending well for now.

That's three minutes gone in the round.
Sosa doesn't land with the attempted body shot.
Sosa is trying to maintain a safe position but Haverford gets an underhook and turns Sosa into the cage.
Haverford is looking to score with knees to the body. Maybe he'll change it up and go body then head. Sosa is defending well for now.
Haverford scores a nice knee to the body.
Sosa lands a left hand that snaps the head of Haverford backwards.
Haverford pushes off and fires off an elbow that misses, before clinching up again, against the cage.
Haverford missing with knees to the body.
Sosa is trying to slow down the pace of the fight but Haverford is keeping busy.
An uppercut to the body lands inside from Sosa.
Haverford misses the knee to the body. Nice hip positioning from Sosa.
Haverford missing with knees to the body.
Haverford tries to land a knee to the head but misses.
Sosa misses with a body punch.

Haverford jumps guard and drags Sosa to the mat. He's obviously going to be looking for submissions off his back.
Sosa stands up and looks to throw the legs aside to pass to side control. Haverford swivels though and keeps the full guard.
Haverford wants to sweep but no luck.

That's four minutes gone in the round.
Haverford working a defensive guard but Sosa manages to pass into side control anyway.
Haverford is trying to control Sosa's posture but Sosa avoids it.
Sosa trying to control the position but Haverford is working away.
The ref warns both fighters not to hold the cage as they work up against the meshing.
Haverford is putting a lot of effort into getting back to his feet here.
We've seen a great period of action over the last minute or so - credit to both fighters for going all out!
The crowd are going absolutely nuts as the round comes to an end - what a fantastic round of action!
Haverford stops Sosa from passing to mount.
And that�s the end of the round � the fighters go back to their corners.
That was a close round but I would say that Tom Haverford will probably get the nod.
Well, the break between rounds is over. Let's get back to the scrappin!


Haverford gets tackled into the cage by Sosa. Sosa maintains the clinch.
Haverford trying to land knees to the body.
Tom Haverford has scored more points in the clinch so far.
Haverford trying to land knees to the body.
Haverford tries to land a knee to the body but he is off balance and Sosa avoids it.
Haverford blocks a couple of punches on the inside.
Haverford using the Thai clinch to land knees to the body.
Haverford tries to land knees in the clinch but Sosa avoids the damage to the body.
Haverford blocks a punch to the side of the head.
Sosa is trying to stall.
Haverford goes for a body shot but it's blocked.
A short right hand to the side of the head by Sosa.
A body shot lands from Sosa.
Sosa tries a body shot but Haverford blocks it.
Sosa lands a shoulder strike that jolts his opponent's head backwards.
A head punch blocked on the inside by Haverford .
Sosa misses with a short punch on the inside.
Sosa is trying to slow down the pace of the fight but Haverford is keeping busy.
That's one minute gone in the round.
Haverford blocks a couple of punches on the inside.
Sosa blocks a knee to the body. He'll have a nicely bruised forearm in the morning.
Haverford tries to land a knee to the body but he is off balance and Sosa avoids it.
A head punch on the inside from Sosa fails to land.
Haverford takes a shot to the head.
Haverford with an attempt at a knee that misses.
With the fighters clinched against the cage, Sosa creates a bit of distance for himself and scores with a nice uppercut.
Sosa managing to block the knees to the body from Haverford .
Sosa tries a shoulder strike but it doesn't do any damage.
Sosa blocks a knee to the body. He'll have a nicely bruised forearm in the morning.
Sosa tries to land a shot to the body but it's blocked.
Sosa managing to block the knees to the body from Haverford .
An uppercut on the inside fails to land for Sosa.
Haverford blocks a punch to the side of the head.
Haverford goes for a takedown attempt but Sosa pushes him away and we're back to fighting at a distance.
Sosa blocks the body kick.
That's two minutes gone in the round.
Sosa throws a shot from downtown. Haverford moves away and avoids it.
Haverford gets a clinch.
Haverford tries to land a knee to the head but Sosa blocks with his arms.
Sosa avoiding damage as Haverford throws knees to the body.
Sosa lands a right hand that snaps the head of Haverford backwards.
Haverford blocks an uppercut.
Sosa misses with a short punch on the inside.
Sosa stalling against the cage.
Haverford can't find room to land a body shot as Sosa controls the action.
Fantastic stuff here - a very entertaining period of action, which has drawn cheers from the crowd.
Haverford is looking to score with knees to the body. Maybe he'll change it up and go body then head. Sosa is defending well for now.
Sosa tried to land a shot to the body but connects with Haverford 's elbow.
Haverford with an attempt at a knee that misses.
Sosa is working hard here but doesn't seem to be able to control effectively, up against the cage.
Sosa has a couple of punches blocked by Haverford .
Sosa tries a body shot but Haverford blocks it.
That's three minutes gone in the round.
Sosa lands a left hand.
Sosa managing to block the knees to the body from Haverford .
Sosa lands with a right to the head.
Sosa takes a knee to the side of the body.
Sosa lands a left hand that snaps the head of Haverford backwards.
Haverford blocking some punches.
Sosa taking a breather.
Haverford trying to land knees to the body.
Haverford tries a knee to the head but he's missed.
Sosa is trying to stall.
Sosa misses with a shot to the kidneys.
Haverford missing with knees to the body.
Sosa is trying to maintain a safe position but Haverford gets an underhook and turns Sosa into the cage.
Sosa lands with a short head shot on the inside.
Haverford misses the knee to the body. Nice hip positioning from Sosa.
Haverford missing with knees to the body.
That's four minutes gone in the round.
Sosa takes a shot to the head.
Sosa blocking some punches.
Haverford is trying to maintain a safe position but Sosa gets an underhook and turns Haverford into the cage.
Sosa lands with a quick shot inside that doesn't really do much damage.
The crowd cheering loudly, showing their appreciation for the quality fight we're seeing here.
A short uppercut from Sosa.
Sosa on the defensive, avoiding the knees to the body.
A short right from Sosa on the inside.
Sosa taking a breather.
Haverford throws a knee to the head but misses.
Sosa managing to block the knees to the body from Haverford .
Both fighters are absolutely exhausted here.
Sosa tries to throw a body punch but Haverford avoids it by throwing Sosa back against the cage.
A battle for position here, against the cage.
Haverford tries to land knees in the clinch but Sosa avoids the damage to the body.
As the round comes to an end the crowd are showing their appreciation for a great round of action.
Haverford is trying to wear down his opponent with knees to the body.
Haverford trying to land knees to the body.
Sosa lands a short shot on the inside that snaps the head of Haverford backwards.
A battle for position here, against the cage.
Haverford trying to stall but Sosa improves his position.
And that�s the end of the round � the fighters go back to their corners.
A close second round but Nir Sosa will probably get the nod - 10:9.
That's the end of the round. The referee orders the cornermen out of the cage so we can get back down to business.

Sosa throws a hook but Haverford blocks it.
Sosa misses with a looping right.
Haverford tries to close the distance and clinch up but Sosa swats him away and circles back towards the center.
Haverford displays some good footwork, moving neatly out of range as Sosa throws out the jab.
Tom Haverford is looking to throw some combinations by the looks of things.
Sosa misses with a series of wild punches.
Sosa throws a jab when Haverford was well out of range.
Haverford shoots in with a lovely double leg takedown. Sosa manages to land in full guard to minimise the damage.
Haverford throwing strikes but missing.
Sosa working a defensive guard here.
Haverford pressing down on his opponent's thigh, looking to pass guard. Sosa is keeping the position for now.
Haverford is looking to work some ground and pound but Sosa has wrist control.
That's one minute gone in the round.
Haverford stands up and looks to throw the legs aside to pass to side control. Sosa swivels though and keeps the full guard.
Haverford passes Sosa's right leg, so he's now in half guard.
Haverford looking to pass the half guard. Not this time.
Haverford missing with the ground and pound from half guard.

Haverford is trying to work for a kimura but Sosa is defending well.
Both fighters are breathing heavily.
Haverford is working for a submission of some sort.
Haverford is thinking about going for an arm triangle but he can't free his leg.
That's two minutes gone in the round.
Sosa trying to control but Haverford postures up.
Haverford wants to take a breather but Sosa is having none of it.
Haverford throwing punches and elbows but they're not doing any damage.
Sosa is trying to control but can't.

The ref stands the fighters back up. Nir Sosa was stalling too much, according to the referee.
Sosa lands a glancing blow to the side of Haverford 's head.
Haverford throws a front kick that sends Sosa stumbling back into the cage.
The crowd cheering loudly, showing their appreciation for the quality fight we're seeing here.
Haverford is looking to take this fight into the clinch.
Haverford avoids a lazy jab quite easily.
That's three minutes gone in the round.
Haverford tries to land a front kick but Sosa steps back. That was a bit too telegraphed.
Sosa tries to check the leg kick but that clearly hurt him.
Sosa defends well against a solid takedown attempt from Haverford .
Sosa looks to score with a combo but nothing lands.
Sosa misses with a right hand
and Haverford makes the exchange count by landing a cracking kick to the body. Sosa really felt that one!
Sosa scores with a body shot.
Sosa misses with a body shot. Nice footwork from Haverford .
Haverford is looking to clinch but Sosa is avoiding it.
Sosa throws a body punch but Haverford moves out of range.
Tom Haverford seems to be the more aggressive standup fighter in this bout.
Haverford lunges at Sosa with a hook that half lands and is half blocked by Sosa's hand.
Sosa avoids the head kick by Haverford .
Haverford takes a punch right to his stomach. That took the wind out of him momentarily.
That's four minutes gone in the round.
A looping hook to the body misses from Sosa. Haverford does a little dance to reset his feet.
Haverford tries to clinch up against the cage, rushing in the close the distance. Sosa manages to break the clinch and circles back to the middle of the mat.
Haverford on the wrong end of an overhand right that came out of nowhere.
Haverford tries to clinch but is not successful on this occasion.
Haverford staying out of range there.
Haverford dodges the punch combination from Sosa.
Haverford slips a jab from Sosa.
Haverford misses with an attempted mid kick.
Sosa fakes high and swings low for a body shot but Haverford manages to avoid it.
This has been an exciting period of action!
As the round comes to an end the crowd are showing their appreciation for a great round of action.
Haverford moves out of range of the strikes.
Sosa throws a monster uppercut resembling something out of street fighter but it doesn't land.
Sosa scores with a nice right hand.
And that�s the end of the round � the fighters go back to their corners.
That was a close round but Tom Haverford did the better work so I'd imagine he'll take it.
OK. That's time! The bell goes and we're back to the action.

Sosa looks to land a left hand but Haverford moved out of range nicely.
Haverford fails with an attempt to clinch.
Haverford blocks a jab.
Haverford throws a head kick but Sosa moves out of range.
Sosa scores with a jab to the jaw of his opponent.
Haverford looking to throw a kick but he's pulled out of it.
Haverford lands with a head kick! That's gotta hurt.
Sosa jabs at Haverford 's body.
Haverford fails miserably with a takedown attempt.
Haverford wants to clinch up but Sosa keeps it at a distance.
Sosa misses with an uppercut. Haverford saw that one coming.
Haverford moves out of range as Sosa strikes.
Haverford tries to close the distance and clinch up against the cage but Sosa paws at him with a jab and circles away.
That's one minute gone in the round.
Haverford throws a right and a left that both miss.
Haverford takes an uppercut right on the button but keeps his composure.

It looks like Tom Haverford has been cut.
Sosa scores with a crisp jab that stopped Haverford in his tracks.
Haverford misses with a straight left.
Sosa lands with a shot to the body.
Haverford keeping a good distance there, avoiding the body shot.
Sosa connects with the punch.
Haverford takes a shot right to the bread basket.
Sosa gets a clinch.
Sosa tries a body shot but Haverford blocks it.
Haverford misses with a body punch.
Haverford working Sosa over with knees to the body.
Sosa is absolutely dripping with sweat - he looks exhausted.
Wooooo! Give it up for these two warriors! They are putting on a show!
Haverford landing knees to the body.
Haverford throws a knee to the head but misses.
That's two minutes gone in the round.
Sosa makes some space for himself and lands an uppercut.
Haverford creates a bit of distance and throws an elbow that only just misses.
Haverford missing with knees to the body.
Haverford with an attempt at a knee that misses.
Haverford blocks a body shot from Sosa.
Haverford utilising his Muay Thai to score with a knee to the body.
Haverford stalling.
Haverford tries a knee to the head but he's missed.
Sosa misses with a hook to the ribs.
Haverford trying to land knees to the body.
Sosa is working hard here but doesn't seem to be able to control effectively, up against the cage.
Kneeeeees! The crowd are calling for knees to the body. Haverford obliges.
Sosa managing to block the knees to the body from Haverford .
Sosa managing to block the knees to the body from Haverford .
Haverford trying to land knees to the body.
That's three minutes gone in the round.
Haverford is trying to slow down the pace in the clinch, to catch his breath.
Sosa scores with a shot to the side of Haverford 's head.
Haverford stalling in the clinch but Sosa improves position.
Sosa tries a body shot but Haverford blocks it.
Haverford is trying to maintain a safe position but Sosa gets an underhook and turns Haverford into the cage.
A short right from Sosa on the inside.
Sosa lands a nice looking hook to the body, against the cage.
Haverford tries to land a knee to the head but misses.
Haverford tries a knee to the head but he's missed.
Sosa scores with an uppercut up the middle.
A hook to the body from Sosa.
Sosa looking to slow down the pace here.
Sosa is persisting with his attempts to control the action in the clinch, rather than do any real damage.
Haverford trying to stall but Sosa improves his position.
That's four minutes gone in the round.
An uppercut to the body lands inside from Sosa.
Haverford tries to land a shot to the body but it's blocked.
Haverford is looking to score with knees to the body. Maybe he'll change it up and go body then head. Sosa is defending well for now.
Sosa lands punches inside but they're not really causing much damage.
Both fighters working to control the clinch.
We've seen a great period of action over the last minute or so - credit to both fighters for going all out!
Sosa lands with a short shot to the head.
Haverford has Sosa pressed up against the cage and is working for takedown. Sosa manages to improve position though and keeps the fight standing.
Sosa avoiding damage as Haverford throws knees to the body.
Haverford will no doubt start fighting again in a minute but for now he's just having a little rest, leaning Sosa up against the cage.
A right hook to the body lands for Sosa.
The crowd are going absolutely nuts as the round comes to an end - what a fantastic round of action!
Sosa misses with a hook to the ribs.
Sosa has Haverford pressed against the cage.
Haverford 's head jolts backwards as he takes an uppercut right on the button!
And that�s the end of the round � the fighters go back to their corners.
A close fourth round but Nir Sosa will probably get the nod - 10:9.
The cut man is working on Tom Haverford 's cut.
The fighters' corners scream their final instructions, as the referee calls time. Here we go, back to the action! So, we enter the final round. Let's see if either fighter can bring us a finish, or whether we're going to the judges scorecards.

Sosa cracks Haverford with a good jab.
Haverford throws a right hand that Sosa ducks under and follows up with a left that Sosa also avoids with ease.
Haverford fails in his attempt to clinch.
Haverford tries a switch kick but it misses it's target.
Haverford gets his head snapped back by a nice shot there.
Haverford takes a hook to the side of the head. I wonder if that's got his ears ringing.
Sosa thows a left - swing and a miss!
Sosa throws an uppercut from half a mile away. Haverford sees it coming and avoids it easily.
Haverford wants to clinch up but Sosa keeps it at a distance.
Haverford shakes his hands off, looking to compose himself, but takes a jab to the jaw whilst he does it.
Sosa missing with a left hand there. Haverford was out of range so wasted energy throwing that one.
Haverford closes the distance and gets a double leg, slamming Sosa to the mat! Sosa manages to get full guard.
Sosa is trying to keep Haverford in close.
That's one minute gone in the round.
Haverford drops back for a leg but he's not going to get it - he lets go and Sosa dives on top into guard.
Sosais looking to pass into half guard but Haverford pushes him away with his feet and jumps on top - now Haverford is in guard.
Sosa avoiding any damage from the ground and pound.
Haverford pressing down on his opponent's thigh, looking to pass guard. Sosa is keeping the position for now.
Haverford is working hard here to advance position.
Haverford passes into half guard.
Both of our modern day gladiators look out of it here - an gruelling 5 rounds of action taking it's toll on them, no doubt.
Haverford in half guard on the top. He's looking for a kimura... He's got it locked and he's managed to free his trapped foot. Sosa tries to escape but it's on too tight and he has to tap! Great BJJ skills there from Haverford !
Ladies and gentlemen, after 2:56 of round 5, we have a winner by way of Submission (Kimura). Tom Haverford !
A very excited looking Tom Haverford made sure he remembered to thank all the fans both in the arena and on the internet. He said all the coolest people spend all day on MMA websites, which got a big reaction.
|
|
|
|
|
|
|
|
|
|
|
|
|
|
|
|
|
|
|
|
|
|
|
| S |
C
A |
G |
S |
C
B |
G |
|
S |
C |
G |
|
energy
A | B |
|
hype
A | B |
|
pop
A | B |
|
mgr
A | B |
|
FIGHT
RATING
100% |
|
|
|
|
|
|

