|
|
PBP Commentary |
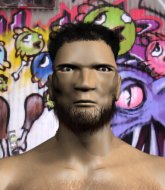
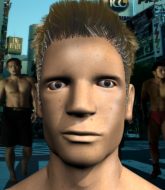
Coming up we have a heavyweight MMA rules bout between Dwayne Perry (ranked 0 p4p, 0 weight class) and Daniel Bloom (ranked 0 p4p, 0 weight class). Bloom has chosen Let The Bodies Hit The Floor as his entrance music. Dwayne Perry has the edge in experience - let's see if he can make that count tonight.
 |
|
 |
| 178 cm
22
260 lbs
1 - 2 - 0 |
|
192 cm
18
225 lbs
1 - 1 - 0 |
Decent wrestler
Basic striking
Cuts easily |
|
BJJ Blue Belt
Basic striking
Determined |
|
| |
|
Ladies and gentlemen. This fight is 3 rounds, in the heavyweight division.
Introducing the fighter to my left, fighting out of the red corner.
With a record of
1 - 2 - 0, fighting out of Las Vegas, Dwayne Perry!
And introducing the fighter to my right, fighting out of the blue corner.
With a record of
1 - 1 - 0, fighting out of Las Vegas, Daniel Bloom!
The judges for this bout are Gwen Towbar, Wesley Smith and Tiny Johnson.

The bell rings for round one and we are underway!
Perry blocks a low kick nicely.
Daniel Bloom seems to be the more aggressive standup fighter in this bout.

Perry drives through with a takedown into guard.
Perry wants to control from the top but Bloom keeps moving.
Bloom is looking to get back to his feet but can't, whilst Perry is controlling him.

Bloom is edging up against the cage. He's using the cage to get back to his feet. Nice work there - the fighters are clinched.
Bloom stops a takedown attempt from Perry.
Perry has hold of one of Bloom's legs. Bloom is fighting the takedown attempt but Perry gets the trip and lands the takedown into guard.
Perry really is a fat lump.
Bloom is trying to control the position from the bottom.
Bloom pushes Perry off for just long enough to get back to his feet. Very athletic spring there.
Perry closes the distance and gets a double leg, slamming Bloom to the mat! Bloom manages to get full guard.
Bloom wants to sweep but no luck.
Bloom keeping moving, preventing Perry from controlling successfully.
Perry is pushing down on Bloom's leg trying to pass to half guard. Bloom is fighting to maintain full guard but Perry has managed to sneak the leg through.
Perry prevents Bloom from standing back up.
Bloom looks gassed!

That's one minute gone in the round.
Perry thows a huge punch but Bloom dodges it nicely.
Bloom has hold of Perry's hands but Perry slips his arm to the side and lands an elbow.
Perry is keeping good posture, landing some ground and pound.
Perry takes advantage of the dominant position to land a couple of big hammer fists.
Perry scoring with strikes to the body and head.
Perry slips a nice elbow through Bloom's hands, connecting with Bloom's forehead.
Bloom gets back to full guard.
Perry lands a couple of digs.
Bloom is trying to stand up but he's not managed so far.
Bloom looking to control.
Perry is just sitting in guard, looking to avoid any submissions.
Perry throws and elbow that misses. Bloom uses the momentum to reverse the position. He's now in Perry's guard. Nice move by Bloom!

That's two minutes gone in the round.
Bloom won't allow Perry to sweep him here.
Bloom wanted to stand there but Perry had control of the position.
Bloom advances to half guard.
Bloom prevents Perry from improving his position.
Perry manages to get to full guard.
Perry on his back here. We all know that wrestlers don't like being on their back so let's see if Perry tries to get out of the position.
Bloom gets to his feet. Perry looking to butt scoot but the ref puts an end to that. On your feet son!
Perry shoots for a takedown but Bloom saw that one coming a mile off and avoided it easily.
Bloom fails to land with a series of punches.
Bloom scores with a nice head shot.
Perry tries to clinch up.
Perry shoots in for a takedown - he's clinched up with Bloom but Bloom pushes him off and we're back to square one.
That's three failed takedown attempts in the round for Dwayne Perry. That's going to take a lot out of him.
Bloom fails to land with a series of punches.

That's three minutes gone in the round.
Bloom tries to clinch but Perry is having none of it.
Perry tries to clinch there but Bloom circles away.
Bloom lands a right hook to the body.
Bloom connects with a lovely jab that went straight through the gap between Perry's hands.
Perry shoots for a double leg takedown but Bloom sprawls well. He's pushed Perry's face into the mat and manages to get back to his feet relatively easily.

Bloom has closed the distance and engaged Perry in a clinch.
Perry drops down for a takedown but doesn't get it.
A right hand to the body from Bloom.
Perry tries to pull guard but can't drag his opponent to the mat. Bloom just stands there and leans against the cage.
Bloom ties up his opponent against the cage and manages to drag the fight down to the ground. Bloom no doubt will be looking to work submissions from his guard.
Bloom wants to stand and escape but Perry is having none of it.
The ref warns both fighters not to hold the cage as they work up against the meshing.
Bloom keeping full guard, as Perry tries to pass.
Perry has been looking to land a fair amount of strikes on the ground. He might be looking to soften his opponent up in order to work for a submission.
Perry won't allow Bloom to get back to his feet.
Perry throws a big right hand that misses.

That's four minutes gone in the round.
Bloom wants to stand and escape but Perry is having none of it.
Perry scores with a decent looking elbow strike.
Bloom is working an open guard here, looking to improve his position. No doubt that will leave him open to counters but at least he's being more offensive.
Both fighters really going for it on the ground here!

Well, the referee has seen enough. Neither fighter is active enough on the ground so he's stood them back up.
Perry scores a takedown into full mount!
Bloom is not a happy chappy� he wants out of there.
Bloom tries to lock up and control but Perry gives him a forearm to the face and pushes him away.
Bloom throwing punches from his back but nothing is landing.
Perry breaks from Bloom's wrist control and lands an elbow.
The crowd applaud the fighters efforts here as the round comes to an end.
Perry throws an elbow from mount that misses. Lucky escape for Bloom because Perry loaded up on that one.
Bloom is trying to escape the mount.
And that�s the end of the round � the fighters go back to their corners.
Dwayne Perry dominated that round.
Well, the break between rounds is over. Let's get back to the scrappin!

Bloom swinging wilding here.
Perry looking for a takedown here - he's got it.
Bloom is trying to stand up but he's not managed so far.
Bloom has his feet on Perry's hips. He pushes off and gets to his feet. Nice work.
Perry drops down and drives through with a powerful takedown into guard.
Perry content to stall in guard here.
Perry scores with a decent looking elbow strike.
Both fighters are absolutely exhausted here.
Perry stands and throws Bloom's legs to the side, diving into side control.
Perry in side control lands a decent elbow.
That's one minute gone in the round.
Perry scores with punches from side control.
Bloom is moving his hips around well on the bottom and has managed to get back to half guard.
Perry seems to be taking a bit of a break to think of his next move. He lands a short punch in the meantime.
Bloom is not content to let Perry control the position.
Bloom tries to push off, looking to stand up, but Perry manages to move to mount!
Perry lands a shot to the body, followed up by a shot to the exposed head of his trapped opponent.
Bloom tries to hold on but Perry pushes him away.
Bloom is really trying hard to get back to his feet.
Bloom wants to control but Perry is having none of it.
Perry unloading with bombs!
That's two minutes gone in the round.
There's not a lot going on here and the crowd are letting the fighters know they're not willing to tolerate a lack of action.
Bloom is wriggling around trying to escape.
Bloom tries to lock up and control but Perry gives him a forearm to the face and pushes him away.
Bloom is looking to get to half guard.
Perry landing strikes from the mount and Bloom is in trouble!
Perry with a couple of short strikes.
Perry can't quite control the action as he would like just now, as Bloom is looking to escape.
Perry is still in mount, landing shots to his trapped opponent. Bloom can't stay in a position like this for much longer.
Bloom is looking to improve his position but Perry isn't that keen on the idea.
Bloom wants to get back to his feet.
Perry prevents Bloom from getting the reversal.
The fighters are pressed up against the cage, both looking to find a bit of space to work.
That's three minutes gone in the round.
Bloom is bucking up trying to escape but Perry cracks him with another couple of good strikes.
Bloom working to try and regain half guard.
Bloom wants to use the cage to get back to his feet here.
Bloom in a bad spot here, taking shots to the head.
Perry working away from the top, dropping strikes.
Dwayne Perry overall seems to be getting the better of the ground position in the fight so far.
Bloom regains half guard.
Perry throwing shots but they're hitting the canvas more than the man.
Perry takes advantage of the dominant position to land a couple of big hammer fists.
Perry trying to control from half guard but Bloom is working away.
Nice strikes from Perry there.
That's four minutes gone in the round.
Perry stops Bloom from getting back to his feet.
Perry lands strikes from half guard.
Bloom has hold of Perry's hands but Perry slips his arm to the side and lands an elbow.

Bloom looking to work for a kimura from the bottom.
Bloom wants to control but Perry is keeping busy and won't allow it.
The referee decides to stand the fighters back up.
A cross from Bloom lands.
Perry takes a shot right to the liver - Bas would have been proud of that punch.
Perry has closed the distance and engaged Bloom in a clinch.
Bloom is looking to break free of the clinch but Perry has double underhooks.
Perry looking for a takedown.
Bloom is trying to break the clinch but Perry has him pressed against the cage.
And that�s the end of the round � the fighters go back to their corners.
Dwayne Perry dominated that second round.
That's time! Back to the action! Let's get this one finished - here comes the final round!

Perry closes the distance and clinches.
Perry has Bloom pressed up against the cage and is working for takedown. Bloom manages to improve position though and keeps the fight standing.
Perry can't get the takedown.
Bloom tries for a takedown. No joy.
Bloom is trying to break the clinch but Perry has him pressed against the cage.
Perry is trying to work for a single leg takedown but Bloom pulls him back up using the underhooks.
That's three failed takedown attempts in the round for Dwayne Perry. That's going to take a lot out of him.
Perry goes for a takedown in the clinch but Bloom prevents it.
Bloom looks to throw an elbow but misses.
Perry tries for a takedown. No joy.
Perry tries to pull guard but Bloom won't allow it.
Perry has double underhooks and is working for a body lock takedown. He's got it. The fighters land in half guard but Bloom regains guard immediately.
Perry wants to control from the top but Bloom keeps moving.
Perry scoring with some ground and pound.
That's one minute gone in the round.
Bloom is working from a closed guard but he's struggling to control his opponent.
Perry works over Bloom with some ground and pound from guard.
Bloom takes a big intake of breath there - he's definitely tired.
Bloom wants to get back to his feet but Perry is in a dominant position and won't allow it.
Perry stands up and waves to Bloom to follow him.
Bloom misses the jab.
Perry shoots in and gets a takedown into half guard. Perry showed some decent athleticism there.
Perry takes advantage of the dominant position to land a couple of big hammer fists.
Ground and pound from Perry.
Bloom on the receiving end of some nice ground and pound.
The two fighters exchange a few words. I couldn't hear what they were saying but maybe it's more fun if you make it up yourself. Perry connects with a nice short shot to Bloom's temple.
That's two minutes gone in the round.
Perry blocks the strikes from Bloom.
Perry prevents Bloom from standing back up.
Bloom tries to roll over but Perry keeps him under control.
Bloom wants to get back to his feet.
Perry working Bloom over with strikes.
Perry is looking for the mount but instead finds himself back in full guard.
Perry stands up and looks to throw the legs aside to pass to side control. Bloom swivels though and keeps the full guard.
Perry trying to control the position from guard on top but Bloom is wriggling around, looking for whatever he can.
Bloom is working from a closed guard but he's struggling to control his opponent.
That's three minutes gone in the round.
Perry is sitting in guard, working some ground and pound.
Perry might be looking to lock onto one of his opponent's long limbs for a submission, whilst we're on the ground.
Perry lands a couple of elbows.
Perry connects with a couple of short punches.
Perry passes easily into side control. Nice work.
Perry in side control, working for a kimura. He's got hold of an arm and he's torquing it... Bloom is tapping! That's the end of the fight!
Ladies and gentlemen, after 3:45 of round 3, we have a winner by way of Submission (Kimura). Dwayne Perry!
|
|
|
|
|
|
|
|
|
|
|
|
|
|
|
|
|
|
|
|
|
|
|
| S |
C
A |
G |
S |
C
B |
G |
|
S |
C |
G |
|
energy
A | B |
|
hype
A | B |
|
pop
A | B |
|
mgr
A | B |
|
FIGHT
RATING
73% |
|
|
|
|
|
|
