|
|
PBP Commentary |
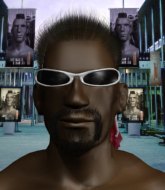
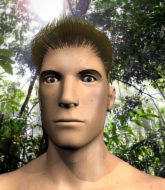
Coming up we have a super heavyweight MMA rules bout between Idi Ota (ranked 0 p4p, 0 weight class) and Jack Anderson (ranked 0 p4p, 0 weight class). Idi Ota has the better chin. Will he look to stand and bang today?
 |
|
 |
| 184 cm
19
295 lbs
2 - 1 - 0 |
|
195 cm
26
300 lbs
3 - 3 - 0 |
Decent wrestler
Good knees
Very strong |
|
Dangerous GnP
Brawler
Knockout power |
|
| |
|
Ladies and gentlemen. This fight is 3 rounds, in the super heavyweight division.
Introducing the fighter to my left, fighting out of the red corner.
With a record of
2 - 1 - 0, fighting out of Los Angeles, Idi Ota!
And introducing the fighter to my right, fighting out of the blue corner.
With a record of
3 - 3 - 0, fighting out of Helsinki, Jack Anderson!
The judges for this bout are John Kavanagh, Dean Styles and Jorge Garcia.

The bell rings for round one and we are underway!
Anderson closes the distance and clinches up with Ota, looking for a takedown. Anderson pushes Ota against the cage but Ota circles to the side and manages to break the clinch.
Ota stuffs the takedown.
Anderson shoots in for a takedown - he's clinched up with Ota but Ota pushes him off and we're back to square one.
Idi Ota has stuffed three takedown attempts in the round now. That's going to take a lot out of Jack Anderson.
Ota tries to close the distance and clinch up but Anderson swats him away and circles back towards the center.
Anderson keeps the fight on the outside.
Nice sprawl there from Ota as Anderson shoots in.
No luck with that takedown attempt from Anderson.
Anderson shoots in for a takedown but doesn't get it.
Ota slaps away a takedown attempt from Anderson, before circling back to the center of the mat.
Anderson looks gassed!
Anderson shoots for a takedown but Ota saw that one coming a mile off and avoided it easily.
Anderson looks for a takedown but Ota sprawls well.
Anderson throws a looping left and ducks down for a takedown. He's got his arms around Ota's waist but Ota gets an underhook and avoids the takedown by throwing Anderson off to one side.

That's one minute gone in the round.
Anderson swats away the attempt to clinch by Ota.
Ota fails in his attempt to clinch.
Ota tries to clinch up.
Ota is looking to clinch.
Ota tries to close the distance and clinch up against the cage but Anderson paws at him with a jab and circles away.
Ota is looking to clinch.
Anderson looks for a takedown but Ota sprawls well.
Anderson tries to score a power double leg takedown but Ota sees that one coming and sprawls well. That will dishearten Anderson somewhat.
Ota is looking to take this fight into the clinch.

That's two minutes gone in the round.
No luck with that takedown attempt from Anderson.
Ota tries to clinch but Anderson is having none of it.
Jack Anderson seems to be the more aggressive standup fighter in this bout.
Ota tries to clinch there but Anderson circles away.
Ota displays good takedown defense there as he swats away a double leg from Anderson.
The fight stays on the outside here - Ota looks like he's thinking about clinching though.
Ota fails in his attempt to clinch.
No luck for Anderson with that takedown attempt.
Anderson fails with a takedown attempt.
The fight stays on the outside here - Ota looks like he's thinking about clinching though.

That's three minutes gone in the round.
Ota fails in his attempt to clinch.

Ota takes the fight into the clinch.
Anderson can't get the takedown.
Ota landing knees to the body.
Anderson takes a knee to the side of the body.
The crowd are loving this. Great action here.
Knees to the body from Ota.

Ota drops Anderson with a big knee straight up the middle! Anderson is covering up against the cage but manages to escape and gets back to his feet!

It looks like Jack Anderson has been cut.
Anderson swats away the attempt to clinch by Ota.
Ota leaves Anderson with his face pressed against the mat as he sprawls beautifully, defending against a solid takedown attempt.
Ota tries to clinch but Anderson moves out of range.

That's four minutes gone in the round.
Anderson is trying hard to land a takedown here. Ota sprawls well and keeps this one on the feet.
The fight stays on the outside here - Ota looks like he's thinking about clinching though.
Anderson shoots in for a takedown but doesn't get it.
Ota tries to clinch but Anderson moves out of range.
Anderson has a takedown stuffed.
Ota tries to close the distance and clinch up against the cage but Anderson paws at him with a jab and circles away.
Ota doesn't manage to clinch there - Anderson circles away.
Ota fails in his attempt to clinch.
The crowd are going absolutely nuts as the round comes to an end - what a fantastic round of action!
Ota slips under a jab.
Ota has taken the fight to the clinch.
Anderson is looking for a takedown.
And that�s the end of the round � the fighters go back to their corners.
Idi Ota dominated that round.
The cut man is working on Jack Anderson's cut.
That's time! Back to the action!

Anderson will have to do better than that with his takedown attempts.
Ota is looking to clinch.
Anderson shoots in but Ota avoids the takedown attempt easily.
Anderson changes levels and looks for a double leg takedown. Ota tries to avoid it but Anderson manages to keep hold of a leg and drag Ota to the ground. Ota escapes though and pops straight back up to his feet.
Idi Ota has stuffed three takedown attempts in the round now. That's going to take a lot out of Jack Anderson.
Anderson keeps the fight on the outside.
Idi Ota is winning the standup battle so far.
Ota tries to clinch there but Anderson circles away.
Anderson keeps the fight on the outside.
Anderson tries for a takedown but Ota sees it coming a mile off and avoids it easily.
Ota wants to clinch up but Anderson keeps it at a distance.
Anderson swats away the attempt to clinch by Ota.
Anderson is breathing heavily.
Anderson shoots in for a takedown. "Ole!" shouts Ota as he jumps to the side.
Ota fails with an attempt to clinch.
That's one minute gone in the round.
Anderson avoids the clinch attempt nicely.
Anderson misses with a takedown attempt. He shot from a bit too far out.
Ota tries to close the distance and clinch but Anderson swats him to one side with an open hand palm strike and circles away.
Ota moves in looking to clinch but Anderson pushes him off.
Ota tries to clinch but is not successful on this occasion.
Anderson looks frustrated there after his takedown attempt is stuffed easily.
Ota is looking to take this fight into the clinch.
Anderson keeps the fight on the outside.
Ota tries to clinch but Anderson moves out of range.
That's two minutes gone in the round.
Ota fails in his attempt to clinch.
Anderson shoots in for a takedown - he's clinched up with Ota but Ota pushes him off and we're back to square one.
Ota tries to clinch but Anderson moves out of range.
Anderson fails miserably with a takedown attempt.
Ota moves in looking to clinch but Anderson pushes him off.
Ota tries to clinch up against the cage, rushing in the close the distance. Anderson manages to break the clinch and circles back to the middle of the mat.
Anderson circles away from the clinch attempt.
Anderson fails miserably with a takedown attempt.
Anderson keeps the fight on the outside.
Ota tries to close the distance and clinch up but Anderson swats him away and circles back towards the center.
That's three minutes gone in the round.
Ota moves in looking to clinch but Anderson pushes him off.
A really sloppy takedown attempt there from Anderson.
Anderson fails to land the takedown.
Ota tries to clinch up.
Anderson tries to shoot in for a takedown. He's got hold of a leg but Ota swivels and escapes.
Ota is looking to take this fight into the clinch.
Ota is looking to take this fight into the clinch.
Anderson shoots in for a takedown. "I don't think so" says Ota as he avoids it easily.
That's four minutes gone in the round.
Anderson circles away from the clinch attempt.
Ota gets to the clinch - let's see what his plan is here.
Ota with a knee to the head.
Ota unloads a knee to the mid-section. Anderson lets out a prehistoric sounding urrrrgh.
Wooooo! Give it up for these two warriors! They are putting on a show!
Kneeeeees! The crowd are calling for knees to the body. Ota obliges.
Ota using the Thai plumb to throw knees but Anderson has his back arched nicely, preventing the strike.
Ota with an attempt at a knee that misses.
Ota with an attempt at a knee that misses.
Ota with an attempt at a knee that misses.
Ota with a knee to the head.
That has opened up Jack Anderson's cut even more.
Ota misses with a knee strike.
Ota misses with a knee to the head.
Kneeeeees! The crowd are calling for knees to the body. Ota obliges.
Ota connects with a nasty looking knee right to Anderson's face.
As the round comes to an end the crowd are showing their appreciation for a great round of action.
A knee to the head by Ota.
Ota gets underhooks to prevent Anderson's takedown attempt.
Anderson is trying desperately to land a takedown but Ota is having absolutely none of it. This is turning into a bit of a nightmare for Anderson.
Ota throws a vicious knee straight up the middle but Anderson blocks it with crossed arms.
Anderson tries for a takedown. No joy.
And that�s the end of the round � the fighters go back to their corners.
Idi Ota dominated that second round.
The cut man is working on Jack Anderson's cut.
The referee calls time. The cornermen exit stage left and we're back to business. This is the final round!

The fight stays on the outside here - Ota looks like he's thinking about clinching though.
Anderson shoots in and drives through. Ota sprawls well.
Anderson shoots in for a double leg but Ota sprawls well. That's going to sap some energy.
Anderson shoots in for a takedown - he's clinched up with Ota but Ota pushes him off and we're back to square one.
Idi Ota has stuffed three takedown attempts in the round now. That's going to take a lot out of Jack Anderson.
Anderson tries for a takedown but Ota circles away easily
and Ota counters by moving into the clinch.
Anderson takes a knee right on the jaw!
Knees in the clinch landing for Ota.
Kneeeeees! The crowd are calling for knees to the body. Ota obliges.
The crowd cheering loudly, showing their appreciation for the quality fight we're seeing here.
Ota landing knees to the head.
A knee to the head by Ota.
Ota connects with a knee to the head.
The cut above Jack Anderson's eye is starting to cause him problems now.
Anderson takes a big intake of breath there - he's definitely tired.
Ota lands a good knee to the midsection. Anderson won't want to take too many of those.
Ota lands a nice knee to the body.
Ota is really dominating this fight. Is there anything that Anderson can do to turn this around?
That's one minute gone in the round.
Ota looking to throw knees to the head but Anderson is blocking nicely.
Ota lands a knee to the head there! That was nasty!
Anderson takes a knee right on the jaw!

Anderson is rocked!
Anderson takes a knee right on the jaw!
Anderson is still on wobbly legs! Can Ota finish him?
Jack Anderson's cut is absolute horrible now. This looks like something out of a horror film with blood covering both fighters.
Anderson takes a knee right on the jaw!
Ota with a knee to the head.
Ota unloads a knee to the mid-section. Anderson lets out a prehistoric sounding urrrrgh.
A knee to the head by Ota.
Ota with an attempt at a knee that misses.
Anderson wants to take the fight to the mat but Ota manages to get underhooks and keep the fight in the clinch.
Ota lands a knee to the head there! That was nasty!
Idi Ota has scored more points in the clinch so far.
Ota throws a knee to the head but misses.
Ota prevents the takedown attempt.
A knee to the head by Ota.
Anderson is working on a leg, looking for a takedown but Ota is defending well.
Ota unloads a knee to the mid-section.
Anderson seems to have recovered his senses.
Ota unloads a knee to the mid-section. Anderson lets out a prehistoric sounding urrrrgh.
Ota is pressed up against the cage. Anderson has hold of a leg and is looking to drag Ota down to the mat. Ota avoids the attempt though and has circled away. We're back to striking at a distance.
Anderson shoots in for a takedown - he's clinched up with Ota but Ota pushes him off and we're back to square one.
Ota doesn't manage to clinch there - Anderson circles away.
That's two minutes gone in the round.
We've seen a great period of action over the last minute or so - credit to both fighters for going all out!
Ota moves into the clinch.
Ota unloads a knee to the mid-section. Anderson lets out a prehistoric sounding urrrrgh.
Ota lands a knee to the head.
Ota using the Thai clinch to land knees to the body.
Ota working Anderson over with knees to the body.
Anderson wants to take the fight to the mat but Ota manages to get underhooks and keep the fight in the clinch.
Ota looking to throw knees to the head but Anderson is blocking nicely.
Ota lands a knee to the head.
Anderson has a body lock and is looking for a takedown. Ota is bouncing around trying to prevent the takedown and somehow he has indeed managed to stay on his feet.
Ota landing knees to the head.
Ota prevents a takedown attempt there.
Ota using the Thai plumb to throw knees but Anderson has his back arched nicely, preventing the strike.
Anderson is looking for a takedown up against the cage. Ota gets underhooks though and prevents the takedown attempt.
Ota prevents a takedown attempt there.
That's three minutes gone in the round.
Ota connects with a nasty looking knee right to Anderson's face.
Anderson has hold of a leg and is looking for a trip takedown. Ota avoids it nicely though and we remain in the clinch.
Knees in the clinch landing for Ota.
Ota using the Thai plumb to throw knees but Anderson has his back arched nicely, preventing the strike.
Ota tries a knee to the head but he's missed.
Ota blocking some punches.
Ota using the Thai clinch to land knees to the body.
Ota gets underhooks to prevent Anderson's takedown attempt.
Ota scores a nice knee to the body.
Anderson has Ota pressed up against the cage and is working for takedown. Ota manages to improve position though and keeps the fight standing.
Ota gets underhooks to prevent Anderson's takedown attempt.
Anderson goes for a takedown in the clinch but Ota prevents it.
Ota unloads a knee to the mid-section. Anderson lets out a prehistoric sounding urrrrgh.
Ota utilising his Muay Thai to score with a knee to the body.
That's four minutes gone in the round.
Ota landing knees to the body. They look like they could hurt.
Anderson on the defensive, avoiding the knees to the body.
Anderson tries to score a body lock takedown but Ota shows good agility there to stay on his feet.
Wooooo! Give it up for these two warriors! They are putting on a show!
Anderson takes a knee to the side of the body.
Ota misses with a knee to the head.
Anderson tries to score a body lock takedown but Ota shows good agility there to stay on his feet.
Ota landing knees to the head.
Anderson takes a knee to the side of the body.
Ota lands a knee to the head.
Ota prevents a takedown attempt there.
Ota unloads a knee to the mid-section. Anderson lets out a prehistoric sounding urrrrgh.
The crowd are going absolutely nuts as the round comes to an end - what a fantastic round of action!
Ota with the Thai clinch. He's looking to land a big knee but he's not managed it this time.
Anderson goes for a takedown attempt but Ota pushes him away and we're back to fighting at a distance.
Anderson tries to score a power double leg takedown but Ota sees that one coming and sprawls well. That will dishearten Anderson somewhat.
And that's the end of the fight!
Idi Ota showed his dominance in that final round.
Well Ota has outscored his opponent in every aspect of the fight today. Only a scarily incompetent judge or two will keep him from a well deserved win... Over to the ring announcer for the scorecards.
Ladies and gentlemen, after 3 rounds of action, we go to the scorecards for a decision.
Judge John Kavanagh scores the fight 30:27
Judge Dean Styles scores the fight 30:27
Judge Jorge Garcia scores the fight 30:27
In favor of your winner, by unanimous decision... Idi Ota!
|
|
|
|
|
|
|
|
|
|
|
|
|
|
|
|
|
|
|
|
|
|
|
| S |
C
A |
G |
S |
C
B |
G |
|
S |
C |
G |
|
energy
A | B |
|
hype
A | B |
|
pop
A | B |
|
mgr
A | B |
|
FIGHT
RATING
86% |
|
|
|
|
|
|
