|
|
PBP Commentary |
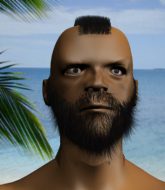
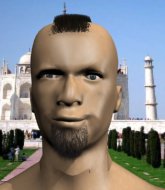
Coming up we have a lightweight MMA rules bout between Johnny Sahebt (ranked 0 p4p, 0 weight class) and Buddi Zoom (ranked 0 p4p, 0 weight class). Zoom is bobbing his head along to his entrance song: Thunder Struck - ACDC. Johnny Sahebt has the better chin. Will he look to stand and bang today?
 |
|
 |
| 178 cm
22
160 lbs
5 - 6 - 0 |
|
169 cm
28
168 lbs
7 - 3 - 0 |
Good takedowns
Basic striking
Good chin |
|
BJJ Purple Belt
Brawler
Powerful |
|
| |
|
Ladies and gentlemen. This fight is 3 rounds, for the lightweight championship of the world!
Introducing the champion to my left, fighting out of the red corner.
With a record of
5 - 6 - 0, fighting out of Sydney, Johnny Sahebt!
And introducing the challenger to my right, fighting out of the blue corner.
With a record of
7 - 3 - 0, fighting out of Sydney, Buddi Zoom!
The judges for this bout are Winston Howard, Skip Squint and Eliza Hachem.

The bell rings for round one and we are underway!

Sahebt clinches up against the cage.
Sahebt drops down looking for an ankle pick but Zoom pulls his leg out and moves away.

Sahebt decides to change it up a bit and drives through with a nice takedown into half guard.
The referee is pacing around the two fighters - he looks like he's thinking about a standup.
Zoom pushes Sahebt off looking to stand but Sahebt dives back in and keeps control.

Zoom kicks Sahebt off and gets back to his feet.
Zoom will have to do better than that with his takedown attempts.
Sahebt shoots in for a takedown and gets it. Oh and he's advanced to full mount straight away.
Zoom tries to buck Sahebt off but he can't manage it.
Sahebt seems to be looking to move to his opponent's back but Zoom is holding on tight.

Sahebt is working on an americana here. Ooh, that looks pretty nasty! Nope, Zoom has managed to escape the submission attempt.
This has been an exciting period of action!
Zoom bucks up and throws Sahebt to the side - he's got back to his feet. Great escape!
Sahebt shoots in with a takedown attempt and he has Zoom pinned against the cage. Zoom gets the underhooks and manages to circle away.
Sahebt stuffs a takedown. It's all about dictating where the fight takes place and Sahebt wants it to stay on the feet.
Zoom shoots in but doesn't get the takedown
and Sahebt counters by moving into the clinch. Good anticipation by Sahebt.
Johnny Sahebt has stuffed three takedown attempts in the round now. That's going to take a lot out of Buddi Zoom.
Sahebt is looking for a takedown.

That's one minute gone in the round.
Sahebt changes levels and goes for a takedown here. Zoom fights it off and pushes away nicely.
Sahebt shoots in for a takedown and gets it.
Zoom is refusing to be controlled, as Sahebt sits in half guard.
Zoom looks like he's trying to stand up.
Zoom is using up a lot of energy trying to get back to his feet. Perhaps he should improve his position first.
Zoom has one foot on Sahebt's thigh - he pushes off and manages to get back to his feet.
Zoom misses with a takedown attempt - Sahebt sprawls well and throws a nice strike on the way out which just misses.
The fight stays on the outside here - Sahebt looks like he's thinking about clinching though.
Sahebt drops down and drives through with a powerful takedown into guard.
The fighters are pressed up against the cage, both looking to find a bit of space to work.
Zoom is trying to stand up but he's not managed so far.

That's two minutes gone in the round.
This has been an exciting period of action!
Zoom keeping moving, preventing Sahebt from controlling successfully.
Zoom wants to stand up but Sahebt is controlling him.
Both fighters really going for it on the ground here!
Zoom has momentary wrist control but Sahebt slips an elbow through the middle.
Zoom keeping moving, preventing Sahebt from controlling successfully.
The referee looks like he's ready to step in and stand the fighters back up.
Sahebt looking to pass the guard.
Sahebt thinks about going for a leg but decides against it, in order to maintain the position.
Sahebt stops Zoom from standing up.
The ref warns both fighters not to hold the cage as they work up against the meshing.

That's three minutes gone in the round.
Sahebt wants to pass the guard but Zoom is keeping the position.
Zoom kicks Sahebt off and gets to his feet.
No luck for Zoom with that takedown attempt.
Sahebt keeps the fight standing with a nice sprawl.
Zoom looks gassed!
Zoom circles away from the clinch attempt.
Zoom shoots in but Sahebt avoids the takedown attempt easily.
Zoom displays good takedown defense there as he swats away a double leg from Sahebt.
Sahebt leaves Zoom with his face pressed against the mat as he sprawls beautifully, defending against a solid takedown attempt.
Sahebt shoots in and gets a takedown into half guard. Sahebt showed some decent athleticism there.
Sahebt is working for submissions here but there's nothing on.
Sahebt trying to mount his opponent but Zoom defends it.

That's four minutes gone in the round.
Sahebt is trying to work for a kimura but Zoom is defending well.
Sahebt is working for submissions here but there's nothing on.
Zoom pushes Sahebt off and gets back to his feet.
This is a great period of action - very entertaining stuff!
Sahebt shoots in for a takedown. "Ole!" shouts Zoom as he jumps to the side.
Zoom shoots in for a takedown but Sahebt shows good takedown defense there and keeps this one on the feet.
Sahebt feints and then dives in with a takedown. That was a long way out but the feint bought him enough time to close the distance and complete the takedown. Now we'll play guard for a bit and see who can get the better of that position.
Zoom is looking to get back to his feet but can't, whilst Sahebt is controlling him.
The crowd are going absolutely nuts as the round comes to an end - what a fantastic round of action!
Sahebt drops back looking for a leg! Zoom is in trouble here! The fighters roll with the hold and Zoom manages to kick Sahebt off! Sahebt jumps back into Zoom's guard.
Zoom is looking to get back to his feet but can't, whilst Sahebt is controlling him.
And that�s the end of the round � the fighters go back to their corners.
Johnny Sahebt dominated that round.
The minute break is over - no more time for sponges and pep talks - back to the action!

Sahebt is looking to clinch.
Sahebt closes the distance and clinches up with Zoom, looking for a takedown. Sahebt pushes Zoom against the cage but Zoom circles to the side and manages to break the clinch.
Sahebt gets to the clinch - let's see what his plan is here.
Zoom unloads a knee to the mid-section.
Sahebt can't get the takedown.
Zoom tries a knee to the head but he's missed.
Sahebt misses the knee to the body. Nice hip positioning from Zoom.
Sahebt avoiding damage as Zoom throws knees to the body.
Sahebt tries to pull guard but Zoom forces him back to his feet, against the cage.
That's three failed takedown attempts in the round for Johnny Sahebt. That's going to take a lot out of him.
Zoom lands with a short head shot on the inside.
Zoom lands a knee to the head there! That was nasty!

It looks like Johnny Sahebt has been cut.
Zoom tries to land knees in the clinch but Sahebt avoids the damage to the body.
Sahebt blocks a knee to the body. He'll have a nicely bruised forearm in the morning.
Both fighters are absolutely exhausted here.
Sahebt is looking to score with knees to the body. Maybe he'll change it up and go body then head. Zoom is defending well for now.
Sahebt blocks an elbow strike from Zoom.
Zoom missing with knees to the body.
The fans in attendance giving it up for the two fighters, who have really let it all hang out in the last minute or so!
Sahebt managing to block the knees to the body from Zoom.

Sahebt breaks the clinch and we're back to striking at distance.
No luck for Zoom with that takedown attempt.
That's one minute gone in the round.
Sahebt closes the distance and gets a trip takedown into side control. Zoom quickly recovers to half guard.
Zoom pushes Sahebt off and gets back to his feet.
Zoom gets his takedown attempt stuffed easily
and Sahebt counters by moving into the clinch. Good anticipation by Sahebt.
Sahebt jumps guard.
Sahebt has a loose triangle. He'll be looking to tighten that up but Zoom can see exactly what he's planning and manages to posture up and free himself.

Zoom is trying to work a guillotine from the top, or something like that? Don't know how he thinks he's going to get a finish from there.
Sahebt throwing some rather feeble looking strikes off his back.
That's two minutes gone in the round.
Sahebt trying to strike from the bottom but really, it's not the best position to be doing that from!
Sahebt is looking to sinch up a triangle. Zoom throws the leg off to one side though and gets in tight to Sahebt's body to avoid the submission. Sahebt has instead reached around Zoom's neck and now has a guillotine! Oh, this is biiiig trouble! Sahebt arches his back and squeezes and forces the tap from his hapless opponent.
Ladies and gentlemen, after 2:26 of round 2, we have a winner by way of Submission (Guillotine). Johnny Sahebt!
Johnny Sahebt is the new lightweight champion!
Johnny Sahebt tried to hype himself up post fight but didn't word it too well and it ended up with him sounding like a bit of a tool.
|
|
|
|
|
|
|
|
|
|
|
|
|
|
|
|
|
|
|
|
|
|
|
| S |
C
A |
G |
S |
C
B |
G |
|
S |
C |
G |
|
energy
A | B |
|
hype
A | B |
|
pop
A | B |
|
mgr
A | B |
|
FIGHT
RATING
85% |
|
|
|
|
|
|
