|
|
PBP Commentary |
Coming up we have a lightweight MMA rules bout between Doc Holliday (ranked 0 p4p, 0 weight class) and Charlie Reynolds (ranked 0 p4p, 0 weight class). Doc Holliday had a look across the cage there at his opponent. He definitely means business
 |
|
 |
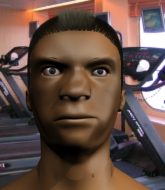
| 175 cm
29
165 lbs
14 - 9 - 0 |
|
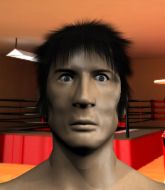
174 cm
28
165 lbs
17 - 10 - 0 |
Abu Dhabi Champ
World class boxer
Insanely flexible |
|
Good wrestler
Great elbows
Good gas tank |
|
| |
|
Ladies and gentlemen. This fight is 3 rounds, in the lightweight division.
Introducing the fighter to my left, fighting out of the red corner.
With a record of
14 - 9 - 0, fighting out of Las Vegas, Doc Holliday!
And introducing the fighter to my right, fighting out of the blue corner.
With a record of
17 - 10 - 0, fighting out of Montreal, Charlie Reynolds!
The judges for this bout are Colin Fray, Josh West and Jeff Smith.

The bell rings for round one and we are underway!
Reynolds misses with a telegraphed body shot
and Reynolds takes a counter punch right on the button for his troubles.
A head kick misses from Reynolds.
Reynolds lands a leg kick that knocks Holliday off balance momentarily.
Charlie Reynolds seems to be the more aggressive standup fighter in this bout.
Reynolds connects with a jab.
Reynolds lands a lovely overhand right.
Holliday sizes up Reynolds with a pawing jab and scores with a straight right down the middle.
Holliday shoots in for a takedown. "I don't think so" says Reynolds as he avoids it easily.
A punch combination from Reynolds misses.
Reynolds tries to close the distance and clinch up but Holliday swats him away and circles back towards the center.
Reynolds takes a thudding leg kick, right into the meat of the thigh.
Holliday tries to land with a swinging hook to the body but Reynolds was well out of range. Poor timing from Holliday.
Holliday throws a hook to the body but it doesn't connect.

Holliday shoots in for a takedown and gets it. Let's see what he's got on the mat.
The fighters are pressed up against the cage, both looking to find a bit of space to work.
The referee is pacing around the two fighters - he looks like he's thinking about a standup.
Holliday wants to control from the top but Reynolds keeps moving.
The crowd are loving this. Great action here.
Holliday postures up to throw the ground and pound strikes but they don't connect.
Reynolds preventing the ground and pound from doing any damage.

That's one minute gone in the round.
Holliday stops Reynolds from standing up.
Holliday trying to control the position from guard on top but Reynolds is wriggling around, looking for whatever he can.
Holliday trying to pass the guard but can't manage it just yet.
Holliday throws a big elbow that misses.
Reynolds pulls Holliday in close to prevent any damage.
Holliday throwing strikes but missing.
Holliday passes easily into side control. Nice work.

That's two minutes gone in the round.
Reynolds is trying to control Holliday's posture but Holliday avoids it.
Holliday prevents Reynolds from escaping the position.
Holliday controls the position from side control.
Reynolds holds on to Holliday's head and controls the position momentarily.
The strikes coming from Holliday are missing the target in this wave of attacks.
Holliday wants to control but Reynolds is keeping him busy.

That's three minutes gone in the round.
Holliday lands a decent elbow from side control.
Holliday has been looking to land a fair amount of strikes on the ground. He might be looking to soften his opponent up in order to work for a submission.
Holliday lands a knee to the body and a forearm to the face.
Holliday scoring with punches and elbows.
Holliday throws an elbow but Reynolds slips to the side and avoids it well.
Holliday landing strikes.
Holliday is looking to take a break and control but Reynolds is keeping him honest, looking to work from the bottom.
Holliday misses with an attempted head punch from side control.
Reynolds is pushing Holliday's head away, looking to escape. Holliday manages to hold on to the position though.
Reynolds tries to get back to half guard but can't.

That's four minutes gone in the round.
Holliday is pausing for a moment. What's he doing? It looks like he's clearing his nose. Oh dude! He's shot a load of snot all down Reynolds's shoulder. That is not cool.
An elbow from Holliday crashes against the mat.
This is a great period of action - very entertaining stuff!
Reynolds tries to bench press Holliday off him but Holliday keeps the position.
The strikes coming from Holliday are missing the target in this wave of attacks.
Holliday throws a knee to the body but it doesn't do much damage.
Holliday trying to control the action but Reynolds is working from the bottom.
Reynolds really doesn't want to stay on the ground with Holliday. If he can't get it back to his feet, it's only a matter of time before he'll be tapping out.
Reynolds trying to remain calm as Holliday controls from the top position.
The ref warns both fighters not to hold the cage as they work up against the meshing.
As the round comes to an end the crowd are showing their appreciation for a great round of action.

Holliday is trying to get an arm triangle but Reynolds is defending well.
Holliday throws an elbow but Reynolds slips to the side and avoids it well.
And that�s the end of the round � the fighters go back to their corners.
Doc Holliday dominated that round.
The corners get their ten second warning. Both fighters stand from their stools and stare eachother down, ready to get back to the action.

A shot to the liver by Holliday. Beautiful body shot.
Reynolds throws a push kick but Holliday slaps the foot to one side.
Holliday misses with a low kick as Reynolds jumps back.
Holliday ducks down and throws a hook to the body but Reynolds moves away.
Holliday swats away the attempt to clinch by Reynolds.
Reynolds misses with a combination
and Holliday makes the exchange count by landing a cracking kick to the body. Reynolds really felt that one!
Charlie Reynolds is looking to throw some combinations by the looks of things.
Holliday throws out a token jab with nothing on it.
Holliday ducks under a wild hook from Reynolds.
Reynolds explodes with a nice body kick and back out of range. Nice work.
Reynolds misses with a series of wild punches.
That kick from Holliday tenderised Reynolds's leg. Reynolds is trying to keep his angry face on.
A slow jab from Holliday misses its intended target.
Reynolds connects with the punch.
Reynolds avoids the body shot from Holliday.
Reynolds fails to land with the punch combination there - jab, cross, hook, miss, miss, miss.
That's one minute gone in the round.
Holliday motions for Reynolds to come forward. Holliday throws a leg kick but it misses it's target.

Reynolds moves into the clinch successfully.
Holliday swings wildly with an uppercut but Reynolds uses good head movement to avoid it.
Holliday dodges an elbow strike from Reynolds.
Reynolds lands an elbow just above Holliday 's eye.
Holliday wants a takedown but no success here.
Holliday cracks Reynolds with a nice body shot.
Reynolds misses with a hook to the ribs.
Holliday swings away with an uppercut that misses.
Reynolds lands a nice knee to the body.
An uppercut on the inside fails to land for Holliday.
Reynolds is looking to score with knees to the body. Maybe he'll change it up and go body then head. Holliday is defending well for now.
Reynolds tries to land knees in the clinch but Holliday avoids the damage to the body.
Reynolds throws an elbow but it's blocked.
Holliday lands a hook to the body. It's hard to tell if that hurt Reynolds or not.
Wooooo! Give it up for these two warriors! They are putting on a show!
Holliday can't find room to land a body shot as Reynolds controls the action.
Holliday tries to break free but Reynolds pushes him back against the cage.
Holliday pushes Reynolds back against the cage and lands a hook to the side of the head.
Holliday tried to land a shot to the body but connects with Reynolds's elbow.
That's two minutes gone in the round.
Nice body punch from Reynolds - that landed with a thud.
Reynolds blocks a punch to the side of the head.
Holliday misses with a punch to the body.
Reynolds with a knee to the head.
Holliday scores with a shot to the side of Reynolds's head.
Holliday blocks a knee to the body. He'll have a nicely bruised forearm in the morning.

Holliday breaks the clinch.
Reynolds gets to the clinch - let's see what his plan is here.
Holliday blocks the elbow strike.
Reynolds lands a short shot on the inside that snaps the head of Holliday backwards.
Reynolds tries to land a knee to the body but he is off balance and Holliday avoids it.
Reynolds trying to land knees to the body.
Holliday blocks a knee to the body. He'll have a nicely bruised forearm in the morning.
Holliday dodges an elbow strike from Reynolds.
Reynolds blocks an uppercut.
Reynolds is pressed up against the cage. Holliday has hold of a leg and is looking to drag Reynolds down to the mat. Reynolds avoids the attempt though and has circled away. We're back to striking at a distance.
Reynolds misses with a body shot.
Reynolds wants to clinch.
That's three minutes gone in the round.
Some wild striking there from Reynolds.
Holliday throws a decent looking leg kick but it doesn't land clean.
Holliday works Reynolds's body with a nice hook.
A big right from Reynolds misses.
Holliday looks to land a left hand but Reynolds moved out of range nicely.
A slow jab from Reynolds misses its intended target.
Reynolds thows a body shot but no joy.
Holliday uses decent footwork to sidestep a right hand from Reynolds.
Holliday's corner calls for a 1-2. Holliday obliges with the 1 part as he scores the single shot and moves back out of range.
Reynolds is looking to take this fight into the clinch.
Reynolds moves in looking to clinch but Holliday pushes him off.
That's four minutes gone in the round.
Reynolds misses with a telegraphed body shot
and Holliday counters with a good right hand that lands right on the jaw.
Reynolds thows a body kick. Holliday tries to catch it but that hurt him.
Holliday throws an overhand right that lands on Reynolds's shoulder, as Reynolds tries to avoid the shot.
Holliday fakes high and swings low for a body shot but Reynolds manages to avoid it.
Reynolds throws a right hand that Holliday ducks under and follows up with a left that Holliday also avoids with ease.
Holliday blocks a jab.
Holliday throws a hook to the body but it doesn't connect.
Reynolds moves into range and connects with a jab.
Holliday moves out of range of the strikes.
Holliday misses with a hook. Reynolds ducked under it nicely.
Holliday lands with an uppercut that bounces Reynolds off the cage and back into range.
We've seen a great period of action over the last minute or so - credit to both fighters for going all out!
Reynolds keeping a good distance there, avoiding the body shot.
The crowd are going absolutely nuts as the round comes to an end - what a fantastic round of action!
Holliday closes the distance and clinches up with Reynolds, looking for a takedown. Holliday pushes Reynolds against the cage but Reynolds circles to the side and manages to break the clinch.
That's three failed takedown attempts in the round for Doc Holliday. That's going to take a lot out of him.
Reynolds looks to land a right hand but Holliday moved out of range.
Reynolds motions for Holliday to come forward. Reynolds throws a leg kick but it misses it's target.
Reynolds blocks a jab.
And that�s the end of the round � the fighters go back to their corners.
Charlie Reynolds showed his class in that round. I'd imagine he'll take it on all the scorecards.
That's time! Back to the action! This is the final round!

A left and a right from Reynolds both land. Nice combination.
Reynolds defending well as Holliday loads up on a big left hand.
Holliday with a nice cross.
Holliday circles away from the clinch attempt.
Reynolds misses with a hook. Holliday ducked under it nicely.

Holliday moves into the clinch.
Holliday dodges an elbow strike from Reynolds.
Holliday lands with a short head shot on the inside.
Holliday misses with a hook to the ribs.
Holliday works for underhooks and lands a body shot in the process.
Holliday working on landing some head shots here - that one got through nicely.
Nice elbow from Reynolds.
A head punch on the inside from Holliday fails to land.
Reynolds looks to throw an elbow but misses.
Reynolds takes a shot to the head.
Holliday is looking for a takedown up against the cage. Reynolds gets underhooks though and prevents the takedown attempt.
Holliday struggles to land a body shot inside as Reynolds controls his hands.
Holliday blocks a knee to the body. He'll have a nicely bruised forearm in the morning.
Holliday takes a knee right on the jaw!
That's one minute gone in the round.
Reynolds tries a shoulder strike but it doesn't do any damage.
Holliday lands a right hand.
Reynolds blocks a body shot from Holliday.
Holliday lands a hook to the side of the head.
Holliday avoiding damage as Reynolds throws knees to the body.
Charlie Reynolds seems to be working more effectively in the clinch in the fight so far.
Reynolds is looking to score with knees to the body. Maybe he'll change it up and go body then head. Holliday is defending well for now.
Holliday working some nice short punches in the clinch.
Reynolds fails to land with a short punch on the inside.
Holliday misses with a body punch.
Reynolds misses the knee to the body. Nice hip positioning from Holliday.
Holliday tries a body shot but Reynolds blocks it.
Holliday swings away with an uppercut that misses.
Nice elbow from Reynolds.
Holliday tries to land a shot to the body but it's blocked.
Holliday lands on the inside with an uppercut.
Holliday blocks an elbow strike.
Holliday's corner calls for him to break the clinch, which he does.
A solid leg kick lands there for Holliday.
Holliday misses with a wild body shot.
That's two minutes gone in the round.
Holliday takes a swing at Reynolds's ribcage but misses.
Holliday swings away with a body shot that misses
and Reynolds counters nicely by changing levels and landing a hook to the body.
The crowd are loving this. Great action here.
Good shot there by Reynolds.
Holliday takes a punch right to his stomach. That took the wind out of him momentarily.
Reynolds blocks a low kick nicely.
Jab by Reynolds.
Reynolds misses with a low kick.
Holliday misses the shot to the body.
Holliday showing good head movement there, avoiding the strikes from Reynolds.
Reynolds throws the kick towards the body but Holliday avoids it.
Holliday lands a slapping body shot.
Holliday throws a hard body shot but it just misses.
Holliday closes the distance and scores a nice trip takedown into half guard. Reynolds did well to prevent Holliday getting side control.
Holliday works his way into full mount!
That's three minutes gone in the round.
Holliday tries to control but Reynolds wriggling away.
Reynolds can't escape the position.
Holliday throwing strikes here but Reynolds is writhing around nicely and avoiding any serious damage.
Reynolds wriggling around on the bottom manages to avoid the strikes thrown by Holliday.
Holliday misses with a head shot.
Holliday lands a shot to the body, followed up by a shot to the exposed head of his trapped opponent.
That's four minutes gone in the round.
Holliday fakes a shot to the body and cracks his opponent in the head. Nice ground and pound there!

Reynolds is rocked!
Reynolds is trying to get back to his feet but can't.
Reynolds is still in real trouble! Can Holliday finish him?
Oooooh, big shot lands for Holliday! Reynolds is hurt baaadly! Holliday is firing away with more strikes - Reynolds is covering up... the ref is warning him to do something. He's just covering up though still and the ref has to step in to end the fight! This one is all over!
Ladies and gentlemen, after 4:29 of round 3, we have a winner by way of TKO (Strikes). Doc Holliday!
After the big win, Doc Holliday made sure to do all the important stuff like thanking his sponsors TFP Graphics - Pit Inc and telling the interviewer how much he loves him.
|
|
|
|
|
|
|
|
|
|
|
|
|
|
|
|
|
|
|
|
|
|
|
| S |
C
A |
G |
S |
C
B |
G |
|
S |
C |
G |
|
energy
A | B |
|
hype
A | B |
|
pop
A | B |
|
mgr
A | B |
|
FIGHT
RATING
80% |
|
|
|
|
|
|
