|
|
PBP Commentary |
Coming up we have a middleweight MMA rules bout between John Hampton (ranked 0 p4p, 0 weight class) and Jim Saaki (ranked 0 p4p, 0 weight class). We have two fighters making their debuts here, so let's see who comes out of this one with their first professional victory.
 |
|
 |
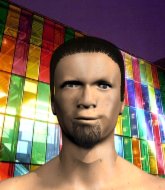
| 190 cm
25
185 lbs
0 - 0 - 0 |
|
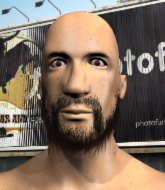
180 cm
25
188 lbs
0 - 0 - 0 |
BJJ Blue Belt
Solid Muay Thai
Big heart |
|
Good takedowns
Brawler
Solid chin |
|
| |
|
Ladies and gentlemen. This fight is 3 rounds, in the middleweight division.
Introducing the fighter to my left, fighting out of the red corner.
With a record of
0 - 0 - 0, fighting out of Los Angeles, John Hampton!
And introducing the fighter to my right, fighting out of the blue corner.
With a record of
0 - 0 - 0, fighting out of Los Angeles, Jim Saaki!
The judges for this bout are , Timothy Bukovac and Jack Bonds.

The bell rings for round one and we are underway!
Hampton shoots in looking for a double leg takedown. Saaki defends it nicely.
No luck with that takedown attempt from Saaki.
Saaki tries to score a power double leg takedown but Hampton sees that one coming and sprawls well. That will dishearten Saaki somewhat.
Hampton tries to clinch up.
Saaki shoots in and drives through. Hampton sprawls well.
John Hampton has stuffed three takedown attempts in the round now. That's going to take a lot out of Jim Saaki.
Hampton lands a jab to Saaki's midsection.
Saaki shoots in looking for a takedown but Hampton manages to keep the fight standing, pushing Saaki's face into the canvas for good measure before circling away.
Saaki tries to clinch but is not successful on this occasion.
Saaki takes a head kick and shrugs it off.
Saaki tries to shoot in for a takedown. He's got hold of a leg but Hampton swivels and escapes.
Hampton scores with a head kick. Saaki tried to block it but didn't get his arm up in time.

It looks like Jim Saaki has been cut.
Wooooo! Give it up for these two warriors! They are putting on a show!
Hampton looks for a takedown here. Will he get it? Saaki is fending him off so far but Hampton persists. Nope, Saaki circles away and we're back to standing.
Hampton works over Saaki's head and body with a nice combination.
Saaki fakes high and shoots in for a takedown but Hampton avoids it really well and circles away.
Saaki looks gassed!
Saaki sees a low kick coming and goes to check it, but it's actually a body kick and it thuds into his unprotected ribs.

That's one minute gone in the round.
Saaki changes levels and looks for a double leg takedown. Hampton tries to avoid it but Saaki manages to keep hold of a leg and drag Hampton to the ground. Hampton escapes though and pops straight back up to his feet.
Hampton fakes with a right hand and throws a good leg kick, right into the thigh. That had to hurt Saaki.
Hampton shoots in but Saaki avoids the takedown attempt easily.
Hampton shoots in looking for a takedown but Saaki manages to keep the fight standing, pushing Hampton's face into the canvas for good measure before circling away.
Hampton shoots in with a takedown attempt and he has Saaki pinned against the cage. Saaki gets the underhooks and manages to circle away.
Hampton leaves Saaki with his face pressed against the mat as he sprawls beautifully, defending against a solid takedown attempt.
Hampton shoots for a takedown but Saaki saw that one coming a mile off and avoided it easily.
Hampton lands three nice shots there - that looked like it hurt!

Saaki moves into range and clinches up with Hampton.

Hampton breaks from the clinch.
Saaki is trying desperately to land a takedown but Hampton is having absolutely none of it. This is turning into a bit of a nightmare for Saaki.

That's two minutes gone in the round.
Hampton throws a looping left and ducks down for a takedown. He's got his arms around Saaki's waist but Saaki gets an underhook and avoids the takedown by throwing Hampton off to one side.
Hampton shoots in looking for a takedown but Saaki manages to keep the fight standing, pushing Hampton's face into the canvas for good measure before circling away.
Saaki fails with a takedown attempt.
A really sloppy takedown attempt there from Saaki.
The fans in attendance giving it up for the two fighters, who have really let it all hang out in the last minute or so!
Saaki shoots in for a takedown but Hampton shows good takedown defense there and keeps this one on the feet.
Hampton shoots in for a double leg but Saaki sprawls well. That's going to sap some energy.
Good standup being displayed there by Hampton as he connects with a hook.
Hampton displays good takedown defense there as he swats away a double leg from Saaki.
Saaki shoots for a double leg takedown but Hampton sprawls well. He's pushed Saaki's face into the mat and manages to get back to his feet relatively easily.
A really sloppy takedown attempt there from Hampton.
Saaki moves into the clinch.

That's three minutes gone in the round.
Hampton tries to land knees in the clinch but Saaki avoids the damage to the body.

Saaki turns his hips and lands a very nice judo throw into side control!

Saaki looking for an arm triangle but it's way too loose to do anything.
Sloppy strikes there by Saaki.
Hampton gets one leg under and gets the fight to half guard.
Saaki works his way into side control.
Hampton managing to avoid any damage from the strikes thrown by Saaki.

That's four minutes gone in the round.
Saaki working away diligently from side control. Landing strikes effectively there - that will score him some points on the judges scorecards.
Hampton knows he needs to get back to his feet asap. He's simply no match for Saaki on the ground.
Hampton wants to get back to his feet but Saaki drags him back down.
The ref warns both fighters not to hold the cage as they work up against the meshing.
Hampton takes a nasty elbow to the side of the head.
Fantastic stuff here - a very entertaining period of action, which has drawn cheers from the crowd.
Hampton taking a bit of punishment here - Saaki scoring with strikes.
The fighters are pressed up against the cage, both looking to find a bit of space to work.
Saaki works a knee to the body and follows up with a nice elbow to the head.
Saaki lands a few punches from side control.
Saaki wants to work for a kimura but he's foiled early by Hampton, who protects the arm well.
The fighters are starting to get a bit slippery now, which will make submissions a bit more difficult.
Hampton taking a bit of punishment here - Saaki scoring with strikes.
The crowd are going absolutely nuts as the round comes to an end - what a fantastic round of action!
Saaki thinks about going for a far side armbar but bails out and retains the dominant position instead.
Hampton can't do much from the bottom here.
And thats the end of the round the fighters go back to their corners.
Jim Saaki dominated that round.
The cut man is working on Jim Saaki's cut.
That's the end of the round. The referee orders the cornermen out of the cage so we can get back down to business.

Saaki circles away from the clinch attempt.
Jim Saaki seems to be the more aggressive standup fighter in this bout.
Saaki shoots in for a takedown from distance. He catches Hampton napping and manages to drive through into side control!
Saaki tries for a kimura. Not really close to a finish though.
Saaki connects with a decent looking elbow from side control that caused Hampton some visible discomfort.
Saaki working hard here to secure a kimura but he's not really in the right position for it.
Hampton manages to get back to half guard.
Fantastic stuff here - a very entertaining period of action, which has drawn cheers from the crowd.
Saaki trying to mount his opponent but Hampton defends it.
Saaki drops an elbow to the side of Hampton's head.
That's one minute gone in the round.
Hampton is looking to regain full guard. Not this time though.
Saaki not landing any meaningful shots this time.
Both fighters are absolutely exhausted here.
Saaki looking to pass the half guard. Not this time.
Saaki misses with a head shot. Hampton uses the momentum to regain guard.
Saaki lands a couple of digs.

Hampton is working actively off his back, looking to secure an arm or perhaps work for a triangle.
Saaki throws a big elbow that misses.
That's two minutes gone in the round.
Saaki stands up and looks to throw the legs aside to pass to side control. Hampton swivels though and keeps the full guard.
Saaki passes into half guard.
Jim Saaki has got the better of the ground game so far.
Saaki is looking for a kimura here.
Saaki passes the guard and advances to mount!
Saaki looking to finish Hampton with some ground and pound. This is bad for Hampton!
That's three minutes gone in the round.
Saaki landing shots from mount.
Saaki raining down shots from the mount!
The crowd growing excited in anticipation of a finish here! Right on cue, Saaki cracks his opponent with a massive right hand that draws loud cheers!
Saaki punishing his opponent with strikes.
A nice elbow there by Saaki.
We've seen a great period of action over the last minute or so - credit to both fighters for going all out!
Saaki looking to isolate an arm here. Hampton doesn't see it coming and as Saaki extends the arm, he's forced to tap out! Nice submission by Saaki!
Ladies and gentlemen, after 3:47 of round 2, we have a winner by way of Submission (Armbar). Jim Saaki!
A very excited looking Jim Saaki rambled incoherently for about 5 minutes post fight about how awesome he is. It was kinda funny for a while but then everyone got annoyed.
|
|
|
|
|
|
|
|
|
|
|
|
|
|
|
|
|
|
|
|
|
|
|
| S |
C
A |
G |
S |
C
B |
G |
|
S |
C |
G |
|
energy
A | B |
|
hype
A | B |
|
pop
A | B |
|
mgr
A | B |
|
FIGHT
RATING
75% |
|
|
|
|
|
|
