|
|
PBP Commentary |
Coming up we have a featherweight MMA rules bout between Marcus Brave (ranked 0 p4p, 0 weight class) and Kenny Hill (ranked 0 p4p, 0 weight class). Hill has chosen Its Raining Men as his entrance music. The fight MMA fans around the world have waited their entire lives for!
 |
|
 |
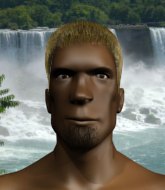
| 179 cm
19
145 lbs
0 - 5 - 0 |
|
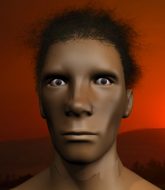
167 cm
26
135 lbs
3 - 4 - 0 |
BJJ Blue Belt
Brawler
Granite chin |
|
BJJ Blue Belt
Basic striking
Determined |
|
| |
|
Ladies and gentlemen. This fight is 3 rounds, in the featherweight division.
Introducing the fighter to my left, fighting out of the red corner.
With a record of
0 - 5 - 0, fighting out of St Petersburg, Marcus Brave!
And introducing the fighter to my right, fighting out of the blue corner.
With a record of
3 - 4 - 0, fighting out of St Petersburg, Kenny Hill!
The judges for this bout are Igor Prikhodko, Vladimir Khabensky and Dmitry Maklakov.

The bell rings for round one and we are underway!
Brave wants to clinch but Hill slips to the side
and Hill counters with a left to the body.
Brave tries to clinch up against the cage, rushing in the close the distance. Hill manages to break the clinch and circles back to the middle of the mat.

Hill closes the distance and clinches.
Hill avoiding damage as Brave throws knees to the body.
Hill wants to take the fight to the mat but Brave manages to get underhooks and keep the fight in the clinch.
Brave stops a takedown attempt from Hill.
Hill is working on a leg, looking for a takedown but Brave is defending well.
Marcus Brave has stuffed three takedown attempts in the round now. That's going to take a lot out of Kenny Hill.
Hill changes levels and goes for a takedown here. Brave fights it off and pushes away nicely.
Brave wants to clinch.

Brave forces Hill back against the cage and clinches.
Hill blocks a knee to the body. He'll have a nicely bruised forearm in the morning.
Hill tries for a takedown but Brave manages to get underhooks.

That's one minute gone in the round.
Brave is defending well against a takedown attempt.
Brave prevents a takedown attempt there.
Hill tries to break the clinch but Brave is controlling the position.
Hill has a body lock and is looking for a takedown. Brave is bouncing around trying to prevent the takedown and somehow he has indeed managed to stay on his feet.
Brave trying to land knees to the body.
Hill tries to take the fight to the ground by pulling guard but can't manage it.
Hill is working on a leg, looking for a takedown but Brave is defending well.
Hill goes for a takedown in the clinch but Brave prevents it.
Hill tries for a takedown but Brave manages to get underhooks.
Hill has a body lock and is looking for a takedown. Brave is bouncing around trying to prevent the takedown and somehow he has indeed managed to stay on his feet.
Hill looks winded!

That's two minutes gone in the round.
Brave misses the knee to the body. Nice hip positioning from Hill.
Hill is trying to pull guard but Brave turns him against the cage and we stay in the clinch.
Hill jumps guard but Brave stands there with Hill around his waist. Hill gives up and drops back to his feet. We remain in the clinch.
Brave prevents a takedown attempt there.
Hill has a body lock and is looking for a takedown. Brave is bouncing around trying to prevent the takedown and somehow he has indeed managed to stay on his feet.
Knees in the clinch landing for Brave.
Brave is defending well against a takedown attempt.
Hill wants to break free but Brave has control.
Brave tries to land a knee to the body but he is off balance and Hill avoids it.

Hill breaks the clinch and we return to the middle of the mat.

That's three minutes gone in the round.
Brave fails with an attempt to clinch.
Brave tries to clinch there but Hill circles away.
Brave tries to clinch up against the cage, rushing in the close the distance. Hill manages to break the clinch and circles back to the middle of the mat.
Marcus Brave seems to be the more aggressive standup fighter in this bout.
Brave tries to close the distance and clinch but Hill swats him to one side with an open hand palm strike and circles away.
Brave tries to clinch there but Hill circles away.
Hill tries to close the distance and clinch up but Brave swats him away and circles back towards the center.
Hill avoids the clinch attempt nicely.
Brave tries to grapple but his opponent circles
and Hill counters with a stiff right hand.
Hill pivots, looking for a leg kick but Brave is out of range and Hill settles back down.
Marcus Brave is looking to keep the fight on the feet at all costs.
Brave tries to clinch but fails miserably
and Hill counters by moving into the clinch. Good anticipation by Hill.
Hill drops down looking for an ankle pick but Brave pulls his leg out and moves away.
Hill looks for a takedown here. Will he get it? Brave is fending him off so far but Hill persists. Nope, Brave circles away and we're back to standing.
Hill looks for a takedown here. Will he get it? Brave is fending him off so far but Hill persists. Nope, Brave circles away and we're back to standing.
Brave instigates a clinch.
Hill is trying to work for a single leg takedown but Brave pulls him back up using the underhooks.

That's four minutes gone in the round.
Hill is trying to pull guard but Brave turns him against the cage and we stay in the clinch.
Hill is looking to break free of the clinch but Brave has double underhooks.
Brave is looking to score with knees to the body. Maybe he'll change it up and go body then head. Hill is defending well for now.
Hill is trying to work for a single leg takedown but Brave pulls him back up using the underhooks.
Brave trying to land knees to the body.
Hill tries to circle away but Brave has him pinned against the cage.
Hill is working for takedown but Brave is calmly controlling the position for now.
The crowd are loving this. Great action here.
Hill has dropped down and is looking to force the takedown but it's defended by Brave after a bit of a struggle.
As the round comes to an end the crowd are showing their appreciation for a great round of action.
Hill on the defensive, avoiding the knees to the body.
Hill blocks a knee to the body. He'll have a nicely bruised forearm in the morning.
Brave is pressed up against the cage. Hill has hold of a leg and is looking to drag Brave down to the mat. Brave avoids the attempt though and has circled away. We're back to striking at a distance.
And thats the end of the round the fighters go back to their corners.
That was a close round but I would say that Marcus Brave will probably get the nod.
The corners get their ten second warning. Both fighters stand from their stools and stare eachother down, ready to get back to the action.

Hill keeps the fight on the outside.
Hill lands a straight punch to the body, keeping Brave at a distance.
Hill fails with a takedown attempt.
Hill avoids the clinch attempt nicely.
Brave wants to clinch
and Hill connects with a straight left hand counter down the middle.
Hill clinches up against the cage.
Hill is trying to force a seperation but Brave has the dominant position.
Brave is pressed up against the cage. Hill has hold of a leg and is looking to drag Brave down to the mat. Brave avoids the attempt though and has circled away. We're back to striking at a distance.
Brave tries to close the distance and clinch but Hill swats him to one side with an open hand palm strike and circles away.
Brave tries to clinch but Hill moves out of range.
Hill shoots in with a takedown attempt and he has Brave pinned against the cage. Brave gets the underhooks and manages to circle away.
Marcus Brave has stuffed three takedown attempts in the round now. That's going to take a lot out of Kenny Hill.
Hill has managed to clinch.
Hill throws a head punch that misses.
Hill wants a takedown but no success here.
Hill is breathing heavily.
That's one minute gone in the round.
Brave stops a takedown attempt from Hill.
Brave prevents the takedown attempt.
Hill is working for takedown but Brave is calmly controlling the position for now.
Brave missing with knees to the body.
Hill has a body lock and is looking for a takedown. Brave is bouncing around trying to prevent the takedown and somehow he has indeed managed to stay on his feet.
Hill is looking for a takedown up against the cage. Brave gets underhooks though and prevents the takedown attempt.
Brave misses the knee to the body. Nice hip positioning from Hill.
Brave missing with knees to the body.
Hill is trying to pull guard but Brave turns him against the cage and we stay in the clinch.
Brave misses the knee to the body. Nice hip positioning from Hill.
Knees in the clinch landing for Brave.
That's two minutes gone in the round.
Hill tries for a takedown. No joy.
Brave trying to land knees to the body.
Hill avoiding damage as Brave throws knees to the body.
Brave is looking to score with knees to the body. Maybe he'll change it up and go body then head. Hill is defending well for now.
Knees to the body from Brave.

Hill gets control of Brave's arms and successfully pulls guard. Hill will no doubt be looking for submissions off his back.
Hill preventing the ground and pound from doing any damage.

Hill looking for submissions from the bottom here. Moving his hips around, possibly looking for an armbar.
Brave will need to keep those long limbs tucked in whilst he's on the ground, to prevent any submissions.
Hill is looking for a guillotine. You can't force these things though and Brave defends well.
Brave works a leg free and moves into half guard.
The crowd cheering loudly, showing their appreciation for the quality fight we're seeing here.
Brave is looking to advance position but Hill won't allow it.
Brave works his foot free and advances to mount.
That's three minutes gone in the round.
Brave looking to finish with strikes here!
Brave prevents Hill from getting the reversal.
Hill blocking the ground and pound.
Hill blocking the ground and pound.
Brave punching from mount but Hill doing a good job of avoiding damage.
Hill is really trying hard to get back to his feet.
Hill wants to control but Brave is having none of it.
Hill is bucking up trying to escape but Brave cracks him with another couple of good strikes.
Hill wants to hold on but Brave pushes him away.
Hill tries to reverse the position but Brave maintains control.
That's four minutes gone in the round.
Hill wants to control but Brave is having none of it.
Brave thowing shots but they're missing.
Brave avoids the attempt from Hill to control.
Poor strikes thrown by Brave there. More accuracy and less frantic strikes would help!
Brave throwing strikes here but Hill is writhing around nicely and avoiding any serious damage.
Brave unloads with some shots from mount but Hill bucks and avoids them well.
The crowd are loving this. Great action here.
Hill is trying to stand up.
Hill is desperately trying to get back to half guard.
Hill tries to lock up and control but Brave gives him a forearm to the face and pushes him away.
As the round comes to an end the crowd are showing their appreciation for a great round of action.
Brave looking to ground and pound but Hill is blocking nicely.
Hill regains half guard.
Hill looking to work for a kimura from the bottom.
And thats the end of the round the fighters go back to their corners.
That was a close second round but I would say that Marcus Brave will probably get the nod.
That's the end of the interval. I'm sure that seemed a lot quicker than a minute for our two fighters! Back to the action. Ladies and gentlemen, this is the final round!

Brave fails in his attempt to clinch.
Brave tries to clinch but Hill moves out of range.
Hill misses with a takedown attempt - Brave sprawls well and throws a nice strike on the way out which just misses.
Brave moves into the clinch.
Hill wants a takedown but no success here.
Hill is trying to pull guard but being pressed up against the cage enables Brave to keep the fight standing.
Marcus Brave has stuffed three takedown attempts in the round now. That's going to take a lot out of Kenny Hill.
Brave trying to land knees to the body.
Hill can't get the takedown.
Hill jumps guard but Brave stands there with Hill around his waist. Hill gives up and drops back to his feet. We remain in the clinch.
Hill takes a big intake of breath there - he's definitely tired.
Brave putting his Muay Thai to good use. He has Hill in a tight clinch and is doing some damage with knees to the body.
That's one minute gone in the round.
Hill has hold of a leg and is looking for a trip takedown. Brave avoids it nicely though and we remain in the clinch.
Hill wants a takedown but no success here.
Brave is looking to score with knees to the body. Maybe he'll change it up and go body then head. Hill is defending well for now.
Marcus Brave has scored more points in the clinch so far.
Hill blocks a knee to the body. He'll have a nicely bruised forearm in the morning.
Hill tries to score a body lock takedown but Brave shows good agility there to stay on his feet.
Hill fails to pull guard.
Brave is looking to score with knees to the body. Maybe he'll change it up and go body then head. Hill is defending well for now.
Brave is defending well against a takedown attempt.
Brave lands a nice knee to the body.
Hill managing to block the knees to the body from Brave.
Brave is defending well against a takedown attempt.
That's two minutes gone in the round.
Brave is looking to score with knees to the body. Maybe he'll change it up and go body then head. Hill is defending well for now.
Hill changes levels and goes for a takedown here. Brave fights it off and pushes away nicely.
Brave tries to clinch up.
Brave is looking to clinch.
Brave tries to clinch but Hill moves out of range.
Brave fails in his attempt to clinch.
Brave tries to clinch but is not successful on this occasion.
Hill fails with a takedown attempt.
Brave wants to clinch up but Hill keeps it at a distance.
Brave tries to clinch there but Hill circles away.
Hill circles away from the clinch attempt
and Hill counters with a one-two to the body.
The fight stays on the outside here - Brave looks like he's thinking about clinching though.
That's three minutes gone in the round.
Brave wants to clinch up but Hill keeps it at a distance.
Brave tries to clinch but Hill moves out of range.
Brave fails in his attempt to clinch.
Marcus Brave is looking to throw some combinations by the looks of things.
Brave is looking to clinch but Hill is avoiding it.
Kenny Hill has stepped it up - he knows he needs a finish here!
Brave tries to close the distance and clinch but Hill swats him to one side with an open hand palm strike and circles away.
Hill scores with a jab to the jaw of his opponent.
Brave tries to clinch there but Hill circles away.
Brave wants to clinch
and Hill counters with a left to the body.
Brave fails with an attempt to clinch.
Brave doesn't manage to clinch there - Hill circles away.
No luck with that takedown attempt from Hill.
Hill tries to shoot in for a takedown. He's got hold of a leg but Brave swivels and escapes.
Brave tries to clinch up but Hill circles away and keeps his distance.
Brave is looking to take this fight into the clinch.
Hill is looking to score with low kicks.
That's four minutes gone in the round.
The fight stays on the outside here - Brave looks like he's thinking about clinching though.
Brave is looking to take this fight into the clinch.
Brave is looking to clinch but Hill is avoiding it.
Brave tries to close the distance and clinch up against the cage but Hill paws at him with a jab and circles away.
Brave tries to clinch up.
Hill closes this distance looking for a takedown but Brave circles away.
Brave clinches up with Hill and pushes him back against the cage.
Brave misses the knee to the body. Nice hip positioning from Hill.
Brave tries to land a knee to the body but he is off balance and Hill avoids it.
The crowd applaud the fighters efforts here as the round comes to an end.
Brave is looking to score with knees to the body. Maybe he'll change it up and go body then head. Hill is defending well for now.
Fantastic stuff here - a very entertaining period of action, which has drawn cheers from the crowd.
Brave is looking to score with knees to the body. Maybe he'll change it up and go body then head. Hill is defending well for now.
Hill has a body lock and is looking for a takedown. Brave is bouncing around trying to prevent the takedown and somehow he has indeed managed to stay on his feet.
And that's the end of the fight!
Marcus Brave showed his dominance in that final round.
Well Brave has outscored his opponent in every aspect of the fight today. Only a scarily incompetent judge or two will keep him from a well deserved win... Over to the ring announcer for the scorecards.
Ladies and gentlemen, after 3 rounds of action, we go to the scorecards for a decision.
Judge Igor Prikhodko scores the fight 30:27
Judge Vladimir Khabensky scores the fight 30:28
Judge Dmitry Maklakov scores the fight 28:29
In favor of your winner, by split decision... Marcus Brave!
Marcus Brave gave a mention to STEEL PENN'S 160 OF STEEL $50 Hilo in his post fight interview. That will please them (and hopefully generate some sales).
|
|
|
|
|
|
|
|
|
|
|
|
|
|
|
|
|
|
|
|
|
|
|
| S |
C
A |
G |
S |
C
B |
G |
|
S |
C |
G |
|
energy
A | B |
|
hype
A | B |
|
pop
A | B |
|
mgr
A | B |
|
FIGHT
RATING
70% |
|
|
|
|
|
|
