|
|
PBP Commentary |
Coming up we have a bantamweight MMA rules bout between Keita Aoki (ranked 0 p4p, 0 weight class) and Wallace Barrowman (ranked 0 p4p, 0 weight class). Keita Aoki has the better chin. Will he look to stand and bang today?
 |
|
 |
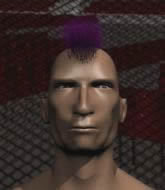
| 165 cm
31
144 lbs
7 - 7 - 0 |
|
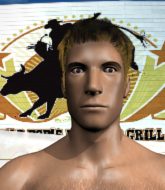
174 cm
24
138 lbs
6 - 8 - 0 |
BJJ Brown Belt
Solid boxing
Insanely flexible |
|
BJJ Purple Belt
Excellent MT
Powerful |
|
| |
|
Ladies and gentlemen. This fight is 3 rounds, in the bantamweight division.
Introducing the fighter to my left, fighting out of the red corner.
With a record of
7 - 7 - 0, fighting out of Hilo, Keita Aoki!
And introducing the fighter to my right, fighting out of the blue corner.
With a record of
6 - 8 - 0, fighting out of Hilo, Wallace Barrowman!
The judges for this bout are Jeff Smith, Ryoma Takatsuka and Paul Gruel.

The bell rings for round one and we are underway!
Aoki throws a head kick that misses.

Barrowman tries to sprawl but Aoki drives through with a takedown into half guard.
The referee must be thinking about standing these guys back up.

Aoki is trying to work for a kimura. This could be trouble! No, Barrowman has managed to free his arm - good work.
Barrowman is trying to get back to full guard.
Barrowman trying to control here.
The ref warns both fighters not to hold the cage as they work up against the meshing.
Aoki is working for a kimura but Barrowman is defending it quite comfortably.
Aoki controlling the pace.
Barrowman is looking to improve his position.

That's one minute gone in the round.
Aoki is working for a submission of some sort.
Aoki is looking for an arm triangle, whilst trying to pass to side control. Barrowman doesn't seem that keen to cooperate though. No luck this time Aoki.
Barrowman is trying to control but can't.
Aoki is working for a submission of some sort.

That's two minutes gone in the round.
Barrowman is refusing to be controlled, as Aoki sits in half guard.
Barrowman is defending against the submission attempts here by Aoki.
Aoki controlling the action here.
Aoki seems to have a rather negative gameplan on the ground. He seems keen to just score the takedown and hold down Barrowman for as long as he can get away with.

That's three minutes gone in the round.
Aoki is trying a forearm choke� I don't think that's going to do much at this level of the game.
Aoki is looking for a kimura here.
Aoki looking for a kimura but he'll have to free his other leg if he wants to finish that. Perhaps he's just using it as a distraction technique.
Aoki is looking for a kimura here.

That's four minutes gone in the round.
Aoki is working for a kimura here but Barrowman manages to reverse the position and he's now in Aoki's guard.
Aoki is looking for a guillotine. You can't force these things though and Barrowman defends well.
Aoki working for a triangle but Barrowman defends it easily.
And that�s the end of the round � the fighters go back to their corners.
Keita Aoki dominated that round.
That's the end of the interval. I'm sure that seemed a lot quicker than a minute for our two fighters! Back to the action.

Aoki shoots for a takedown but Barrowman saw that one coming a mile off and avoided it easily.
The fight stays on the outside here - Barrowman looks like he's thinking about clinching though.
Wallace Barrowman seems to be the more aggressive standup fighter in this bout.
Barrowman tries to clinch but is not successful on this occasion.
Barrowman tries to close the distance and clinch up against the cage but Aoki paws at him with a jab and circles away.
We've had a slow start to the round here - hopefully the action picks up.

Barrowman closes the distance and clinches.
Aoki avoids the elbow strike from Barrowman, against the cage.
Barrowman tries a body shot but Aoki blocks it.
Barrowman misses with a knee strike.

Barrowman breaks the clinch and we're back to striking at distance.
That's one minute gone in the round.
Barrowman is looking to clinch.
Aoki closes this distance looking for a takedown but Barrowman circles away.
Aoki takes a head kick and keeps coming.
Barrowman looks to score with a combo but nothing lands.
Barrowman moves in looking to clinch but Aoki pushes him off.
Barrowman closes the distance looking to clinch
and he gets countered with a snapping leg kick.
Aoki dives in and grabs Barrowman's left leg, looking for a takedown. Barrowman pushes down on Aoki's head and hops out.
That's three failed takedown attempts in the round for Keita Aoki. That's going to take a lot out of him.
Barrowman moves into the clinch successfully.
Barrowman gets double underhooks to prevent a takedown attempt from Aoki.
Barrowman has had enough of the clinch and is looking to separate.
That's two minutes gone in the round.
Barrowman pushes off an throws an elbow but Aoki leans to the side and avoids it. We're back to clinching against the cage.
Barrowman pushes off and fires off an elbow that misses, before clinching up again, against the cage.
Barrowman scores a nice knee to the body.
Barrowman tries to land knees in the clinch but Aoki avoids the damage to the body.
Aoki blocks a knee to the body. He'll have a nicely bruised forearm in the morning.
Barrowman misses with a knee strike.
This has been an exciting period of action!
Barrowman escapes the clinch and we're back to striking.
Barrowman tries to clinch there but Aoki circles away.
Barrowman doesn't manage to clinch there - Aoki circles away.
Barrowman throws a hard body shot but it just misses.
That's three minutes gone in the round.
Barrowman looks to clinch

and Aoki counters by clinching up.
Aoki is working for takedown but Barrowman is calmly controlling the position for now.
Aoki managing to block the knees to the body from Barrowman.
Barrowman with an attempt at a knee that misses.
Barrowman is pressed up against the cage. Aoki has hold of a leg and is looking to drag Barrowman down to the mat. Barrowman avoids the attempt though and has circled away. We're back to striking at a distance.
Wallace Barrowman is looking to keep the fight on the feet at all costs.
Barrowman defends well against a solid takedown attempt from Aoki.
Aoki swats away the attempt to clinch by Barrowman.
Aoki shoots and misses
and Barrowman counters with a shot to the ribs. That looked like it hurt.
Keita Aoki is looking to throw some combinations by the looks of things.
Barrowman tries to close the distance and clinch up against the cage but Aoki paws at him with a jab and circles away.
Aoki swats away the attempt to clinch by Barrowman.
Barrowman tries to clinch up against the cage, rushing in the close the distance. Aoki manages to break the clinch and circles back to the middle of the mat.
That's four minutes gone in the round.
Barrowman wants to clinch up but Aoki keeps it at a distance.
Barrowman throws a hard body shot but it just misses.
The fight moves into the clinch position.
An uppercut on the inside fails to land for Barrowman.
Kneeeeees! The crowd are calling for knees to the body. Barrowman obliges.
Aoki blocks a knee to the body. He'll have a nicely bruised forearm in the morning.
Aoki managing to block the knees to the body from Barrowman.
The crowd applaud the fighters efforts here as the round comes to an end.
Aoki jumps into guard, dragging Barrowman to the mat.
The crowd cheering loudly, showing their appreciation for the quality fight we're seeing here.
Aoki looking for submissions off his back, moving his hips, looking for an opening.
Barrowman really doesn't want to stay on the ground with Aoki. If he can't get it back to his feet, it's only a matter of time before he'll be tapping out.
Aoki looking for a guillotine here but Barrowman defends easily.
And that�s the end of the round � the fighters go back to their corners.
Wallace Barrowman showed his class in that round. I'd imagine he'll take it on all the scorecards.
The fighters get back to their feet, the hooter sounds and we're back to the action! This is the final round!

Barrowman tries to clinch
and he gets countered with a snapping leg kick.
Barrowman wants to clinch.
Barrowman displays good takedown defense there as he swats away a double leg from Aoki.
Barrowman tries to clinch but fails miserably
and Aoki counters by moving into the clinch.
Barrowman trying to land knees to the body.
Barrowman using the Thai plumb to throw knees but Aoki has his back arched nicely, preventing the strike.
Barrowman landing knees to the body. They look like they could hurt.
Aoki changes levels and goes for a takedown here. Barrowman fights it off and pushes away nicely.
Aoki fails with a rather predictable takedown attempt.
That's three failed takedown attempts in the round for Keita Aoki. That's going to take a lot out of him.
That's one minute gone in the round.
Barrowman tries to clinch up but Aoki circles away and keeps his distance.
Aoki moves into range and clinches up with Barrowman.
Aoki avoids the elbow strike from Barrowman, against the cage.
Barrowman using the Thai plumb to throw knees but Aoki has his back arched nicely, preventing the strike.
Aoki drops to a knee looking for a takedown but Barrowman gets the underhooks and prevents it.
Aoki is trying to drag Barrowman to the mat but Barrowman just about manages to keep his footing. He used the cage to his advantage there.
Aoki blocks an elbow strike from Barrowman.
That's two minutes gone in the round.
Aoki is trying to force a seperation but Barrowman has the dominant position.
Barrowman breaks the clinch.
Barrowman tries to clinch up against the cage, rushing in the close the distance. Aoki manages to break the clinch and circles back to the middle of the mat.
Barrowman tries to close the distance and clinch up against the cage but Aoki paws at him with a jab and circles away.
Aoki fails with a rather predictable takedown attempt.
Aoki dives in and scores a takedown into Barrowman's guard.
Barrowman tries to land a sweep but no joy.
Barrowman keeping moving, preventing Aoki from controlling successfully.
Barrowman working the defensive guard well to avoid strikes from Aoki.
That's three minutes gone in the round.
Barrowman keeping moving, preventing Aoki from controlling successfully.
The referee claps his hands together and tells the fighters to work.

We're going to have a standup here because Keita Aoki wasn't active enough for the referee's liking.
Barrowman tries to clinch
and Aoki counters with a single leg into guard. Barrowman didn't expect that.
Aoki trying to control the position from guard on top but Barrowman is wriggling around, looking for whatever he can.
Barrowman takes a big intake of breath there - he's definitely tired.
Aoki is going to have to think about doing something other than just controlling because Barrowman is managing to avoid having the position dictated to him.
That's four minutes gone in the round.
The referee claps his hands together and tells the fighters to work.
A real slowdown in the pace of the fight for a moment, as Barrowman holds on and takes a little breather.
Keita Aoki has forced the referee to step in and bring the fight back to the feet.
The fight stays on the outside here - Aoki looks like he's thinking about clinching though.
The fight stays on the outside here - Barrowman looks like he's thinking about clinching though.
Barrowman tries to clinch up.
The crowd applaud the fighters efforts here as the round comes to an end.
Barrowman tries to clinch
and Aoki holds on and brings the fighters into a clinch.
This is a great period of action - very entertaining stuff!
Barrowman tries to stall but Aoki uses the opportunity to gain a better position.
Barrowman lands a good knee to the midsection. Aoki won't want to take too many of those.
And that's the end of the fight!
Keita Aoki showed his dominance in that final round.
I think Aoki has won this one but let's see what the judges have to say. Over to the ring announcer for the scorecards.
Ladies and gentlemen, after 3 rounds of action, we go to the scorecards for a decision.
Judge Jeff Smith scores the fight 29:28
Judge Ryoma Takatsuka scores the fight 29:28
Judge Paul Gruel scores the fight 29:28
In favor of your winner, by unanimous decision... Keita Aoki!
Keita Aoki decided to thank the fans in attendance for making a great atmosphere. It seemed to go down pretty well.
|
|
|
|
|
|
|
|
|
|
|
|
|
|
|
|
|
|
|
|
|
|
|
| S |
C
A |
G |
S |
C
B |
G |
|
S |
C |
G |
|
energy
A | B |
|
hype
A | B |
|
pop
A | B |
|
mgr
A | B |
|
FIGHT
RATING
45% |
|
|
|
|
|
|
