|
|
PBP Commentary |
Coming up we have a middleweight MMA rules bout between Camber Cartwright (ranked 0 p4p, 0 weight class) and Pete Mercury (ranked 0 p4p, 0 weight class). These two fighters really are very evenly matched on the feet - it will be fascinating to see who can assert themselves in that aspect of the fight.
 |
|
 |
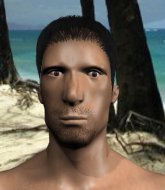
| 190 cm
27
192 lbs
5 - 7 - 0 |
|
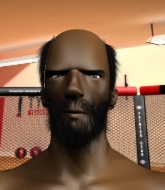
168 cm
28
188 lbs
4 - 7 - 0 |
BJJ Purple Belt
Solid Muay Thai
Very quick |
|
BJJ Blue Belt
Decent boxing
Powerful |
|
| |
|
Ladies and gentlemen. This fight is 2 rounds, in the middleweight division.
Introducing the fighter to my left, fighting out of the red corner.
With a record of
5 - 7 - 0, fighting out of Hilo, Camber Cartwright!
And introducing the fighter to my right, fighting out of the blue corner.
With a record of
4 - 7 - 0, fighting out of Hilo, Pete Mercury!
The judges for this bout are Chris Saunders, Ryoma Takatsuka and Jeff Smith.

The bell rings for round one and we are underway!
Cartwright tries to score a power double leg takedown but Mercury sees that one coming and sprawls well. That will dishearten Cartwright somewhat.
Cartwright looks to clinch
and Cartwright takes a counter punch right on the button for his troubles.

Cartwright moves into the clinch.
Mercury avoiding damage as Cartwright throws knees to the body.
A nice glancing elbow lands by Cartwright.
Cartwright creates a bit of space for himself and sneaks an elbow through Mercury's defenses.
With the two fighters working up against the ropes, Cartwright just misses with a elbow thrown towards Mercury's brow.
Mercury is looking to control Cartwright's arms but Cartwright gets an underhook and turns him. Now Mercury has his back to the ropes.
Cartwright is looking to score with knees to the body. Maybe he'll change it up and go body then head. Mercury is defending well for now.
Cartwright misses with an elbow over the top.
Cartwright lands an elbow inside.
Mercury throws a punch but it's blocked by Cartwright.
Cartwright misses the knee to the body. Nice hip positioning from Mercury.
Mercury leaning his opponent against the ropes.
Mercury avoiding damage as Cartwright throws knees to the body.
Mercury on the defensive, avoiding the knees to the body.

That's one minute gone in the round.

Cartwright breaks from the clinch.
Cartwright has a takedown stuffed.
Cartwright tries to clinch but Mercury moves away
and Mercury connects with a straight left hand counter down the middle.
Mercury tries to keep at a distance but Cartwright has taken the fight into the clinch.
Mercury lands a right hand that snaps the head of Cartwright backwards.
A head punch on the inside from Mercury fails to land.
Cartwright tries to stall but Mercury uses the opportunity to gain a better position.
Mercury avoiding damage as Cartwright throws knees to the body.
Mercury lands with a quick shot inside that doesn't really do much damage.
Cartwright letting Mercury take a breather here.
Mercury pushes Cartwright back against the ropes and lands a hook to the side of the head.
Cartwright tries to land a knee to the body but he is off balance and Mercury avoids it.

That's two minutes gone in the round.
Good anti-grappling being displayed by Mercury as Cartwright tries to tie him up.
Mercury is trying to slow down the pace in the clinch, to catch his breath.
Cartwright trying to land knees to the body.
Cartwright tries to land knees in the clinch but Mercury avoids the damage to the body.
Cartwright lands an elbow just above Mercury 's eye.
Mercury managing to block the knees to the body from Cartwright.
Cartwright working hard to break the clinch.
Cartwright looks to throw an elbow but misses.
Mercury stalling in the clinch but Cartwright improves position.
We've seen a great period of action over the last minute or so - credit to both fighters for going all out!
A short right from Mercury on the inside.
Mercury wants to push off and get back to the center of the mat but Cartwright has him pressed against the ropes.
Cartwright using the Thai clinch to land knees to the body.
Cartwright is trying to wear down his opponent with knees to the body.
Mercury looks winded!
Mercury is trying to break the clinch but Cartwright is controlling him.
Cartwright lands an elbow that stopped Mercury in his tracks for a moment.
Cartwright is trying to slow down the pace in the clinch, to catch his breath.

That's three minutes gone in the round.
Mercury avoids the elbow strike from Cartwright, against the ropes.
Mercury lands with a left to the head.
Mercury on the defensive, avoiding the knees to the body.
Mercury on the defensive, avoiding the knees to the body.
Mercury takes an elbow to the temple.
Cartwright utilising his Muay Thai to score with a knee to the body.
A nice glancing elbow lands by Cartwright.
Cartwright crunches a lovely knee into Mercury's ribcage.
Mercury prevents a takedown attempt there.
That's three failed takedown attempts in the round for Camber Cartwright. That's going to take a lot out of him.
Mercury looks like he'd prefer to be striking at range right now.
Cartwright lands an elbow inside.
A head punch on the inside from Mercury fails to land.
Cartwright manages to break the clinch.
A really sloppy takedown attempt there from Cartwright.

That's four minutes gone in the round.
The fans in attendance giving it up for the two fighters, who have really let it all hang out in the last minute or so!
Cartwright shoots in with a takedown attempt and he has Mercury pinned against the ropes. Mercury gets the underhooks and manages to circle away.
Cartwright tries to clinch but fails miserably
and Mercury makes him pay by landing a nice hook to the body before moving out of range.
Mercury circles away from the clinch attempt.
Cartwright is trying hard to land a takedown here. Mercury sprawls well and keeps this one on the feet.
Cartwright will have to do better than that with his takedown attempts.
Cartwright staying out of range there.

That's five minutes gone in the round.
Cartwright darts in trying to clinch
and Mercury counters with a straight right hand.
Cartwright delivers a nice body kick.

Cartwright is looking for a takedown here. He's shot in and has managed to get it, finishing up in Mercury's half guard.

Cartwright is looking for an arm triangle, whilst trying to pass to side control. Mercury doesn't seem that keen to cooperate though. No luck this time Cartwright.
Cartwright is trying to work for a kimura but Mercury is defending well.

That's six minutes gone in the round.
Mercury is defending against the submission attempts here by Cartwright.
The fighters are going at a pretty good pace and they're both starting to sweat now.
Cartwright wants to work for an arm triangle but Mercury is really keeping half guard well and defending the submission attempt.
Cartwright will need to keep those long limbs tucked in whilst he's on the ground, to prevent any submissions.
Cartwright is working for a submission here. He's got hold of the far side arm and he's looking for a kimura. He's cranking on the arm and he's got it! Mercury is tapping out! Ouch, that looked like it hurt!
Ladies and gentlemen, after 6:59 of round 1, we have a winner by way of Submission (Kimura). Camber Cartwright!
Camber Cartwright took to the mic in his post fight interview and said 'It is what it is, and one day I will rule the nest. Until then, 'Carry On My Wayward Son.''.
|
|
|
|
|
|
|
|
|
|
|
|
|
|
|
|
|
|
|
|
|
|
|
| S |
C
A |
G |
S |
C
B |
G |
|
S |
C |
G |
|
energy
A | B |
|
hype
A | B |
|
pop
A | B |
|
mgr
A | B |
|
FIGHT
RATING
37% |
|
|
|
|
|
|
