|
|
PBP Commentary |
Coming up we have a featherweight MMA rules bout between Benjamin St Andre (ranked 0 p4p, 0 weight class) and Rocky Bullwinkle (ranked 0 p4p, 0 weight class). Chooooooooon! I think St Andre might be my favorite fighter, now he's come out to When the Saints Go Marching In. Rocky Bullwinkle has the power to score a knockout today if he connects clean with Benjamin St Andre's chin.
 |
|
 |
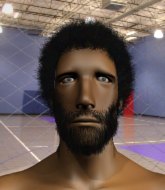
| 176 cm
28
151 lbs
21 - 6 - 0 |
|
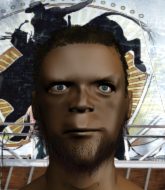
185 cm
31
150 lbs
16 - 12 - 1 |
BJJ Brown Belt
Excellent boxer
Insanely flexible |
|
Good wrestler
Lethal high kicks
Granite chin |
|
| |
|
Ladies and gentlemen. This fight is 5 rounds, in the featherweight division.
Introducing the fighter to my left, fighting out of the red corner.
With a record of
21 - 6 - 0, fighting out of Las Vegas, Benjamin St Andre!
And introducing the fighter to my right, fighting out of the blue corner.
With a record of
16 - 12 - 1, fighting out of Amsterdam, Rocky Bullwinkle!
The judges for this bout are Aafke Stam, Nard Betker and Paulsen Ambrosius.

The bell rings for round one and we are underway!
St Andre avoids the body shot from Bullwinkle.
Bullwinkle moves out of range of the leg kick from St Andre.
Bullwinkle fails with a takedown attempt from distance.
St Andre looks to land a body kick but Bullwinkle moved away.
Bullwinkle fails with a takedown attempt from distance.
Bullwinkle misses the shot to the body.
Rocky Bullwinkle seems to be the more aggressive standup fighter in this bout.
Bullwinkle fails with a takedown attempt from distance.
Benjamin St Andre has stuffed three takedown attempts in the round now. That's going to take a lot out of Rocky Bullwinkle.
Bullwinkle closes this distance looking for a takedown but St Andre circles away.
St Andre jabs at Bullwinkle's body.
St Andre thuds his shin into the meat of Bullwinkle's side.
St Andre connects with a nice looking jab.
St Andre tries to work over Bullwinkle's front leg with a kick but Bullwinkle checks it.
Bullwinkle looks shocked there as he takes a right hand to the temple.
This is a great period of action - very entertaining stuff!
Bullwinkle loads up on a big right hand but St Andre slips the punch.
St Andre lands a vicious shot with the stealth of a sniper and the strength of a viper. Are vipers that strong? I can think of lots of things that are stronger than a viper - not many rhyme with sniper though.
St Andre scores with a sloppy punch to the body. Not much technique there but it did the business.

Bullwinkle drives through with a takedown into St Andre's guard. Let's see what he can do from the top position.
We could do with one of the fighters taking the initiative a bit more on the ground - they're both waiting to capitalize on a mistake.
Bullwinkle trying to move into half guard but instead St Andre has managed to sweep!

Bullwinkle looking for submissions from the bottom but instead St Andre passes into side control.
St Andre slips into full mount, dodging the strikes by Bullwinkle.

That's one minute gone in the round.
St Andre controlling his opponent.
The fighters are trapped in the ropes so we're going to have a reposition here. The ref calls for a break and repositions the fighters in the center of the ring.
St Andre tries to control but Bullwinkle wriggling away.
Bullwinkle is desperately trying to improve his position but St Andre has a good base and remains in mount.
Bullwinkle is squirming around, avoiding St Andre's attempts to control the action.

St Andre is working on an americana here. Ooh, that looks pretty nasty! Nope, Bullwinkle has managed to escape the submission attempt.
St Andre goes for an armbar but he's fallen flat on his backside there and now Bullwinkle is on top in guard.

That's two minutes gone in the round.
Bullwinkle stands up and looks to throw the legs aside to pass to side control. St Andre swivels though and keeps the full guard.
St Andre controls Bullwinkle momentarily but Bullwinkle frees himself.
Bullwinkle working some strikes from top position.
St Andre is trying to keep Bullwinkle in close.
The fighters are tangled up in the ropes here. We might need a restart if the fighters can't break free themselves.
St Andre is active off his back here, looking for submissions.
Wooooo! Give it up for these two warriors! They are putting on a show!
St Andre escapes his hips to the side and looks to be working for an armbar. Bullwinkle gives him a little smile and shakes his head. No chance.

That's three minutes gone in the round.
Bullwinkle trying to pass the guard but can't manage it just yet.
Bullwinkle stands and throws St Andre's legs to the side, diving into side control.
Bullwinkle tries to move to mount but St Andre blocks the move with his legs.
St Andre gets back to half guard.
St Andre is looking to control Bullwinkle's leg but it's slowly edging free. Can St Andre avoid being mounted?
Bullwinkle is trying to work for a kimura but St Andre is defending well.
St Andre tries to roll over but Bullwinkle keeps him under control.

That's four minutes gone in the round.
The fighters are battling for position here. St Andre manages to regain full guard. Nice work.
Bullwinkle is trying to work a guillotine from the top, or something like that? Don't know how he thinks he's going to get a finish from there.
St Andre is trying to control the position from the bottom.
Bullwinkle forces his way into half guard.
St Andre has his hands clasped together around Bullwinkle's back. He's all about the action.
Fantastic stuff here - a very entertaining period of action, which has drawn cheers from the crowd.
Bullwinkle is looking for a kimura here.
The crowd are going absolutely nuts as the round comes to an end - what a fantastic round of action!
Bullwinkle wants to pass the guard but St Andre is defending well.
And that�s the end of the round � the fighters go back to their corners.
Benjamin St Andre dominated that round.
That's the end of the interval. I'm sure that seemed a lot quicker than a minute for our two fighters! Back to the action.

St Andre lands a slapping body shot.
Bullwinkle keeping his hands up high there, blocking the jab from St Andre.
Bullwinkle moves into range and throws a combination. A nice jab followed by a hook to the body.
A telegraphed takedown attempt from Bullwinkle is defended easily by St Andre.
Nice defenses there by Bullwinkle.
St Andre throws a shot to the body.
Bullwinkle with a lazy takedown attempt
and St Andre counters with a leg kick that reverborates around the arena.
Bullwinkle drives through with a really nice takedown into side control.
St Andre is sneaking out the side here. He's bucked Bullwinkle off and has taken his back!
This has been an exciting period of action!
Bullwinkle preventing the rear naked choke attempt from St Andre.
Bullwinkle tries to escape but St Andre has the hooks in and won't let him break free.
St Andre is looking for the choke from the back position but Bullwinkle is controlling his hands well.
That's one minute gone in the round.
Bullwinkle turns into St Andre and is now in his guard.
Bullwinkle forces his way into half guard.
Bullwinkle is trying for a guillotine from the top but the pressure isn't in the right place so St Andre is just riding it out for now. Bullwinkle eventually gives up the hold.
Rocky Bullwinkle has got the better of the ground game so far.
St Andre trying to control but Bullwinkle postures up.
Bullwinkle wants to work for an arm triangle but St Andre is really keeping half guard well and defending the submission attempt.
Bullwinkle is trying for a guillotine from the top but the pressure isn't in the right place so St Andre is just riding it out for now. Bullwinkle eventually gives up the hold.
St Andre actively working from the bottom here.
That's two minutes gone in the round.
Bullwinkle tries to pass to full mount but St Andre defends it.
Bullwinkle lands with an elbow from half guard - that looked like it hurt.
Bullwinkle passes to full mount!
Bullwinkle avoids the attempt from St Andre to control.
Bullwinkle has control of St Andre's right arm, working for a kimura. It's a bit of a token attempt though and St Andre regains control of the situation pretty easily.
This is a great period of action - very entertaining stuff!
St Andre is looking to improve his position but Bullwinkle isn't that keen on the idea.
That's three minutes gone in the round.
Bullwinkle is trying to take his opponent's back.
St Andre tries to get back to half guard but can't.
Bullwinkle wants to take St Andre's back but he can't do it this time.
Bullwinkle is a painfully thin specimen of a man. You do wonder whether a good body kick would snap him clean in two.
Bullwinkle jumps to side control looking for an arm triangle but St Andre manages to avoid the submission attempt.
St Andre prevents Bullwinkle from moving into mount.
St Andre is sneaking out the side here. He's bucked Bullwinkle off and has taken his back!
St Andre is hanging on to Bullwinkle's back as he tries to escape.
St Andre misses with punches from the back.
St Andre looking for the rear naked choke. And he's got it! Bullwinkle taps!
Ladies and gentlemen, after 4:56 of round 2, we have a winner by way of Submission (RNC). Benjamin St Andre!
Benjamin St Andre thanked the fans post fight for their support.
|
|
|
|
|
|
|
|
|
|
|
|
|
|
|
|
|
|
|
|
|
|
|
| S |
C
A |
G |
S |
C
B |
G |
|
S |
C |
G |
|
energy
A | B |
|
hype
A | B |
|
pop
A | B |
|
mgr
A | B |
|
FIGHT
RATING
54% |
|
|
|
|
|
|
