|
|
PBP Commentary |
Coming up we have a welterweight MMA rules bout between The Loser (ranked 0 p4p, 0 weight class) and Fujika Kaguchi (ranked 0 p4p, 0 weight class). Both fighter's entrance songs getting the crowd jumping here.
 |
|
 |
| 180 cm
18
184 lbs
0 - 0 - 0 |
|
175 cm
19
170 lbs
2 - 5 - 0 |
Good wrestling
Brawler
Big heart |
|
BJJ Blue Belt
Brawler
Knockout power |
|
| |
|
Ladies and gentlemen. This fight is 3 rounds, in the welterweight division.
Introducing the fighter to my left, fighting out of the red corner.
With a record of
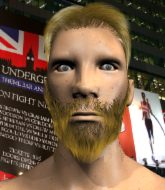
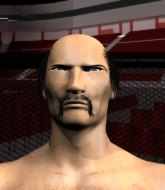
0 - 0 - 0, fighting out of Sydney, The Loser!
And introducing the fighter to my right, fighting out of the blue corner.
With a record of
2 - 5 - 0, fighting out of Sydney, Fujika Kaguchi!
The judges for this bout are Summer Carpenter, Damien Edna and Hugh Johnson.

The bell rings for round one and we are underway!
Loser tries to clinch but Kaguchi is having none of it.
Kaguchi looks really tired already! That doesn't bode well for a good, competitive fight!
Kaguchi shoots in for a takedown but doesn't get it.
Loser leaves Kaguchi with his face pressed against the mat as he sprawls beautifully, defending against a solid takedown attempt.
Loser misses with a looping left.
Loser fails with the takedown.
Loser thows a left - swing and a miss!
Loser shoots in looking for a double leg takedown. Kaguchi defends it nicely.
Kaguchi fakes high and shoots in for a takedown but Loser avoids it really well and circles away.
The Loser has stuffed three takedown attempts in the round now. That's going to take a lot out of Fujika Kaguchi.
Kaguchi keeps the fight standing with a nice sprawl.
Loser wants to clinch.
Loser shoots in for a takedown. "I don't think so" says Kaguchi as he avoids it easily.

That's one minute gone in the round.
Loser misses the shot to the body.
Loser shoots in but Kaguchi avoids the takedown attempt easily.
An inside leg kick from Loser misses.
Kaguchi slaps away a takedown attempt from Loser, before circling back to the center of the mat.

Loser rushes Kaguchi and pushes him back against the cage in a clinch.
Kaguchi dodges an elbow strike from Loser.
Kaguchi goes for a takedown in the clinch but Loser prevents it.
Loser tries to circle away but Kaguchi has him pinned against the cage.
Loser goes for a takedown attempt but Kaguchi pushes him away and we're back to fighting at a distance.
Loser attempts a low kick but it misses it's target.

That's two minutes gone in the round.
Loser tries to clinch but is not successful on this occasion.
Loser throws a looping left and ducks down for a takedown. He's got his arms around Kaguchi's waist but Kaguchi gets an underhook and avoids the takedown by throwing Loser off to one side.
Loser will need to tighten up his combinations if he doesn't want to gas himself out, swinging at thin air.
Loser misses with a series of wild punches.
Kaguchi swats away the attempt to clinch by Loser.
A really sloppy takedown attempt there from Loser.
Kaguchi misses with a takedown attempt - Loser sprawls well and throws a nice strike on the way out which just misses.
Loser tries to clinch but Kaguchi moves out of range.

That's three minutes gone in the round.
Loser misses with a takedown attempt. He shot from a bit too far out.
Loser shoots in and drives through. Kaguchi sprawls well.
Kaguchi shoots in for a takedown but doesn't get it.
Kaguchi keeps the fight on the outside.
Loser pivots, looking for a leg kick but Kaguchi is out of range and Loser settles back down.
Loser fails to land the takedown.
Kaguchi takes a step back and watches a body kick go sailing past his mid section.
The fight stays on the outside here - Loser looks like he's thinking about clinching though.
Loser has a takedown stuffed.
Loser misses with a jab and misses with a cross straight after too.
Kaguchi swats away the attempt to clinch by Loser.

That's four minutes gone in the round.
No luck for Loser with that takedown attempt.
Loser defends well against a solid takedown attempt from Kaguchi.
Loser shoots in for a takedown but doesn't get it.
Loser fails with a takedown attempt.
Loser misses with a body shot. Nice footwork from Kaguchi.
Loser tries to score with a low kick but Kaguchi moves his leg out of the way.
The crowd applaud the fighters efforts here as the round comes to an end.
Kaguchi displays good takedown defense there as he swats away a double leg from Loser.
Loser shoots in looking for a double leg takedown. Kaguchi defends it nicely.
Loser scores with a jab to the body.
And thats the end of the round the fighters go back to their corners.
The Loser dominated that round.
Well, the break between rounds is over. Let's get back to the scrappin!

Loser throws out a loose jab but Kaguchi uses good head movement to avoid it.
Loser fails with the takedown.
Loser closes this distance looking for a takedown but Kaguchi circles away.
Loser tries to close the distance and clinch but Kaguchi swats him to one side with an open hand palm strike and circles away.

Loser gets caught napping as Kaguchi dives in and scores a takedown. Loser manages to retain guard.
Loser is doing well to control the posture of his opponent and prevent any damage.
Loser is trying to keep Kaguchi in close.
Loser has his hands on Kaguchi's head, controlling the position.
Kaguchi is breathing heavily.
That's one minute gone in the round.

The Loser has forced the referee to step in and bring the fight back to the feet.
Kaguchi dodges the punch combination from Loser.
Fujika Kaguchi seems to be the more aggressive standup fighter in this bout.
A slow jab from Loser misses its intended target.
Loser wants to clinch up but Kaguchi keeps it at a distance.
Loser shoots in looking for a double leg takedown. Kaguchi defends it nicely.
That's three failed takedown attempts in the round for The Loser. That's going to take a lot out of him.
The fighters are going at a pretty good pace and they're both starting to sweat now.
Kaguchi shoots in for a takedown. "Ole!" shouts Loser as he jumps to the side.
Loser shoots in for a takedown. "I don't think so" says Kaguchi as he avoids it easily.
The fight stays on the outside here - Loser looks like he's thinking about clinching though.
Loser fakes high and shoots in for a takedown but Kaguchi avoids it really well and circles away.
That's two minutes gone in the round.
Loser tries to clinch up.
Loser tries to clinch up against the cage, rushing in to close the distance. Kaguchi manages to break the clinch and circles back to the middle of the mat.
Kaguchi fails to land the takedown.
Loser moves in looking to clinch but Kaguchi pushes him off.
Loser fails with a takedown attempt.
Kaguchi avoids the clinch attempt nicely.
Loser throws a low kick but his opponent is out of range.
Nice takedown defense from Kaguchi. No joy for Loser on that attempt.
Loser fails with a takedown attempt.
Loser shoots in looking for a takedown but Kaguchi manages to keep the fight standing, pushing Loser's face into the canvas for good measure before circling away.
That's three minutes gone in the round.
Kaguchi blocks a head kick by Loser.
Kaguchi tries to shoot in for a takedown. He's got hold of a leg but Loser swivels and escapes.
Loser misses with a two punch combination.
Kaguchi shoots in for a takedown but Loser shows good takedown defense there and keeps this one on the feet.
No luck for Kaguchi with that takedown attempt.
A really sloppy takedown attempt there from Kaguchi.
Kaguchi keeps the fight on the outside.
Loser shoots in for a takedown - he's clinched up with Kaguchi but Kaguchi pushes him off and we're back to square one.
The fight stays on the outside here - Loser looks like he's thinking about clinching though.
Loser shoots in for a takedown. "I don't think so" says Kaguchi as he avoids it easily.
That's four minutes gone in the round.
Kaguchi looks for a takedown but Loser sprawls well.
Kaguchi shoots in for a double leg but Loser sprawls well. That's going to sap some energy.
Kaguchi keeps the fight standing with a nice sprawl.
Kaguchi circles away from the clinch attempt.
Loser shoots in for a double leg but Kaguchi sprawls well. That's going to sap some energy.
Loser keeps the fight standing with a nice sprawl.
Loser moves in looking to clinch but Kaguchi pushes him off.
The crowd applaud the fighters efforts here as the round comes to an end.
Loser scores with a one two! Kaguchi had his feet all tangled up there and couldn't avoid the strikes.
Loser slaps away a takedown attempt from Kaguchi, before circling back to the center of the mat.
And thats the end of the round the fighters go back to their corners.
The Loser dominated that second round.
The minute break is over - no more time for sponges and pep talks - back to the action! This is the final round!

Kaguchi changes levels and looks for a double leg takedown. Loser tries to avoid it but Kaguchi manages to keep hold of a leg and drag Loser to the ground. Loser escapes though and pops straight back up to his feet.
A telegraphed takedown attempt from Loser is defended easily by Kaguchi.
Loser shoots in for a takedown. "I don't think so" says Kaguchi as he avoids it easily.
Loser fails to land the takedown.
That's three failed takedown attempts in the round for The Loser. That's going to take a lot out of him.
Kaguchi shoots in but no luck this time.
Loser wants to land a leg kick but Kaguchi is out of range.
Loser fails miserably with a takedown attempt.
Loser misses with a wild combination.
Both fighters are breathing heavily.
Kaguchi keeps the fight on the outside.
That's one minute gone in the round.
Loser tries to clinch up but Kaguchi circles away and keeps his distance.
No luck with that takedown attempt from Loser.
Loser shoots in and drives through. Kaguchi sprawls well.
Kaguchi shoots in but Loser avoids the takedown attempt easily.
Kaguchi shoots in looking for a takedown but Loser manages to keep the fight standing, pushing Kaguchi's face into the canvas for good measure before circling away.
Loser keeps the fight on the outside.
Loser changes levels and looks for a double leg takedown. Kaguchi tries to avoid it but Loser manages to keep hold of a leg and drag Kaguchi to the ground. Kaguchi escapes though and pops straight back up to his feet.
Loser throws a combination but it was largely blocked by Kaguchi.
Loser fails with a takedown attempt from distance.
Kaguchi fails with a rather predictable takedown attempt.
Fujika Kaguchi has stepped it up - he knows he needs a finish here!
That's two minutes gone in the round.
Loser has a takedown stuffed.
Loser throws a sloppy head kick and Kaguchi moves out of range easily.
Loser moves in looking to clinch but Kaguchi pushes him off.
A telegraphed takedown attempt from Loser is defended easily by Kaguchi.
Loser tries to clinch but is not successful on this occasion.
Horrible takedown by Loser or perhaps it was just good defense by Kaguchi which made him look bad.
Boom, another hit is landed. "You're gunna get knocked out" taunts Loser, as that shot connected.
Kaguchi shoots in but no luck this time.
That's three minutes gone in the round.
Loser tries for a takedown but Kaguchi sees it coming a mile off and avoids it easily.
Loser looks for a takedown here. Will he get it? Kaguchi is fending him off so far but Loser persists. Nope, Kaguchi circles away and we're back to standing.
Loser closes the distance and clinches up with Kaguchi, looking for a takedown. Loser pushes Kaguchi against the cage but Kaguchi circles to the side and manages to break the clinch.

Kaguchi closes the distance and presses his opponent up against the cage.
Kaguchi has Loser pressed against the cage, preventing Loser from circling away and getting back to striking at range.
Loser is trying to pull guard but Kaguchi has him pressed against the cage.
Kaguchi is looking for a takedown up against the cage. Loser gets underhooks though and prevents the takedown attempt.
Loser is looking to score with knees to the body. Maybe he'll change it up and go body then head. Kaguchi is defending well for now.
Loser jumps guard but Kaguchi stands there with Loser around his waist. Loser gives up and drops back to his feet. We remain in the clinch.
Loser blocks an uppercut.
Loser is trying to pull guard but being pressed up against the cage enables Kaguchi to keep the fight standing.
Loser tries to pull guard but Kaguchi won't allow it.
Loser is trying to break the clinch but Kaguchi has him pressed against the cage.
That's four minutes gone in the round.
Loser tries to take the fight to the ground by pulling guard but can't manage it.
Kaguchi looking for a takedown.
Loser wants to break free but Kaguchi has control.
Loser is looking for a takedown.
Loser is working hard here but doesn't seem to be able to control effectively, up against the cage.
Loser goes for a takedown in the clinch but Kaguchi prevents it.
Kaguchi misses with a hook to the ribs.
The crowd cheering loudly, showing their appreciation for the quality fight we're seeing here.

Loser breaks the clinch and we're back to striking at distance.
The crowd applaud the fighters efforts here as the round comes to an end.
Loser will have to do better than that with his takedown attempts.
Kaguchi tries to shoot in for a takedown. He's got hold of a leg but Loser swivels and escapes.
The Loser is fighting for a decision here - he's started to take the cautious approach.
Loser fails to land with a series of punches.
A telegraphed right hand from Loser misses the target.
And that's the end of the fight!
The Loser showed his dominance in that final round.
Well I reckon that's a shut out for Loser, winning every round. Will the judges agree? They are the ones who matter, even if they are often depressingly incompetent. Over to the ring announcer for the scorecards.
Ladies and gentlemen, after 3 rounds of action, we go to the scorecards for a decision.
Judge Summer Carpenter scores the fight 30:27
Judge Damien Edna scores the fight 30:27
Judge Hugh Johnson scores the fight 30:27
In favor of your winner, by unanimous decision... The Loser!
|
|
|
|
|
|
|
|
|
|
|
|
|
|
|
|
|
|
|
|
|
|
|
| S |
C
A |
G |
S |
C
B |
G |
|
S |
C |
G |
|
energy
A | B |
|
hype
A | B |
|
pop
A | B |
|
mgr
A | B |
|
FIGHT
RATING
52% |
|
|
|
|
|
|

