|
|
PBP Commentary |
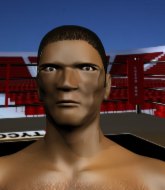
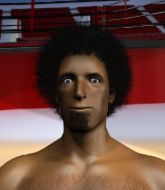
Coming up we have a heavyweight MMA rules bout between Chris Badass (ranked 0 p4p, 0 weight class) and Tyron Marshall (ranked 0 p4p, 0 weight class). Badass's entrance music is Caskey- dolla bills. A fine choice. Both fighters look fresh as a daisy as they make their way towards the cage.
 |
|
 |
| 185 cm
18
230 lbs
1 - 0 - 0 |
|
200 cm
22
240 lbs
1 - 0 - 0 |
BJJ Blue Belt
Brawler
KO power |
|
BJJ Blue Belt
Solid Muay Thai
Determined |
|
| |
|
Ladies and gentlemen. This fight is 3 rounds, in the heavyweight division.
Introducing the fighter to my left, fighting out of the red corner.
With a record of
1 - 0 - 0, fighting out of Sydney, Chris Badass!
And introducing the fighter to my right, fighting out of the blue corner.
With a record of
1 - 0 - 0, fighting out of Sydney, Tyron Marshall!
The judges for this bout are Steve Erwin, Winston Howard and Damien Edna.

The bell rings for round one and we are underway!

Marshall closes the distance and clinches.
Badass tries to pull guard but Marshall won't allow it.
A short uppercut from Marshall.
Marshall has a body lock and is looking for a takedown. Badass is bouncing around trying to prevent the takedown and somehow he has indeed managed to stay on his feet.
Badass tries to pull guard but can't drag his opponent to the mat. Marshall just stands there and leans against the cage.
Marshall goes for a takedown attempt but Badass pushes him away and we're back to fighting at a distance.
Marshall misses with a takedown

and Badass counters by moving into the clinch.
Chris Badass has stuffed three takedown attempts in the round now. That's going to take a lot out of Tyron Marshall.
Marshall is trying to work out of this bad position, with his back against the cage.
Badass drops down looking for an ankle pick but Marshall pulls his leg out and moves away.
A really sloppy takedown attempt there from Badass.

That's one minute gone in the round.
Badass fails miserably with a takedown attempt.

Badass closes the distance and gets a double leg, slamming Marshall to the mat! Marshall manages to get full guard.
The ref warns both fighters not to hold the cage as they work up against the meshing.
Badass has decided he wants to stand but the closed guard of Marshall is proving hard to escape from.
Marshall looking to control.
Marshall tries to land a sweep but no joy.

Marshall is throwing his legs up, looking for submissions. Badass is aware though and is defending well.
Marshall is working an open guard here, looking to improve his position. No doubt that will leave him open to counters but at least he's being more offensive.
Badass wants to control from the top but Marshall keeps moving.
Marshall working a defensive guard here.
Badass might be looking to lock onto one of his opponent's long limbs for a submission, whilst we're on the ground.

That's two minutes gone in the round.
Marshall keeping moving, preventing Badass from controlling successfully.

The referee decides to stand the fighters back up, due to lack of activity on the part of Chris Badass.
No luck for Badass with that takedown attempt.
Badass throws a looping left and ducks down for a takedown. He's got his arms around Marshall's waist but Marshall gets an underhook and avoids the takedown by throwing Badass off to one side.
Marshall is trying hard to land a takedown here. Badass sprawls well and keeps this one on the feet.
Badass shoots in looking for a double leg takedown. Marshall defends it nicely.

That's three minutes gone in the round.
Badass wants to clinch up but Marshall keeps it at a distance.
Badass shoots in for a takedown. "I don't think so" says Marshall as he avoids it easily.
Nice takedown defense from Marshall. No joy for Badass on that attempt.
Badass is breathing heavily.
Badass tries to drive through with a takedown attempt but Marshall defends well and Badass ends up having to push Marshall into the cage where they will battle it out in the clinch.
Badass wants to push off and get back to the center of the mat but Marshall has him pressed against the cage.
Marshall stalling.
Badass working hard to break the clinch.

That's four minutes gone in the round.
Marshall drops down looking for an ankle pick but Badass pulls his leg out and moves away.
Badass stuffs the takedown attempt from Marshall. Marshall gets slowly back to his feet.
Nice takedown defense from Badass. No joy for Marshall on that attempt.
The crowd applaud the fighters efforts here as the round comes to an end.
Badass throws a lazy body kick
and Marshall counters by clinching up.
Badass gets a trip takedown into half guard.
Marshall moves his hips nicely and gets into full guard.
And that�s the end of the round � the fighters go back to their corners.
That was a close round but I would say that Chris Badass will probably get the nod.
The fighters get back to their feet, the hooter sounds and we're back to the action!

Badass misses with a left hand
and Marshall counters with a low kick, right behind Badass 's knee.
Badass darts in looking for a takedown but Marshall gets double underhooks and turns Badass into the cage.
Marshall slows down the pace here.
Badass is trying to break free.
Badass is trying to pull guard but Marshall turns him against the cage and we stay in the clinch.
Badass has dropped down and is looking to force the takedown but it's defended by Marshall after a bit of a struggle.
That's three failed takedown attempts in the round for Chris Badass. That's going to take a lot out of him.
Badass misses the knee to the body. Nice hip positioning from Marshall.
Marshall tries for a takedown. No joy.

Marshall breaks from the clinch.
That's one minute gone in the round.
Badass stuffs the takedown.
Badass looks for a takedown but Marshall sprawls well.
Marshall stuffs the takedown attempt from Badass. Badass gets slowly back to his feet.
Badass fails to land the takedown.
Both fighters are absolutely exhausted here.
Marshall avoids the clinch attempt nicely.
Marshall is looking to take this fight into the clinch.
Marshall forces Badass back against the cage and clinches.
That's two minutes gone in the round.
Badass is looking for a takedown up against the cage. Marshall gets underhooks though and prevents the takedown attempt.
Marshall is trying to pull guard but Badass turns him against the cage and we stay in the clinch.
Badass drops to a knee looking for a takedown but Marshall gets the underhooks and prevents it.
Badass has managed to pull guard. Let's see whether he can work an aggressive guard. It will also be interesting to see what tactics Marshall uses from the top position.
Badass keeping full guard, as Marshall tries to pass.
Marshall thinks about going for a leg but decides against it, in order to maintain the position.
Badass trying to keep a closed guard but Marshall is proving a slippery customer.
That's three minutes gone in the round.
Marshall throwing strikes but missing.
Marshall trying to control the position from guard on top but Badass is wriggling around, looking for whatever he can.
Marshall drops back looking for a heel hook - he quickly realises he's not going to get it but Badass manages to dive on top of him before he can escape and now Marshall has Badass in his guard.
Badass wants to control from the top but Marshall keeps moving.
Badass prevents Marshall from getting back to his feet.
Marshall has a loose triangle. He'll be looking to tighten that up but Badass can see exactly what he's planning and manages to posture up and free himself.
That's four minutes gone in the round.

Badass gets to his feet and steps away from his opponent.
Badass misses with a hook
enabling Marshall to counter with a crisp jab.
Badass throws a half hearted mid kick.
Badass thows a leg kick but Marshall checks it
and Marshall counters with a nice leg kick.
Marshall has his takedown stuffed
and Badass counters with a shoot takedown into half guard.
We've seen a great period of action over the last minute or so - credit to both fighters for going all out!
The crowd applaud the fighters efforts here as the round comes to an end.
Marshall is pressing down on Badass's left leg trying to get back to full guard. He's managed it.
The fighters are pressed up against the cage, both looking to find a bit of space to work.
Marshall is active off his back here, looking for submissions.
Marshall working for a triangle but Badass defends it easily.
And that�s the end of the round � the fighters go back to their corners.
That was a close second round but I would say that Chris Badass will probably get the nod.
Well, the break between rounds is over. Let's get back to the scrappin! So, we enter the final round. Let's see if either fighter can bring us a finish, or whether we're going to the judges scorecards.

Badass misses with a takedown attempt. He shot from a bit too far out.
Badass has managed to clinch.
Badass struggles to land a body shot inside as Marshall controls his hands.
We've had a slow start to the round here - hopefully the action picks up.
Marshall taking a break, stalling in the clinch.

Marshall works for the underhooks and manages to get a trip takedown into guard.
Marshall wants to pass the guard but Badass is keeping the position.
That's one minute gone in the round.
Marshall postures up as if he's going to throw some strikes but drops back for an ankle! Badass is in big trouble! He looks ready to tap! But no, he's escaped and dives on top of Marshall, into his guard.
Marshall trying to strike from the bottom but really, it's not the best position to be doing that from!
Badass wants to pass the guard but Marshall is keeping the position.
Marshall controls Badass momentarily but Badass frees himself.
Marshall escapes his hips to the side and looks to be working for an armbar. Badass gives him a little smile and shakes his head. No chance.
Marshall takes a big intake of breath there - he's definitely tired.
Badass slows down the pace of the fight for a moment. He'll need to remain active if he doesn't want to see the fight stood back up.
That's two minutes gone in the round.
Badass stands up and waves to Marshall to follow him.
Marshall shoots in for a takedown but Badass shows good takedown defense there and keeps this one on the feet.
Badass shoots for a double leg takedown but Marshall sprawls well. He's pushed Badass's face into the mat and manages to get back to his feet relatively easily.
Marshall lands with a thumping leg kick.
Marshall wants to clinch up but Badass keeps it at a distance.
Badass tries to drive through with a takedown attempt but Marshall defends well and Badass ends up having to push Marshall into the cage where they will battle it out in the clinch.
That's three failed takedown attempts in the round for Chris Badass. That's going to take a lot out of him.
Marshall drops to a knee looking for a takedown but Badass gets the underhooks and prevents it.
That's three minutes gone in the round.
Marshall is working for takedown but Badass is calmly controlling the position for now.
Marshall blocks a body shot from Badass.
Badass is trying to work out of this bad position, with his back against the cage.
Badass is defending well against a takedown attempt.

Badass manages to break the clinch.
Badass bobs and weaves into range and then changes levels and scores with a nice takedown into side control.
Marshall is trying to improve his position.
Badass wants to lay and pray for a moment but Marshall keeps working.
That's four minutes gone in the round.
Marshall tries to buck Badass off but Badass is having none of it.
Badass trying to control the position but Marshall is working away.
You can see the frustration on Marshall's face, being in this tough position on the bottom.
Badass stands up.
Tyron Marshall has stepped it up - he knows he needs a finish here!
Badass throws a combination but it was largely blocked by Marshall.
And that's the end of the fight!
Chris Badass showed his dominance in that final round.
Well I reckon that's a shut out for Badass, winning every round. Will the judges agree? They are the ones who matter, even if they are often depressingly incompetent. Over to the ring announcer for the scorecards.
Ladies and gentlemen, after 3 rounds of action, we go to the scorecards for a decision.
Judge Steve Erwin scores the fight 30:27
Judge Winston Howard scores the fight 30:27
Judge Damien Edna scores the fight 30:27
In favor of your winner, by unanimous decision... Chris Badass!
A very excited looking Chris Badass made sure he remembered to thank all the fans both in the arena and on the internet. He said all the coolest people spend all day on MMA websites, which got a big reaction.
|
|
|
|
|
|
|
|
|
|
|
|
|
|
|
|
|
|
|
|
|
|
|
| S |
C
A |
G |
S |
C
B |
G |
|
S |
C |
G |
|
energy
A | B |
|
hype
A | B |
|
pop
A | B |
|
mgr
A | B |
|
FIGHT
RATING
46% |
|
|
|
|
|
|
