|
|
PBP Commentary |
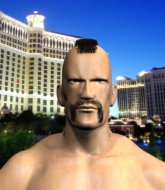
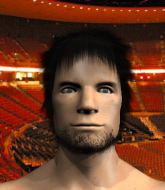
Coming up we have a light heavyweight MMA rules bout between Kaito Saruwatari (ranked 0 p4p, 0 weight class) and Johnny Blaze (ranked 0 p4p, 0 weight class). Saruwatari comes to the cage accompanied by Guerilla Radio. Blaze has chosen Monster by Skillet as his entrance music. Over to our ring announcer for the fighter introductions!
 |
|
 |
| 186 cm
31
214 lbs
17 - 9 - 0 |
|
188 cm
20
212 lbs
8 - 3 - 0 |
BJJ Purple Belt
Lethal high kicks
Cardio machine |
|
BJJ Purple Belt
Excellent MT
Granite chin |
|
| |
|
Ladies and gentlemen. This fight is 3 rounds, in the light heavyweight division.
Introducing the fighter to my left, fighting out of the red corner.
With a record of
17 - 9 - 0, fighting out of Montreal, Kaito Saruwatari!
And introducing the fighter to my right, fighting out of the blue corner.
With a record of
8 - 3 - 0, fighting out of Montreal, Johnny Blaze!
The judges for this bout are Trevor Gratis, Steve Smith and Ian Loll.

The bell rings for round one and we are underway!

Blaze pushes Saruwatari up against the cage in a clinch.
Saruwatari lands a hook that snaps the head of Blaze backwards.
A short right from Saruwatari.
Blaze working aggressively here.
Blaze takes a shot to the head.
Saruwatari managing to block the knees to the body from Blaze.
Saruwatari can't find room to land a body shot as Blaze controls the action.
Saruwatari blocks a punch to the side of the head.
Blaze misses with the head strike.
Blaze swings wildly with an uppercut but Saruwatari uses good head movement to avoid it.
Saruwatari throws a blind hook that connects with the side of Blazes head.
Saruwatari blocks a couple of punches on the inside.
With the fighters clinched against the cage, Saruwatari creates a bit of distance for himself and scores with a nice uppercut.
Blaze throws a nice elbow but it doesn't land.
Blaze doesn't land with the attempted body shot.
Saruwatari struggles to land a body shot inside as Blaze controls his hands.
Blaze swings wildly with an uppercut but Saruwatari uses good head movement to avoid it.

Saruwatari breaks from the clinch.
This has been an exciting period of action!
Saruwatari closes the distance and lands a one-two.
Saruwatari tries to keep at a distance but Blaze has taken the fight into the clinch.
Saruwatari managing to block the knees to the body from Blaze.

That's one minute gone in the round.
Saruwatari digs a right hand underneath Blaze's ribcage. Blaze let out a lung full of air as it connected.
Saruwatari looks like he'd prefer to be striking at range right now.
Saruwatari blocks a knee to the body. He'll have a nicely bruised forearm in the morning.
Saruwatari breaks the clinch and we're back to striking at distance.
Saruwatari tries to keep at a distance but Blaze has taken the fight into the clinch.
A short right from Saruwatari on the inside.
Blaze tried to land a shot to the body but connects with Saruwatari's elbow.
Saruwatari pushes off and circles away, back to the middle of the mat.
Blaze throws a head kick but Saruwatari moves out of range.
Saruwatari scores to the head and body with a nice combination!
Fantastic stuff here - a very entertaining period of action, which has drawn cheers from the crowd.
Saruwatari thuds his right hand into Blaze's forehead from close range. That could be painful for both fighters.
Blaze gets a clinch.
Saruwatari struggles to land a body shot inside as Blaze controls his hands.
Saruwatari tries to land a shot to the body but it's blocked.
Saruwatari breaks the clinch and we're back to striking at distance.
Blaze throws a body kick despite being completely out of range
and Saruwatari counters with a stiff right hand.
Blaze rushes Saruwatari and presses him up against the cage.
Blaze putting his Muay Thai to good use. He has Saruwatari in a tight clinch and is doing some damage with knees to the body.

That's two minutes gone in the round.
Blaze looking to throw knees to the head but Saruwatari is blocking nicely.
Blaze throws a vicious knee straight up the middle but Saruwatari blocks it with crossed arms.
Saruwatari swings away with an uppercut that misses.
Blaze swings away with an uppercut that misses.
Saruwatari lands a nice uppercut.
Blaze comes over the top with an elbow. That landed flush.

It looks like Kaito Saruwatari has been cut.
Blaze lands with a right to the head.
Saruwatari lands a left hand that snaps the head of Blaze backwards.
Blaze trying to land knees to the body.
Saruwatari prevents a body shot from Blaze.
Saruwatari blocks a punch to the side of the head.
A nice left hand lands by Saruwatari.
Saruwatari blocks an elbow strike.
Saruwatari manages to break the clinch.
Blaze gets a clinch.
Saruwatari blocks a punch to the side of the head.
Blaze swings away with an uppercut that misses.
Blaze lands a nice elbow from the clinch.
Saruwatari takes a knee to the side of the body.
Blaze misses with a body punch.

That's three minutes gone in the round.
Saruwatari working on landing some head shots here - that one got through nicely.
Saruwatari lands punches inside but they're not really causing much damage.
Saruwatari manages to break the clinch.
Blaze looks to land a body kick but Saruwatari moved away.
Saruwatari swings away but doesn't land with a series of punches.
Blaze closes the distance and presses his opponent up against the cage.
A frustrated look appears on Saruwatari's face as he tries to break the clinch.
Saruwatari scores with a shoulder strike.
Blaze lands an elbow that stopped Saruwatari in his tracks for a moment.
Saruwatari manages to break the clinch.
Blaze clinches with his opponent.
Blaze misses with some punches.
Blaze blocks an uppercut.
Saruwatari lands a left hand that snaps the head of Blaze backwards.
This is a great period of action - very entertaining stuff!
Blaze working aggressively here.
Blaze prevents Saruwatari from breaking the clinch.
Saruwatari scores with a nice hook to the head.
Blaze swings away with an uppercut that misses.
Saruwatari prevents a body shot from Blaze.

That's four minutes gone in the round.
Blaze lands an elbow inside.
Saruwatari avoiding damage as Blaze throws knees to the body.
Saruwatari lands with a short punch from the clinch.
Saruwatari can't find room to land a body shot as Blaze controls the action.
Blaze misses with a body punch.
Blaze tries to land knees in the clinch but Saruwatari avoids the damage to the body.
Saruwatari manages to break the clinch.
Blaze clinches with his opponent.
Blaze blocks a couple of punches on the inside.
A short uppercut from Saruwatari.
The fighters are going at a pretty good pace and they're both starting to sweat now.
Saruwatari lands a nice uppercut.
Saruwatari blocking some punches.
Blaze goes for a body shot but it's blocked.
Saruwatari gets through Blaze's defenses to land a nice punch to the side of the head.
Blaze looks to throw an elbow but misses.
The crowd are going absolutely nuts as the round comes to an end - what a fantastic round of action!
A short right from Blaze.
Blaze blocking some punches.
Blaze misses with a punch to the body.
Blaze fails to land with a short punch on the inside.
Blaze tried to land a shot to the body but connects with Saruwatari's elbow.
And that�s the end of the round � the fighters go back to their corners.
Kaito Saruwatari dominated that round.
The cut man is working on Kaito Saruwatari's cut.
OK. That's time! The bell goes and we're back to the action.

Blaze ducks under an overhand right and circles away with a smile on his face.
Saruwatari misses with a two punch combination.
Blaze throws a low kick but it's checked well by Saruwatari.
We've been told by Saruwatari's head coaches at Synergy Fight Team (ACME) that he's been working on his takedown defense in preparation for this fight.
Wow, both these guys are really going for it!
Blaze throws a sloppy head kick and Saruwatari moves out of range easily.
Saruwatari closes the distance and lands a one-two.
Saruwatari avoids the body shot from Blaze.
Saruwatari takes a head kick and shrugs it off.
A combination from Saruwatari does no damage.
Saruwatari cracks Blaze with a nice right hand that draws applause from the crowd.
Blaze tries a switch kick but it misses it's target.
Saruwatari throws a wild combination but nothing lands.
Blaze misses with a leg kick.
Blaze looks to land a body kick but Saruwatari moved away.
Saruwatari misses with a few strikes there.
Blaze tries to score with a low kick but Saruwatari moves his leg out of the way.
This is a great period of action - very entertaining stuff!
Blaze throws a leg kick but Saruwatari sees it coming and moves out of range.
Saruwatari lands with a shot to the body.
Saruwatari thows a left - swing and a miss!
That's one minute gone in the round.
Blaze connects with an inside leg kick.
Blaze throws a hook to the body but it doesn't connect.
Blaze tries to score with a low kick but Saruwatari moves his leg out of the way.
Blaze pulls out of a head kick attempt.
Saruwatari dips down and scores with a jab to the body.
Saruwatari lands a glancing blow to the side of Blaze's head.
Saruwatari tries to keep at a distance but Blaze has taken the fight into the clinch.
An uppercut on the inside fails to land for Saruwatari.
Blaze scores with an uppercut up the middle.
Saruwatari tries to break free but Blaze pushes him back against the cage.
Blaze misses with some punches.
Saruwatari escapes the clinch and we're back to striking.
Saruwatari misses with the combination.
Saruwatari misses the shot to the body.
Blaze gets cracked there but stands up to it.
Blaze scores with a slapping inside leg kick.
That's two minutes gone in the round.
Blaze has Saruwatari up against the cage in a clinch.
Fantastic stuff here - a very entertaining period of action, which has drawn cheers from the crowd.
Saruwatari misses with a short punch on the inside.
Saruwatari throws a head punch that misses.
Saruwatari can't find room to land a body shot as Blaze controls the action.
Saruwatari takes an elbow to the forehead.
Saruwatari blocking some punches.
Blaze blocks a punch to the side of the head.
Blaze creates a bit of space for himself and sneaks an elbow through Saruwatari's defenses.
Blaze tries to land a shot to the body but it's blocked.
Saruwatari avoids a wild elbow strike from Blaze.
Blaze doesn't land with the attempted body shot.
With the fighters up against the cage, Blaze throws an elbow but misses.
Blaze lands a left hand.
Kaito Saruwatari's cut is getting worse.
Kaito Saruwatari has scored more points in the clinch so far.
Saruwatari misses with some punches.
Blaze tries to throw a body punch but Saruwatari avoids it by throwing Blaze back against the cage.
Saruwatari tried to land a shot to the body but connects with Blaze's elbow.
Blaze prevents a body shot from Saruwatari.
Blaze misses with the head strike.
That's three minutes gone in the round.
Blaze lands a hook that snaps the head of Saruwatari backwards.
Blaze throws a punch but it's blocked by Saruwatari.
Blaze lands a body punch in the clinch.
Blaze blocks an uppercut.
Saruwatari blocks an uppercut.
Saruwatari blocks a punch to the side of the head.
Saruwatari wants to get back to striking at distance but Blaze won't allow it.
Blaze swings away with an uppercut that misses.
Blaze lands a nice uppercut.
Blaze swings wildly with an uppercut but Saruwatari uses good head movement to avoid it.
Saruwatari lands a hook that snaps the head of Blaze backwards.
Blaze tries to work over Saruwatari's body with a swooping hook but it only glances the target.
Saruwatari lands a right hand that snaps the head of Blaze backwards.
Blaze can't find room to land a body shot as Saruwatari controls the action.
Saruwatari blocks a body shot from Blaze.
The fans in attendance giving it up for the two fighters, who have really let it all hang out in the last minute or so!
Blaze throws a head punch that misses.
A head punch blocked on the inside by Saruwatari.
Saruwatari misses with a short punch on the inside.
That's four minutes gone in the round.
Saruwatari digs a right hand into Blaze's ribs. Those have got to be taking their toll on Blaze's gas tank.
Blaze tries to throw a body punch but Saruwatari avoids it by throwing Blaze back against the cage.
Saruwatari fails to land with a short punch on the inside.
Saruwatari blocks the elbow strike.
Saruwatari tries to break free but Blaze pushes him back against the cage.
Blaze blocks an uppercut.
Saruwatari lands a right hand that snaps the head of Blaze backwards.
Blaze throws a head punch that misses.
Blaze using the Thai plumb to throw knees but Saruwatari has his back arched nicely, preventing the strike.
Blaze tries to land a shot to the body but it's blocked.
Saruwatari is looking to break free of the clinch but Blaze has double underhooks.
Saruwatari lands a right hand that snaps the head of Blaze backwards.
Saruwatari prevents a body shot from Blaze.
Saruwatari tries a body shot but Blaze blocks it.
Saruwatari blocks a knee to the body. He'll have a nicely bruised forearm in the morning.
The crowd are going absolutely nuts as the round comes to an end - what a fantastic round of action!
A head punch blocked on the inside by Blaze.
Saruwatari breaks the clinch.
Blaze avoids a punch combination nicely.
Saruwatari avoids the head kick by Blaze.
And that�s the end of the round � the fighters go back to their corners.
A close second round but Johnny Blaze will probably get the nod - 10:9.
The cut man is working on Kaito Saruwatari's cut.
That's the end of the interval. I'm sure that seemed a lot quicker than a minute for our two fighters! Back to the action. The crowd applaud as we get ready to start the final round!

Blaze darts in and clinches Saruwatari up against the cage.
Blaze misses with a knee to the head.
Blaze fails to land with a short punch on the inside.
Saruwatari prevents a body shot from Blaze.
Saruwatari stays in close to his opponent and throws a right hand to the body.
Blaze misses with an elbow over the top.
Saruwatari lands with a good tight uppercut to the head.
Saruwatari stays in close to his opponent and throws a right hand to the body.
Saruwatari breaks the clinch and we return to the middle of the mat.
Saruwatari moves into range and throws a lovely three punch combination.
Wooooo! Give it up for these two warriors! They are putting on a show!
Blaze takes a body punch that cleary hurt but he's trying not to show any weakness.
A combination from Saruwatari does no damage.
Kaito Saruwatari is looking to throw some combinations by the looks of things.
No joy there for Saruwatari, who threw a few shots but didn't land.
Saruwatari with a nice cross.
Blaze takes a big intake of breath there - he's definitely tired.
Blaze moves into range and clinches up with Saruwatari.
Blaze with the Thai clinch. He's looking to land a big knee but he's not managed it this time.
Blaze doesn't land with the attempted body shot.
Saruwatari scores with a hook to the body.
That's one minute gone in the round.
Saruwatari lands a right hand that snaps the head of Blaze backwards.
Saruwatari makes some space for himself and lands an uppercut.
A head punch on the inside from Saruwatari fails to land.
Saruwatari misses with the head strike.
Blaze misses with a hook from the clinch.
Saruwatari misses with a shot to the kidneys.
Saruwatari breaks the clinch and we return to the middle of the mat.
Saruwatari takes a swing at Blaze's ribcage but misses.
Blaze closes the distance and presses his opponent up against the cage.
Saruwatari escapes the clinch and we're back to striking.
Left hook, right uppercut from Saruwatari.
Saruwatari ducks low and lands a nice hook to the body of his opponent.
Blaze closes the distance and presses his opponent up against the cage.
A quick uppercut on the inside from Saruwatari.
Blaze misses with the head strike.
Blaze misses with a hook from the clinch.
The crowd are loving this. Great action here.
Saruwatari lands an uppercut.
Blaze with an attempt at a knee that misses.
That's two minutes gone in the round.
Saruwatari lands a hook that snaps the head of Blaze backwards.
Blaze working on landing some head shots here - that one got through nicely.
Blaze throws an elbow but it misses.
Blaze tries a knee to the head but he's missed.
Blaze tries to land knees in the clinch but Saruwatari avoids the damage to the body.
Saruwatari dodges an elbow strike from Blaze.
Blaze landing knees to the head.
Blaze blocks a couple of punches on the inside.
Blaze tries to throw a body punch but Saruwatari avoids it by throwing Blaze back against the cage.
A shot in the inside from Saruwatari.
Blaze misses with a punch on the inside.
Saruwatari swings wildly with an uppercut but Blaze uses good head movement to avoid it.
Blaze misses with some punches.
Blaze goes for a body shot but it's blocked.
Saruwatari takes a knee to the side of the body.
Saruwatari misses with a punch to the body.
Saruwatari blocks a knee to the body. He'll have a nicely bruised forearm in the morning.
Saruwatari prevents a body shot from Blaze.
That's three minutes gone in the round.
An uppercut on the inside fails to land for Blaze.
Saruwatari pushes Blaze back against the cage and lands a hook to the side of the head.
Saruwatari lands a short shot on the inside that snaps the head of Blaze backwards.
Saruwatari lands with a short head shot on the inside.
Saruwatari breaks the clinch and we're back to striking at distance.
Blaze throws a front kick aimed at Saruwatari's knee but Saruwatari avoids it well.
Saruwatari looks to score with a combo but nothing lands.
Saruwatari scores with a hook to the body. Blaze takes a step back and tries to catch his breath.
A leg kick checked by Saruwatari.
Blaze moves into range and clinches up with Saruwatari.
Saruwatari has had enough of the clinch and is looking to separate.
Blaze throws a vicious knee straight up the middle but Saruwatari blocks it with crossed arms.
Blaze throws an elbow that misses.
Saruwatari escapes the clinch and we're back to striking.
Saruwatari blocks a head kick by Blaze.
Saruwatari checks a low kick. Bone on bone - not my idea of a good time.
Saruwatari misses with a straight left.
That's four minutes gone in the round.
Some wild striking there from Saruwatari.
The crowd are loving this. Great action here.
Blaze fails to land with the punch combination there - jab, cross, hook, miss, miss, miss.
Saruwatari connects with a nice looking jab.
Saruwatari misses with a body shot.
Saruwatari uses good footwork to get in and out, landing a nice hook.
Blaze throws a front kick aimed at Saruwatari's knee but Saruwatari avoids it well.
Saruwatari digs a good hook to Blaze's body.
Blaze takes a swing at Saruwatari's ribcage but misses.
Saruwatari swings and misses with a hook to the body.
Blaze dodges the punch combination from Saruwatari.
Kaito Saruwatari is winning the standup battle so far.
Blaze throws a front kick aimed at Saruwatari's knee but Saruwatari avoids it well.
The crowd are going absolutely nuts as the round comes to an end - what a fantastic round of action!
Saruwatari misses the shot to the body.
Saruwatari lands the left hand.
Saruwatari throws a hook to the body but it doesn't connect.
And that's the end of the fight!
Kaito Saruwatari showed his dominance in that final round.
Well Saruwatari has outscored his opponent in every aspect of the fight today. Only a scarily incompetent judge or two will keep him from a well deserved win... Over to the ring announcer for the scorecards.
Ladies and gentlemen, after 3 rounds of action, we go to the scorecards for a decision.
Judge Trevor Gratis scores the fight 29:28
Judge Steve Smith scores the fight 29:28
Judge Ian Loll scores the fight 29:28
In favor of your winner, by unanimous decision... Kaito Saruwatari!
During a confident post fight interview, Kaito Saruwatari thanked all his fans. He seemed very genuine when describing how motivated his fans keep him.
|
|
|
|
|
|
|
|
|
|
|
|
|
|
|
|
|
|
|
|
|
|
|
| S |
C
A |
G |
S |
C
B |
G |
|
S |
C |
G |
|
energy
A | B |
|
hype
A | B |
|
pop
A | B |
|
mgr
A | B |
|
FIGHT
RATING
100% |
|
|
|
|
|
|
