|
|
PBP Commentary |
Coming up we have a featherweight MMA rules bout between Kato Kiyomasa (ranked 0 p4p, 0 weight class) and Whadaya Know (ranked 0 p4p, 0 weight class). We have two fighters making their debuts here, so let's see who comes out of this one with their first professional victory.
 |
|
 |
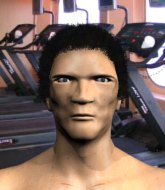
| 185 cm
25
152 lbs
0 - 0 - 0 |
|
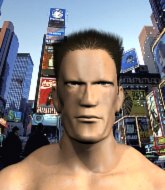
190 cm
25
155 lbs
0 - 0 - 0 |
BJJ Brown Belt
Brawler
KO power |
|
Good wrestler
Brawler
Determined |
|
| |
|
Ladies and gentlemen. This fight is 3 rounds, in the featherweight division.
Introducing the fighter to my left, fighting out of the red corner.
With a record of
0 - 0 - 0, fighting out of Hilo, Kato Kiyomasa!
And introducing the fighter to my right, fighting out of the blue corner.
With a record of
0 - 0 - 0, fighting out of Hilo, Whadaya Know!
The judges for this bout are Josh West, Micheangelo Fripello and Ryoma Takatsuka.

The bell rings for round one and we are underway!
Kiyomasa throws a hard body shot but it just misses.
Kiyomasa misses with a combination

and Know counters with a takedown into side control! That could mean trouble for Kiyomasa!
We could do with one of the fighters taking the initiative a bit more on the ground - they're both waiting to capitalize on a mistake.
Know tries to get to his feet but Kiyomasa is in the middle of advancing position himself and ends up with Know in his guard.
Know would like to get this fight back to the feet but can't get free from the closed guard.
Know wants to pass the guard but Kiyomasa is keeping the position.

Kiyomasa has a loose triangle. He'll be looking to tighten that up but Know can see exactly what he's planning and manages to posture up and free himself.
Kiyomasa wants to sweep here but Know controlling him for the moment.
This is a great period of action - very entertaining stuff!
Kiyomasa keeping full guard, as Know tries to pass.

That's one minute gone in the round.
There's a bit of a scramble here and now Kiyomasa is on top in guard.

Know looking for submissions off his back, moving his hips, looking for an opening.
Know keeping moving, preventing Kiyomasa from controlling successfully.
Know has control of Kiyomasa's left arm, preventing Kiyomasa from doing any damage.
Kiyomasa trying to control the position from guard on top but Know is wriggling around, looking for whatever he can.
Kiyomasa pressing down on his opponent's thigh, looking to pass guard. Know is keeping the position for now.

That's two minutes gone in the round.
Know wants to control here, rather than go for any submissions from the bottom. At least for now.

The ref stands the fighters back up. Whadaya Know was stalling too much, according to the referee.
Kiyomasa tries to clinch but Know moves away
and Know decides to take the opportunity to score a takedown. He's landed in Kiyomasa's guard.
Fantastic stuff here - a very entertaining period of action, which has drawn cheers from the crowd.
Kiyomasa tries to land a sweep but no joy.
Know really doesn't want to stay on the ground with Kiyomasa. If he can't get it back to his feet, it's only a matter of time before he'll be tapping out.
Know throws a big right hand that misses.
Know trying to control but Kiyomasa is working from the bottom.
Know got a little sloppy there for a moment and Kiyomasa has worked his way into a loose triangle - can he finish it?! No, Know has managed to get both his arms back between Kiyomasa's legs - danger averted.
Know engaging in some classic timewasting tactics.
A big thud reverberates around the arena there as Know accidentally thumps the mat. Hopefully he's not broken his hand.

That's three minutes gone in the round.
Kiyomasa trying to keep a closed guard but Know is proving a slippery customer.
Know trying to control but Kiyomasa is working from the bottom.
Know is frustrating his opponent with some stalling tactics from top position.
The ref stands the fighters back up, due to lack of action by Whadaya Know.
Kiyomasa throws a shot to the body.
Kato Kiyomasa seems to be the more aggressive standup fighter in this bout.
An inside leg kick from Know misses.
Know dives in and scores a takedown into Kiyomasa's guard.
The ref warns both fighters not to hold the cage as they work up against the meshing.
Know sitting in guard, not really doing much.
Know would like to get this fight back to the feet but can't get free from the closed guard.

That's four minutes gone in the round.
Kiyomasa wants to control the position but Know says "no thanks buddy" and passes to half guard.
Kiyomasa makes his way to full guard. A much better position for Kiyomasa.
Know working some ground and pound from guard but it's not doing any damage.
Kiyomasa trying to control the position.
We've seen a great period of action over the last minute or so - credit to both fighters for going all out!
Kiyomasa looking for submissions from the bottom here. Moving his hips around, possibly looking for an armbar.
As the round comes to an end the crowd are showing their appreciation for a great round of action.
Know slows down the pace of the fight, as he sits in guard.
And that�s the end of the round � the fighters go back to their corners.
Whadaya Know dominated that round.
The referee calls time. The cornermen exit stage left and we're back to business.


Know drives through and clinches with Kiyomasa against the cage.
Know has hold of a leg and is looking for a trip takedown. Kiyomasa avoids it nicely though and we remain in the clinch.
Kiyomasa tries a body shot but Know blocks it.
Kiyomasa scores with an uppercut up the middle.
Kiyomasa lands with a left to the head.
Know tries to take the fight to the ground by pulling guard but can't manage it.
Kiyomasa goes for a body shot but it's blocked.

Know breaks the clinch and we're back to striking at distance.
Kiyomasa throws a series of punches but Know avoids them all with ease.
Kiyomasa wants to clinch up but Know keeps it at a distance.
Know gets the takedown into side control.
Kiyomasa tries to bench press Know off him but Know keeps the position.
Kiyomasa regains half guard.
That's one minute gone in the round.
Know not throwing his punches with enough precision this time.
Kiyomasa is pressing down on Know's left leg trying to get back to full guard. He's managed it.
Kiyomasa is trying to keep Know in close.
Know won't allow Kiyomasa to sweep him here.
Know drops back for a leg but he's not going to get it - he lets go and Kiyomasa dives on top into guard.
Kiyomasa is trying to work a guillotine from the top, or something like that? Don't know how he thinks he's going to get a finish from there.
Kiyomasa avoids a guillotine attempt easily.
Kiyomasa slips nicely into half guard.
That's two minutes gone in the round.
Kiyomasa trying to control from Know's half guard. Know has other ideas though and has regained full guard.
Know keeping moving, preventing Kiyomasa from controlling successfully.
Know controls Kiyomasa momentarily but Kiyomasa frees himself.
Kiyomasa slips effortlessly into side control - very nice.
We get told so often about how wrestlers don't like to be on their backs. Let's see if Know can do anything to dispel that myth.
Know is looking to regain half guard here but Kiyomasa keeps moving and retains side control.
Whadaya Know has got the better of the ground game so far.
That's three minutes gone in the round.
Know is trying to control Kiyomasa's posture but Kiyomasa avoids it.
Kiyomasa tries for a kimura but Know is defending well.
Kiyomasa is trying to land an Americana. He has the arm isolated but Know is keeping cool and he's avoided the danger for now.
Know is positioning himself to get back to half guard.
Know can't do much from the bottom here.
That's four minutes gone in the round.
Kiyomasa trying to control the action but Know is working from the bottom.
Kiyomasa working hard here to secure a kimura but he's not really in the right position for it.
Know is looking for a sweep.
Kiyomasa prevents Know from escaping the position.
As the round comes to an end the crowd are showing their appreciation for a great round of action.
Know is trying to get back to half guard. He's pushing on Kiyomasa's leg. Oh but that's left an opportunity for Kiyomasa! He's got an arm triangle... it looks tight! He's rotating and Know has tapped! This one is allllll over!
Ladies and gentlemen, after 4:54 of round 2, we have a winner by way of Submission (Arm Triangle). Kato Kiyomasa!
|
|
|
|
|
|
|
|
|
|
|
|
|
|
|
|
|
|
|
|
|
|
|
| S |
C
A |
G |
S |
C
B |
G |
|
S |
C |
G |
|
energy
A | B |
|
hype
A | B |
|
pop
A | B |
|
mgr
A | B |
|
FIGHT
RATING
42% |
|
|
|
|
|
|
