|
|
PBP Commentary |
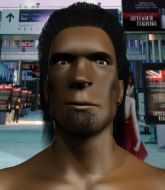
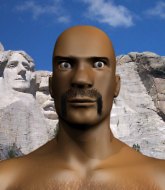
Coming up we have a light heavyweight MMA rules bout between Marcus Hayden (ranked 0 p4p, 0 weight class) and Ben Savage Two (ranked 0 p4p, 0 weight class). This should be fireworks!
 |
|
 |
| 193 cm
18
212 lbs
0 - 0 - 0 |
|
187 cm
22
213 lbs
0 - 3 - 0 |
BJJ White Belt
Excellent boxer
Cuts easily |
|
BJJ White Belt
Solid Muay Thai
Solid chin |
|
| |
|
Ladies and gentlemen. This fight is 3 rounds, in the light heavyweight division.
Introducing the fighter to my left, fighting out of the red corner.
With a record of
0 - 0 - 0, fighting out of Helsinki, Marcus Hayden!
And introducing the fighter to my right, fighting out of the blue corner.
With a record of
0 - 3 - 0, fighting out of Helsinki, Ben Savage Two!
The judges for this bout are Johanna Lukiainen, Ben Zyskovitsi and Tarja Halkonen.

The bell rings for round one and we are underway!
Savage Two dodges the punch combination from Hayden.
Hayden just misses with a punch to the body.
Hayden misses with a series of wild punches.
Hayden digs a good body shot into Savage Two's ribs.
Hayden just misses with a punch to the body.
A looping hook to the body misses from Hayden. Savage Two does a little dance to reset his feet.
Hayden throws a big shot that misses.
Hayden throws a hook to the body but it doesn't connect.
Savage Two moves forwards but Hayden connects with a nice, crisp jab.
Hayden just misses with a punch to the body.
Hayden is looking to wear down Savage Two with body shots, infact he's throwing more body shots than head shots at the moment.
Savage Two moves out of range of the strikes.
Hayden lands with a nice body punch.
Hayden throws a jab but it's blocked by Savage Two.
Hayden with a hook.

That's one minute gone in the round.
Hayden looks to land a left hand but Savage Two moved out of range nicely.
Hayden throws a sloppy body shot
and Savage Two counters with a head kick. That will keep Hayden thinking before he tries any more sloppy attacks!
Hayden cracks Savage Two with a good shot that sees him stumbling back into the cage.
Savage Two dives in for a single leg takedown but Hayden sprawls and the fighters end up clinched against the cage.
Hayden tries a body shot but Savage Two blocks it.
Hayden is trying to work out of this bad position, with his back against the cage.
Hayden misses with a hook from the clinch.
Savage Two has Hayden pressed up against the cage and is working for takedown. Hayden manages to improve position though and keeps the fight standing.
Savage Two is trying to work for a single leg takedown but Hayden pulls him back up using the underhooks.
Marcus Hayden has stuffed three takedown attempts in the round now. That's going to take a lot out of Ben Savage Two.
Kneeeeees! The crowd are calling for knees to the body. Savage Two obliges.
Savage Two lands an elbow just above Hayden 's eye.

It looks like Marcus Hayden has been cut.
Savage Two content to slow the pace in the clinch.
This is a great period of action - very entertaining stuff!
Savage Two missing with knees to the body.

Savage Two turns his hips and lands a very nice judo throw into side control!
The fighters are pressed up against the cage, both looking to find a bit of space to work.
Savage Two looks winded!
Hayden is trying to improve his position.
We could do with one of the fighters taking the initiative a bit more on the ground - they're both waiting to capitalize on a mistake.

That's two minutes gone in the round.

Savage Two decides to stand up, so the ref orders Hayden to his feet.
Hayden lands with a good body shot.
Marcus Hayden is looking to keep the fight on the feet at all costs.
Hayden swings for the body but Savage Two moves out of range.
Hayden throws a hook to the body but it doesn't connect.
Hayden thuds a left hand into Savage Two's body.
Savage Two keeping a good distance there, avoiding the body shot.
Hayden takes a swing at Savage Two's ribcage but misses.
Hayden swings for the body but Savage Two moves out of range.
Hayden fakes high and swings low for a body shot but Savage Two manages to avoid it.

That's three minutes gone in the round.
A punch combination from Hayden misses.
Hayden thows a body shot but no joy.
Hayden fails to land with a series of punches.
Hayden misses with a straight left.
Savage Two on the wrong end of a nice jab.
Hayden is the aggressor but that punch slipped nicely by Savage Two.
Hayden scores with a three punch combo!

It looks like Ben Savage Two has been cut.
Hayden looks to score with a jab to the body but Savage Two is just out of range.
Savage Two slips under a jab from Hayden.
Marcus Hayden seems to be the more aggressive standup fighter in this bout.
Hayden lands with a nice body punch.
This is a great period of action - very entertaining stuff!
Hayden lands a jab to the nose.
Hayden lands a jab to the nose.

That's four minutes gone in the round.
Savage Two uses some good footwork to avoid the body shot by Hayden.
Savage Two steps to the side to avoid the strikes from Hayden.
Hayden fakes high and swings low for a body shot but Savage Two manages to avoid it.
Hayden fakes a head shot and lands one to the body.
Hayden moves into range and connects with a jab.
Hayden lands a jab to Savage Two's midsection.
Hayden misses the shot to the body.
Hayden scores with a jab to the head.
Hayden lands a nice shot to the body.
Savage Two displays some good footwork, moving neatly out of range as Hayden throws out the jab.
The crowd are going absolutely nuts as the round comes to an end - what a fantastic round of action!
Hayden lands an overhand left. A wild punch that just about connected.
Hayden misses with a body shot.
Savage Two uses good footwork to avoid the strikes from Hayden.
And thats the end of the round the fighters go back to their corners.
Marcus Hayden dominated that round.
Both fighters have cut men working on them during the interval.
That's time! Back to the action!

Hayden scores with a punch to the gut of his opponent.
A slow jab from Hayden misses its intended target.
Hayden is really dominating this fight. Is there anything that Savage Two can do to turn this around?

Savage Two darts in and clinches Hayden up against the cage.
Hayden tries a shoulder strike but it doesn't do any damage.
Hayden is looking to break free of the clinch but Savage Two has double underhooks.
Hayden swings away with an uppercut that misses.
Savage Two jumps into guard, dragging Hayden to the mat.
Savage Two keeping moving, preventing Hayden from controlling successfully.
The referee wants the fighters to be more active or he's going to reset them on the feet.

The ref stands the fighters back up. Marcus Hayden wasn't doing enough on the ground.
Hayden looks to score with a jab to the body but Savage Two is just out of range.
That's one minute gone in the round.
Nice uppercut lands for Hayden. That snapped Savage Two's head back.
Hayden lands with a shot to the body.
Savage Two is breathing heavily.
Hayden connects with a crisp jab.
Hayden misses with a body shot. Nice footwork from Savage Two.

Hayden drops Savage Two with a beautiful combination! Savage Two stares up at his opponent, who ushers him back to his feet - Hayden is looking for the KO!

Savage Two is rocked!
The crowd cheering loudly, showing their appreciation for the quality fight we're seeing here.
Hayden connects with a stiff jab that staggers Savage Two - oh and he follows up with a huge uppercut that knocks him out cold! Man, that was brutal!
Ladies and gentlemen, after 1:35 of round 2, we have a winner by way of KO (Punches). Marcus Hayden!
|
|
|
|
|
|
|
|
|
|
|
|
|
|
|
|
|
|
|
|
|
|
|
| S |
C
A |
G |
S |
C
B |
G |
|
S |
C |
G |
|
energy
A | B |
|
hype
A | B |
|
pop
A | B |
|
mgr
A | B |
|
FIGHT
RATING
100% |
|
|
|
|
|
|

