|
|
PBP Commentary |
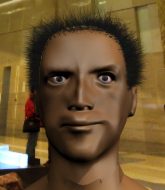
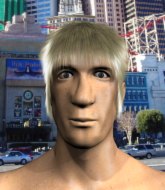
Coming up we have a heavyweight MMA rules bout between Brah At Hammed (ranked 0 p4p, 0 weight class) and Fincent LeBlond (ranked 0 p4p, 0 weight class). LeBlond has chosen Kari Tapio - Olen Suomalainen as his entrance music. Brah At Hammed had a look across the ring there at his opponent. He definitely means business
 |
|
 |
| 190 cm
30
265 lbs
12 - 12 - 0 |
|
196 cm
28
240 lbs
16 - 14 - 0 |
Abu Dhabi Champ
World class MT
Cardio machine |
|
Excellent grappler
World class MT
Granite chin |
|
| |
|
Ladies and gentlemen. This fight is 3 rounds, in the heavyweight division.
Introducing the fighter to my left, fighting out of the red corner.
With a record of
12 - 12 - 0, fighting out of Helsinki, Brah At Hammed!
And introducing the fighter to my right, fighting out of the blue corner.
With a record of
16 - 14 - 0, fighting out of Las Vegas, Fincent LeBlond!
The judges for this bout are Daniel Bishop, Paul Tew and Chris Edwards.

The bell rings for round one and we are underway!
At Hammed shoots in looking for a takedown but LeBlond manages to keep the fight standing, pushing At Hammed's face into the canvas for good measure before circling away.

At Hammed closes the distance and gets a double leg, slamming LeBlond to the mat! LeBlond manages to get full guard.
LeBlond keeping moving, preventing At Hammed from controlling successfully.
LeBlond told us pre-fight that he has been working on his escapes in training. Let's see if he can call on some of his new skills to get back to his feet.

At Hammed got a little sloppy there for a moment and LeBlond has worked his way into a loose triangle - can he finish it?! No, At Hammed has managed to get both his arms back between LeBlond's legs - danger averted.
At Hammed tries to free his leg and advance position but LeBlond is retaining full guard.
LeBlond working for a triangle but At Hammed defends it easily.
LeBlond keeping full guard, as At Hammed tries to pass.

That's one minute gone in the round.
At Hammed is just sitting in guard, looking to avoid any submissions.
At Hammed slips nicely into half guard.
LeBlond looking to force a kimura from the bottom here. He's concentrating on that move too much though and At Hammed pushes past his half guard into mount!
LeBlond tries to reverse the position but At Hammed maintains control.
LeBlond is squirming around, avoiding At Hammed's attempts to control the action.
LeBlond tries to reverse the position but At Hammed maintains control.
At Hammed trying to control but he's not successful this time.
At Hammed wants to control but LeBlond has made it back to half guard. Nice work.
The fighters are tangled up in the ropes here. We might need a restart if the fighters can't break free themselves.
LeBlond is staying active underneath At Hammed, who seems content to just control the action from this position.

That's two minutes gone in the round.
LeBlond trying to control here.

At Hammed is thinking about going for an arm triangle but he can't free his leg.
At Hammed seems to be looking for submissions.
At Hammed tries to pass the half guard into mount. LeBlond knows what he's doing though and prevents the attempt.
LeBlond actively working from the bottom here.
At Hammed is looking for a kimura but LeBlond is holding onto that half guard position, so it's hard for At Hammed to get the leverage.
Wooooo! Give it up for these two warriors! They are putting on a show!
LeBlond works his way to full guard. Good work.

That's three minutes gone in the round.
At Hammed pressing down on his opponent's thigh, looking to pass guard. LeBlond is keeping the position for now.
At Hammed is fighting to break LeBlond's control of his arms but LeBlond is doing a good job of controlling the position at the moment.
LeBlond keeping moving, preventing At Hammed from controlling successfully.
LeBlond is trying to control the position from the bottom.
LeBlond looks to be working for a triangle here. Oh, it looks like he might have it! At Hammed has picked LeBlond up and slammed him! LeBlond can't keep hold of the triangle and At Hammed manages to pass to side control!
At Hammed tries for a kimura but LeBlond is defending well.
LeBlond stops At Hammed from passing to mount.
At Hammed is looking for a kimura. He might have it! No, LeBlond has escaped the position, nice work there.

That's four minutes gone in the round.
At Hammed advances to full mount.
At Hammed moves into side control, trying to work for a kimura. That looks painful! Will he finish!!?? No, LeBlond has worked his arm free - good work by LeBlond!
LeBlond is looking to regain half guard here but At Hammed keeps moving and retains side control.
At Hammed working away.
The fighters are trapped in the ropes so we're going to have a reposition here. The ref calls for a break and repositions the fighters in the center of the ring.
The crowd are loving this. Great action here.
At Hammed is trying to get an arm triangle but LeBlond is defending well.

That's five minutes gone in the round.
At Hammed remains in side control and seems content to stay there. It's a versatile position from which he can work both strikes and submissions, whilst maintaining that control, so maybe he'll sit here for a while.
At Hammed tries for a kimura but LeBlond is defending well.
At Hammed is looking to take a break and control but LeBlond is keeping him honest, looking to work from the bottom.
The referee tells the fighters to keep busy.
LeBlond wants to control but At Hammed postures up.
LeBlond regains half guard.

That's six minutes gone in the round.
At Hammed looks over to his corner - he wants some instructions but his corner are not responding.
At Hammed is looking for an arm triangle, whilst trying to pass to side control. LeBlond doesn't seem that keen to cooperate though. No luck this time At Hammed.
At Hammed seems very keen to just sit and control from half guard but LeBlond does not like that idea so much and is remaining active off his back.
LeBlond is trying to control but At Hammed manages to pass to mount!
At Hammed wants to finish this one by submission but LeBlond is holding onto his waist, trying to prevent any attacks from At Hammed.
LeBlond is desperately trying to get back to half guard.

That's seven minutes gone in the round.
LeBlond is squirming around, avoiding At Hammed's attempts to control the action.
LeBlond is working to get back to half guard.
At Hammed is looking to secure an arm. He's managed it! He's pivoting for an armbar - that looks tight! But LeBlond has managed to get out of it and now he's in a dominant position. Nice work from LeBlond!
At Hammed manages to land a sweep and now he's in mount on top!
LeBlond is looking to get to half guard.

That's eight minutes gone in the round.
At Hammed goes for an armbar but LeBlond turns quickly into his guard - lovely anticipation from LeBlond.
LeBlond postures up as if he's going to throw some strikes but drops back for an ankle! At Hammed is in big trouble! He looks ready to tap! But no, he's escaped and dives on top of LeBlond, into his guard.
LeBlond trying to control the position.
LeBlond throwing his legs up looking for a triangle.
LeBlond wants to sweep here but At Hammed controlling him for the moment.

That's nine minutes gone in the round.
At Hammed looking to sit in guard and control but LeBlond gets the butterfly guard and sweeps. He's now in the guard on the top.
LeBlond trying to pass the guard but can't manage it just yet.
At Hammed looking to control the pace of the fight rather than finish it.
At Hammed is working an open guard here, looking to improve his position. No doubt that will leave him open to counters but at least he's being more offensive.
LeBlond wants to control from the top but At Hammed keeps moving.
The crowd applaud the fighters efforts here as the round comes to an end.
At Hammed wants to sweep but no luck.
And that�s the end of the round � the fighters go back to their corners.
Brah At Hammed dominated that round.
The fighters' corners scream their final instructions, as the referee calls time. Here we go, back to the action!


LeBlond drives through with a takedown into guard.
At Hammed is working from a closed guard but he's struggling to control his opponent.
LeBlond stopping the sweep attempt from At Hammed.
LeBlond stands up and looks to throw the legs aside to pass to side control. At Hammed swivels though and keeps the full guard.
At Hammed can't keep his opponent in guard - LeBlond advances to half guard, no doubt looking to mount.
LeBlond is thwarting At Hammed's attempts to control the position.
At Hammed is looking to regain full guard. Not this time though.
That's one minute gone in the round.
LeBlond wants to control but At Hammed is keeping him busy.
LeBlond is pressing down on At Hammed's thigh, looking to free his foot. At Hammed is holding on for now.
LeBlond seems to be looking for submissions.
LeBlond is working for a submission of some sort.
At Hammed wants to get back to full guard.
At Hammed keeps control of the position for the meantime.
LeBlond is working for a submission of some sort.
That's two minutes gone in the round.
LeBlond is looking for a kimura. It's going to be difficult to finish that from half guard though and At Hammed defends it well.
At Hammed gets full guard.
At Hammed is looking for a triangle but LeBlond pushes his legs off easily.
At Hammed is trying to keep LeBlond in close.
At Hammed wants to sweep but no luck.
That's three minutes gone in the round.
At Hammed trying to keep a closed guard but LeBlond is proving a slippery customer.
LeBlond wants to pass the guard but At Hammed is keeping the position.
At Hammed is working an open guard here, looking to improve his position. No doubt that will leave him open to counters but at least he's being more offensive.
LeBlond looking to sit in guard and control but At Hammed gets the butterfly guard and sweeps. He's now in the guard on the top.
LeBlond looking to sweep here. No luck so far.
LeBlond is looking for a guillotine. You can't force these things though and At Hammed defends well.
LeBlond looks to be working for a triangle here. Oh, it looks like he might have it! At Hammed has picked LeBlond up and slammed him! LeBlond can't keep hold of the triangle and At Hammed manages to pass to side control!
That's four minutes gone in the round.
At Hammed tries for an arm triangle. That looks pretty tight to me. Is this one over!?! Possibly, maybe, no At Hammed has let go of the choke. Obviously it wasn't as tight as we thought!
LeBlond tries to bench press At Hammed off him but At Hammed keeps the position.
LeBlond wants to control but At Hammed postures up.
At Hammed trying to control the action but LeBlond is working from the bottom.
LeBlond is being controlled here.
At Hammed is working to tighten his grip on LeBlond's neck. He's isolated an arm and is working for an arm triangle. LeBlond has recognised the danger and is trying to turn with the submission but At Hammed is really squeezing tight and eventually LeBlond passes out! At Hammed breaks the hold and jumps onto the ropes to celebrate! Submission of the night, I'd say!
Ladies and gentlemen, after 5:59 of round 2, we have a winner by way of Submission (Arm Triangle). Brah At Hammed!
Our winner, Brah At Hammed, made sure he spent some time buttering up the crowd during his post fight interview, which will no doubt bring him a few more fans.
|
|
|
|
|
|
|
|
|
|
|
|
|
|
|
|
|
|
|
|
|
|
|
| S |
C
A |
G |
S |
C
B |
G |
|
S |
C |
G |
|
energy
A | B |
|
hype
A | B |
|
pop
A | B |
|
mgr
A | B |
|
FIGHT
RATING
48% |
|
|
|
|
|
|
