|
|
PBP Commentary |
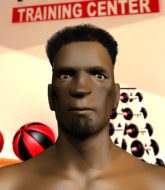
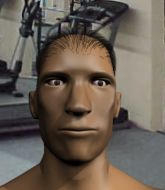
Coming up we have a bantamweight MMA rules bout between Malcolm Ford (ranked 0 p4p, 0 weight class) and Atirhullez Killer (ranked 0 p4p, 0 weight class). Atirhullez Killer has the better chin. Will he look to stand and bang today?
 |
|
 |
| 164 cm
18
140 lbs
1 - 0 - 0 |
|
176 cm
18
138 lbs
0 - 0 - 0 |
BJJ Blue Belt
Counter fighter
Hates pizza |
|
BJJ White Belt
Brawler
Determined |
|
| |
|
Ladies and gentlemen. This fight is 3 rounds, in the bantamweight division.
Introducing the fighter to my left, fighting out of the red corner.
With a record of
1 - 0 - 0, fighting out of Sydney, Malcolm Ford!
And introducing the fighter to my right, fighting out of the blue corner.
With a record of
0 - 0 - 0, fighting out of Sydney, Atirhullez Killer!
The judges for this bout are Skip Squint, John Mangel and Hugh Johnson.

The bell rings for round one and we are underway!
Killer lunges in with swinging rights and lefts but Ford circles away quickly and effectively.
Ford slips a jab and a cross from Killer.
Killer throws a jab, cross combination which is slipped
and Ford counters with a series of strikes. Killer will be more careful next time no doubt.
Killer will need to tighten up his combinations if he doesn't want to gas himself out, swinging at thin air.
Killer misses with a few strikes there.
Killer throws a combination but comes up with nothing but fresh air.

Ford scores a trip takedown into side control. Nice.
We could do with one of the fighters taking the initiative a bit more on the ground - they're both waiting to capitalize on a mistake.
Killer is working hard to escape and get back to his feet. After a battle for position, Ford asserts his dominance and retains side control.
Ford scoring with punches and elbows.
Ford connects with a decent looking elbow from side control that caused Killer some visible discomfort.
Ford controlling the position.
Killer is looking to work his way out of this bad position but Ford is controlling him well.
Ford controlling the position.
Killer is trying to get back to his feet.

That's one minute gone in the round.
Ford controls the position.

Killer sneaks out the side door and pushes Ford away - he's back to his feet. The crowd show their appreciation for the escape.
Killer looks winded!
Killer throws a sloppy head kick and Ford moves out of range easily.
Killer throws a combination but it was largely blocked by Ford.
Ford shoots in looking for a single leg takedown. Killer is trying to defend but Ford finishes it well and ends up in half guard. Let's see if he can advance position further.
Well, if Ford is going to just lie there, perhaps we should talk about what we're having for dinner tonight� I'm having a ham and pineapple pizza� Yum. Can't wait.
Ford seems to have a rather negative gameplan on the ground. He seems keen to just score the takedown and hold down Killer for as long as he can get away with.
Ford slips a nice elbow through Killer's hands, connecting with Killer's forehead.
Killer is trying to defend against the ground and pound but Ford scores with a couple of nice shots.
Ford is scoring with some nice ground and pound from the dominant position.
Ford performing his best blanket impression for a moment.
Ground and pound from Ford.

That's two minutes gone in the round.
Wooooo! Give it up for these two warriors! They are putting on a show!

Ford wants to work for an arm triangle but Killer is really keeping half guard well and defending the submission attempt.
Killer is trying to defend against the ground and pound but Ford scores with a couple of nice shots.
Ford has been looking to land a fair amount of strikes on the ground. He might be looking to soften his opponent up in order to work for a submission.
Killer wants to get back to his feet.
Ford controlling the action here.
Killer is trying to stand back up but Ford is controlling him
Killer is trying to defend against the ground and pound but Ford scores with a couple of nice shots.
The ref warns both fighters not to hold the cage as they work up against the meshing.
Ford is taking a breather. Killer says something to him but it's hard to make out. Perhaps he's telling him to get on with it and actually do something.
Ford wants to work for an arm triangle but Killer is really keeping half guard well and defending the submission attempt.
Ford is nestled in close to Killer, controlling him well. He's worked in a nice elbow to the side of the head as well, for good measure.

That's three minutes gone in the round.
Ford controlling the pace.
Killer tries to kick Ford off but Ford keeps his base steady and stays in half guard.
Ford working the head and body with strikes.
Ford prevents Killer from standing back up.
Ford perhaps working for something from half guard, or maybe not. It looks like he's just sitting there.
Ford slips a nice elbow through Killer's hands, connecting with Killer's forehead.
Ford is keeping good posture, landing some ground and pound.
Ford trying to control the pace.
Ford lands strikes from half guard.
Ford is trying a forearm choke� I don't think that's going to do much at this level of the game.
Ford is figuring out what he wants to do next.

That's four minutes gone in the round.
Ford's ground tactics aren't going to win him many fans. Let's hope he's got fireworks for us if he gets back to his feet because he's not doing much on the ground.
Ford throwing punches and elbows but they're not doing any damage.
Ground and pound from Ford.
The crowd are loving this. Great action here.
Ford is working for a submission of some sort.
Killer wants to get back to his feet.
As the round comes to an end the crowd are showing their appreciation for a great round of action.
Ford is controlling the pace.
Ford takes advantage of the dominant position to land a couple of big hammer fists.
And that�s the end of the round � the fighters go back to their corners.
Malcolm Ford dominated that round.
The corners get their ten second warning. Both fighters stand from their stools and stare eachother down, ready to get back to the action.

Killer throws a right hand that Ford ducks under and follows up with a left that Ford also avoids with ease.
Killer throws a chopping leg kick but Ford manages to avoid taking any serious damage.
Ford fails with a rather predictable takedown attempt.
Killer tries to bum rush Ford with a series of wild strikes but Ford uses good footwork to avoid the assault.
Killer throws a right hand that Ford ducks under and follows up with a left that Ford also avoids with ease.
Ford tries to clinch up but Killer circles away and keeps his distance.
Ford closes the distance and gets a trip takedown into side control. Killer quickly recovers to half guard.
Killer wants to get back to his feet.
Ford controlling the action here.
Killer is trying to stand back up but Ford is controlling him
Killer is breathing heavily.
Ford landing with strikes to the body and head, softening up his opponent.
Killer has hold of Ford's hands but Ford slips his arm to the side and lands an elbow.
The fighters are pressed up against the cage, both looking to find a bit of space to work.
Ford sitting and controlling from the half guard.
That's one minute gone in the round.
Ford is sneakily working for an arm triangle but Killer sees it coming and defends easily.
Ford seems content to maintain position for now, rather than mounting any offense.

The ref stands the fighters back up. Malcolm Ford wasn't doing enough on the ground.
Killer throws a jab, cross combination which is slipped
and Ford counters with a nice jab to the body that keeps Killer thinking.
Killer throws a head kick that misses and slips in the process. He scrambles back to his feet and the fighters circle.
Killer tries a switch kick but it misses it's target.
Ford throws a body punch but Killer moves out of range.
Killer will need to tighten up his combinations if he doesn't want to gas himself out, swinging at thin air.
That's two minutes gone in the round.
Ford shoots in with a takedown attempt and he has Killer pinned against the cage. Killer gets the underhooks and manages to circle away.

Ford fakes with an overhand right and moves in to clinch with Killer, pushing him back against the cage.
Ford is trying to pull guard but being pressed up against the cage enables Killer to keep the fight standing.
That's three failed takedown attempts in the round for Malcolm Ford. That's going to take a lot out of him.
Ford swings wildly with an uppercut but Killer uses good head movement to avoid it.

Killer breaks the clinch and we're back to striking at distance.
Killer is a painfully thin specimen of a man. You do wonder whether a good body kick would snap him clean in two.
Killer motions for Ford to come forward. Killer throws a leg kick but it misses it's target.
Killer avoids a punch combination nicely.
Killer misses with the combination.
That's three minutes gone in the round.
Killer misses with a series of wild punches.
Ford fails with a takedown attempt.
Ford scores with a takedown into Killer's guard.
Ford might be looking to lock onto one of his opponent's long limbs for a submission, whilst we're on the ground.
Killer has momentary wrist control but Ford slips an elbow through the middle.
Killer is looking to get back to his feet but can't, whilst Ford is controlling him.
Malcolm Ford overall seems to be getting the better of the ground position in the fight so far.
Killer is using up a lot of energy trying to get back to his feet. Perhaps he should improve his position first.
That's four minutes gone in the round.
Ford postures up and lands some nice ground and pound.
Killer wants to stand up but Ford is controlling him.
Hammerfist, elbow! yells Ford's corner. There ya go! There ya go!
Ford lands a couple of elbows.
Ford cracks Killer with a solid left hand.
Ford controls the pace of the fight for a moment.
Ford wants to control from the top but Killer keeps moving.
We've seen a great period of action over the last minute or so - credit to both fighters for going all out!
As the round comes to an end the crowd are showing their appreciation for a great round of action.
Ford connects with a couple of short punches.
Ford trying to control but Killer is working from the bottom.
Killer wants to stand up but Ford is controlling him.
And that�s the end of the round � the fighters go back to their corners.
Malcolm Ford dominated that second round.
That's the end of the interval. I'm sure that seemed a lot quicker than a minute for our two fighters! Back to the action. This is the final round!

Ford fakes a jab and then connects with a hook.
A telegraphed right hand from Killer misses the target.
Killer misses with a series of wild punches.
Killer scores with a jab to the head.
Ford shoots in for a takedown but doesn't get it.
Killer misses with a few strikes there.
Killer fakes a jab and throws a low kick but Ford checks it well.
Killer will need to tighten up his combinations if he doesn't want to gas himself out, swinging at thin air.
Ford fails miserably with a takedown attempt.
Killer takes a big intake of breath there - he's definitely tired.
Killer misses with a jab and misses with a cross straight after too.
That's one minute gone in the round.
Ford goes for a double leg but Killer avoids the attempt and the two fighters end up clinched against the cage as Killer continues to drive forward.
That's three failed takedown attempts in the round for Malcolm Ford. That's going to take a lot out of him.
Ford gets control of Killer's arms and successfully pulls guard. Ford will no doubt be looking for submissions off his back.
Killer wants to stand and escape but instead Ford has hit a sweep and he's now on top in guard.
Killer uses the cage to get back to his feet.
Ford shoots in and scores a nice double leg takedown into half guard.
Ford working over Killer with some ground and pound. Killer looks like he wants out of this position, which is understandable.
Killer kicks Ford off and gets back to his feet.
Killer misses with a leg kick
and Ford counters with a series of strikes. Killer will be more careful next time no doubt.
Ford is looking for a takedown here. He's shot in and has managed to get it, finishing up in Killer's half guard.
That's two minutes gone in the round.
We've seen a great period of action over the last minute or so - credit to both fighters for going all out!
Killer is trying to stand.
Ford looks to score some points with some ground and pound.
Killer tries to kick Ford off but Ford keeps his base steady and stays in half guard.
Neither fighter is being very active at the moment, with Ford in particular looking to stall.
Killer wants to get back to his feet.
Ford lands a big shot. The thud that echoes around the arena is like music to the fans' ears.
Ford seems content to maintain position for now, rather than mounting any offense.
Ford scoring with strikes to the body and head.
That's three minutes gone in the round.
Killer is looking to escape.
Ford has hold of the far side arm. He's working for the Kimura, can Killer defend it? Ford steps over the head and cranks it - Killer is tapping out! That was textbook stuff right there - nice submission victory for Ford!
Ladies and gentlemen, after 3:18 of round 3, we have a winner by way of Submission (Kimura). Malcolm Ford!
|
|
|
|
|
|
|
|
|
|
|
|
|
|
|
|
|
|
|
|
|
|
|
| S |
C
A |
G |
S |
C
B |
G |
|
S |
C |
G |
|
energy
A | B |
|
hype
A | B |
|
pop
A | B |
|
mgr
A | B |
|
FIGHT
RATING
81% |
|
|
|
|
|
|
