|
|
PBP Commentary |
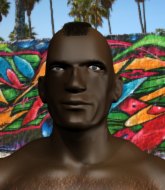
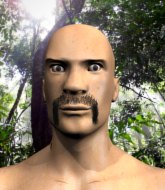
Coming up we have a light heavyweight MMA rules bout between Bret Hart (ranked 0 p4p, 0 weight class) and Jack London (ranked 0 p4p, 0 weight class). Both these guys have really solid chins. Will we see a standup war or will they both decide that a knockout is unlikely and try to win the fight elsewhere?
 |
|
 |
| 193 cm
24
205 lbs
1 - 1 - 0 |
|
178 cm
24
209 lbs
2 - 1 - 0 |
BJJ Blue Belt
Counter fighter
Good chin |
|
Good takedowns
Brawler
Solid chin |
|
| |
|
Ladies and gentlemen. This fight is 3 rounds, in the light heavyweight division.
Introducing the fighter to my left, fighting out of the red corner.
With a record of
1 - 1 - 0, fighting out of Montreal, Bret Hart!
And introducing the fighter to my right, fighting out of the blue corner.
With a record of
2 - 1 - 0, fighting out of Montreal, Jack London!
The judges for this bout are Ian Loll, William Peck and Steve Smith.

The bell rings for round one and we are underway!
London misses with a takedown attempt

and Hart counters with a takedown into side control! That could mean trouble for London!
Hart prevents London from escaping the position.
Hart tries to cartwheel into mount but he doesn't manage it.
London pushes Hart away and creates a bit of space to escape. He's almost out here... but no, Hart gets a good hold of his legs and remains firmly in side control.
Hart wants to control but London is keeping him busy.
London is putting a lot of effort into getting back to his feet here.
This is a great period of action - very entertaining stuff!

That's one minute gone in the round.

Hart working hard here to secure a kimura but he's not really in the right position for it.
Hart prevents London from escaping the position.
Hart tries for an arm triangle. That looks pretty tight to me. Is this one over!?! Possibly, maybe, no Hart has let go of the choke. Obviously it wasn't as tight as we thought!
Hart wants to lay and pray for a moment but London keeps working.
The referee asks Hart politely if he wouldn't mind getting on with it and actually doing something. Hart prefers to stall for the moment though.
London is working hard to escape and get back to his feet. After a battle for position, Hart asserts his dominance and retains side control.
Hart wants to control but London is keeping him busy.
Hart tries to advance to mount but London denies him.

That's two minutes gone in the round.
Hart working hard here to secure a kimura but he's not really in the right position for it.
London is not content to let Hart control the position.
The fighters are starting to get a bit slippery now, which will make submissions a bit more difficult.
London pushes Hart away and creates a bit of space to escape. He's almost out here... but no, Hart gets a good hold of his legs and remains firmly in side control.
Hart wants to lay and pray for a moment but London keeps working.
London tries to escape but Hart is in control.
Fantastic stuff here - a very entertaining period of action, which has drawn cheers from the crowd.

London bucks up and manages to escape back to his feet!

That's three minutes gone in the round.
London fails with the takedown
and Hart counters with a takedown into side control! That could mean trouble for London!
London is trying to get back to his feet.
Hart working hard here to secure a kimura but he's not really in the right position for it.
The fighters are pressed up against the cage, both looking to find a bit of space to work.
London is pushing Hart's head away, looking to escape. Hart manages to hold on to the position though.
Hart tries for a kimura. Not really close to a finish though.
Both fighters really going for it on the ground here!
Hart tries to advance to mount but London denies him.
London is working hard to escape and get back to his feet. After a battle for position, Hart asserts his dominance and retains side control.
Hart tries to advance to mount but London denies him.

That's four minutes gone in the round.
London wants to escape from the position here - easier said than done!
Hart trying to control the action but London is working from the bottom.
London is trying to buck Hart off.
The crowd cheering loudly, showing their appreciation for the quality fight we're seeing here.
London stops Hart from passing to mount.
London is trying to escape and get back to his feet.
As the round comes to an end the crowd are showing their appreciation for a great round of action.
Hart tries to move to mount but London blocks the move with his legs.
London wants to escape from the position here - easier said than done!
And thats the end of the round the fighters go back to their corners.
Bret Hart dominated that round.
The referee calls time. The cornermen exit stage left and we're back to business.

Hart darts in and lands a nice takedown into half guard.
London manages to escape and get back to his feet!
Hart drops down and drives through with a powerful takedown into guard.
London is trying to stand up but he's not managed so far.
Hart pressing down on his opponent's thigh, looking to pass guard. London is keeping the position for now.
London should think about turning a few of those tyres round his middle into muscle if he wants people to take him seriously as an athlete.
London has managed to wall walk up one of the corner posts to get back to his feet. Hart is pushing him up against the cage, looking to control the position.
A frustrated look appears on London's face as he tries to break the clinch.
London tries to break free but Hart pushes him back against the cage.
Hart works for the underhooks and manages to get a trip takedown into guard.
Wooooo! Give it up for these two warriors! They are putting on a show!
London is looking to get back to his feet but can't, whilst Hart is controlling him.
That's one minute gone in the round.
Hart pressing down on his opponent's thigh, looking to pass guard. London is keeping the position for now.
Hart is taking a break and basically stalling. The referee will not allow him to do that for long.
London is looking to get back to his feet but can't, whilst Hart is controlling him.
London can't keep his opponent in guard - Hart advances to half guard, no doubt looking to mount.
Hart throwing shots but London is blocking nicely.
Hart prevents London from standing back up.
Bret Hart overall seems to be getting the better of the ground position in the fight so far.
Hart wants to control but London is keeping him busy.
That's two minutes gone in the round.
London has one foot on Hart's thigh - he pushes off and manages to get back to his feet.
London with a poor takedown
and Hart counters with a shoot takedown. London fights it but they end up in guard.
London is breathing heavily.
The crowd cheering loudly, showing their appreciation for the quality fight we're seeing here.
Hart wants to control from the top but London keeps moving.
Hart pressing down on his opponent's thigh, looking to pass guard. London is keeping the position for now.
The ref warns both fighters not to hold the cage as they work up against the meshing.
Hart trying to control but London is working from the bottom.
Hart drops back looking for a leg! London is in trouble here! The fighters roll with the hold and London manages to kick Hart off! Hart jumps back into London's guard.
London wants to get back to his feet but Hart is in a dominant position and won't allow it.
London manages to wriggle out and sneak his way back up to his feet, so the fighters are now clinched up against the cage.
Hart pulls London into guard.
Hart will need to keep those long limbs tucked in whilst he's on the ground, to prevent any submissions.
That's three minutes gone in the round.
London decides he's had enough of playing guard and decides to stand. Come on Hart, up you get!
London with a poor takedown
and Hart counters with a takedown into side control! That could mean trouble for London!
Hart prevents London from escaping the position.
London sneaks out the side door and pushes Hart away - he's back to his feet. The crowd show their appreciation for the escape.

London tries to keep at a distance but Hart has taken the fight into the clinch.
Hart successfully pulls guard.
The crowd are loving this. Great action here.
London has decided he wants to stand but the closed guard of Hart is proving hard to escape from.
London stands up from guard. Let's bang!
London tries for a takedown but Hart circles away easily
and Hart counters with a takedown into side control.
Bret Hart has stuffed three takedown attempts in the round now. That's going to take a lot out of Jack London.
That's four minutes gone in the round.
London bucks up and tries to throw Hart off but instead Hart has got his back!
London is trying to stand back up.
Hart trying desperately to keep hold of the dominant position.
London is trying to get back to his feet but he's not managed it yet.
London defending nicely against the rear naked choke attempt.
London is trying to stand back up.
The crowd are going absolutely nuts as the round comes to an end - what a fantastic round of action!
And thats the end of the round the fighters go back to their corners.
Bret Hart dominated that second round.
OK. That's time! The bell goes and we're back to the action. This is the final round!

London looks for a takedown but Hart sprawls well.
London fails with the takedown
and Hart counters with a good right hand that lands right on the jaw.
London tries for a takedown but Hart circles away easily
and Hart counters by clinching up.
Bret Hart has stuffed three takedown attempts in the round now. That's going to take a lot out of Jack London.
Hart prevents London from breaking the clinch.
Hart stalling against the cage.
Hart jumps into guard, dragging London to the mat.
London has decided he wants to stand but the closed guard of Hart is proving hard to escape from.
Hart has London pulled in close to control his posture.
That's one minute gone in the round.
London wanted to stand there but Hart had control of the position.
Hart working a defensive guard here.
London has decided he wants to stand but the closed guard of Hart is proving hard to escape from.
London wants to stand and escape but instead Hart has hit a sweep and he's now on top in guard.
Hart prevents London from getting back to his feet.
Hart trying to control the position from guard on top but London is wriggling around, looking for whatever he can.
London wants to get back to his feet but Hart is in a dominant position and won't allow it.
London takes a big intake of breath there - he's definitely tired.
That's two minutes gone in the round.
London keeping full guard, as Hart tries to pass.
Hart passes London's right leg, so he's now in half guard.
London is trying to stand.
Hart tries to pass to full mount but London defends it.
Hart is trying to control. London wants to improve his position but can't escape this time.
Hart tries to pass the half guard into mount. London knows what he's doing though and prevents the attempt.
London looks like he's trying to stand up.
London won't allow Hart to pass to mount.
The referee calls for the fighters to work.
London kicks off Hart and gets to his feet.
This is a great period of action - very entertaining stuff!
London gets his takedown attempt stuffed easily
and Hart counters with a nice double leg into side control. London won't be happy with that.
That's three minutes gone in the round.
A lull in the action here.
London is looking to work his way out of this bad position but Hart is controlling him well.
An elbow from Hart crashes against the mat.
Hart trying to control the position but London is working away.
London pushes Hart away and creates a bit of space to escape. He's almost out here... but no, Hart gets a good hold of his legs and remains firmly in side control.
London is trying to escape the position but Hart is controlling the position.
Hart tries for a kimura but London is defending well.
Hart thinks about going for a far side armbar but bails out and retains the dominant position instead.
That's four minutes gone in the round.
London is putting a lot of effort into getting back to his feet here.
Hart tries to cartwheel into mount but he doesn't manage it.
London is working hard to escape and get back to his feet. After a battle for position, Hart asserts his dominance and retains side control.
Bret Hart is fighting for a decision here - he's started to take the cautious approach.
As the round comes to an end the crowd are showing their appreciation for a great round of action.
London is using up a lot of energy trying to get back to his feet. Perhaps he should improve his position first.
Jack London has stepped it up - he knows he needs a finish here!
Hart controls the position from side control.
And that's the end of the fight!
Bret Hart showed his dominance in that final round.
Well I reckon that's a shut out for Hart, winning every round. Will the judges agree? They are the ones who matter, even if they are often depressingly incompetent. Over to the ring announcer for the scorecards.
Ladies and gentlemen, after 3 rounds of action, we go to the scorecards for a decision.
Judge Ian Loll scores the fight 30:27
Judge William Peck scores the fight 30:27
Judge Steve Smith scores the fight 30:27
In favor of your winner, by unanimous decision... Bret Hart!
Bret Hart spent the whole post fight interview bigging himself up. It didn't go down that well with the fans after a while as they thought it was a bit arrogant.
|
|
|
|
|
|
|
|
|
|
|
|
|
|
|
|
|
|
|
|
|
|
|
| S |
C
A |
G |
S |
C
B |
G |
|
S |
C |
G |
|
energy
A | B |
|
hype
A | B |
|
pop
A | B |
|
mgr
A | B |
|
FIGHT
RATING
84% |
|
|
|
|
|
|
