|
|
PBP Commentary |
Coming up we have a heavyweight MMA rules bout between Giovanni Pearson (ranked 0 p4p, 0 weight class) and Frank White (ranked 0 p4p, 0 weight class). Frank White has the better chin. Will he look to stand and bang today?
 |
|
 |
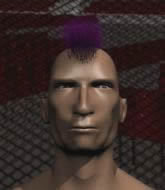
| 182 cm
18
279 lbs
1 - 1 - 0 |
|
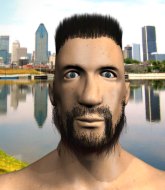
201 cm
19
240 lbs
1 - 2 - 0 |
BJJ Blue Belt
Brawler
Cuts easily |
|
BJJ Blue Belt
Brawler
Solid chin |
|
| |
|
Ladies and gentlemen. This fight is 3 rounds, in the heavyweight division.
Introducing the fighter to my left, fighting out of the red corner.
With a record of
1 - 1 - 0, fighting out of Los Angeles, Giovanni Pearson!
And introducing the fighter to my right, fighting out of the blue corner.
With a record of
1 - 2 - 0, fighting out of Los Angeles, Frank White!
The judges for this bout are Frank Antenori, Jack Bonds and Timothy Bukovac.

The bell rings for round one and we are underway!
Pearson misses with a takedown

and White moves into the clinch.
White has Pearson pressed against the cage, preventing Pearson from circling away and getting back to striking at range.
Pearson takes a knee right on the jaw!

It looks like Giovanni Pearson has been cut.
A knee to the head by White.

White breaks the clinch.
White fails with a rather predictable takedown attempt.
Pearson displays some good footwork, moving neatly out of range as White throws out the jab.
Pearson fails to land with a series of punches.
White fails to land with a series of punches.
White closes the distance and clinches.
Both guys are working to get underhooks.
White breaks the clinch and we return to the middle of the mat.

That's one minute gone in the round.
White avoids a punch combination nicely.
Pearson shoots in but doesn't get the takedown
and White counters with a kick to the head that grazes his opponent. Pearson is lucky that one didn't land flush.
Pearson fails with a rather predictable takedown attempt.
That's three failed takedown attempts in the round for Giovanni Pearson. That's going to take a lot out of him.
White fails to land the takedown.
White fails with the takedown.

Pearson moves into the clinch.
White goes for a takedown attempt but Pearson pushes him away and we're back to fighting at a distance.

Excellent takedown into side control there by White.

That's two minutes gone in the round.
The fans in attendance giving it up for the two fighters, who have really let it all hang out in the last minute or so!
The referee claps his hands together and tells the fighters to work.
Pearson sneaks back into half guard.
Pearson keeps control of the position for the meantime.
White stalling away here and it's allowed Pearson to slip out his trapped foot and regain full guard.
White is taking a break and basically stalling. The referee will not allow him to do that for long.
White wants to stand but Pearson is controlling his posture from full guard.
Pearson could do with losing a few pounds - he looks very soft around the mid section, to put it politely.

That's three minutes gone in the round.
White throws a strike but Pearson rolls with it and manages to sweep. Now he's in guard on top.

White looks to be working for a triangle here. Oh, it looks like he might have it! Pearson has picked White up and slammed him! White can't keep hold of the triangle and Pearson manages to pass to side control!
The fighters are pressed up against the cage, both looking to find a bit of space to work.
White tries to work a leg under to get back to half guard but Pearson wriggles his own leg back out and remains in side control.

Pearson is trying to land an Americana. He has the arm isolated but White is keeping cool and he's avoided the danger for now.
Pearson with the ground and pound but White regains half guard under the barage of strikes.

That's four minutes gone in the round.
Pearson uses his free foot to push down on White's thigh. Eventually he works his other foot free and he's advanced to mount - this is trouble for White.
White tries to hold on but Pearson postures up.
The fighters are starting to get a bit slippery now, which will make submissions a bit more difficult.
White throwing hammer fists to the chest of Pearson. What's that going to do exactly?
As the round comes to an end the crowd are showing their appreciation for a great round of action.
White tries to get back to half guard but can't.
White tries to hold on but Pearson postures up.
White working to try and regain half guard.
And that�s the end of the round � the fighters go back to their corners.
Frank White dominated that round.
The cut man is working on Giovanni Pearson's cut.
The fighters' corners scream their final instructions, as the referee calls time. Here we go, back to the action!

Pearson closes this distance looking for a takedown but White circles away.
Pearson throws a head kick that misses and slips in the process. He scrambles back to his feet and the fighters circle.
White shoots in and gets a takedown into half guard. White showed some decent athleticism there.
Pearson tries to roll over but White keeps him under control.
White looks to score some points with some ground and pound.
Pearson is trying to defend against the ground and pound but White scores with a couple of nice shots.
White working Pearson over with strikes.
The ref warns both fighters not to hold the cage as they work up against the meshing.
White is trying to work for a kimura but Pearson is defending well.
That's one minute gone in the round.
White wants to work for an arm triangle but Pearson is really keeping half guard well and defending the submission attempt.
Pearson tries to roll over but White keeps him under control.
White seems very keen to just sit and control from half guard but Pearson does not like that idea so much and is remaining active off his back.
White keeping composed on the top, looking to control the action.
Pearson might be looking to lock onto one of his opponent's long limbs for a submission, whilst we're on the ground.
That's two minutes gone in the round.
White not throwing his punches with enough precision this time.
White seems content to maintain position for now, rather than mounting any offense.
The referee must be thinking about standing these guys back up.
White is looking for a kimura. It's going to be difficult to finish that from half guard though and Pearson defends it well.
White takes a deep breath and rests his weight momentarily on top of his opponent, to control the position.
Pearson is looking for a sweep. White is wise to his cunning plan and keeps the top position.
Pearson wants to control but White is keeping busy.

The referee decides to stand the fighters back up.
Pearson shoots in and drives through. White sprawls well.
That's three minutes gone in the round.
Pearson tries to clinch there but White circles away.
White shoots in with a lovely double leg takedown. Pearson manages to land in full guard to minimise the damage.
White controlling from the top position.
White has decided he wants to stand but the closed guard of Pearson is proving hard to escape from.
White stopping the sweep attempt from Pearson.
White tries to free his leg and advance position but Pearson is retaining full guard.
That's four minutes gone in the round.
White has decided he wants to stand but the closed guard of Pearson is proving hard to escape from.
White drops back looking for a heel hook - he quickly realises he's not going to get it but Pearson manages to dive on top of him before he can escape and now White has Pearson in his guard.
Our spies down at at Cozad MMA Los Angeles inform us that White has really been working on his submissions in the buildup to this fight. Will it pay off?
White is looking to get back to his feet but can't, whilst Pearson is controlling him.
White is breathing heavily.
The crowd applaud the fighters efforts here as the round comes to an end.
White is working from a closed guard but he's struggling to control his opponent.
And that�s the end of the round � the fighters go back to their corners.
Frank White showed his class in that round. I'd imagine he'll take it on all the scorecards.
The cut man is working on Giovanni Pearson's cut.
The fighters get back to their feet, the hooter sounds and we're back to the action! This is the final round!

White throws an overhand right that lands on Pearson's shoulder, as Pearson tries to avoid the shot.
Pearson throws a head kick that misses.
Pearson moves in looking to clinch but White pushes him off.
Giovanni Pearson is looking to throw some combinations by the looks of things.
Pearson lands with a good body shot.
White tries to clinch but Pearson moves away
and Pearson counters nicely by changing levels and landing a hook to the body.
White pushes Pearson up against the cage in a clinch.
Pearson scores with a shoulder strike.
White breaks the clinch.
Pearson gets to the clinch - let's see what his plan is here.
Pearson has dropped down and is looking to force the takedown but it's defended by White after a bit of a struggle.
White jumps guard but Pearson stands there with White around his waist. White gives up and drops back to his feet. We remain in the clinch.
Pearson tries to score a body lock takedown but White shows good agility there to stay on his feet.
That's one minute gone in the round.
Pearson jumps guard but his hands slip and he falls flat on his back. Well, he's made himself look a right mug there, as White walks away with a smile on his face. Pearson gets slowly back to his feet and shakes his head.
That's three failed takedown attempts in the round for Giovanni Pearson. That's going to take a lot out of him.
White looking to throw a kick but he's pulled out of it.
White clinches with his opponent.
A battle for position here, against the cage.
White breaks the clinch and we're back to striking at distance.
The fight stays on the outside here - White looks like he's thinking about clinching though.
White gets tackled into the cage by Pearson. Pearson maintains the clinch.
White pushes off and circles away, back to the middle of the mat.
The step up in weight doesn't seem to be a problem for White. He's performing admirably here against the bigger man.
That's two minutes gone in the round.
Pearson darts in looking for a takedown but White gets double underhooks and turns Pearson into the cage.
Pearson trying to control the position but instead, White has worked for underhooks and has pushed Pearson into the cage.
White fails to pull guard.
Pearson tries to pull guard but White won't allow it.
White tries to work over Pearson's body with a swooping hook but it only glances the target.
White breaks the clinch and we're back to striking at distance.
White leaves Pearson with his face pressed against the mat as he sprawls beautifully, defending against a solid takedown attempt.
Both fighters are breathing heavily.
White connects with a leg kick. Pearson looked like he was expecting something else and didn't defend it.
White fakes with an overhand right and moves in to clinch with Pearson, pushing him back against the cage.
That's three minutes gone in the round.
White fails to pull guard.
Pearson tries to pull guard but can't drag his opponent to the mat. White just stands there and leans against the cage.
White has dropped down and is working for a takedown. Pearson is trying to keep an underhook but White manages to get the takedown into half guard.
White is looking for a kimura. It's going to be difficult to finish that from half guard though and Pearson defends it well.
White wants to work for an arm triangle but Pearson is really keeping half guard well and defending the submission attempt.
Frank White has got the better of the ground game so far.
White lands a big shot. The thud that echoes around the arena is like music to the fans' ears.
White seems content to maintain position for now, rather than mounting any offense.
That's four minutes gone in the round.
White thows a huge punch but Pearson dodges it nicely.
Pearson is looking to get full guard. It looks like he might be successful but at the last minute White jumps into side control!
White wants to control but Pearson is keeping him busy.

Pearson sneaks out the side door and pushes White away - he's back to his feet. The crowd show their appreciation for the escape.
Pearson shoots in but White avoids the takedown attempt easily.
This is a great period of action - very entertaining stuff!
As the round comes to an end the crowd are showing their appreciation for a great round of action.
White throws a looping left and ducks down for a takedown. He's got his arms around Pearson's waist but Pearson gets an underhook and avoids the takedown by throwing White off to one side.
Giovanni Pearson has stepped it up - he knows he needs a finish here!
Frank White is fighting for a decision - hopefully he's judged it right and he's actually winning the fight.
A combination from Pearson does no damage.
And that's the end of the fight!
Frank White comfortably won the final round on my scorecard.
Well White has outworked and out performed his opponent in all aspects of the game today. He was simply too good and the decision should be no more than a formality. Over to the ring announcer for the scorecards.
Ladies and gentlemen, after 3 rounds of action, we go to the scorecards for a decision.
Judge Frank Antenori scores the fight 27:30
Judge Jack Bonds scores the fight 27:30
Judge Timothy Bukovac scores the fight 27:30
In favor of your winner, by unanimous decision... Frank White!
|
|
|
|
|
|
|
|
|
|
|
|
|
|
|
|
|
|
|
|
|
|
|
| S |
C
A |
G |
S |
C
B |
G |
|
S |
C |
G |
|
energy
A | B |
|
hype
A | B |
|
pop
A | B |
|
mgr
A | B |
|
FIGHT
RATING
52% |
|
|
|
|
|
|
